Installing & Using multilingual guidelines
Requirements
This tutorial requires you to install the Viindoo instance.
As an international software, Viindoo supports many different languages for users to choose from. This article will show you how to change the language of your Viindoo system.
Activate languages
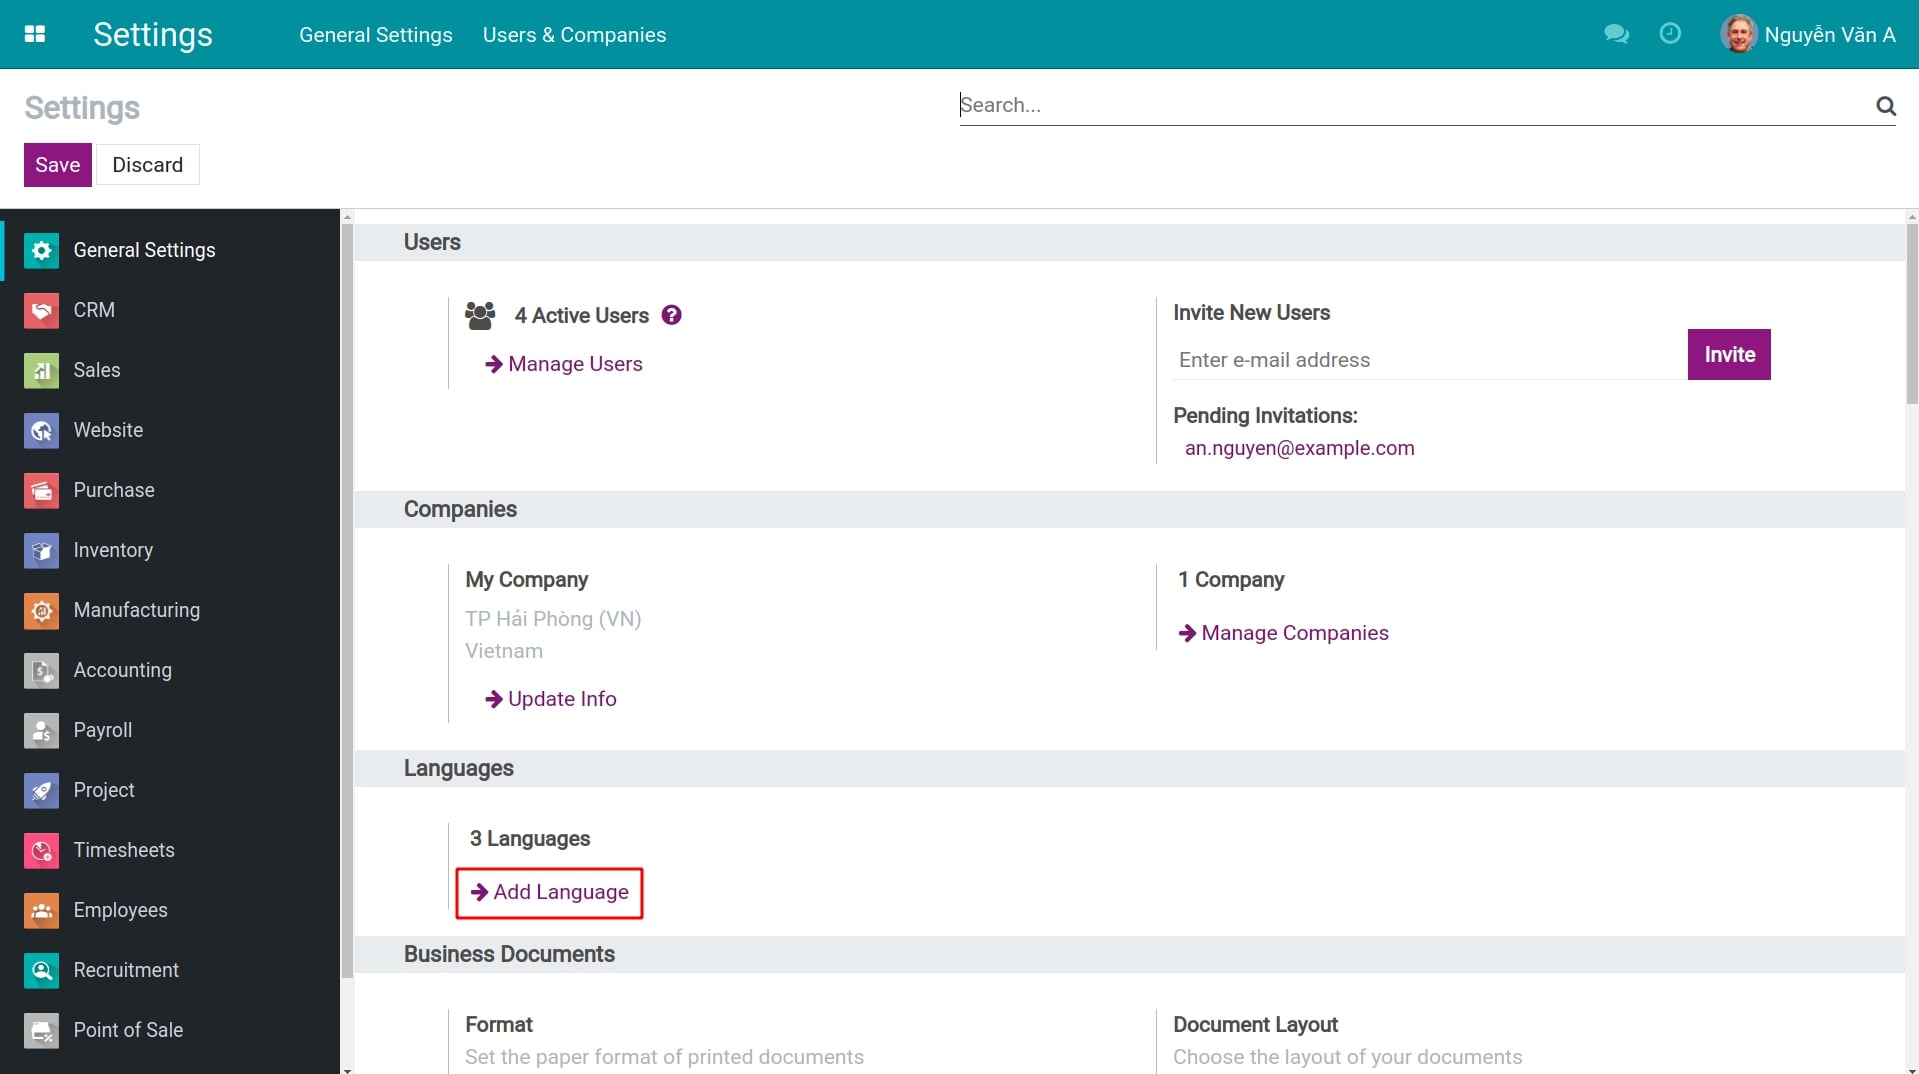
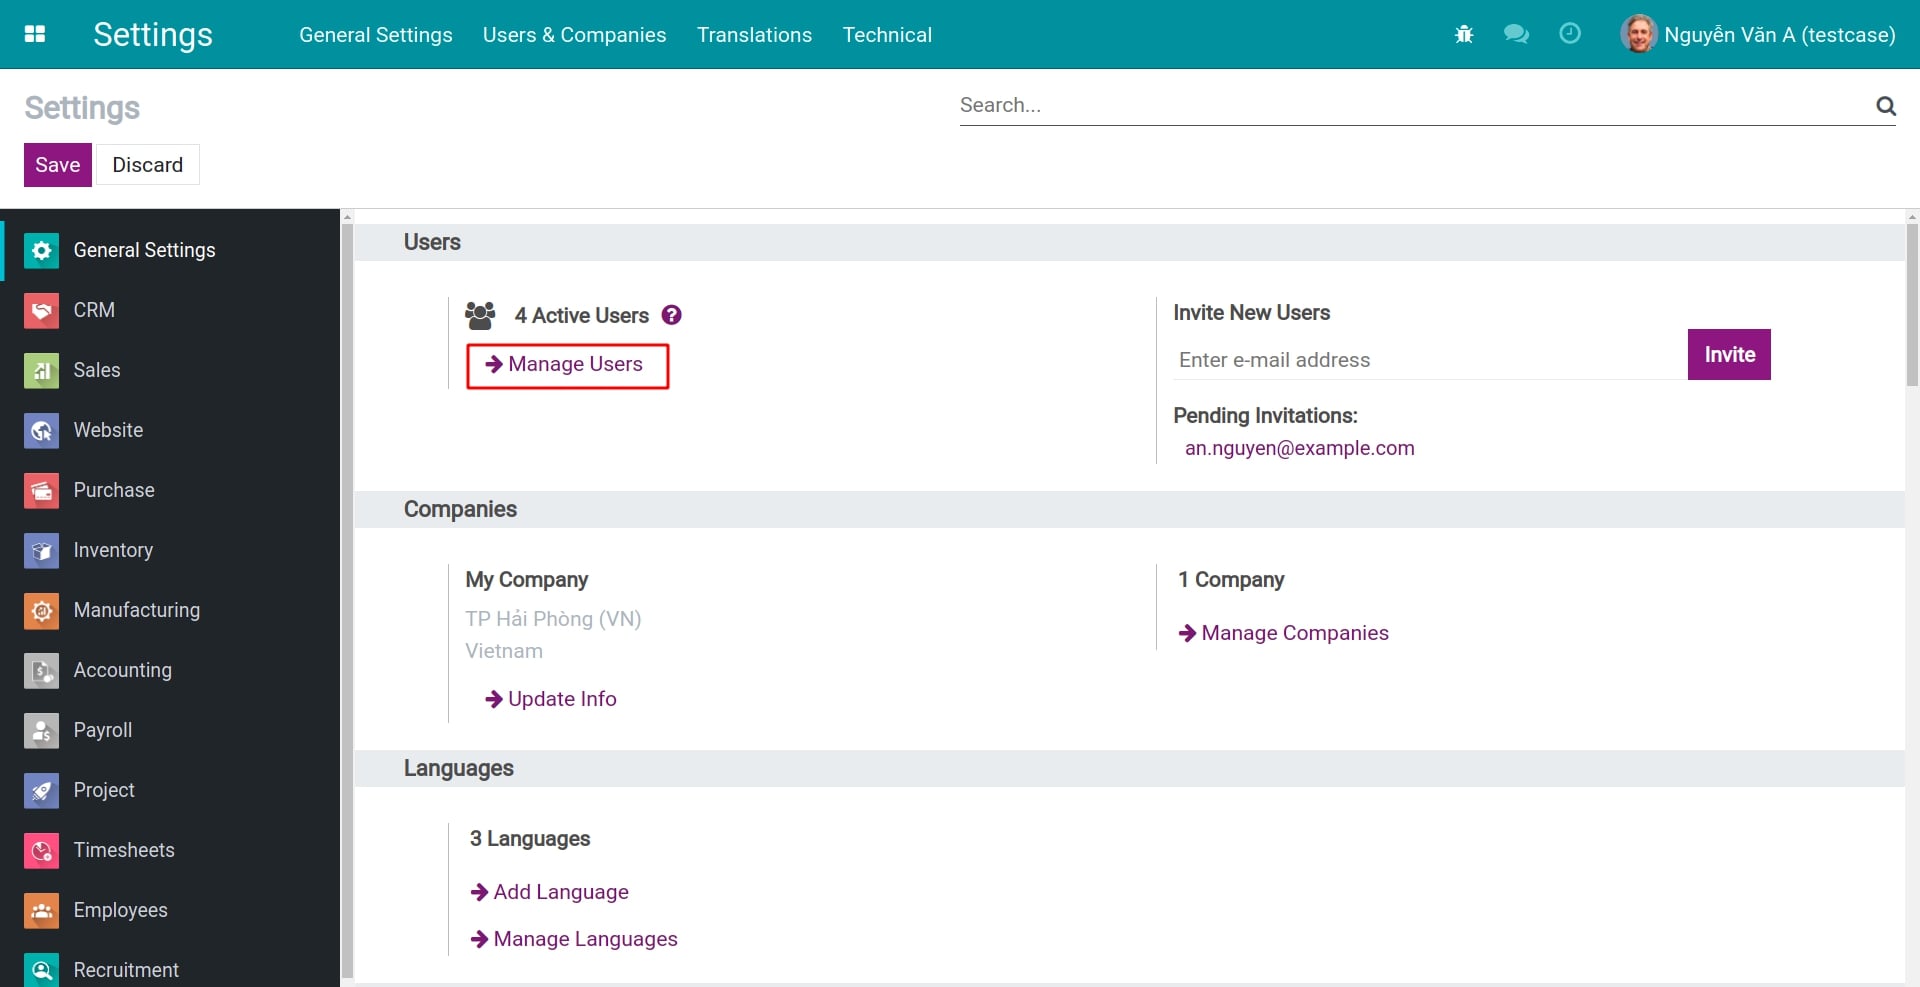
To use a new language, first of all, you need to activate the translations for that language in the Viindoo software. Navigate to and search for the Languages section. Once done, you will be able to see the number of activated languages and the Add Language button.
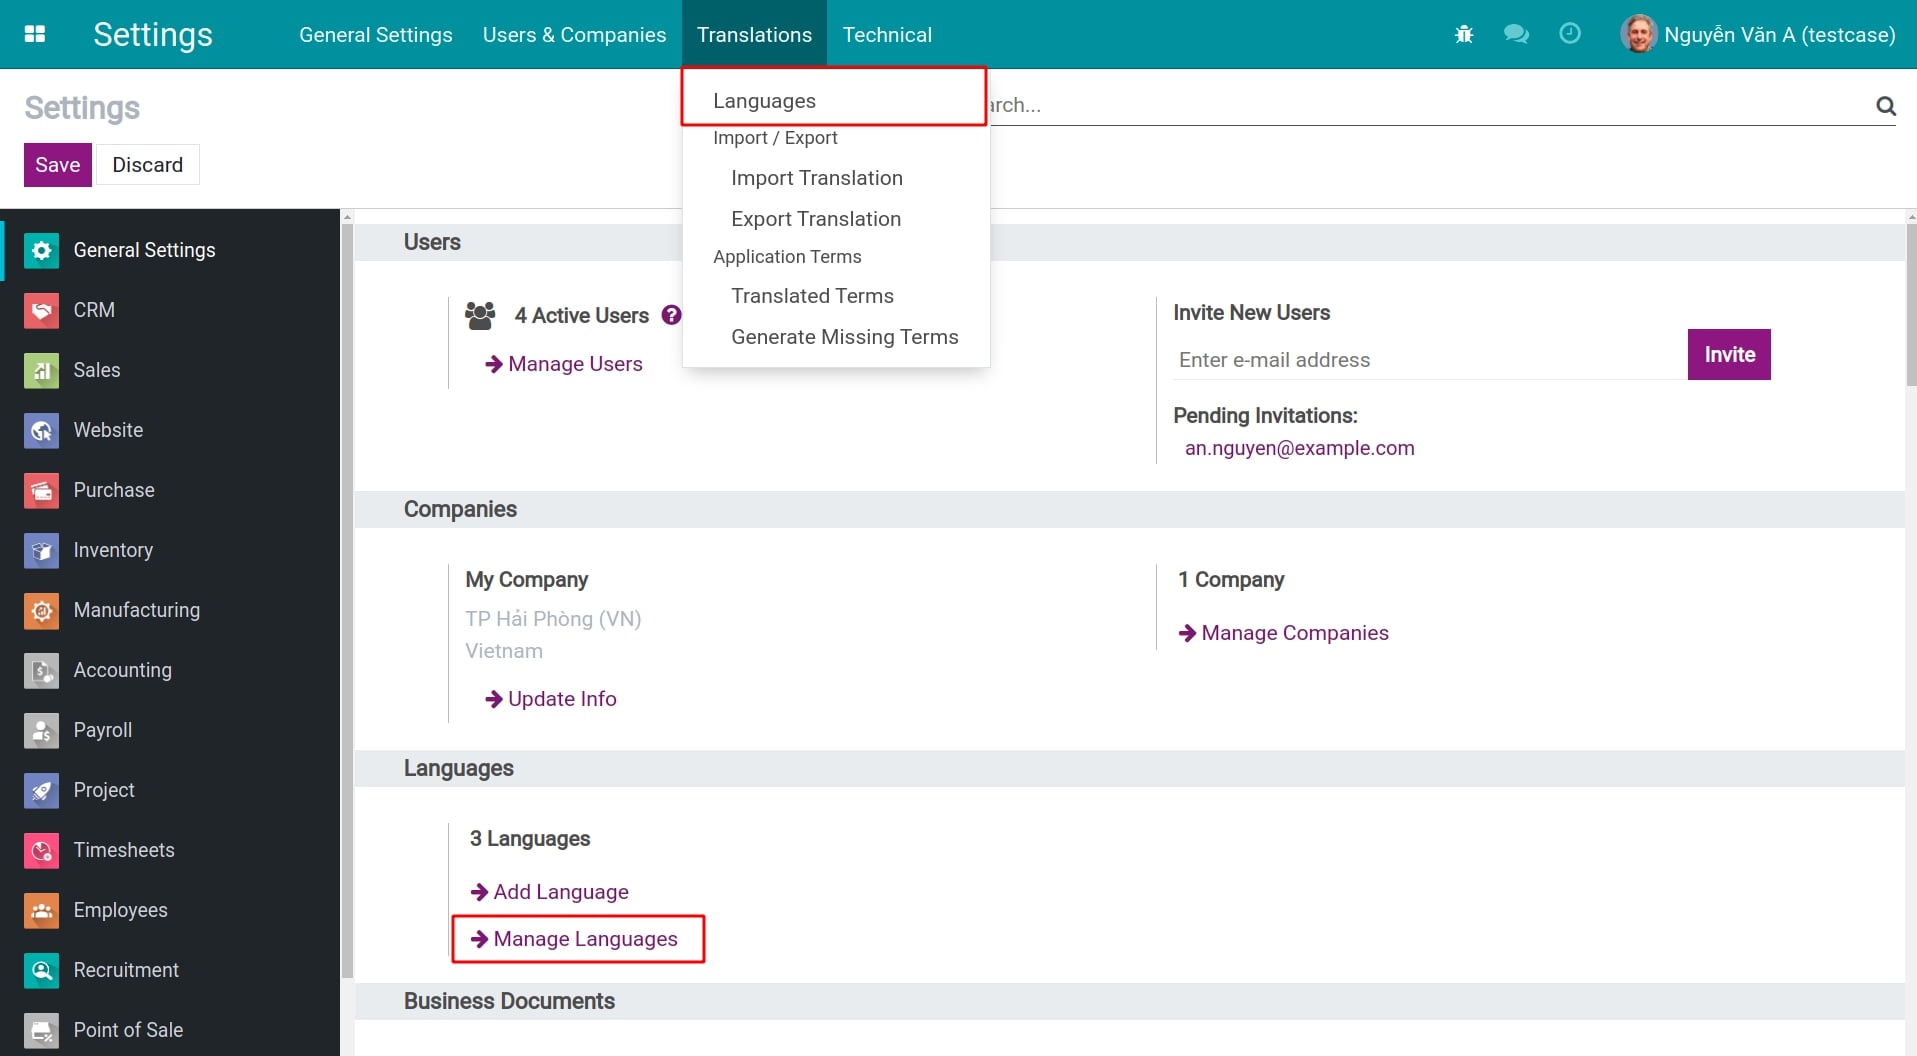
However, in order to see all the available languages and modify some other configurations, you need to activate the developer mode. When this mode is activated, you will see 02 methods as follow:
- Method 01: In the Languages section, you can find the Manage Languages button. Press this button to change to the supported Languages management view in Viindoo software.
- Method 02: On the menu bar, you will see a new option named Translations. Press to change to the same Languages management view.
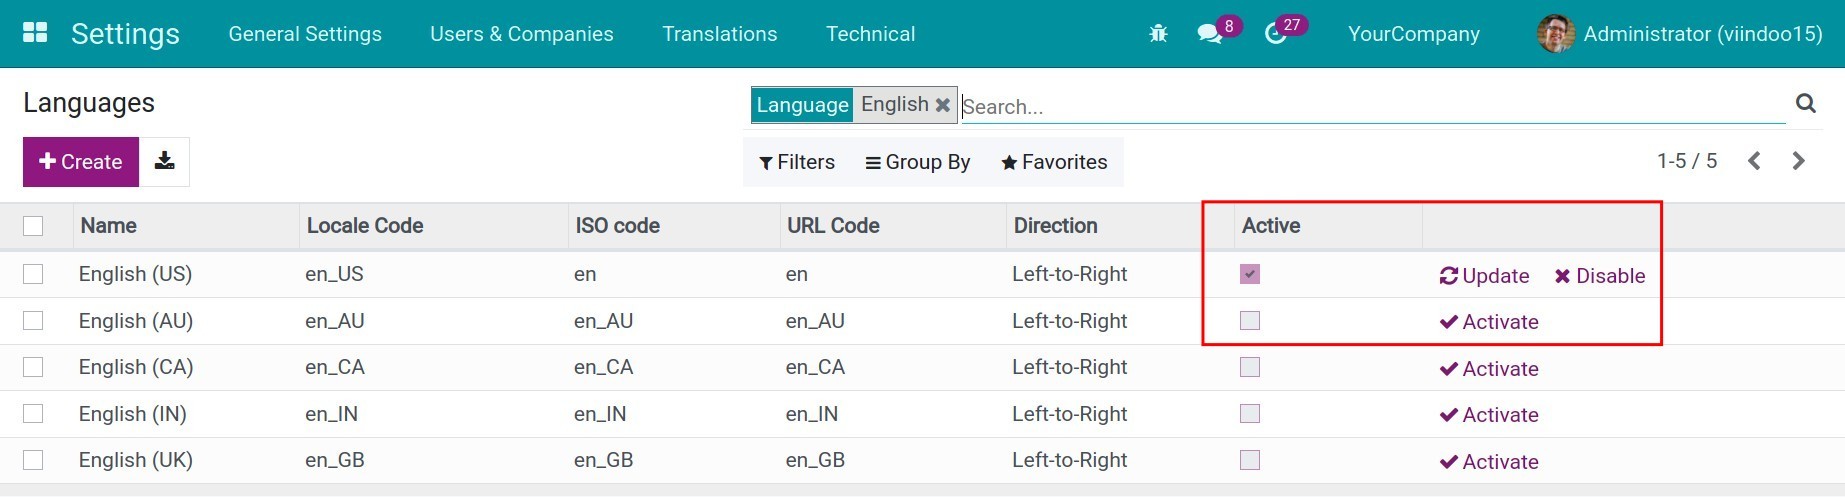
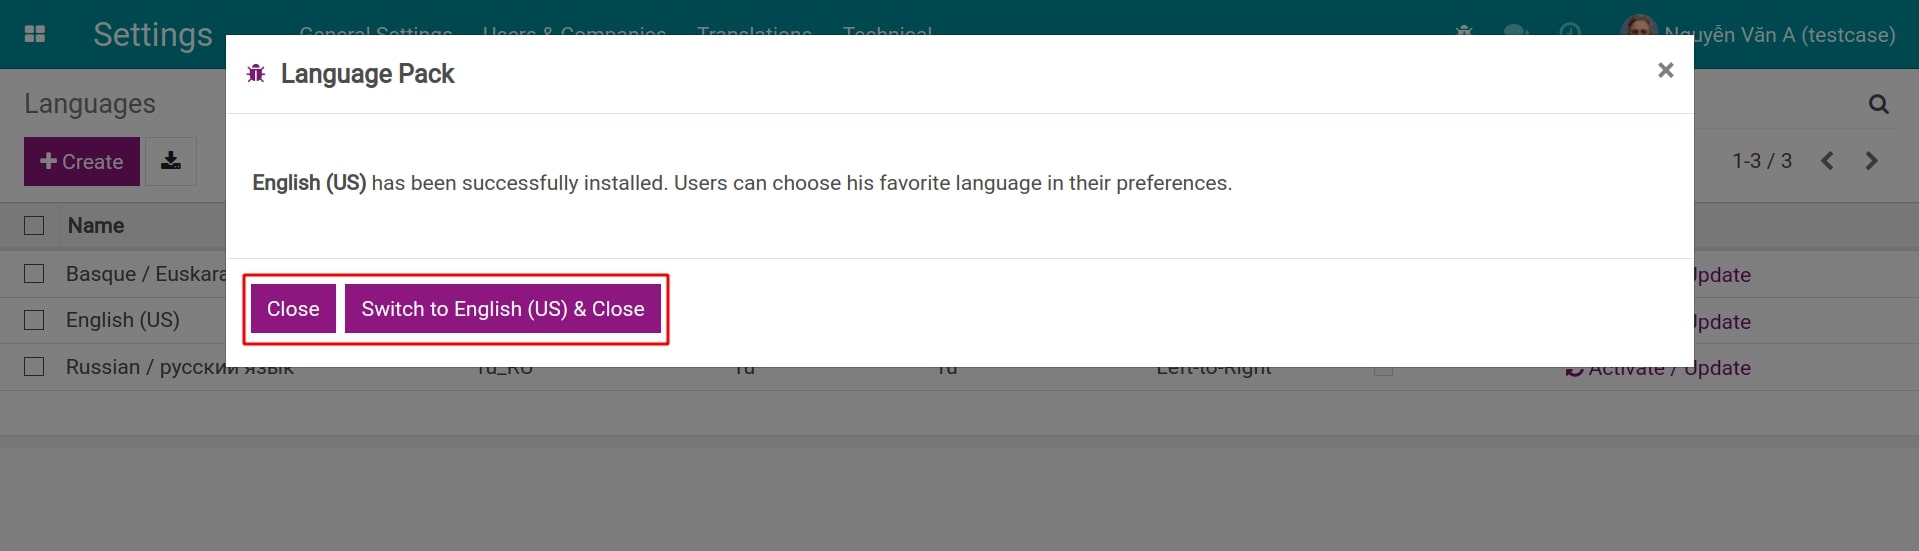
In the Languages management view, you can find the full list of available languages in the software. You can use filters to search for the suitable language. Press Activate to activate a language. You can Update or Disable the activated languages by pressing the corresponding button.
Once the activation is done, press Switch & Close if you want to use that language right away, or Close if you don’t want to change the current language (note that the enabled language will be marked in the Activate column).
Update translations for a language
The Viindoo software is constantly developed and updated, therefore, some translations might be outdated and replaced. To display all the latest translated terms, you can manually update the translation for the required language.
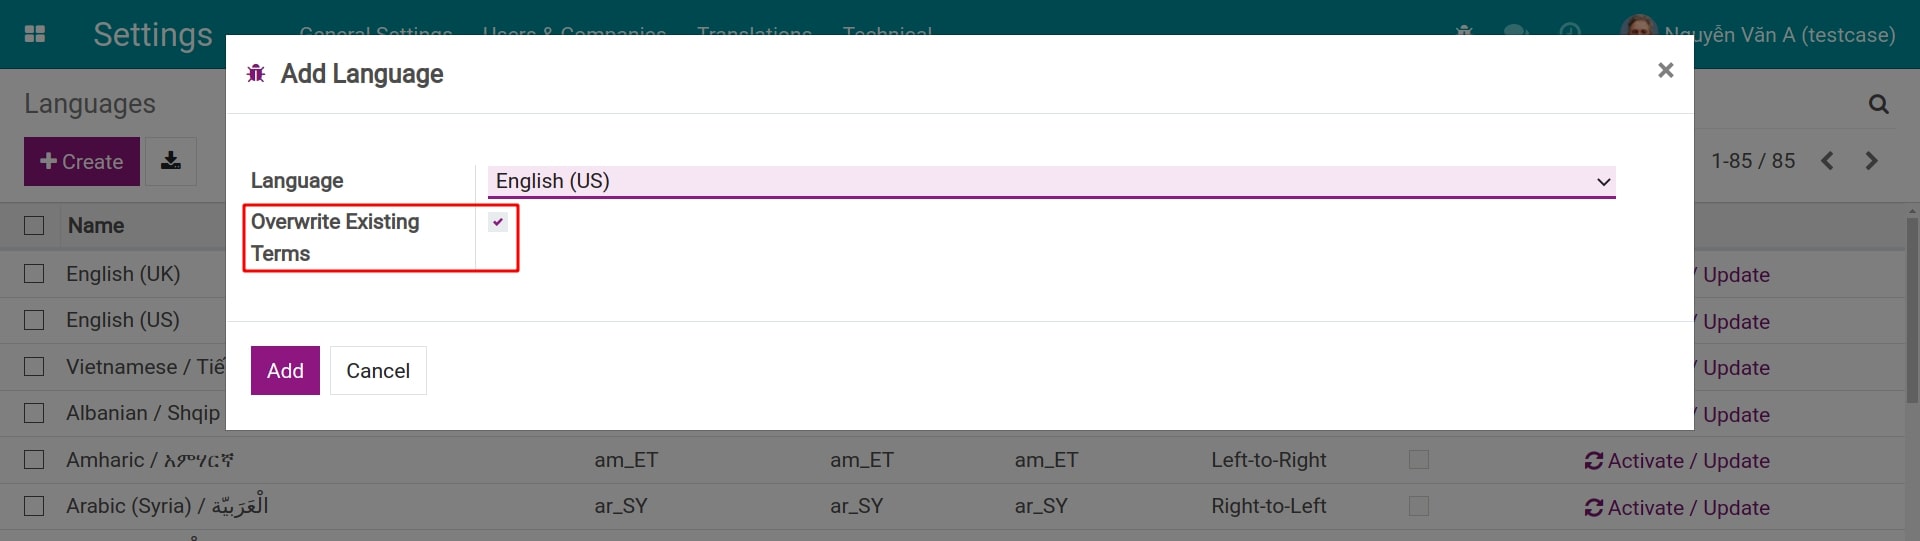
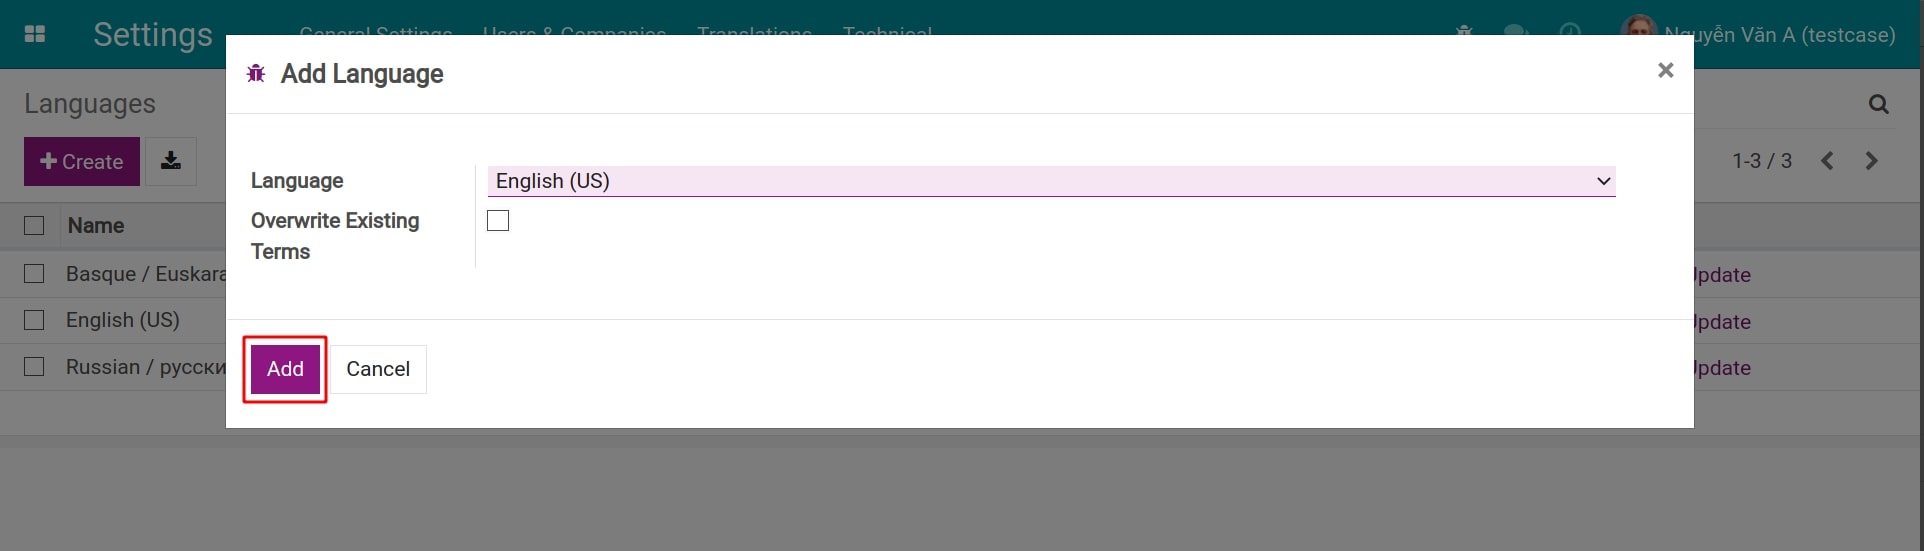
Similar to the language activation, activate the developer mode and navigate to . Before clicking on the Add button, make sure that the Overwrite Existing Terms option is chosen to have the old terms replaced with the new ones.
Change language for a personal account
You can read details about how to change the language for your personal account in the User account privacy setting article.
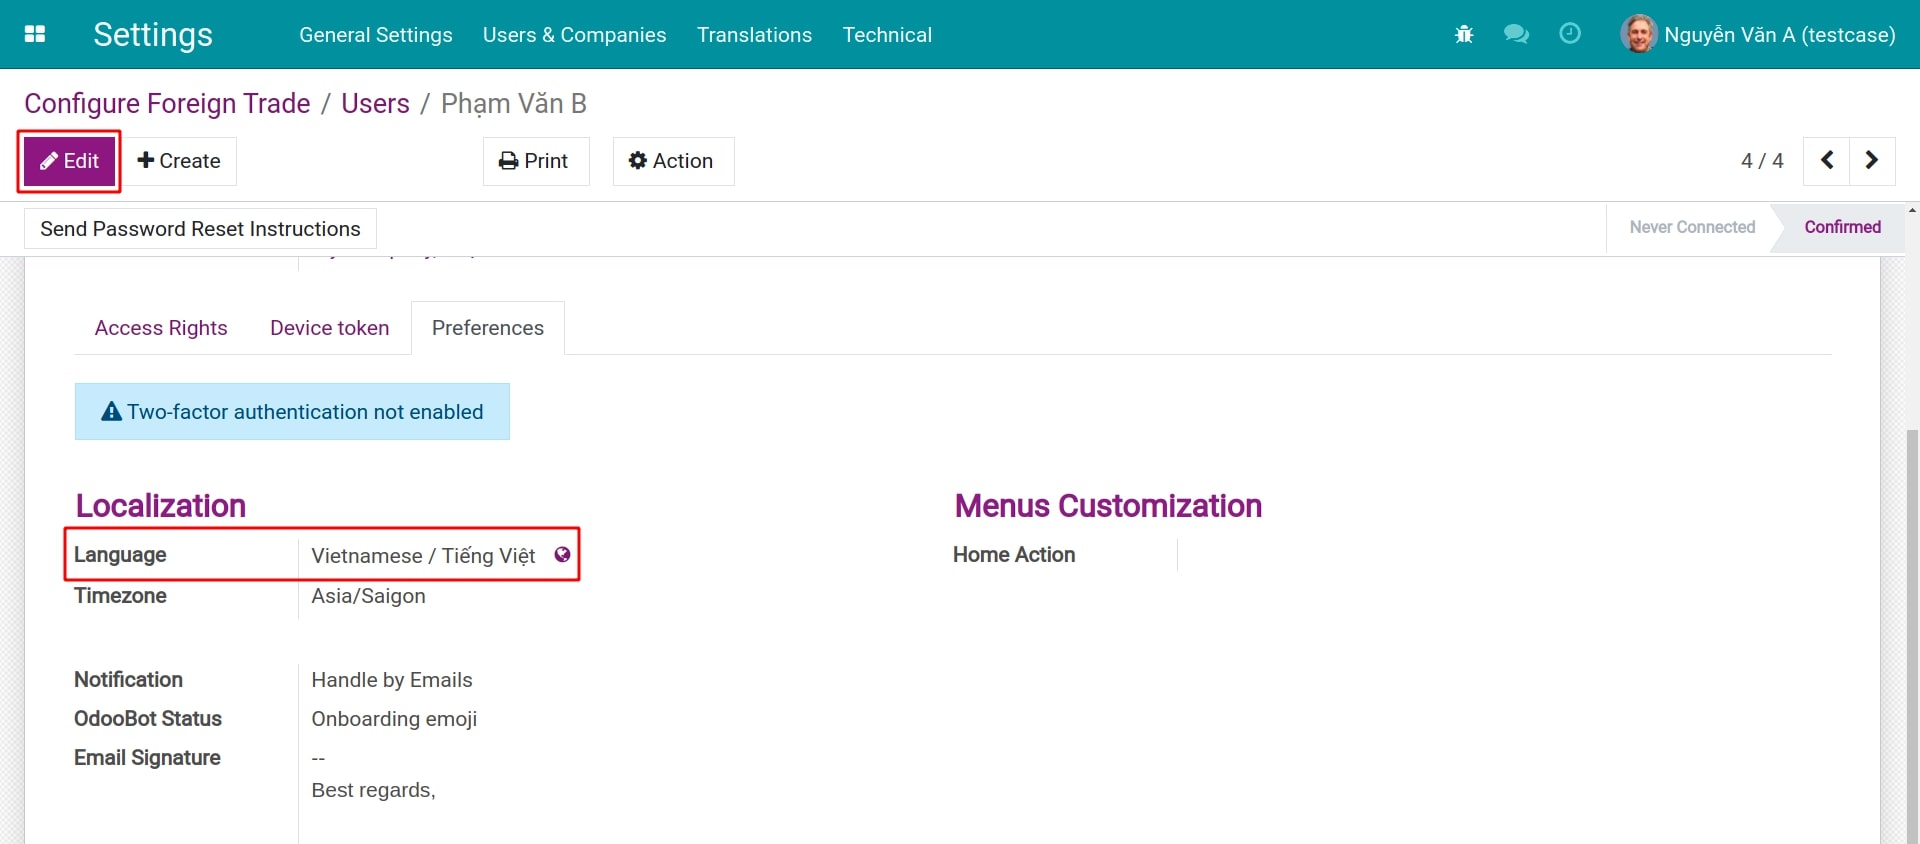
Change language for other user’s account
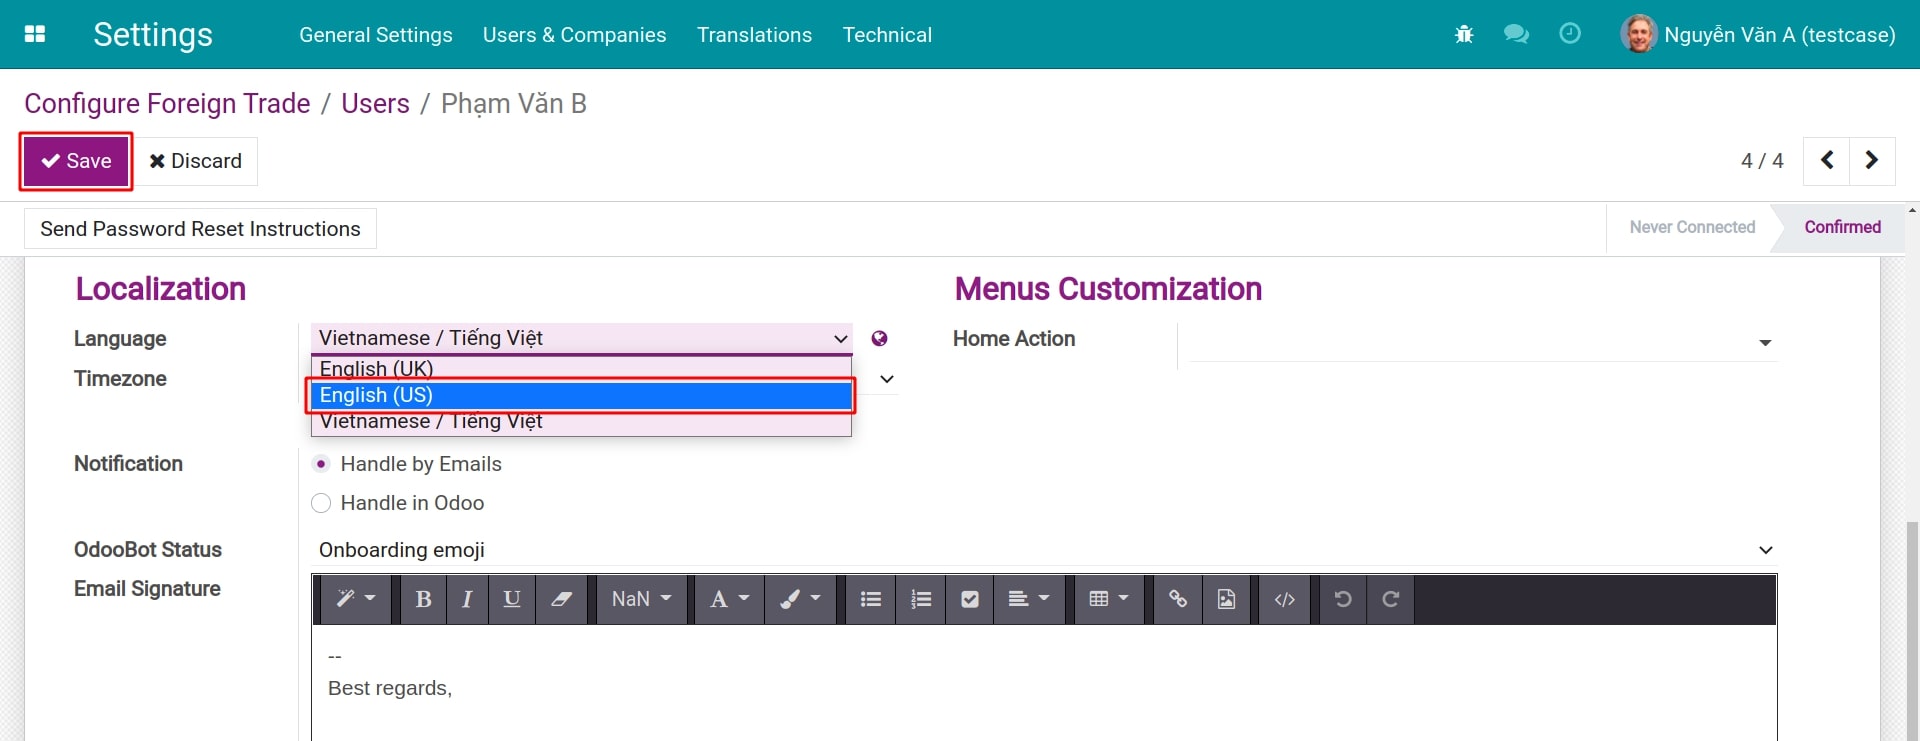
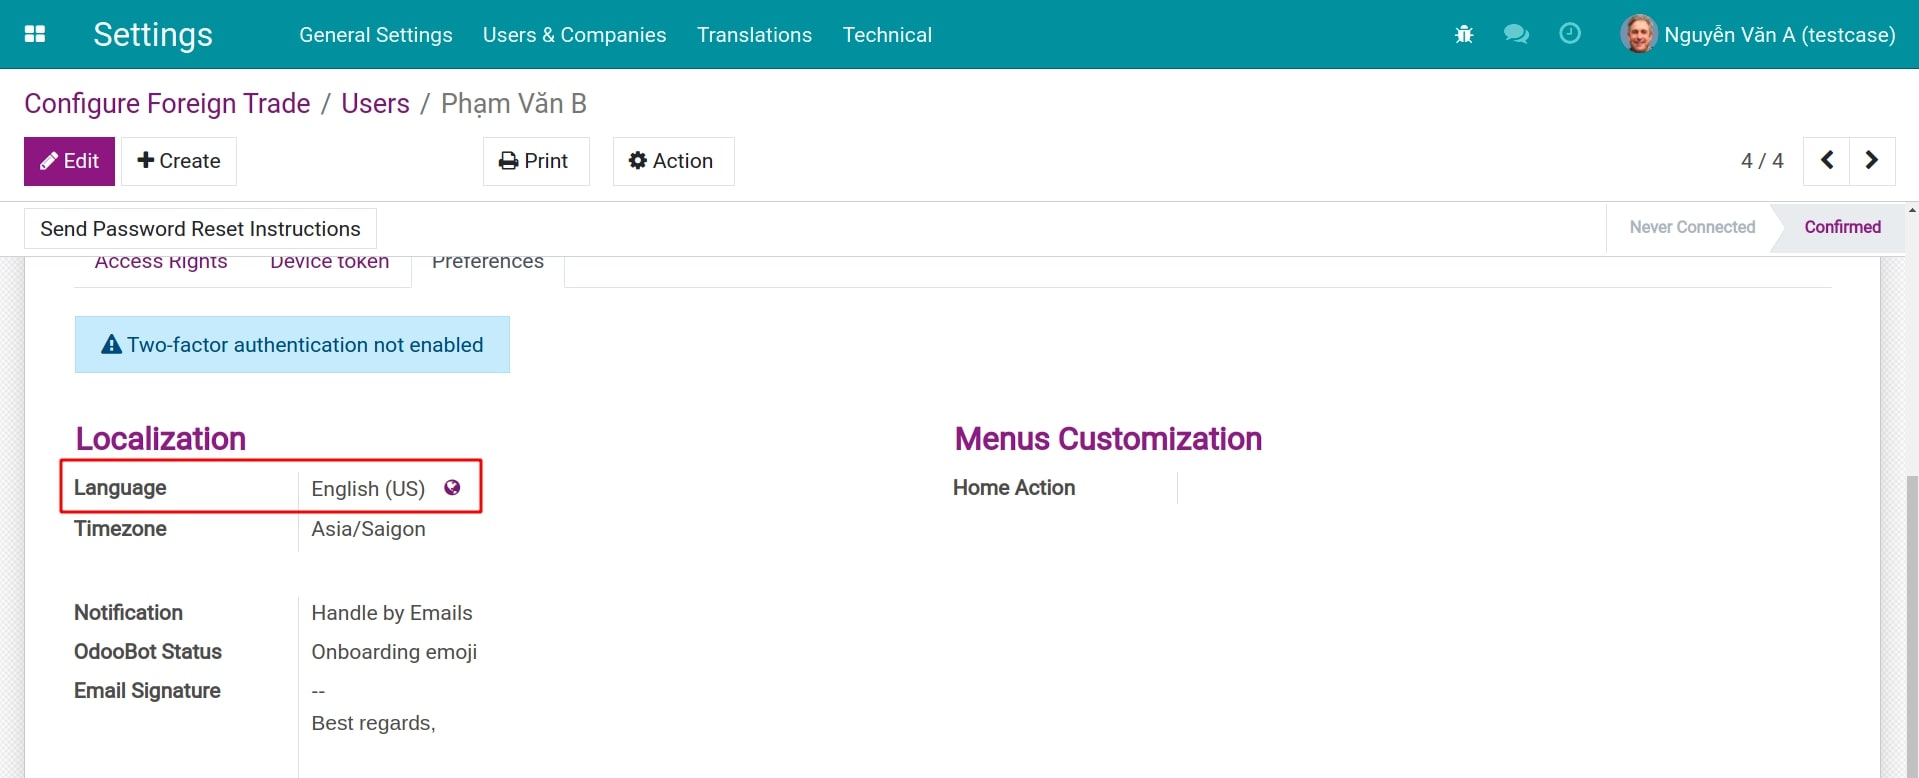
With the Administrator access right, you can change the language settings for any user in your system. Navigate to to access the Users management view and choose the one that needs to change the language.
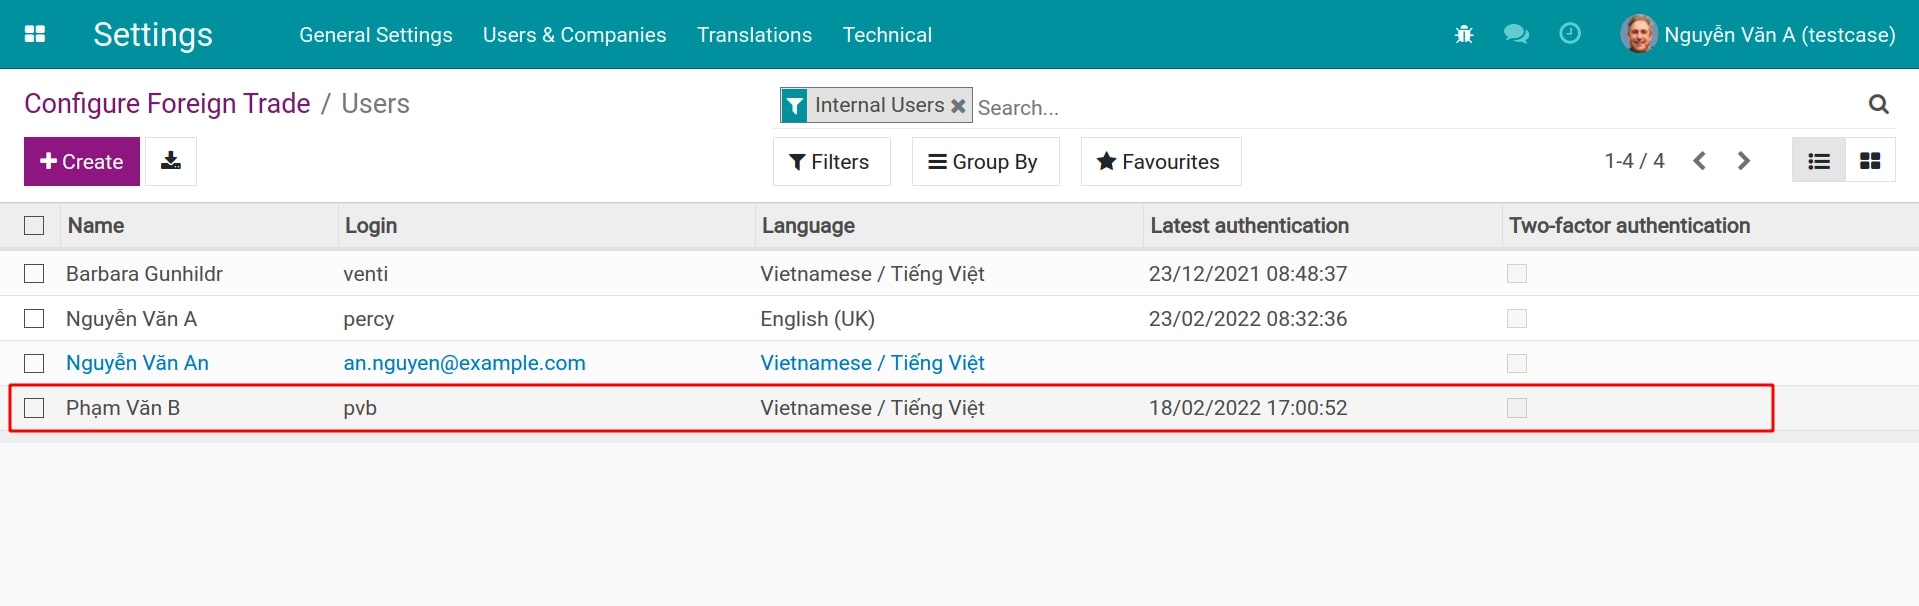
In the user view, press Edit and choose a new language in the Language field in the Preferences tab. Click Save after finishing the language modification to have the system language changed to this new one.