How to run a successful Email Marketing campaign with Viindoo
Four things you should do to run a successful Email Marketing campaign:
Define your relevant email lists and email targets;
Plan the email marketing campaign with clear content;
Schedule an appropriate time to send;
Keep track of the whole mailing process.
Email Marketing app in Viindoo supplies you with great tools to manage your email marketing campaigns.
Requirements
This tutorial requires the installation of the following applications/modules:
Configuration
Go to Email Marketing > Configuration > Settings, check the box of Mailing Campaigns, and click on the Save button to activate the mass mailing campaign management feature.

Create an Email Marketing campaign
Now you will see the Campaigns on the menu bar of the Email Marketing app. Click on this menu and then Create to make a new email marketing campaign.

Fill in the form with the following information:

Campaign Name: Give it a suitable and easy to recognize name;
Responsible: The employee who is in charge of this campaign;
Tags: This is to clarify different campaigns by targets, mailing lists, etc. You can create or edit these tags in Configuration > Campaign Tags.
Click on Save to finish. When you hit the button Send new Mailing, the system will nagivate you to a new view to edit the marketing email.

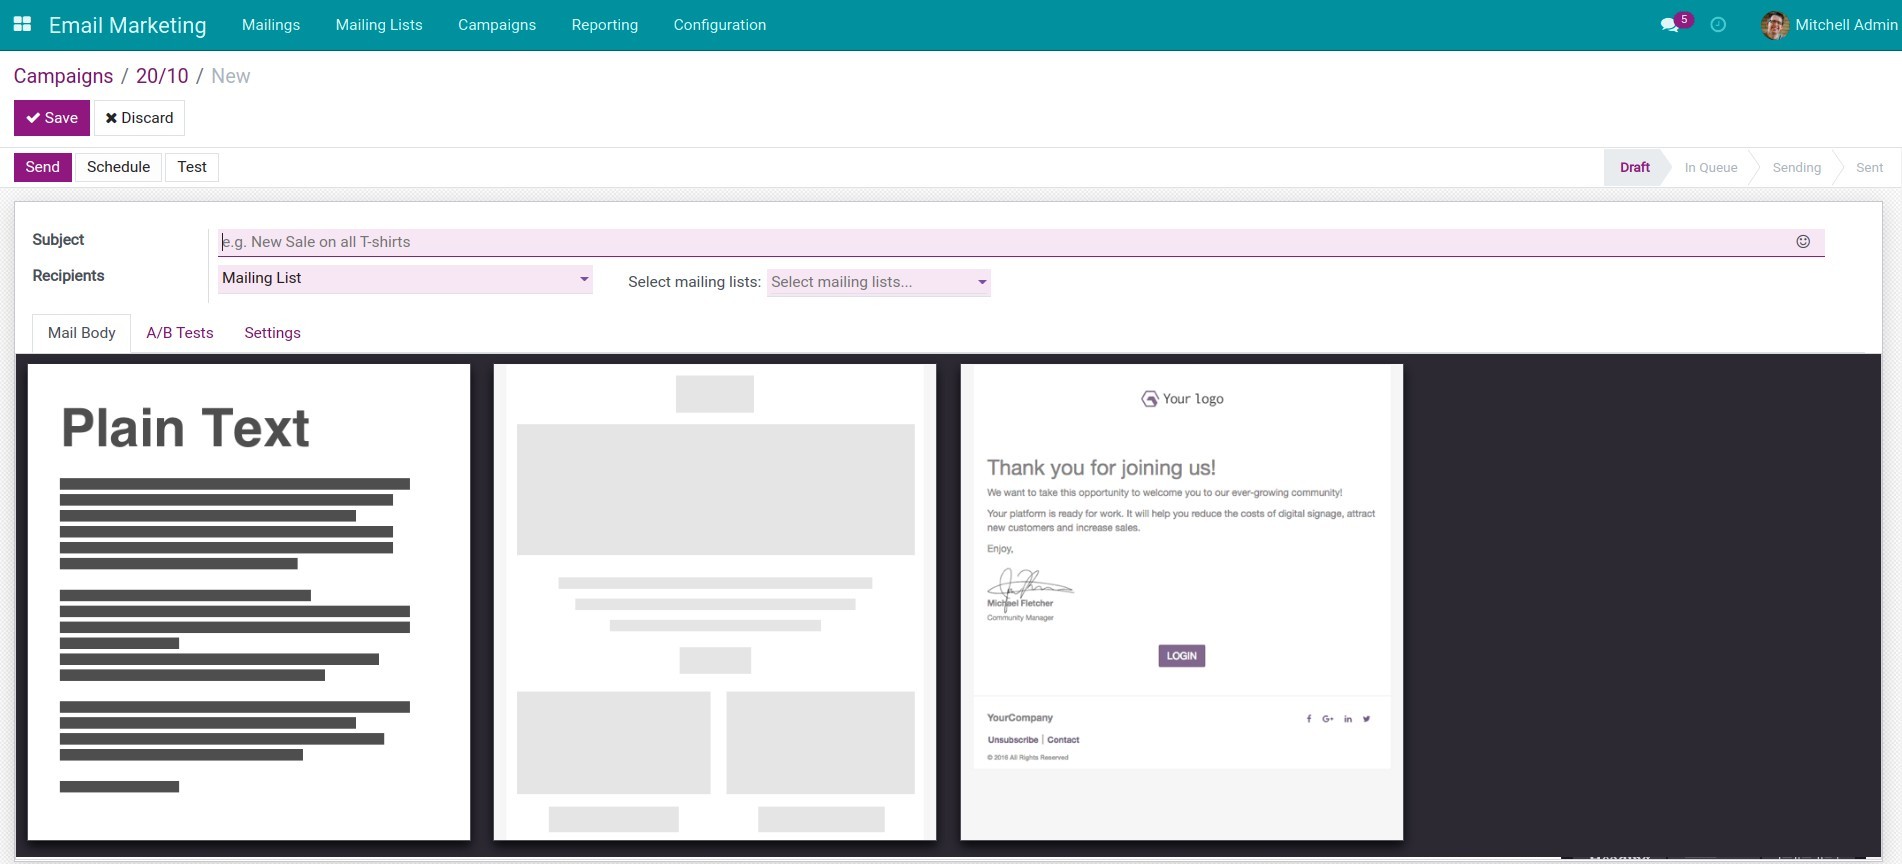
Edit the email marketing content
On the email view, you can edit the following information:
Subject: keep the title short, concise and express the main content you want to convey.
Recipients: the system allows to select the following types of recipients:
Mailing contact;
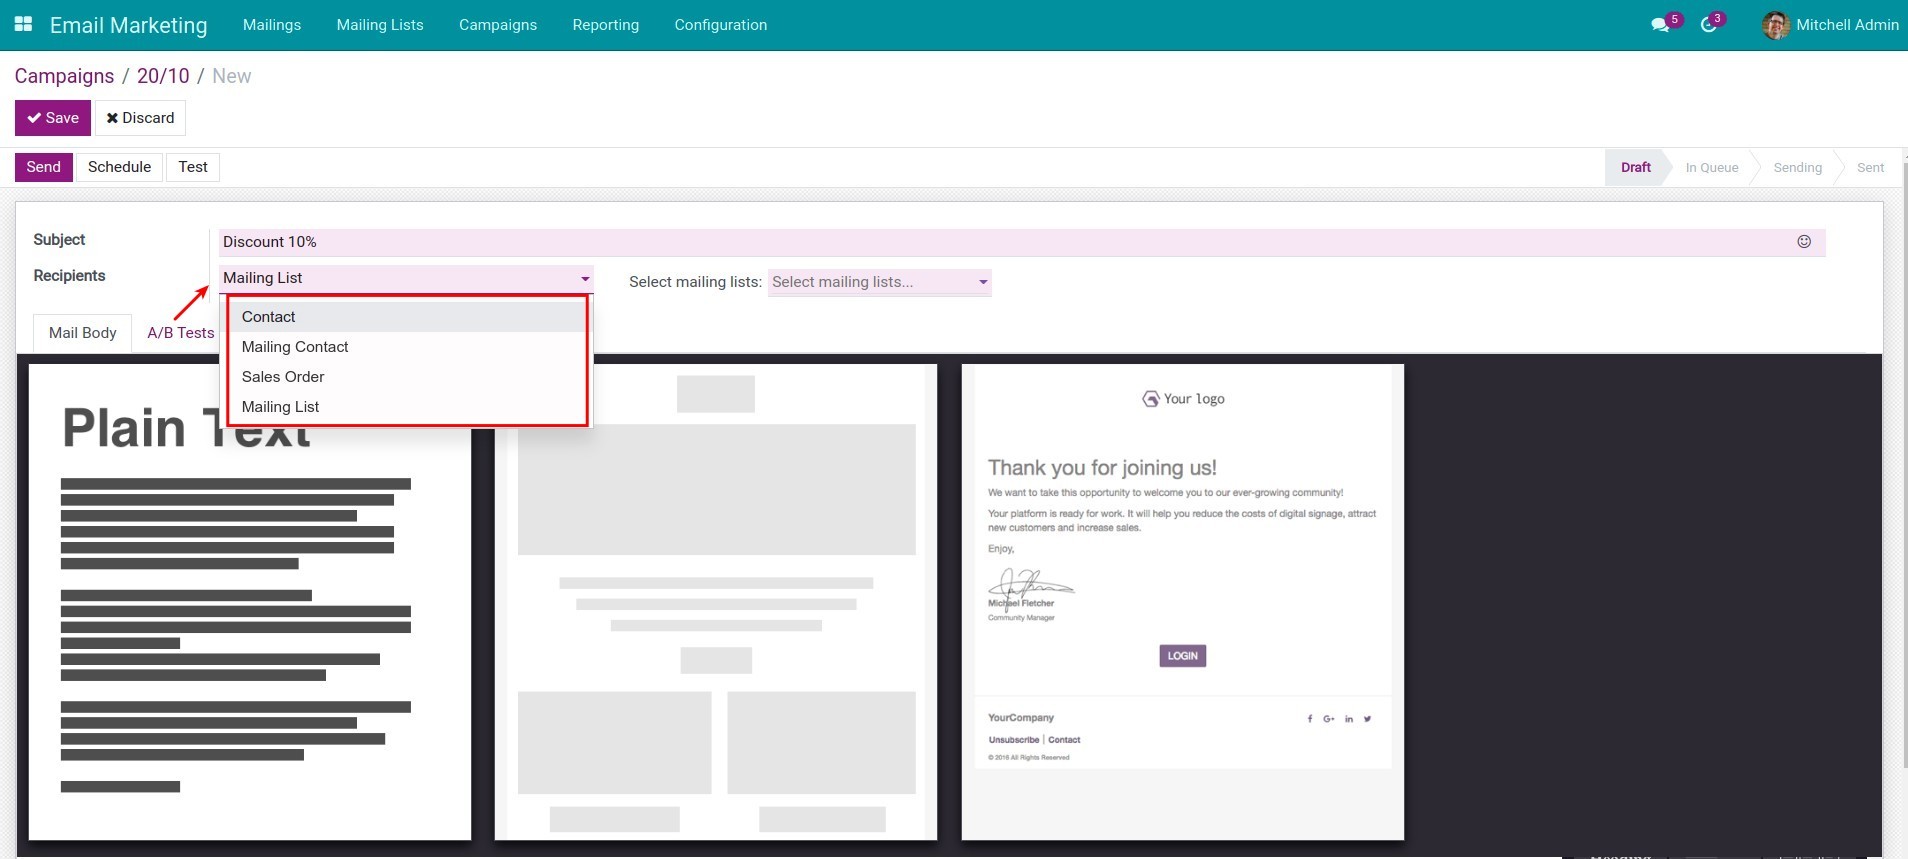
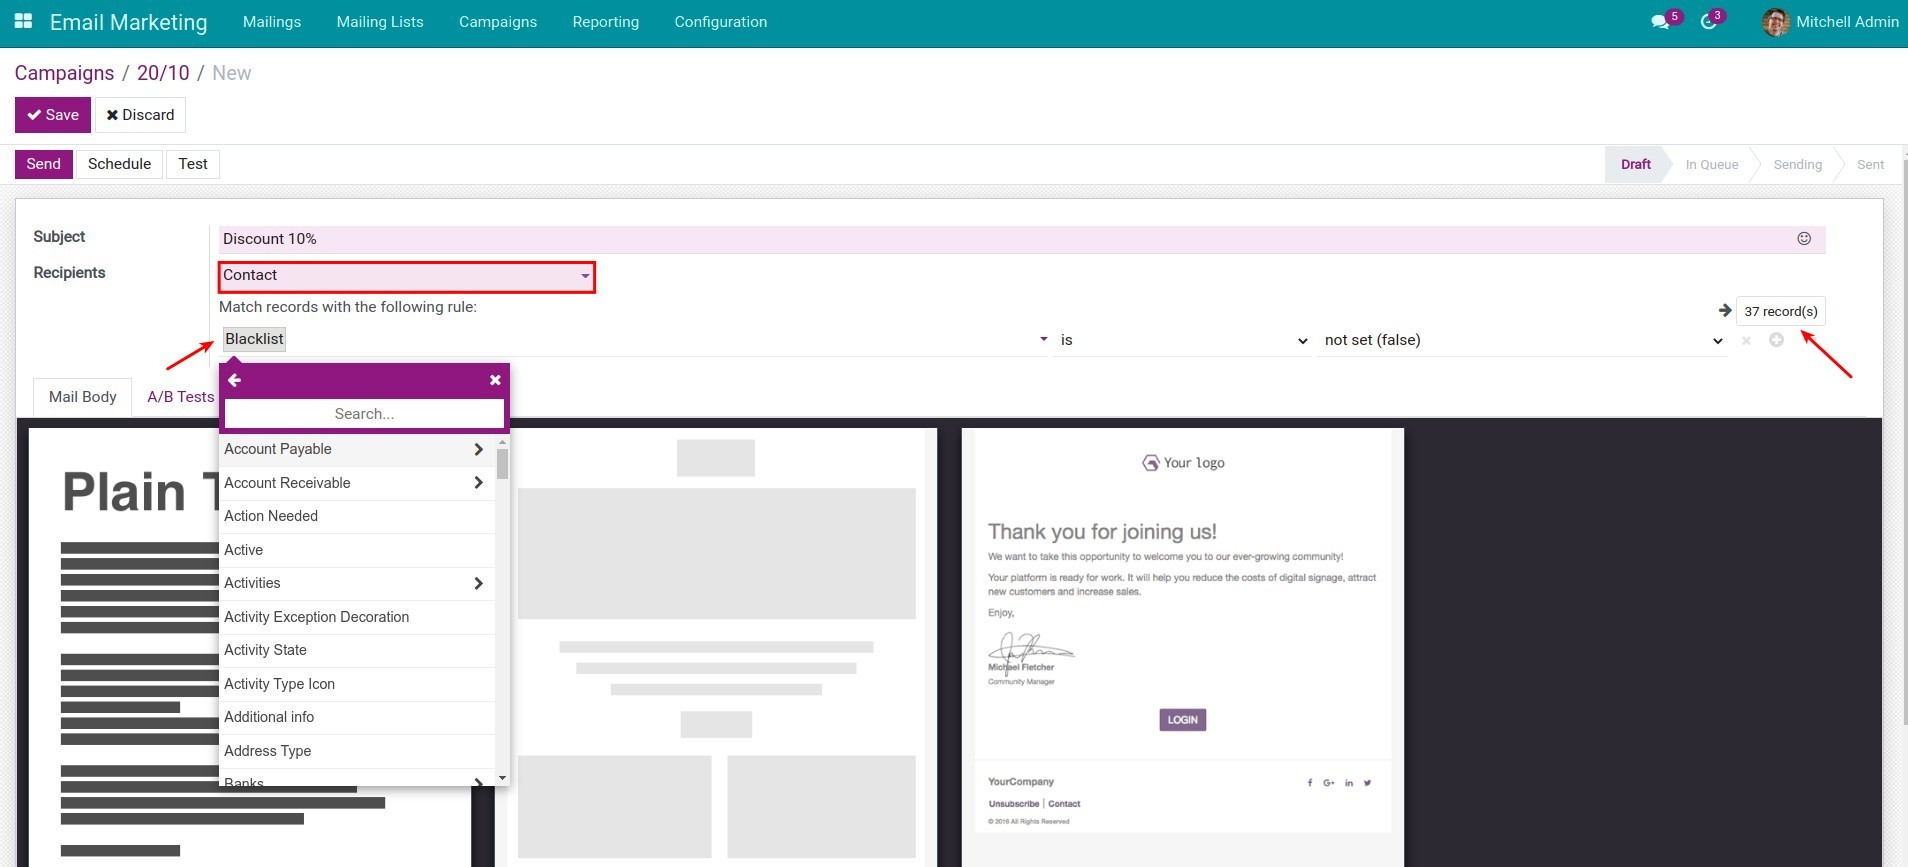
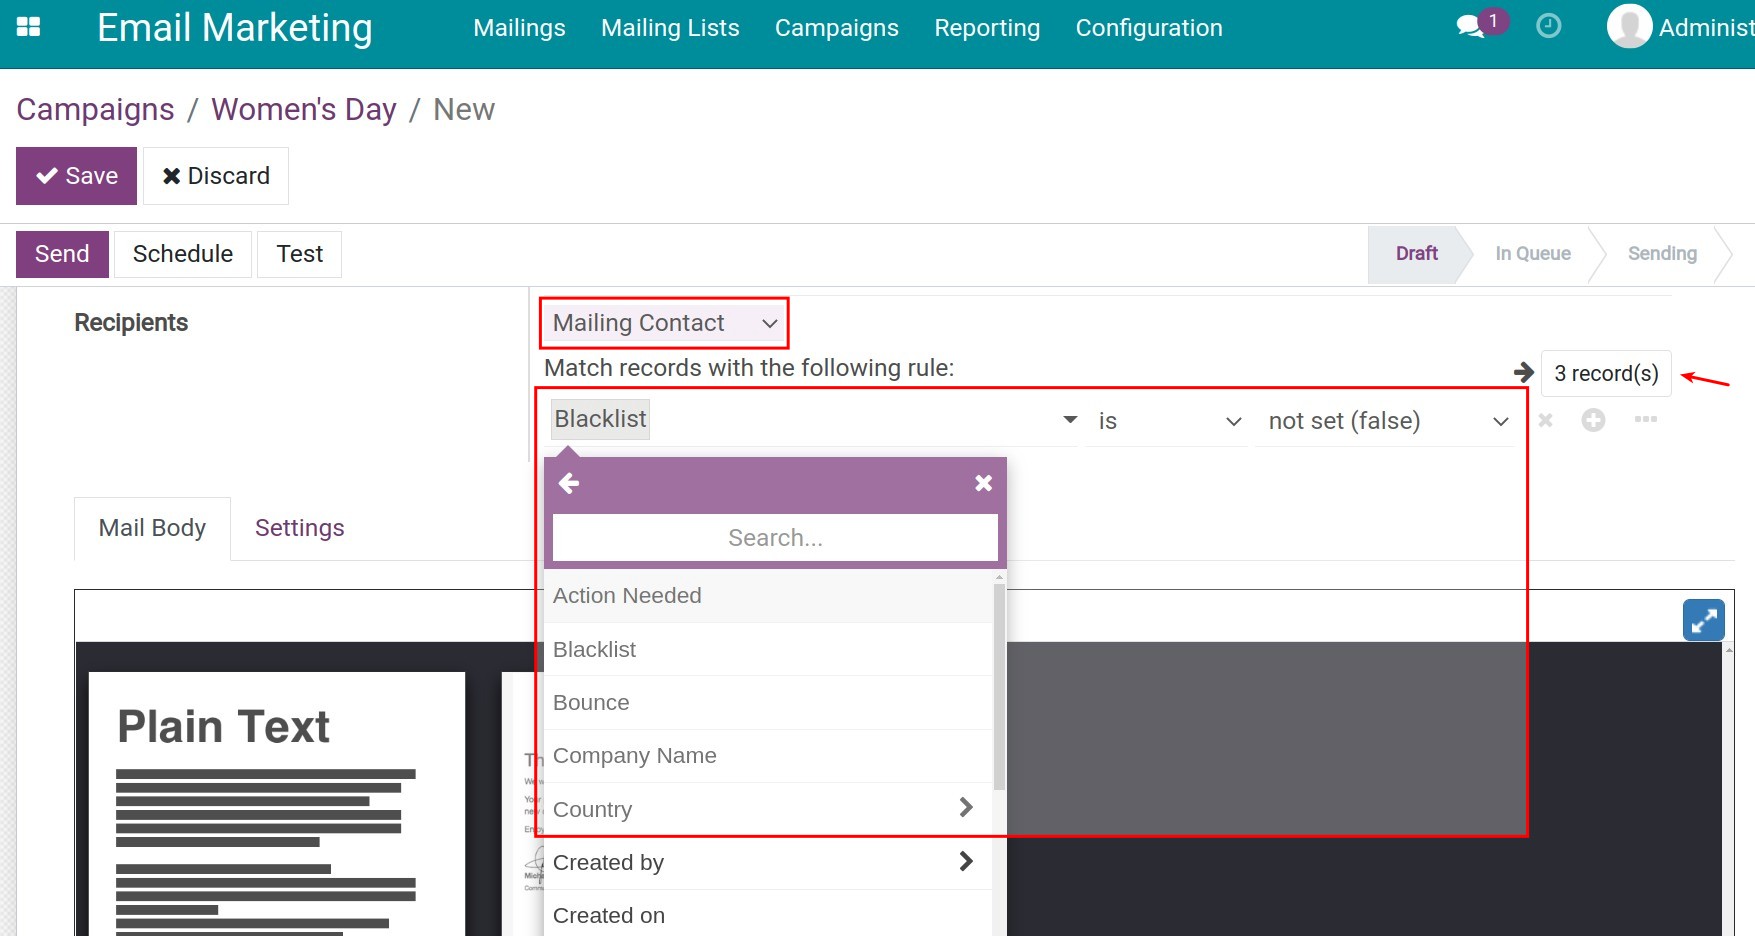
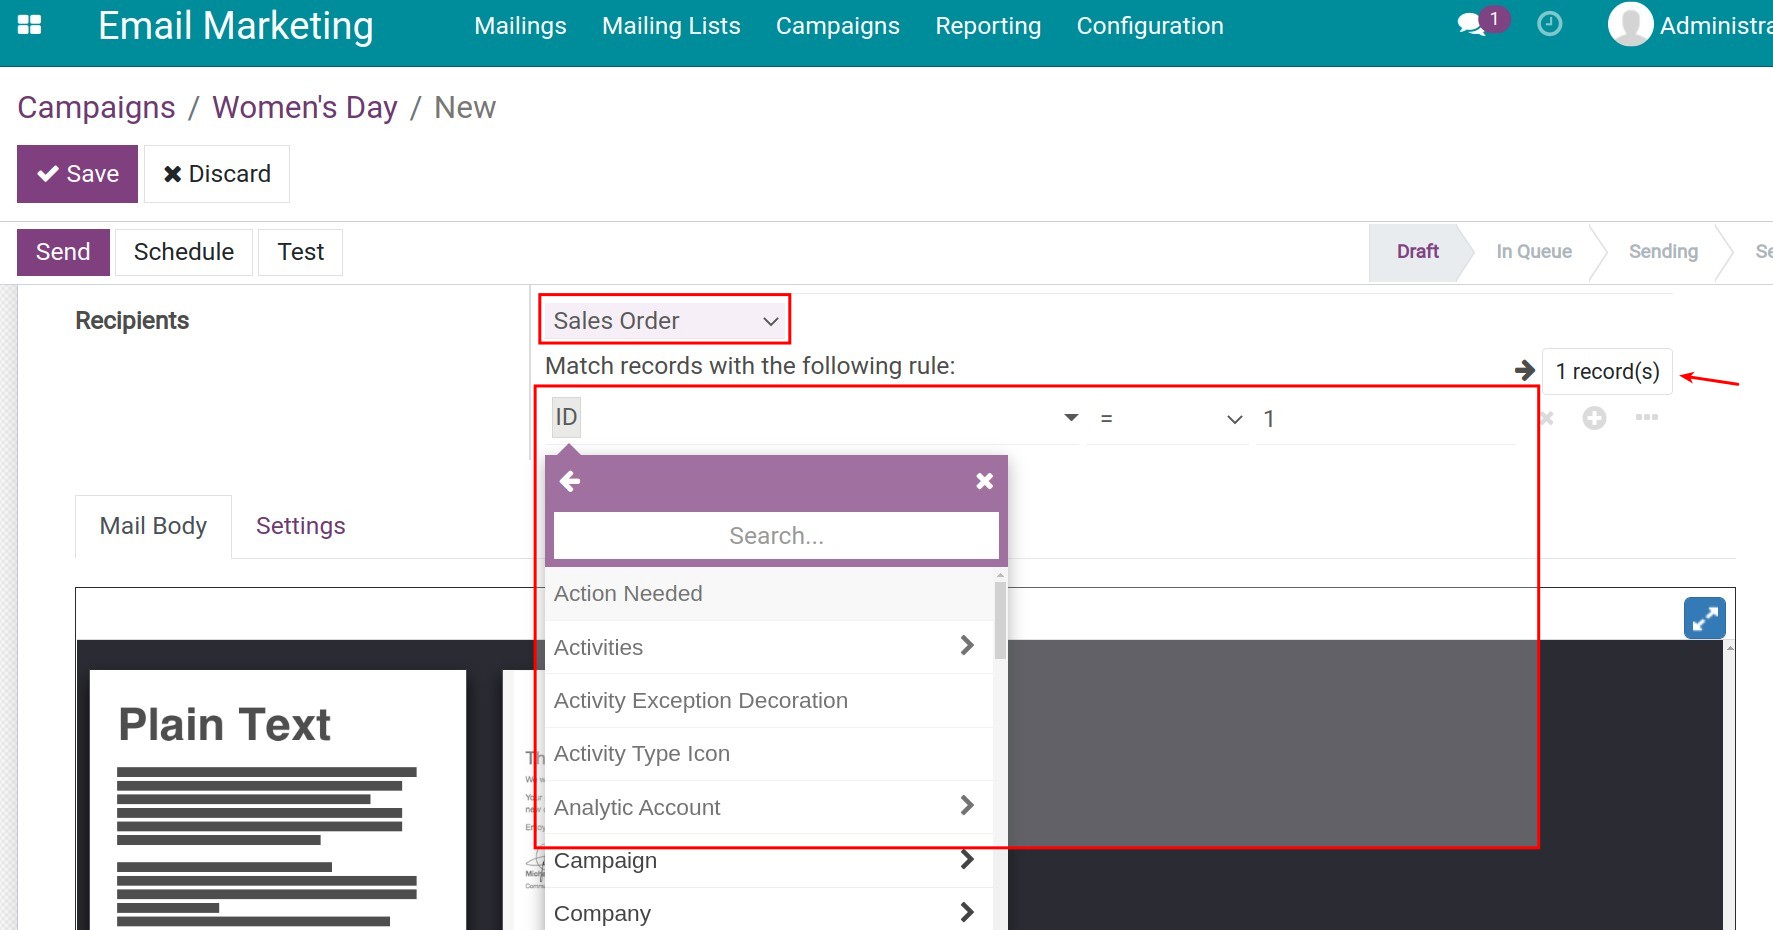
For each type of recipient, the software helps you find records according to different rules that are relevant to the campaign you are running.
Contact:
![Match condition for contact type.]()
Mailing contact:
![Matching condition for mailing contact type.]()
Sale order:
![Match condition for sale order type.]()
Mailing list: The way to create mailing lists.
On the Mail Body tab, the system shows some available email templates. Click on the one you want and edit it.
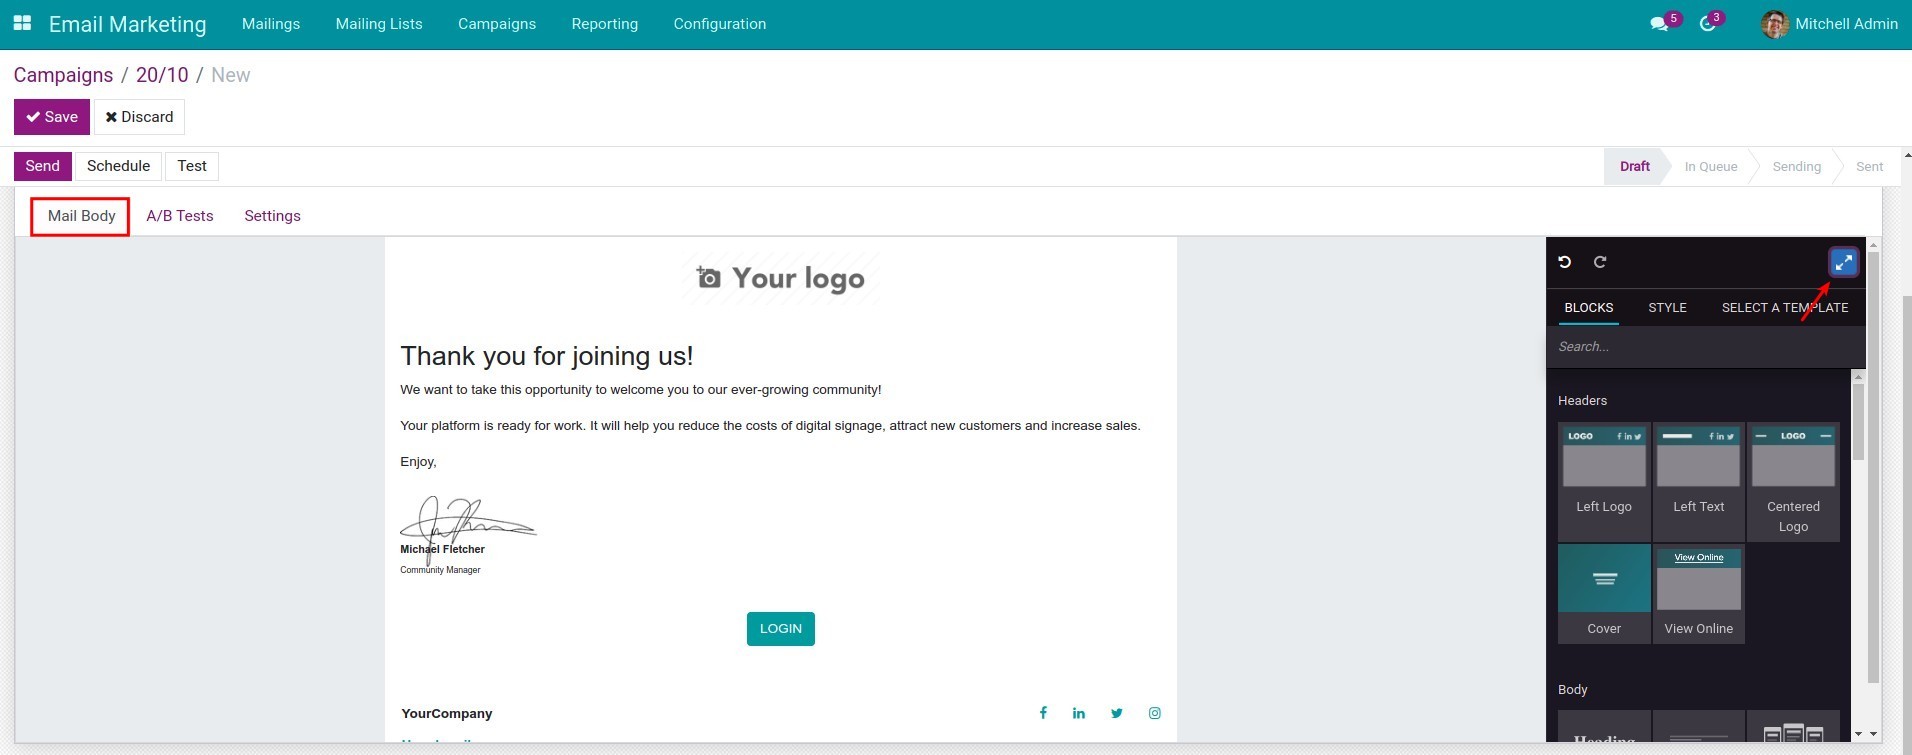
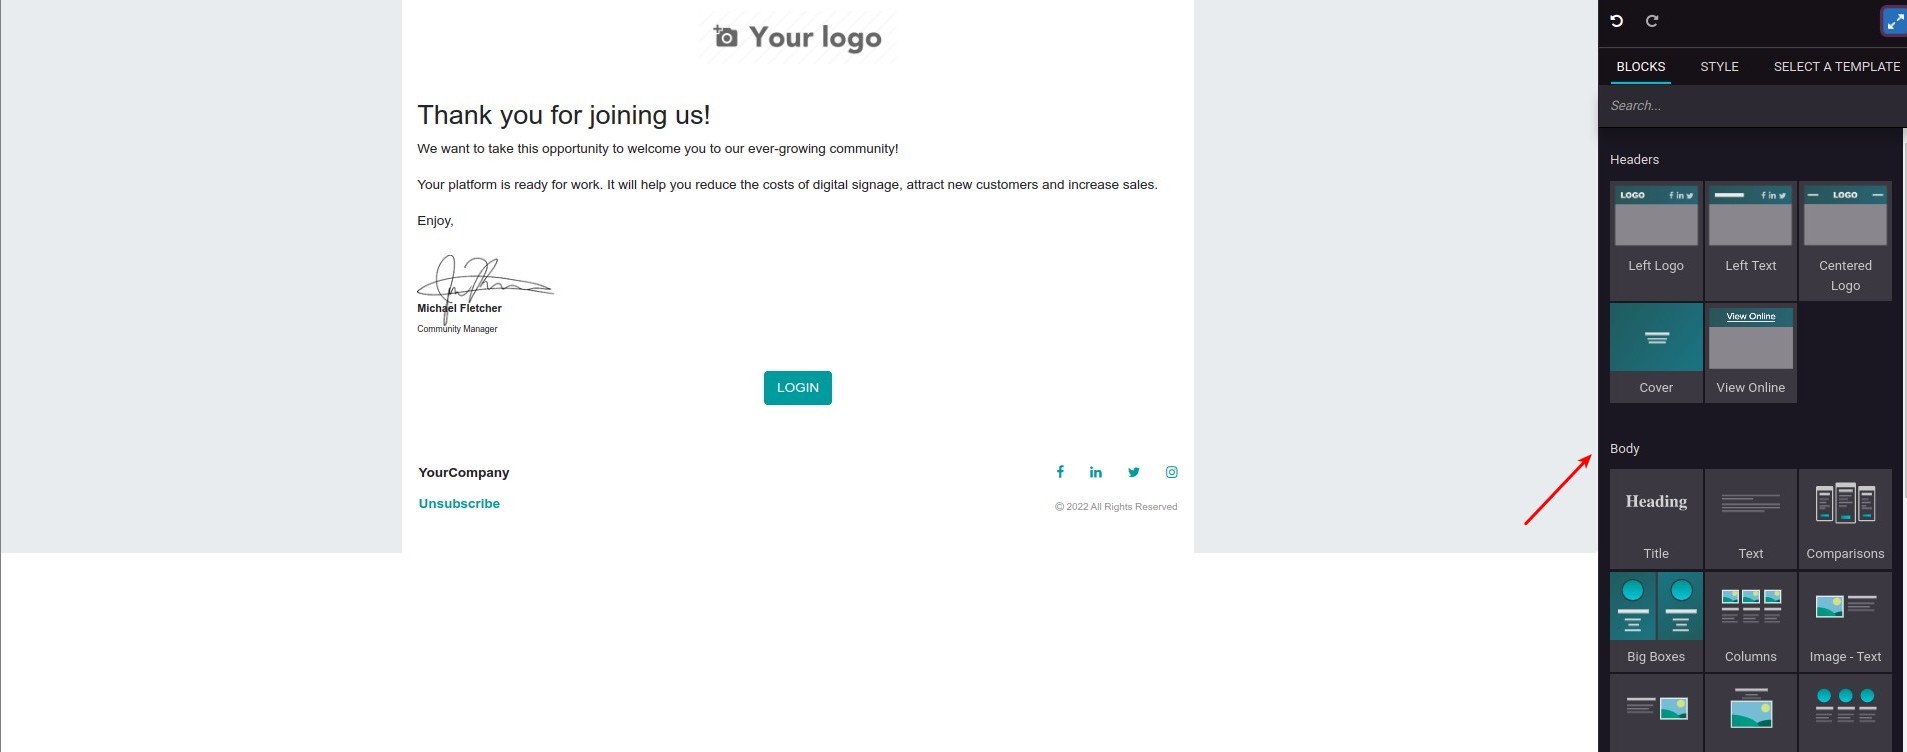
Let’s expand the Mail Body by hitting the arrow icon on the top right side. Now you can edit the content easily just by dragging and dropping the available blocks on the right side.
On the Settings tab, you need to set up some information including:
Preview text: The text appears with the title email for recipients before clicking to view the email;
Send from: The recipients will know who sent the marketing email to them;
Reply to: When the recipients reply directly on the marketing email, it will go to this email address;
Attachments: You can attach other files to the mail here;
Responsible: The user who is in charge of this campaign;
Campaign: The campaign of the email marketing.
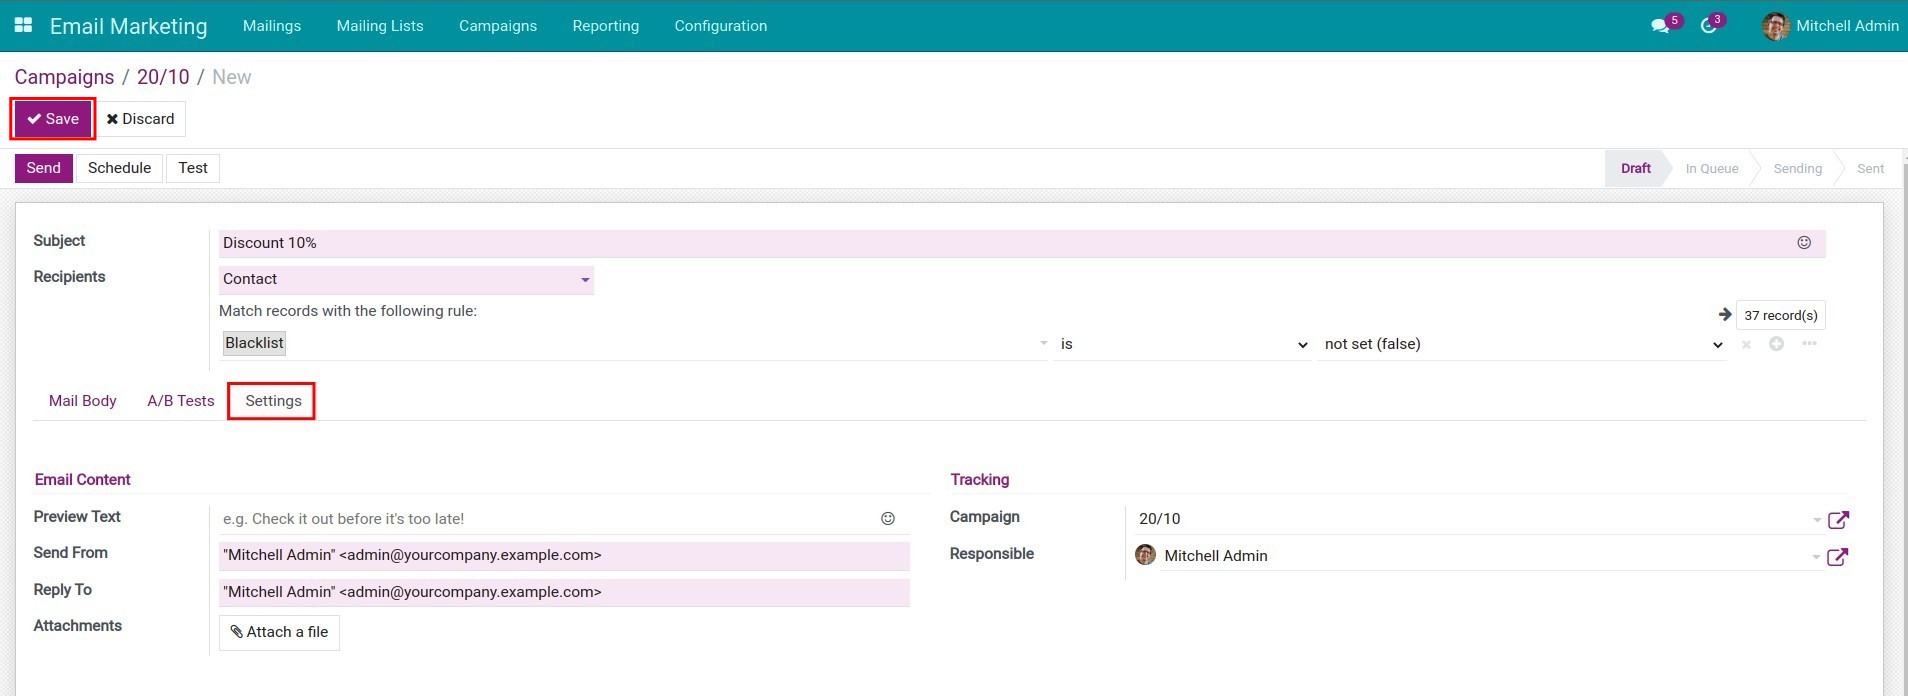
After setting the necessary information, click on the Save button to finish.
Test, Schedule, and Send email marketing
You can preview your email marketing, send right away, or schedule to send later in Viindoo by hitting the buttons: Test, Schedule and Send.
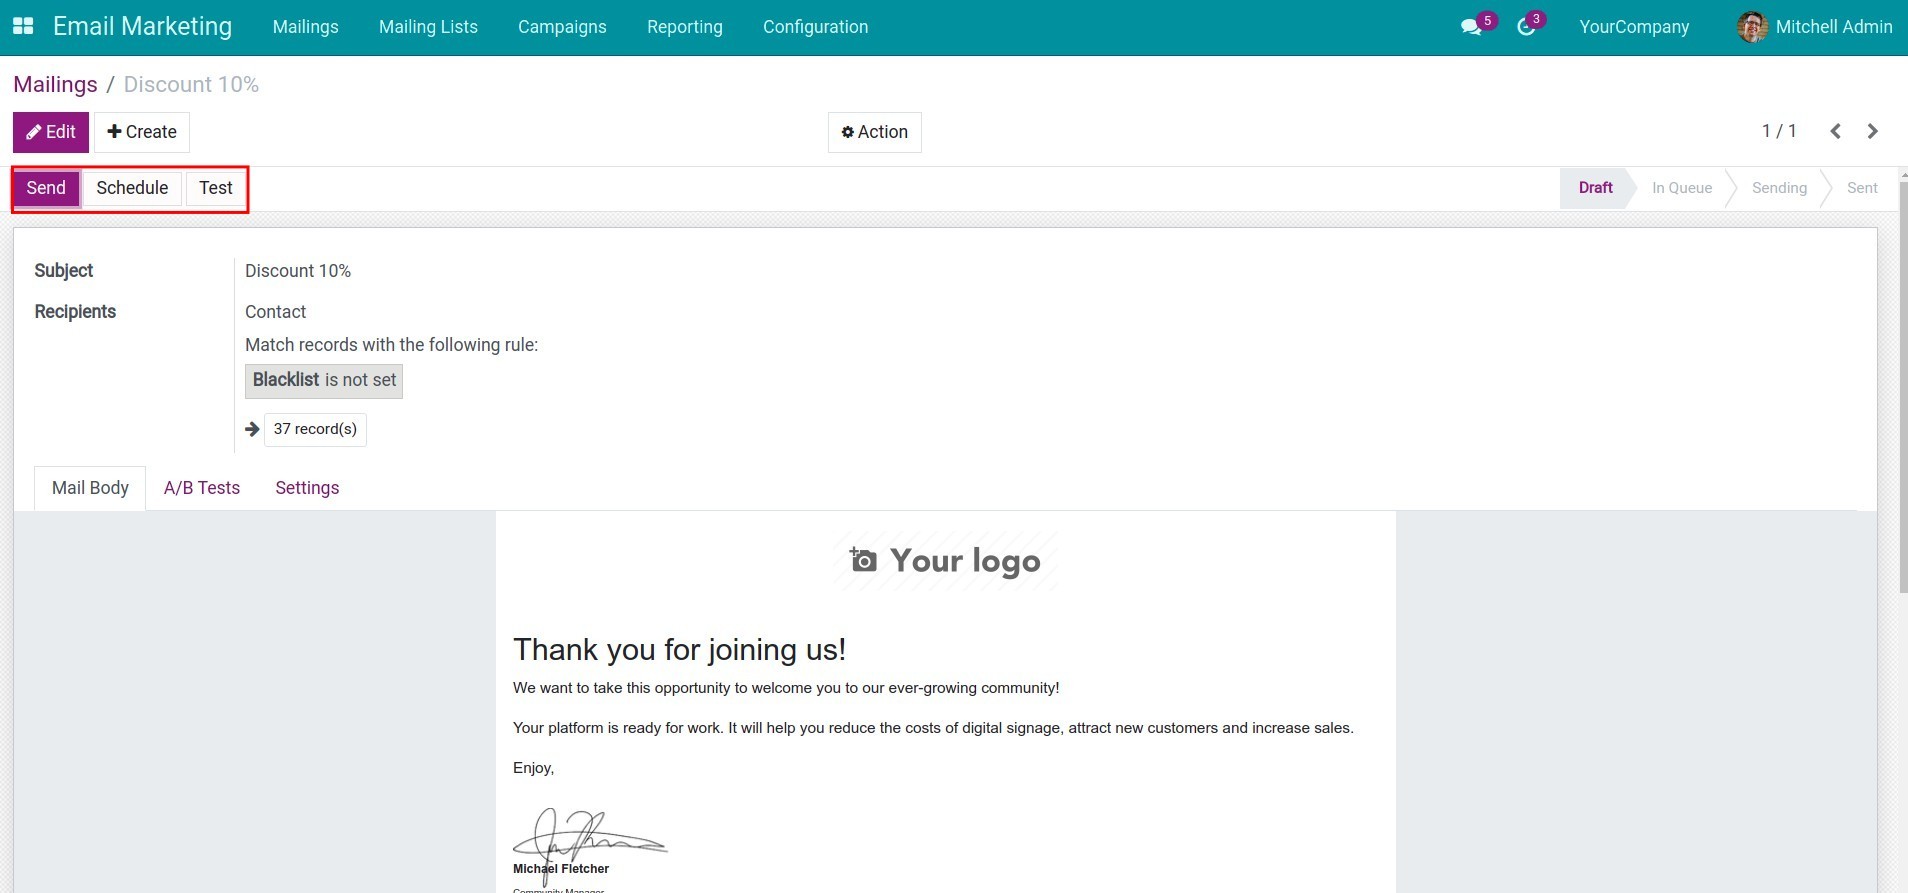
Test
You should send a sample email marketing to a test email address in order to check and fix the errors that may appear before mass mailing. Click on Test, type in an email address and Send.

Schedule
Click on the button Schedule, pick a time in the future to send the email on Send on, and then hit the button Schedule to finish scheduling. After that, the system will move the email marketing campaign to the Waiting status and automatically send the email marketing later.

Send Email
When you want to send the email marketing right after finishing all the settings, click on Send. The system will notify you to confirm this action, click the Ok button. After that, the email will be in the Waiting status.


Keep track of the mailing process
After sending the email to all the recipients, the system will keep track of the result in real-time (including % Received, % Opened, % Clicked, % Replied and % Bounced) and show it right on the email marketing view like the image below.

See also
Related article
Optional module
