Manage inter-warehouse transfers
In this article, we will show you how to manage the goods transfers between internal warehouses when your business has more than one storage location.
Requirements
This tutorial requires the installation of the following applications/modules:
Configure a warehouse
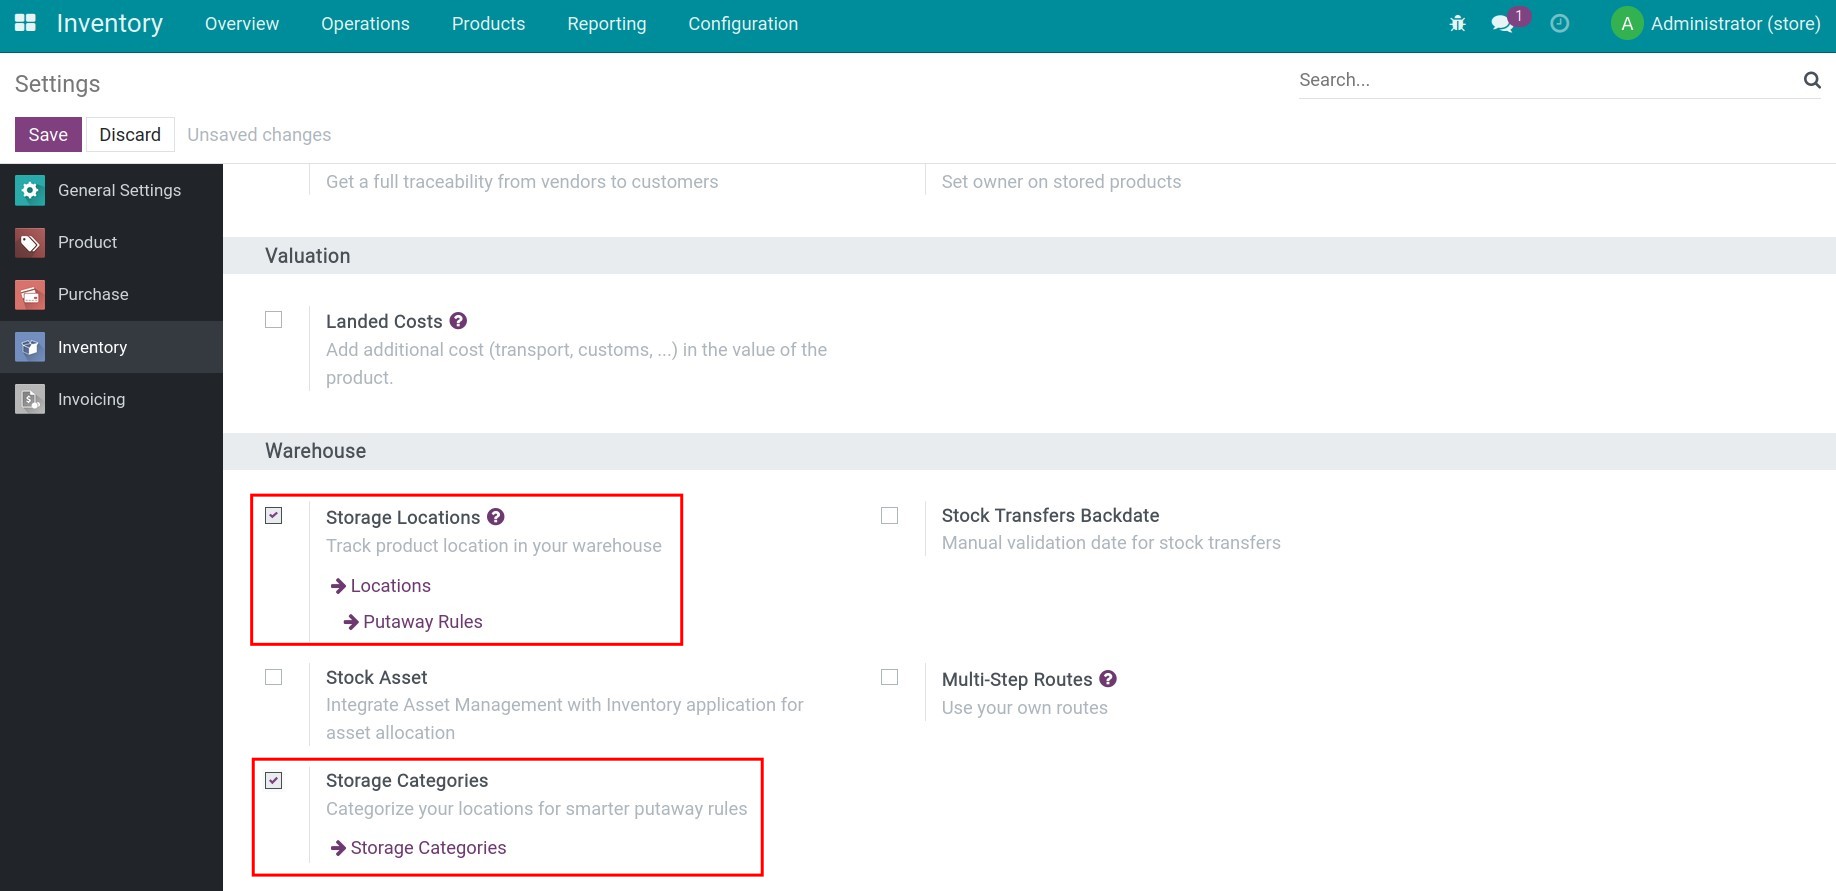
To transfer goods from one warehouse to another, activate the Storage Locations feature. Navigate to Inventory ‣ Configuration ‣ Settings, in the Warehouse section, click on Storage Locations ‣ Save.
Navigate to Inventory ‣ Configuration ‣ Warehouses ‣ Create. Refer to the How to create warehouses and locations article.
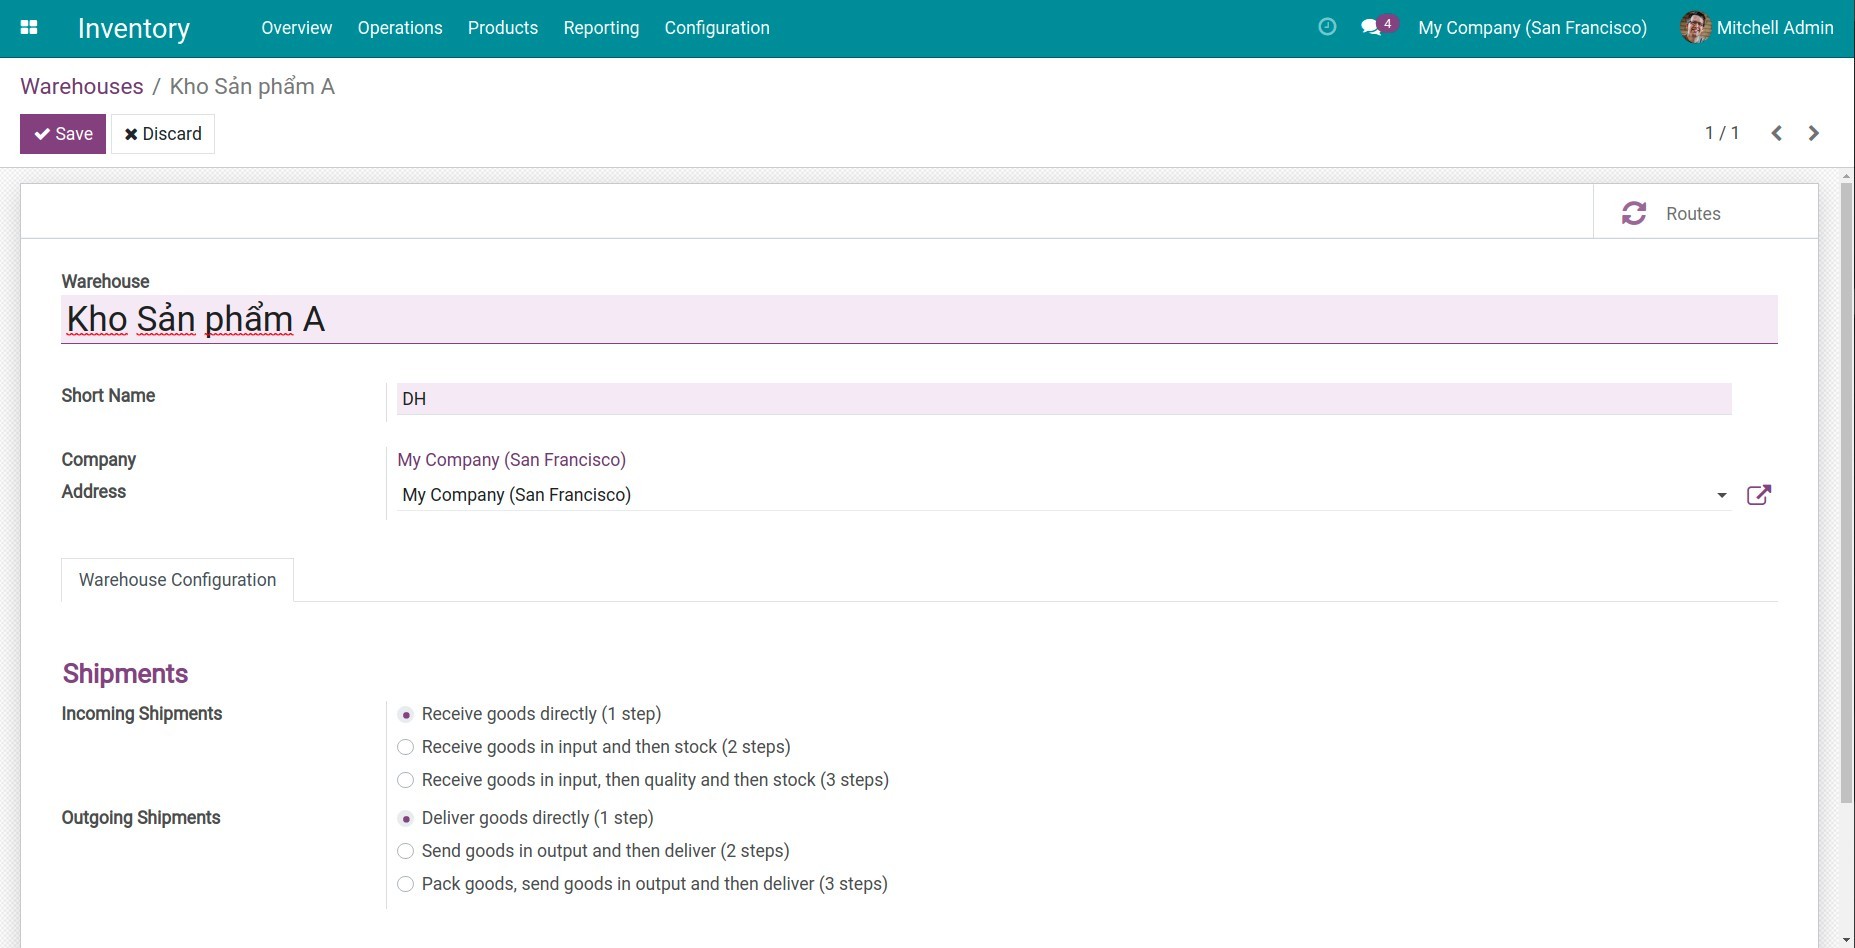
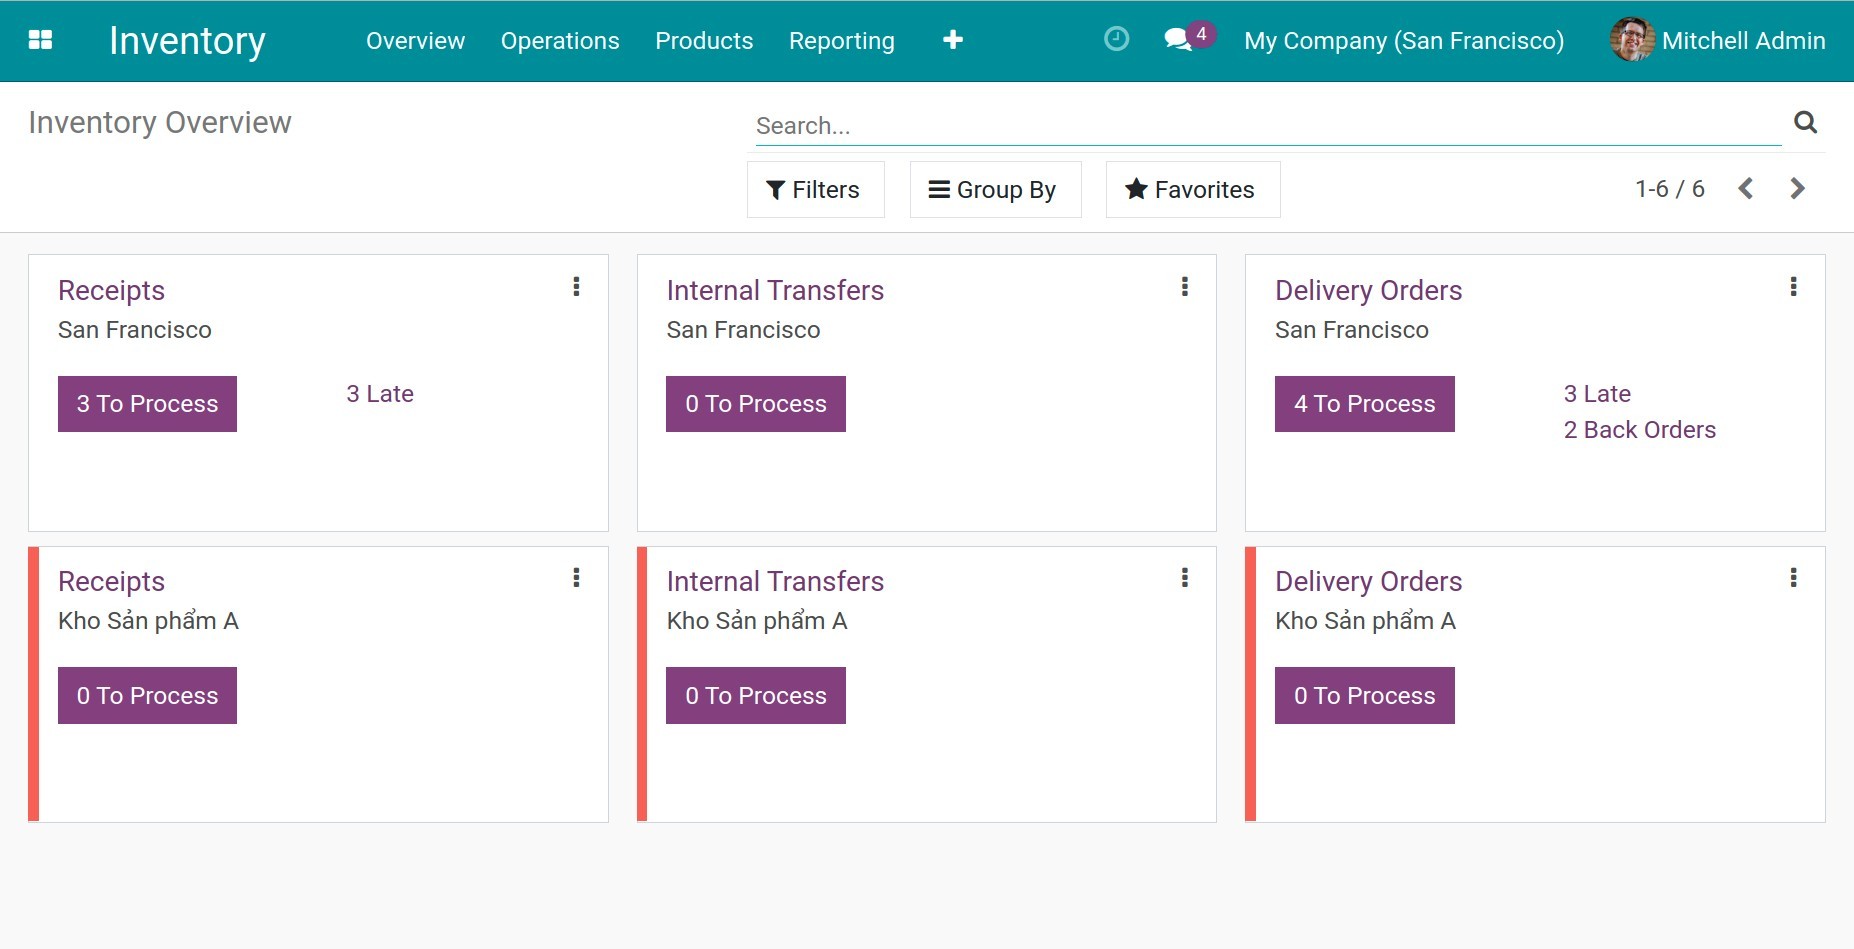
Then press Save to finish the warehouse creation. Once the new warehouse is successfully created, you can see all the transfers of the said warehouse in the Inventory Overview .
Inter-warehouses transfer
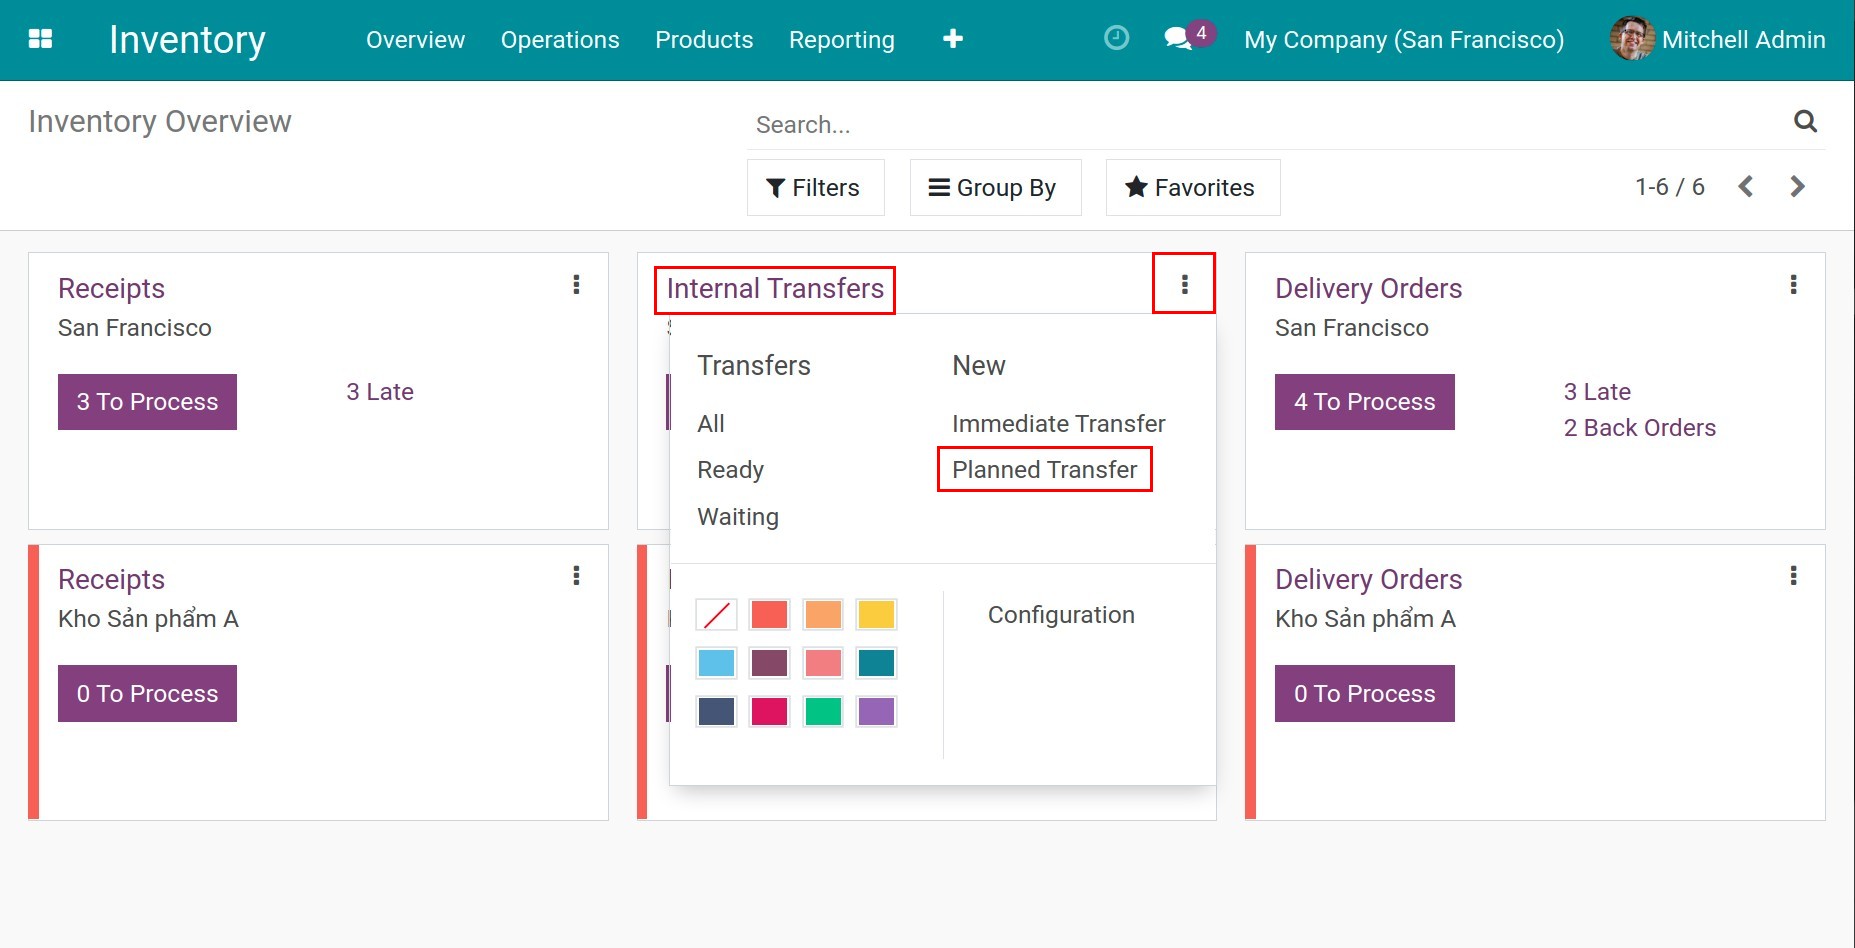
To move products from one warehouse to another, navigate to Inventory ‣ Inventory Overview, choose the Internal Transfers tab of the stock warehouse then choose Planned Transfer.
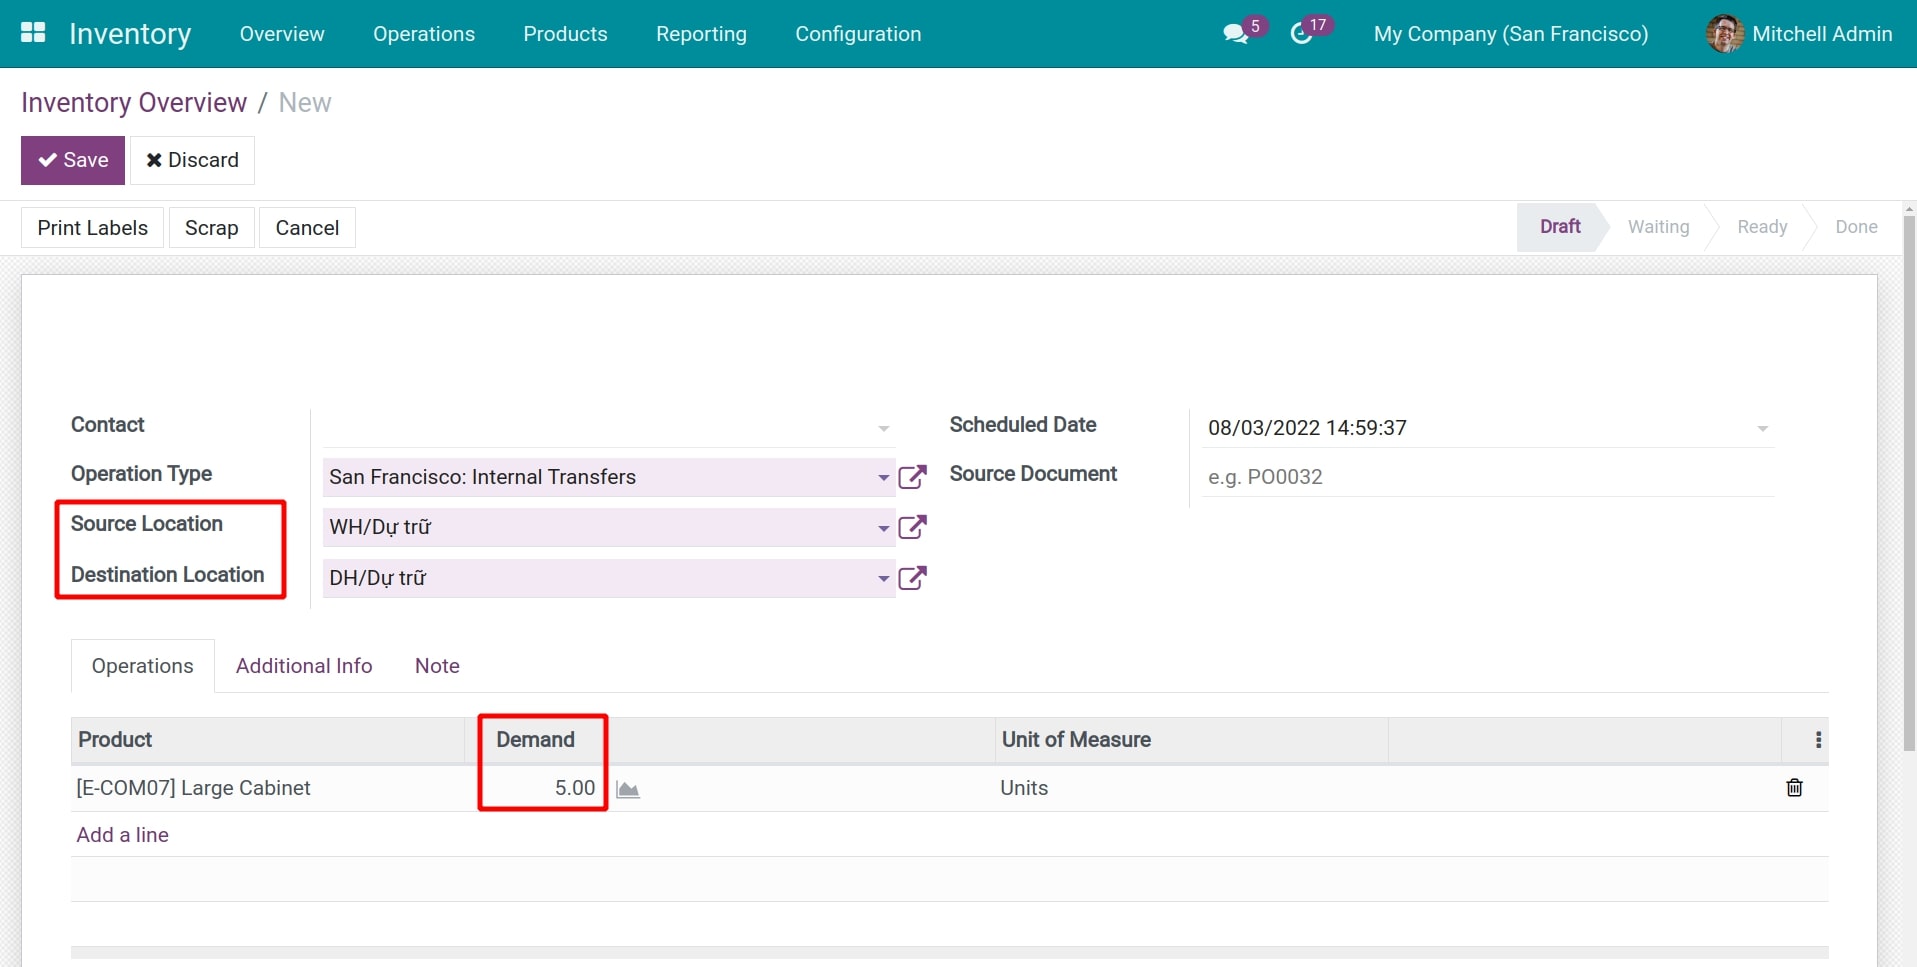
Add the following information to start the transfer:
Source Location: the current location of your product.
Destination Location: the location you want to move the product to.
In the Operations tab, press Add a line to choose a product from the list and add the demand quantity. Then Save to finish the transfer order.
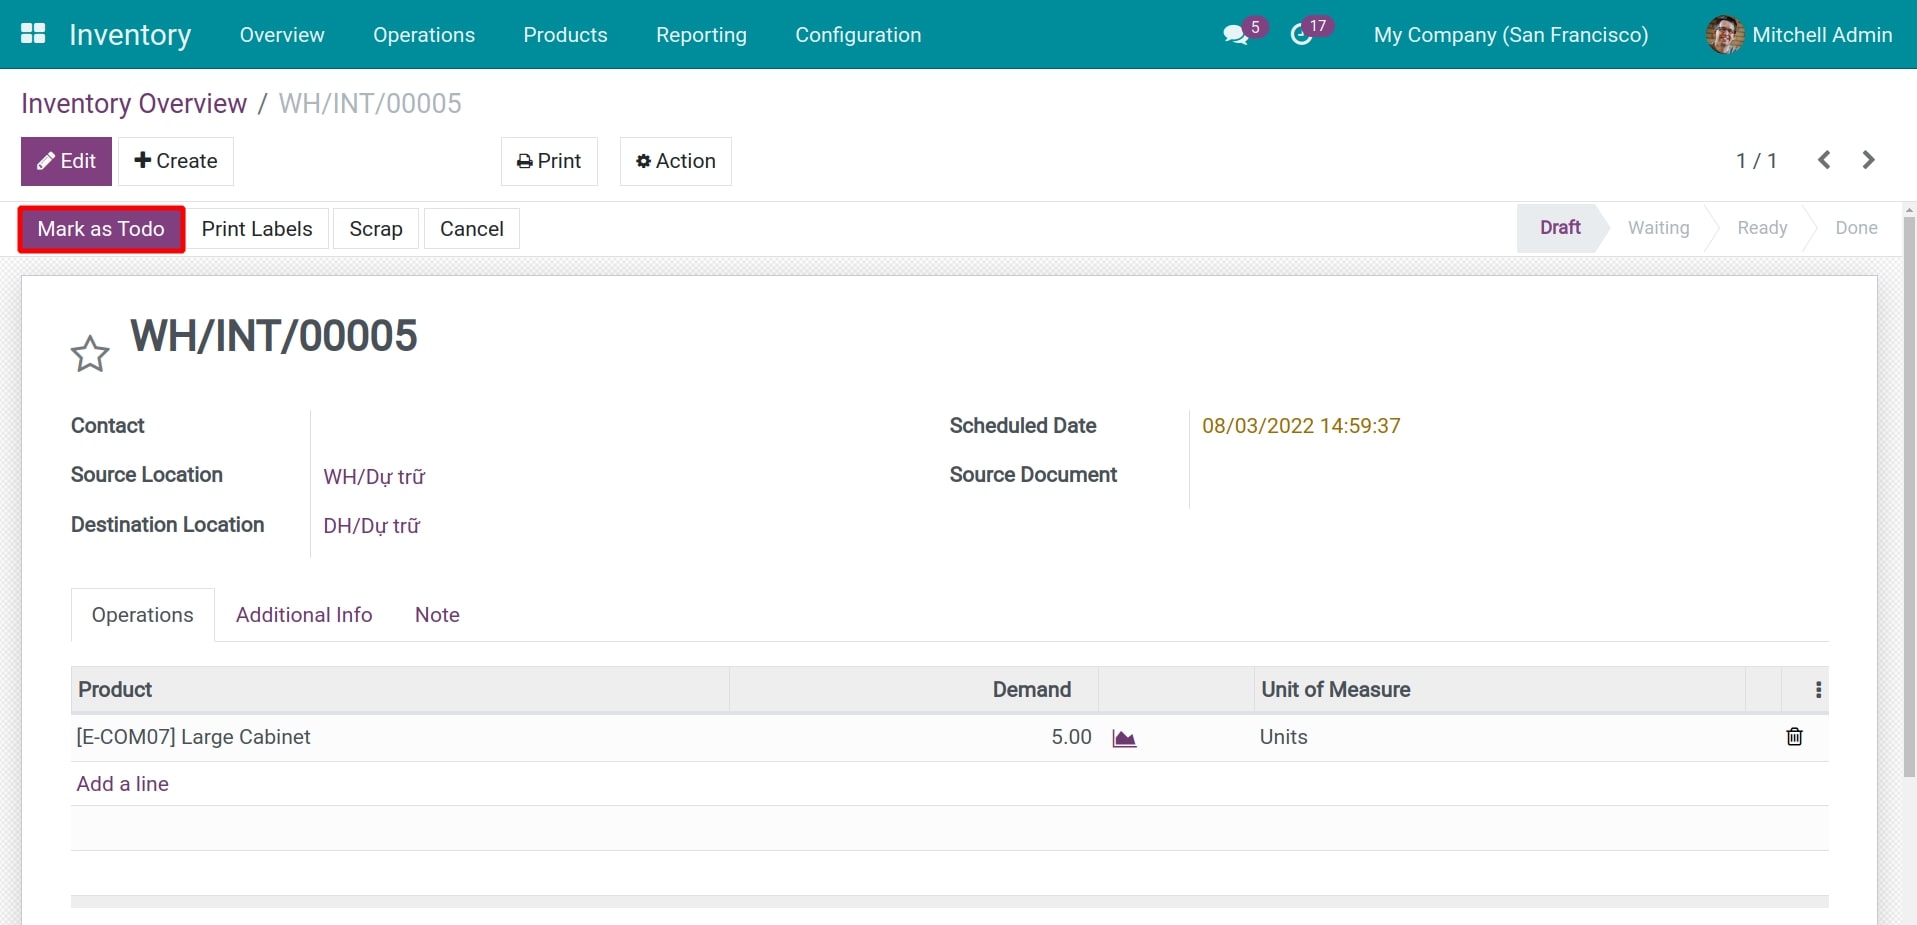
Once the transfer order is created, choose Mark as Todo to schedule the products transition task.
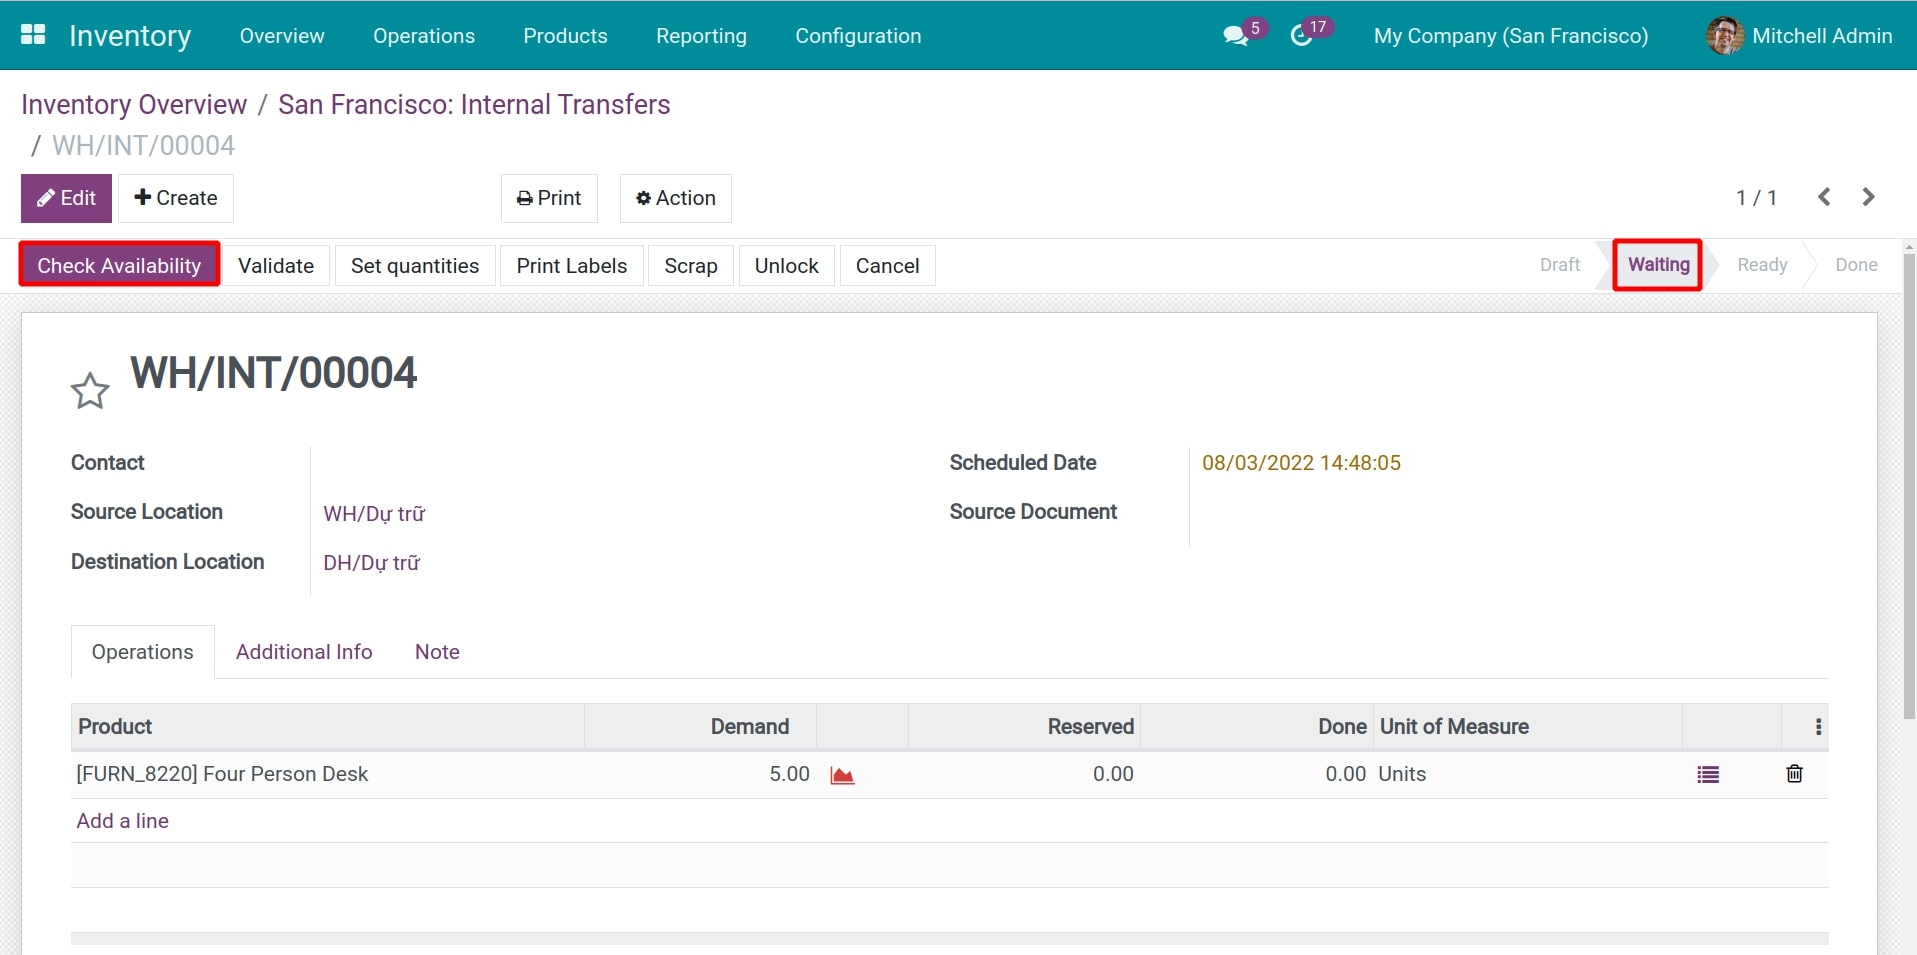
If the product is not available in stock, the transfer order status will be changed to Waiting and the Check Availability button will appear.
Ifthe product is available in stock, the transfer order status will be changed to Ready and the Reserved quantity will be auto-filled.
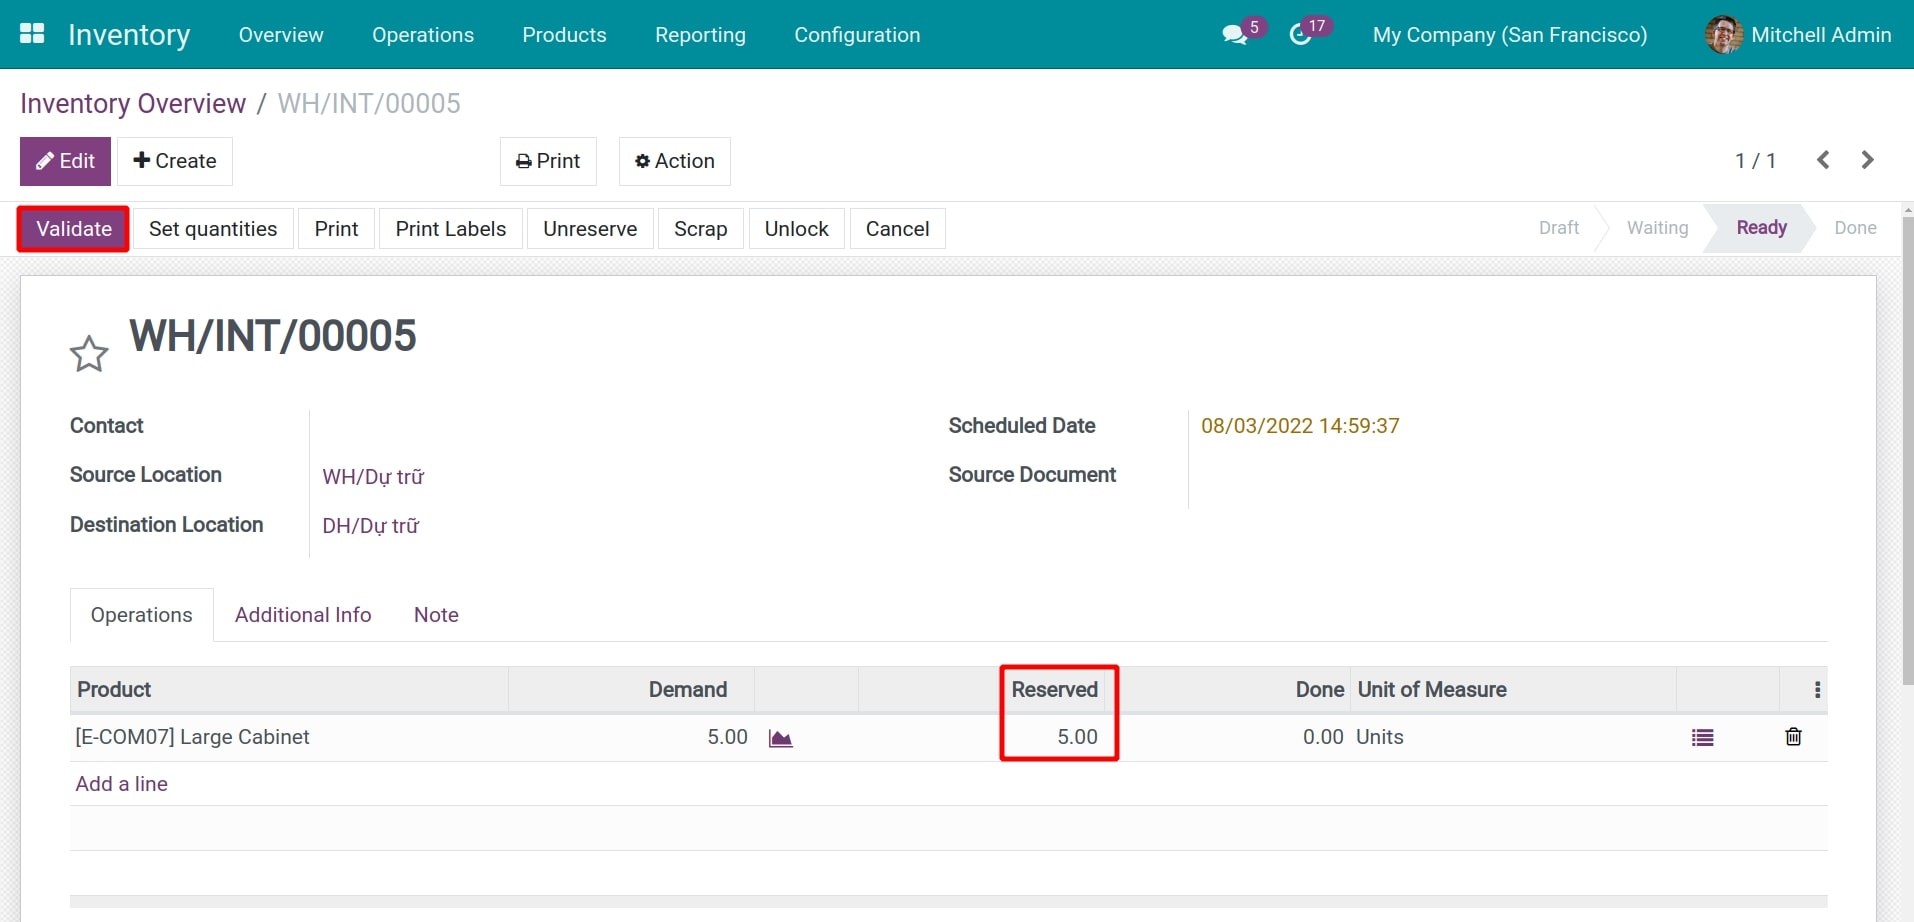
Finally, add the transferred quantity and press Confirm. The internal transfer between warehouses is done.
Above is the process of managing the transfer of goods between internal warehouses to help you control the number of products moving between warehouses in the most effective way.