Repairing at customer’s location
To create repair orders at the customer’s location, you can follow the steps of Create repair order at the company internal location. But there are a few differences to remember:
Step 1: Create a repair order
Information to remember:
Location: is the repair location, in this case, you select the customer location - Partner Locations/Customers.
Parts: add the part products and supplies to serve the repairing process and provide needed information to create invoices for customers.
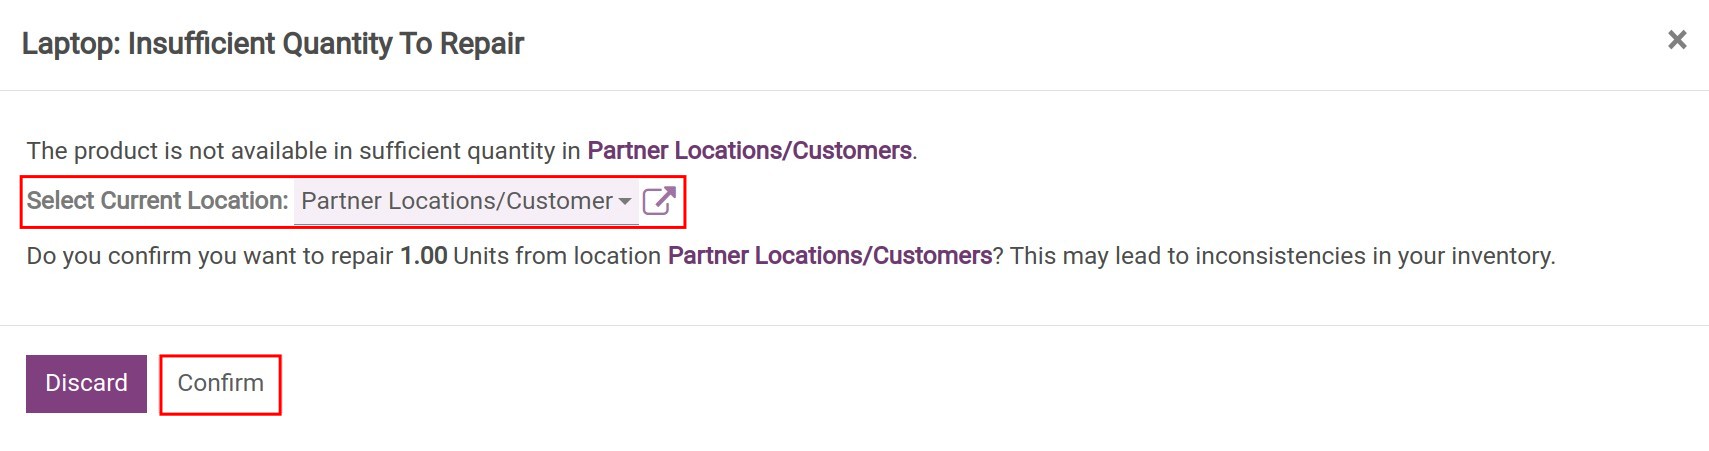
Current location: select the current location of the parts/materials that will be required for the repairing process.
Repair location: is the location where the repairing and replacing occur, the system will use the location set at the Location field above for this column.
Dest.Location: is a virtual location that is used for recording the consumption of the replacement supplies, the system will use Virtual Location/Production as the default location.

Press Confirm Repair and select the customer location as the current location like the image below:
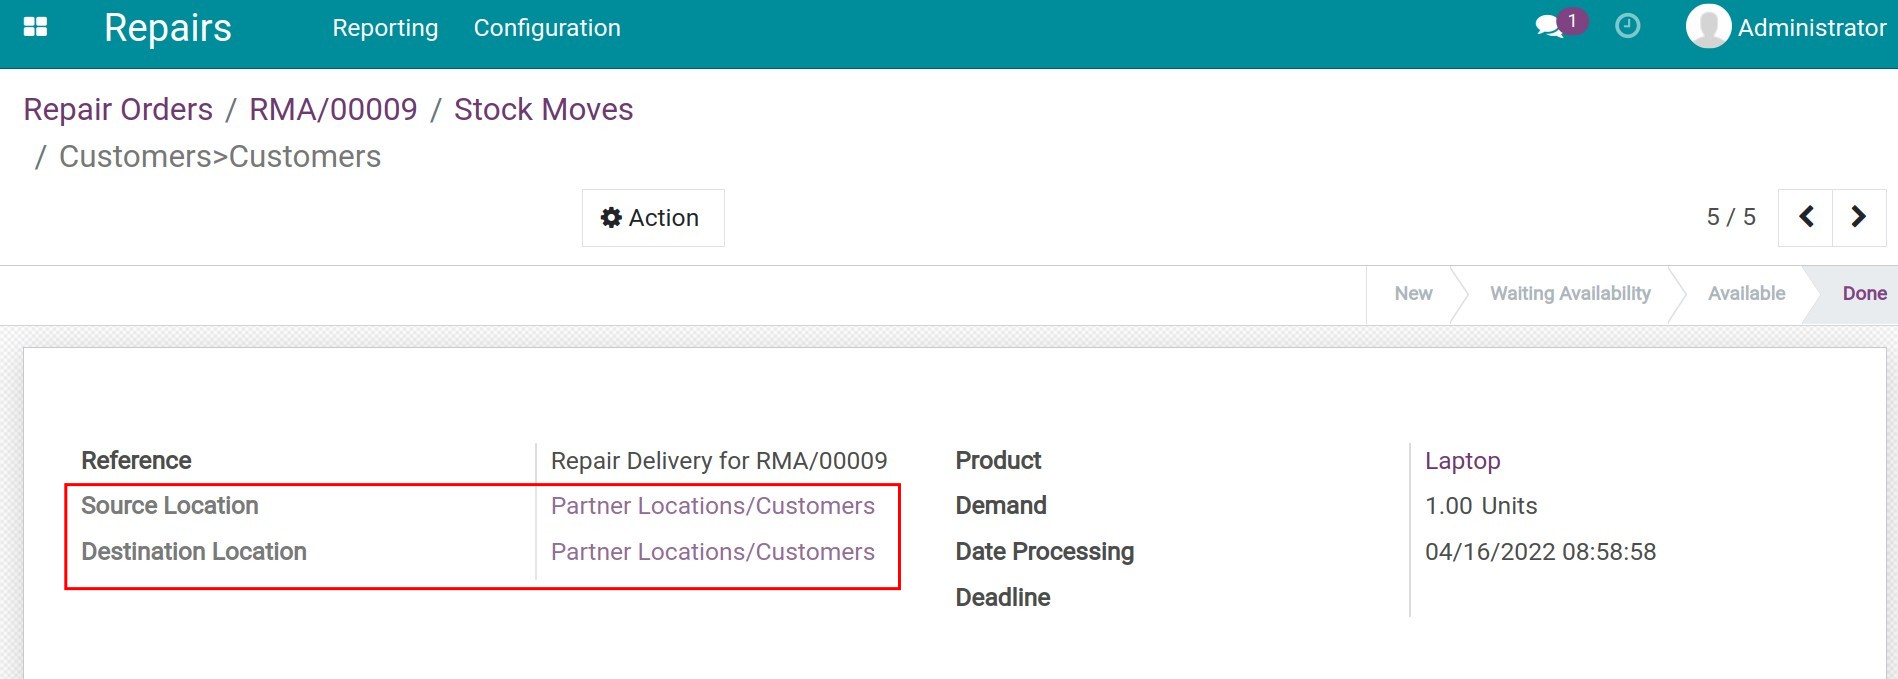
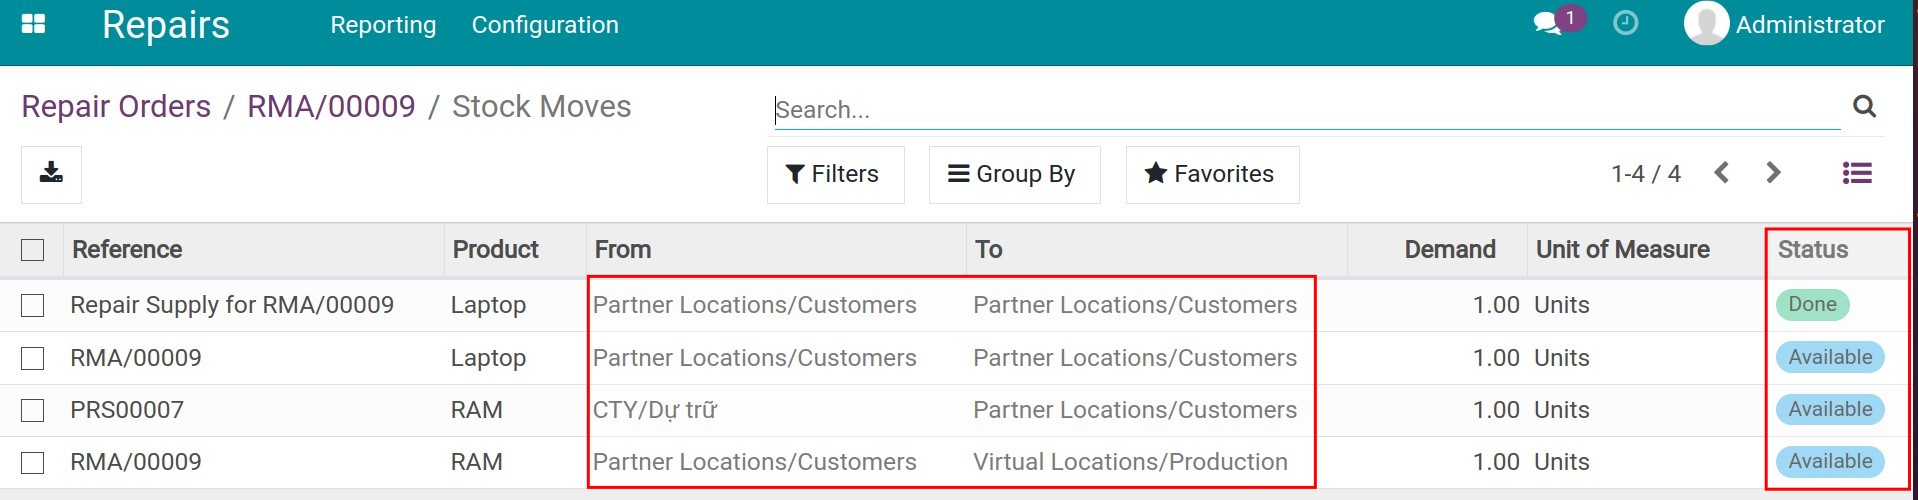
Press Product Moves to view the generated stock moves.
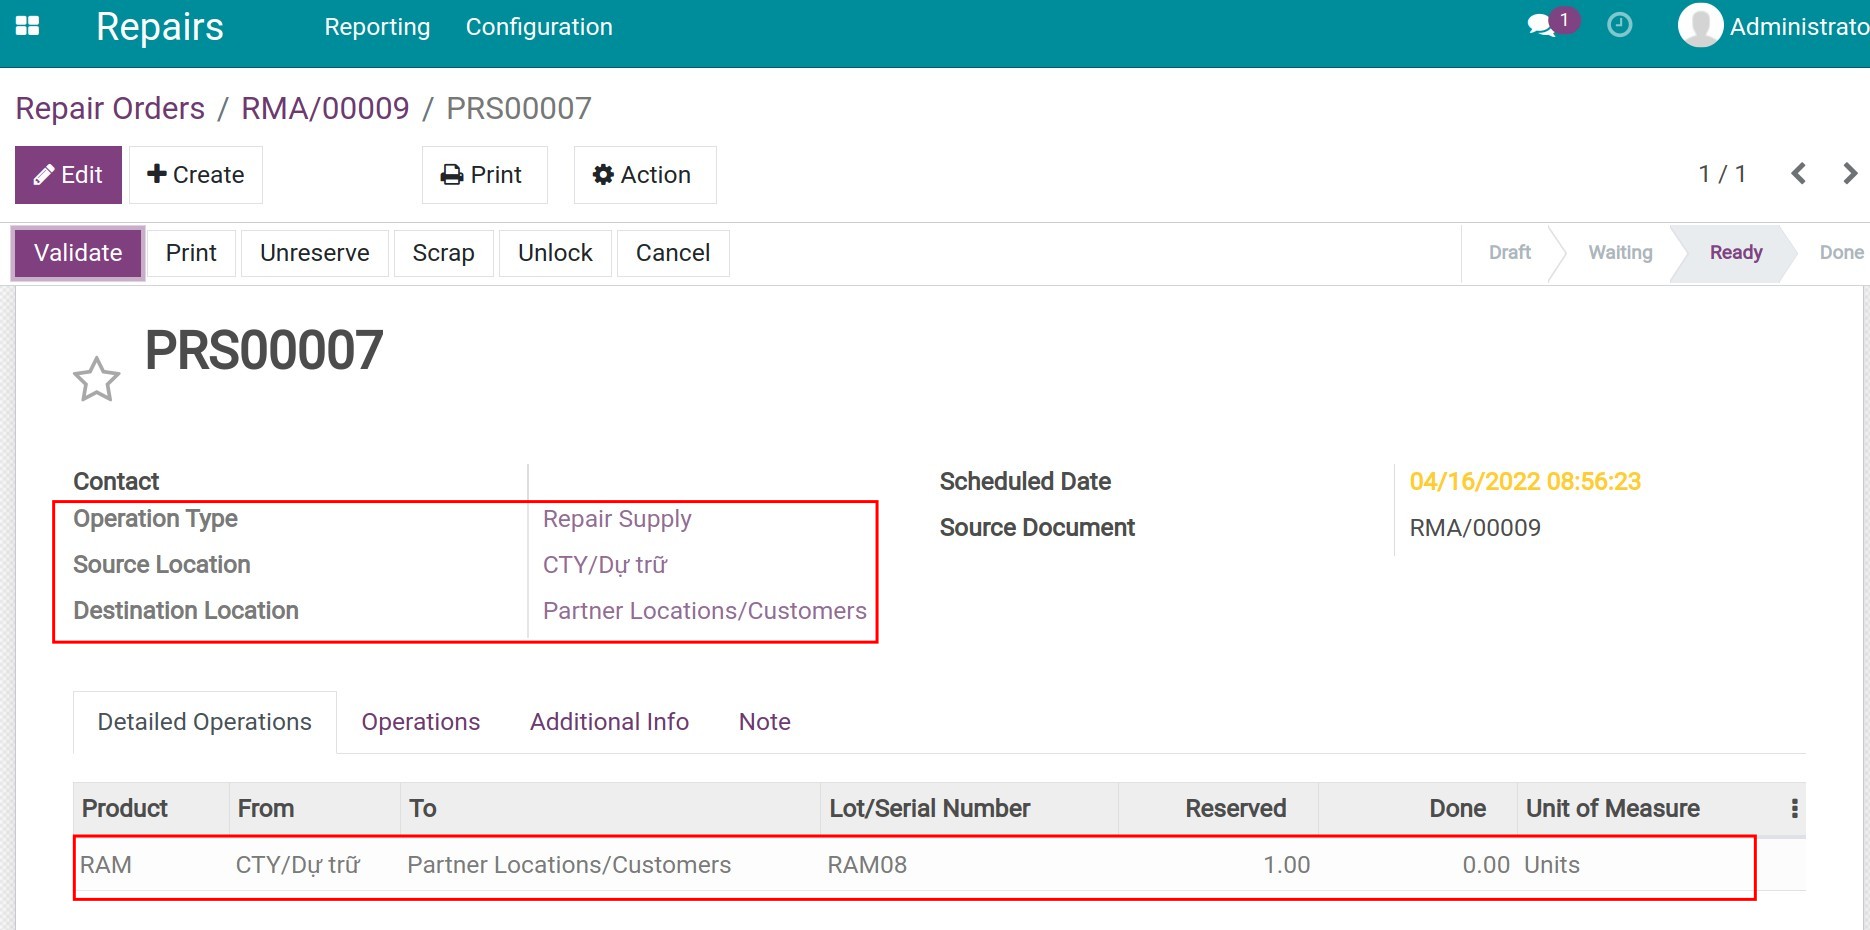
Step 2: Export parts and supplies as the repair order request.
On the repair order, press Move, and then Validate the stock moves.
Step 3: Start repair
Similar as in Create repair orders at the company internal location.
Step 4: End repair, create invoices and delivery to the customer
After ending the repair, you can press Create Invoice to create an invoice for the customer and press Delivery confirm to confirm the delivery. A delivery record will be auto-generated at the Done stage.