Steps to import opening balance
When you start working on the initial setup of Viindoo Accounting management software, one of the most important tasks is importing the opening balance of accounting accounts. This article will show you not only steps to prepare and import the accounting opening balance but also some tips for specific cases that might happen during the importing process.
Requirements
This tutorial requires the installation of the following applications/modules:
Data preparation
Before uploading data to the Viindoo Accounting software, you need to prepare the input data according to the Viindoo data structure. This step helps to reduce the data input time and manual modification later on, avoiding unnecessary mistakes while using the system.
Configure basic accounting information
Depending on your business management needs, you need to configure the basic accounting system before using. Some of the basic information such as: fiscal year, currencies, taxes and tax rules, etc.
The accountant needs to review the chart of accounts that are being used, compare it with the ones provided by the localization packages in Viindoo then create additional accounts according to the management needs.
Prepare compatible input data for Viindoo data structure
If your business has been in operation for a while, there must be some transactions and accounting data available. At the time of preparation for transfer, accountants need to close operations in the old bookkeeping system and prepare input data that is compatible with the data structure of the Viindoo system.
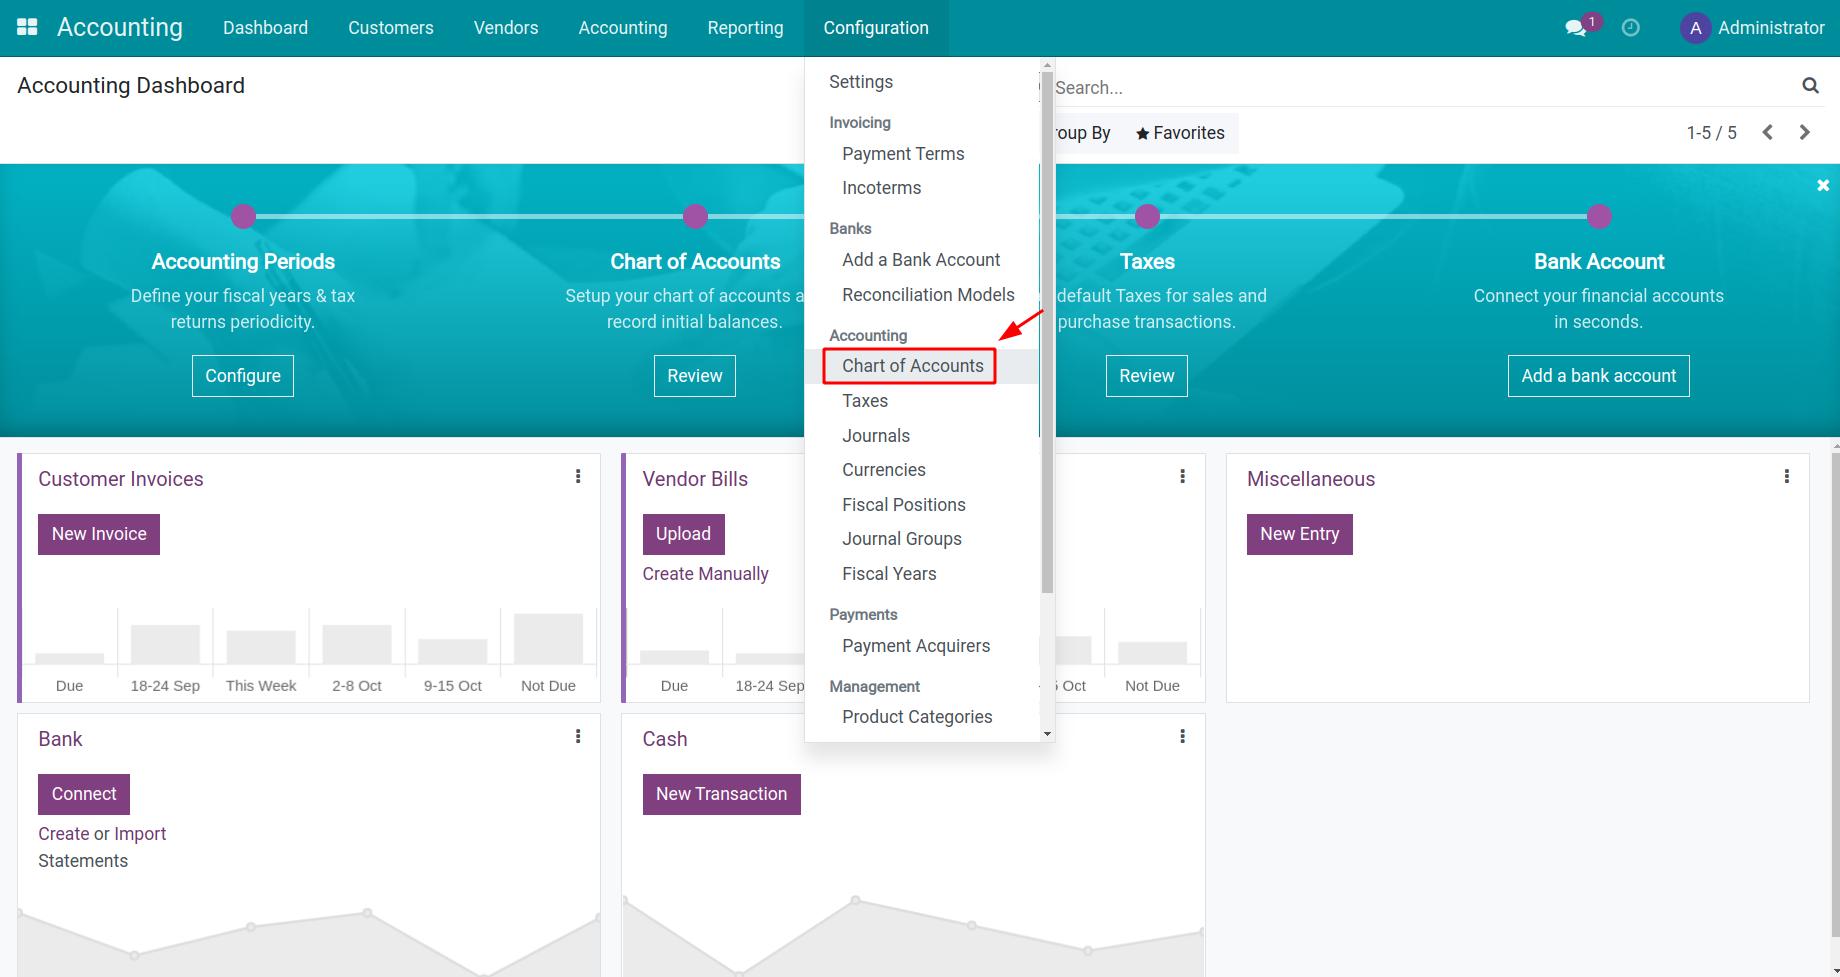
In the Accounting software, navigate to Configuration > Chart of Accounts to see the existing chart of accounts list in your system. From here, you can use the export data feature to download the data structure of the account in the Balance Sheet.
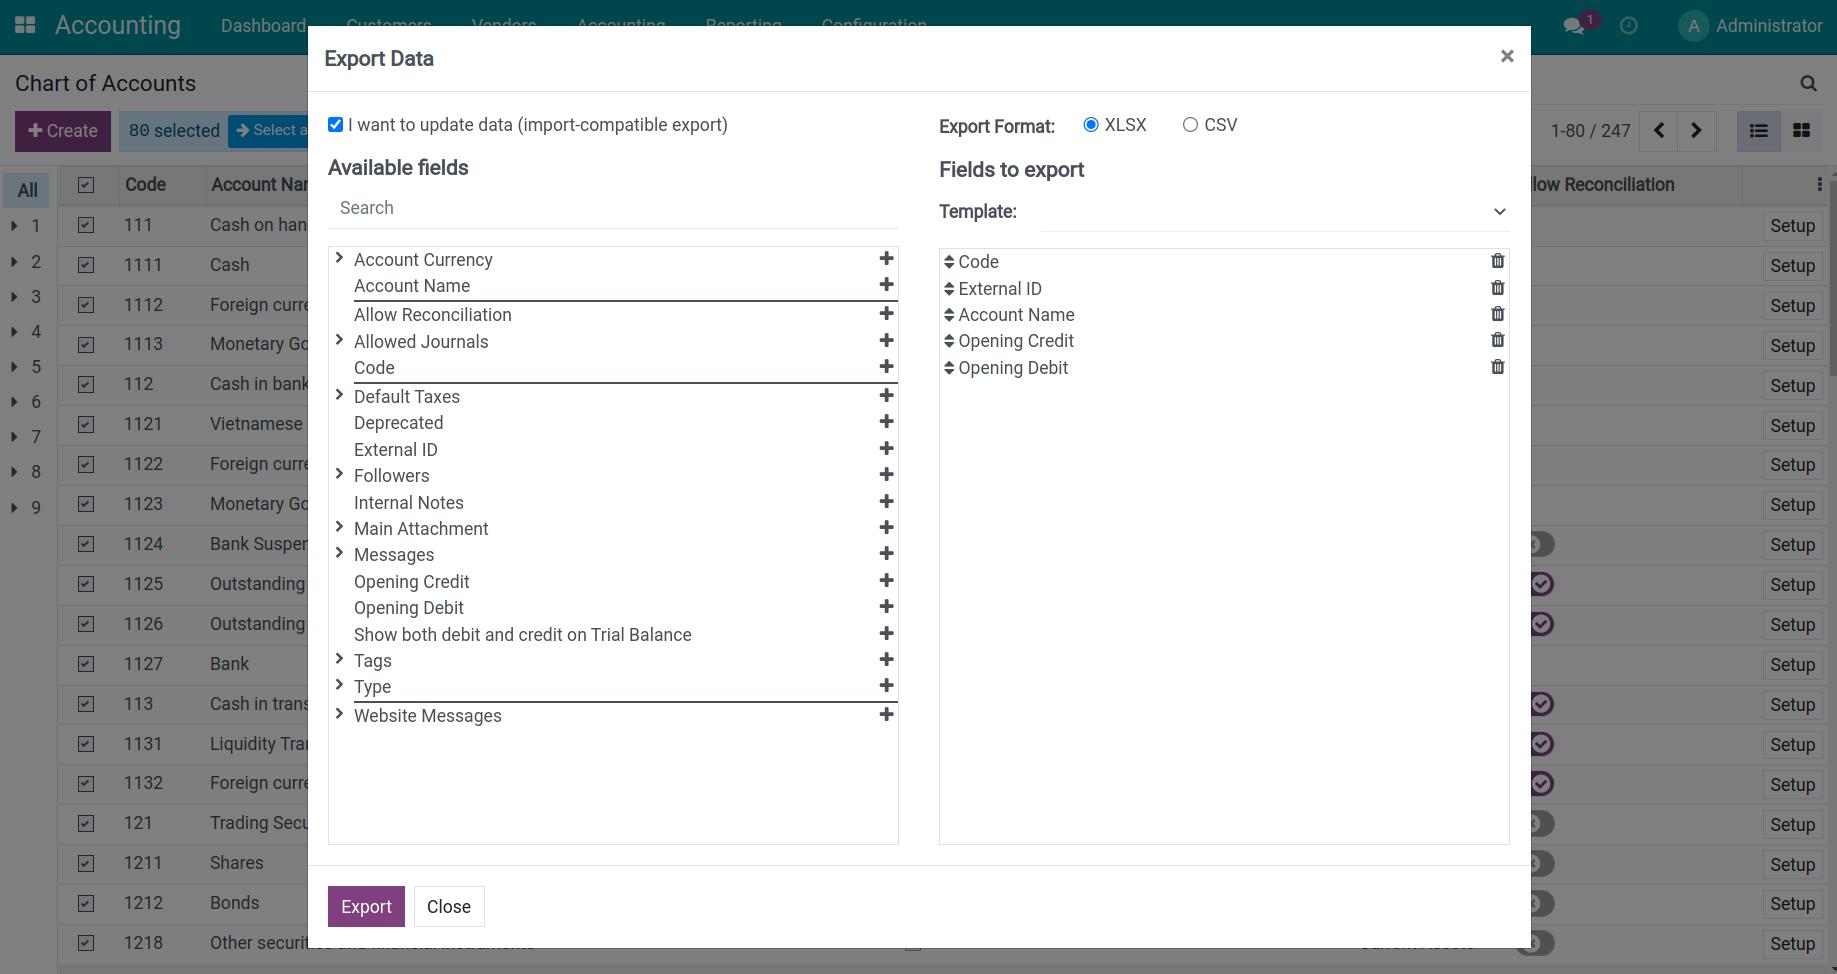
Export the following fields:
Account Code;
Account External ID;
Account Name;
Opening Debit;
Opening Credit.
Import opening balance
Import opening balance in Chart of Accounts
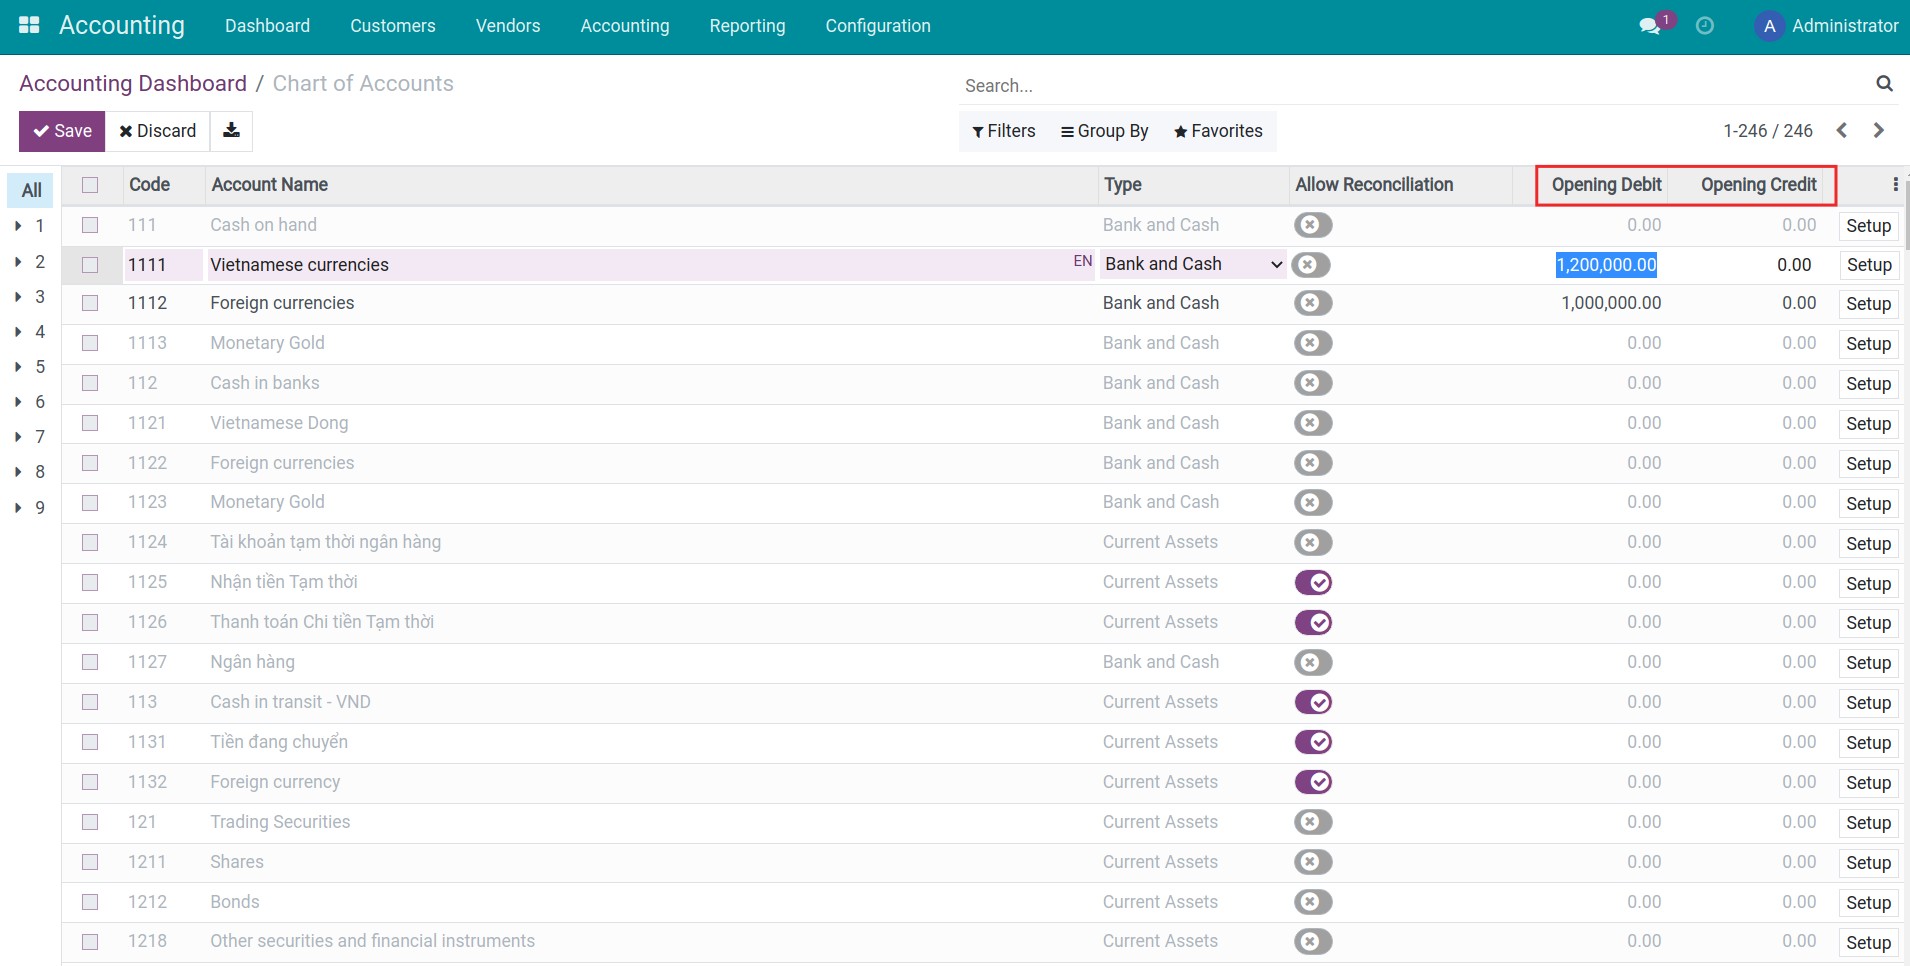
First, you navigate to Accounting > Accounting Dashboard > Chart of Accounts, select Review.

Here, you choose any account and fill in the balance in the field Opening Debit for Accounts with a balance on the Debit side and fill in Opening Credit for Accounts with a balance on the Credit side.
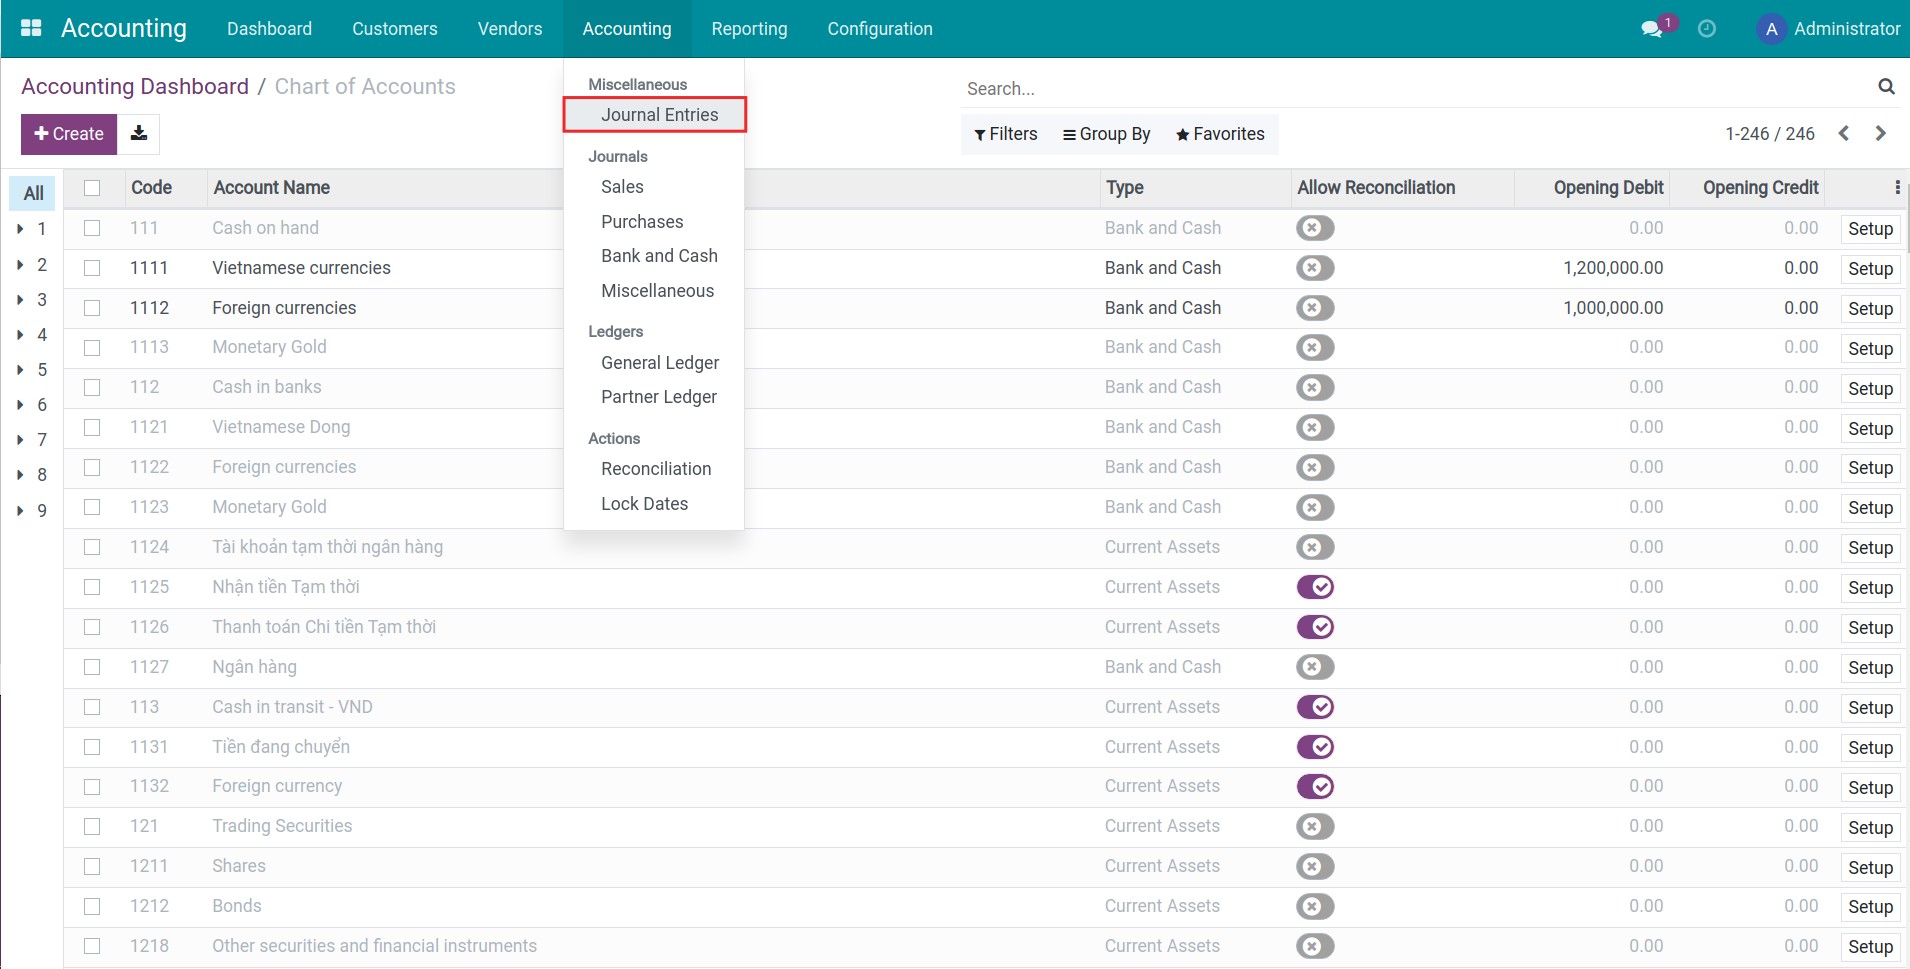
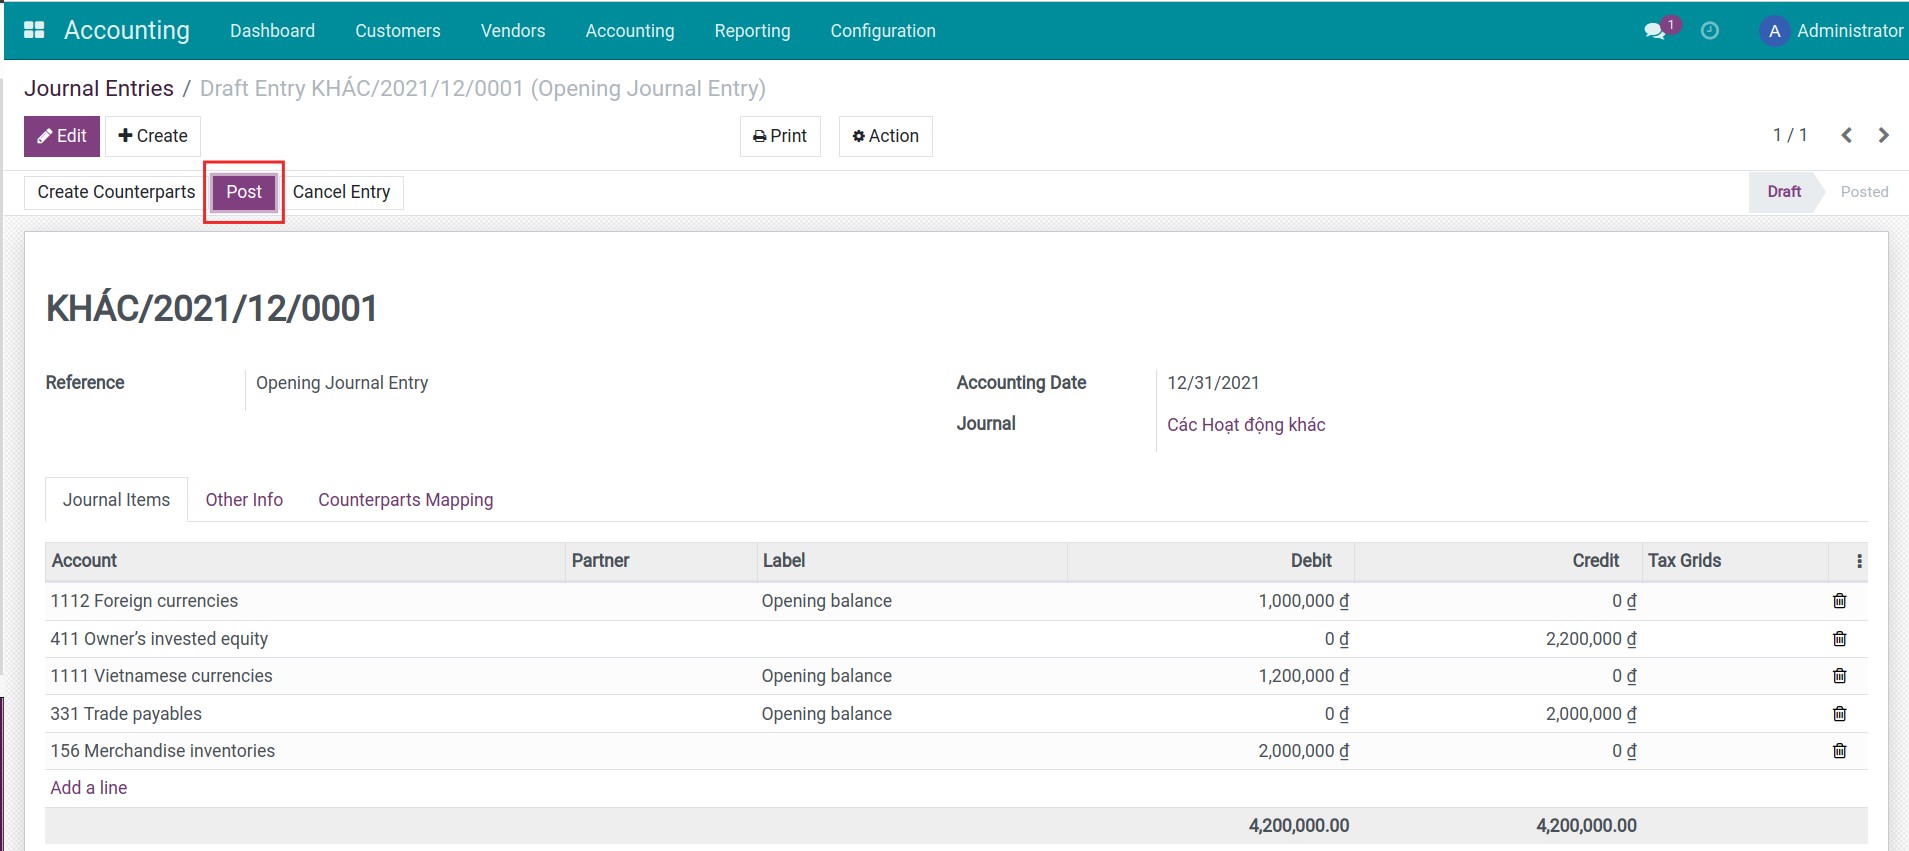
After filling in the opening balance for the Accounts, you navigate to Accounting > Journal Entries, select the entry with Reference as Opening Journal Entry.

You press Post to post the fill in the opening balance entries.
Note
When posting the the fill in the opening balance entries, the Opening Debit and Opening Credit fields in the Chart of Accounts will be hidden. Therefore, you need to add the opening balance of the accounts and then Post entries.
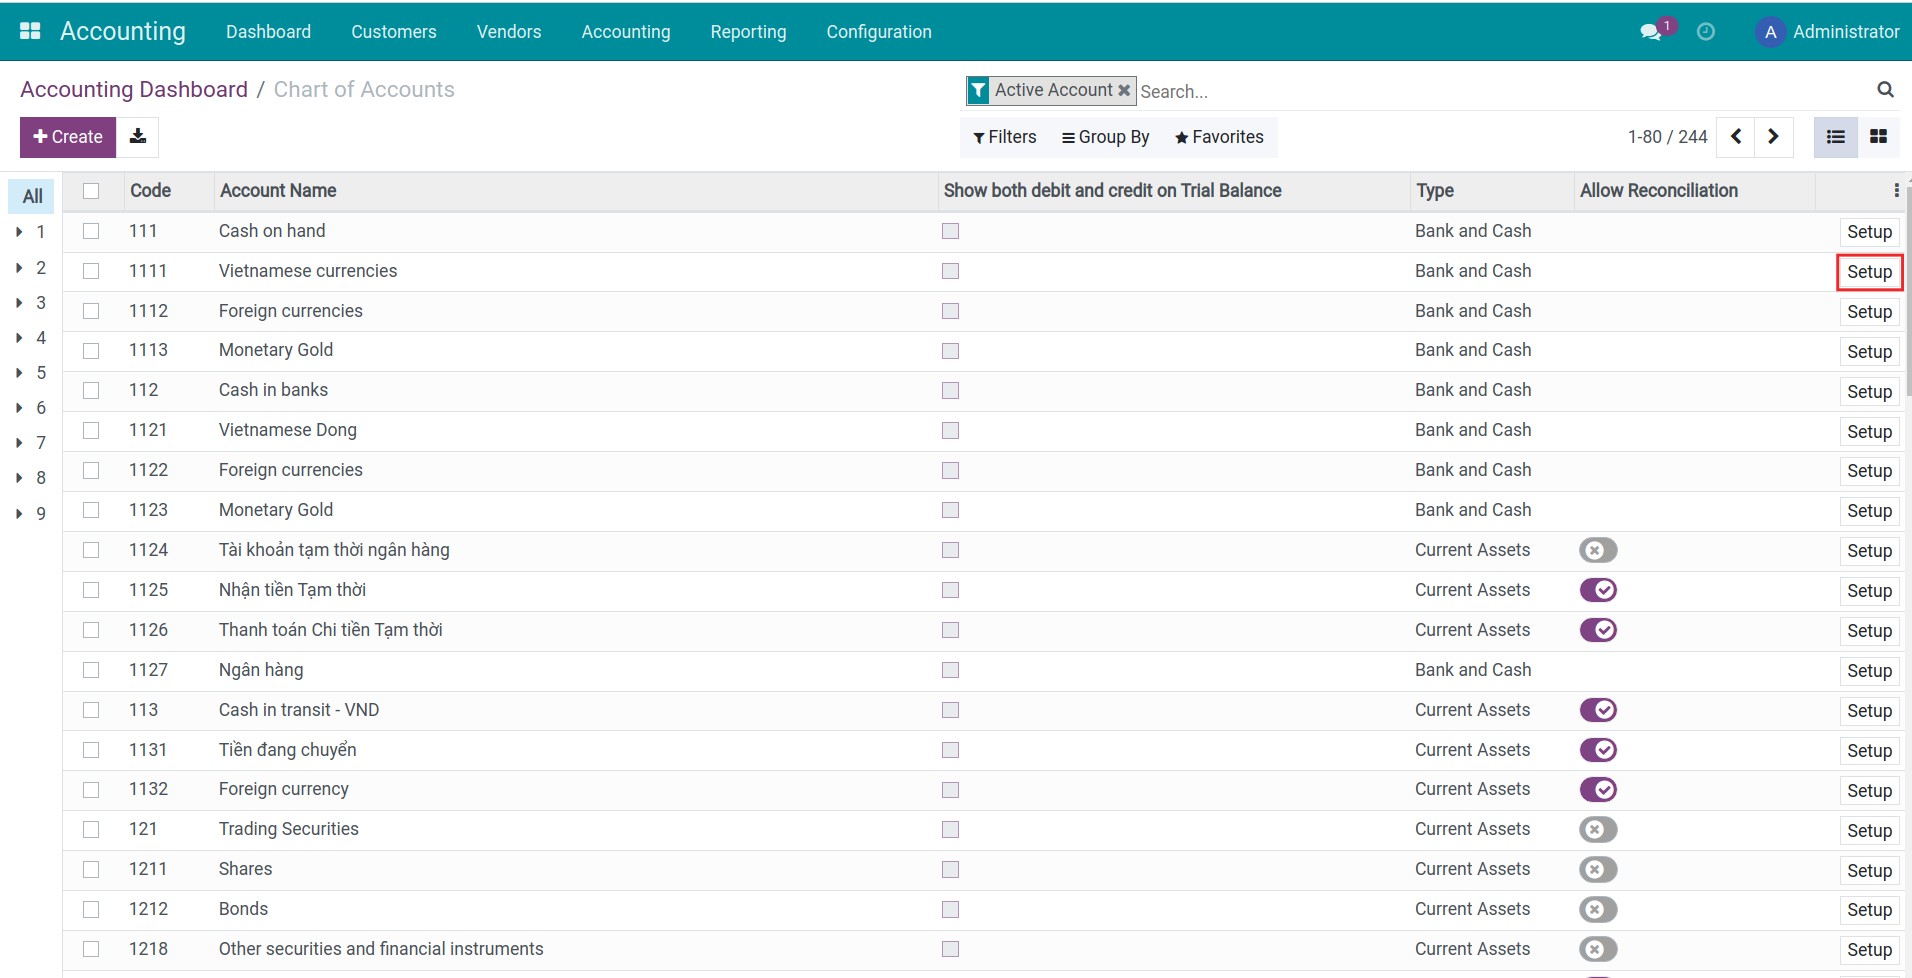
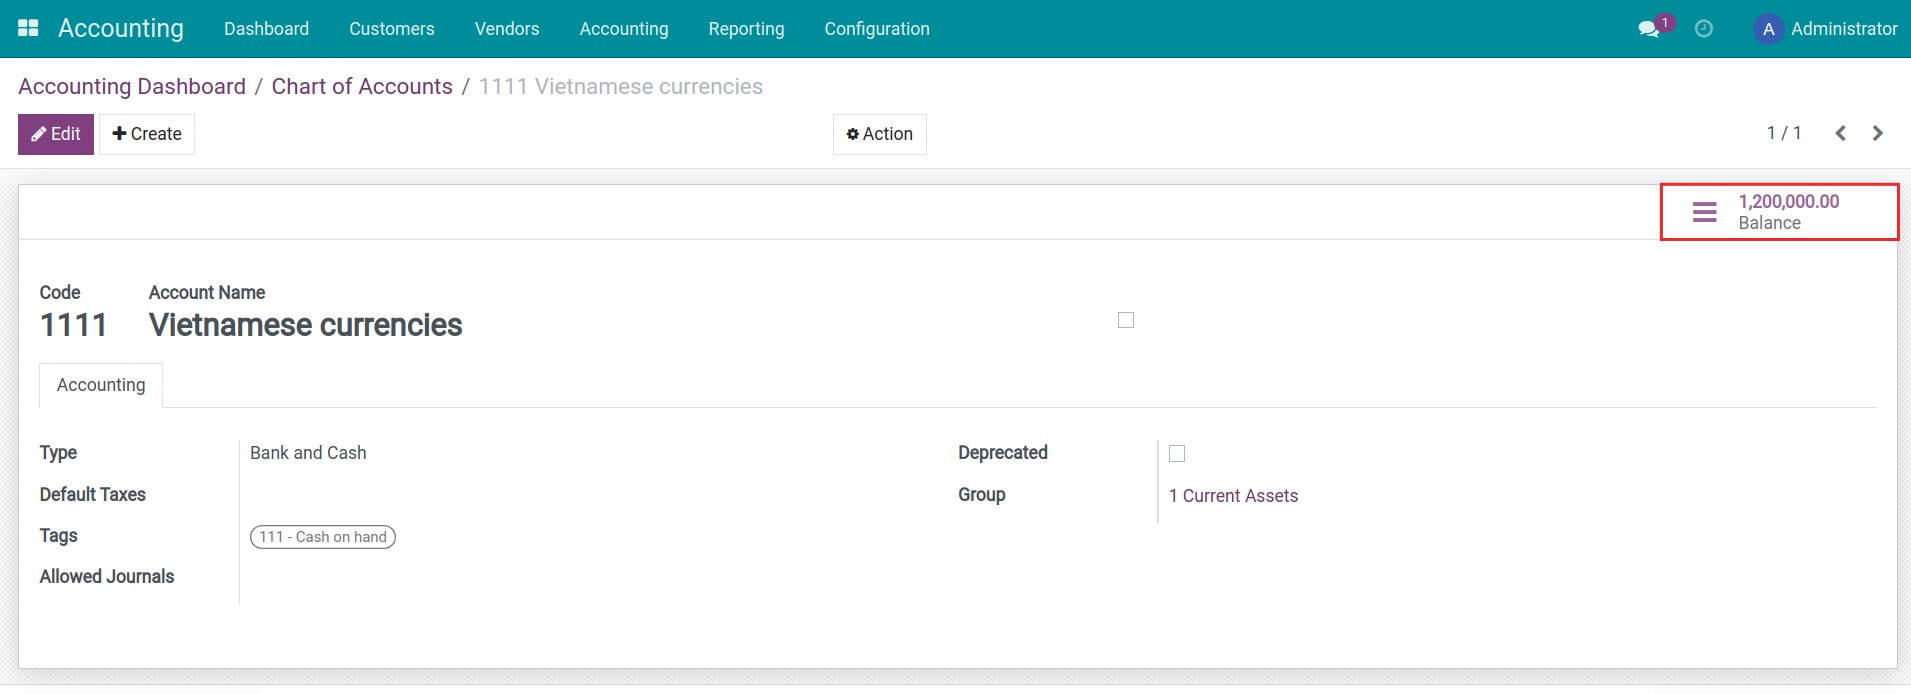
After posting, you navigate to Accounting > Accounting Dashboard > Chart of Accounts and choose Chart of accounts set, press Setup in each Account to see it’s balance.
Import data in bulk
On the data template exported from the system, add the opening debit and credit for each account.
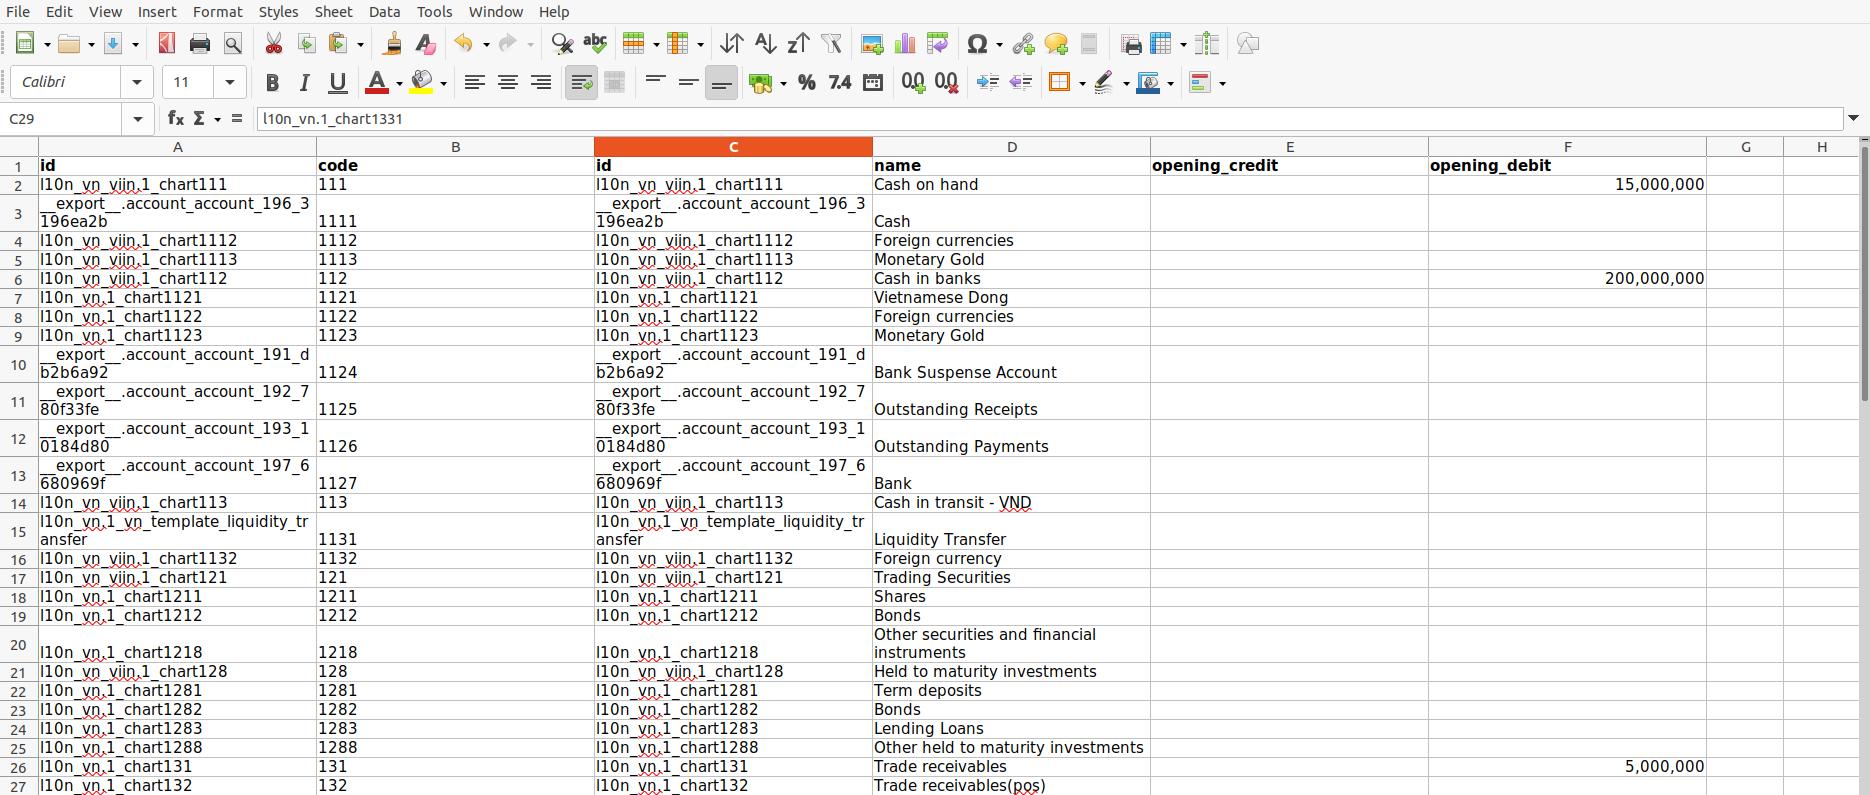
The opening balance of each account should be the total balance until right before the moment your business officially starts using the Viindoo Accounting system. On the other hand, pay attention and review the difference between the opening debit and credit, and make sure that Total Debit Balance = Total Credit Balance.
Tips for the data input process:
If your business possesses various bank accounts, you can create one accounting account for each bank account and import the opening balance with the data template.
For aged payable/receivable accounts related to various partners (such as 141 - Advance, 334 - Employee Payables, 131 - Accounts Receivable, etc.), the accountant can add the opening balance of the account, then create a journal entry to register the debit/credit amount of each partner.
The opening balance of inventory accounts (such as inventories in transit, materials, etc.) needs to be imported into the system from the Inventory software.
Note
Any difference between Opening Debit and Opening Credit will be registered in the 911- Income Summary by default. However, if you don’t want to use this account, create a new account named 999 to record this difference.
Account 999 will be reconciled with journal items created from the inventory adjustment and won’t be displayed on accounting reports.
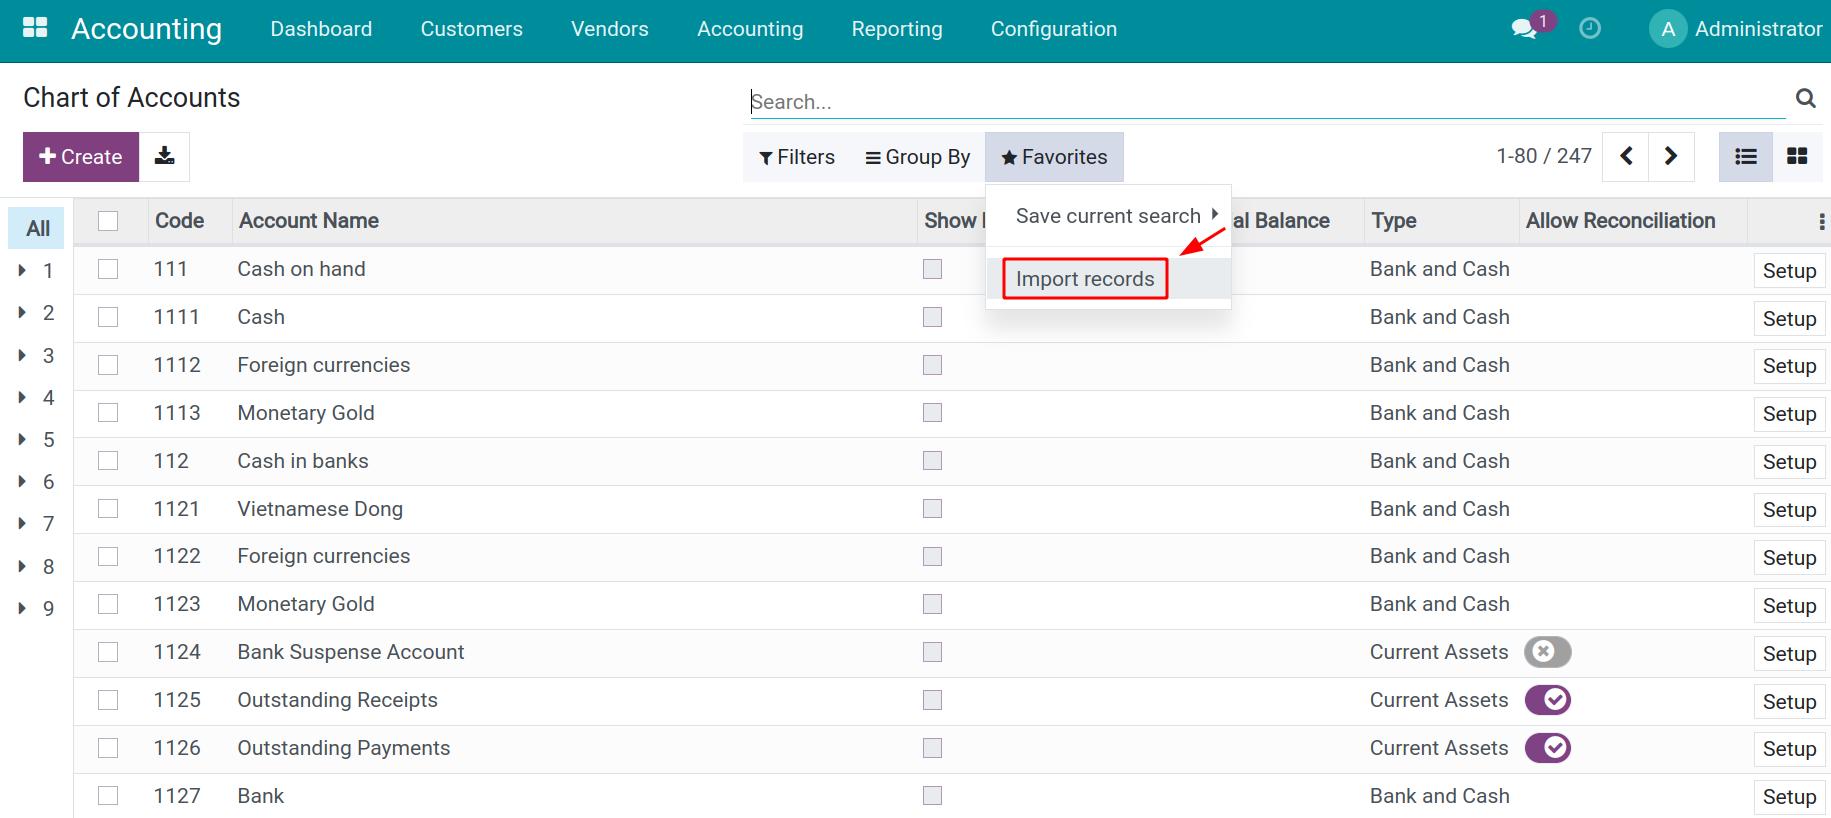
After validating the data quality, from the Chart of Accounts view, upload the final opening balance data file to the system by using the import data feature.
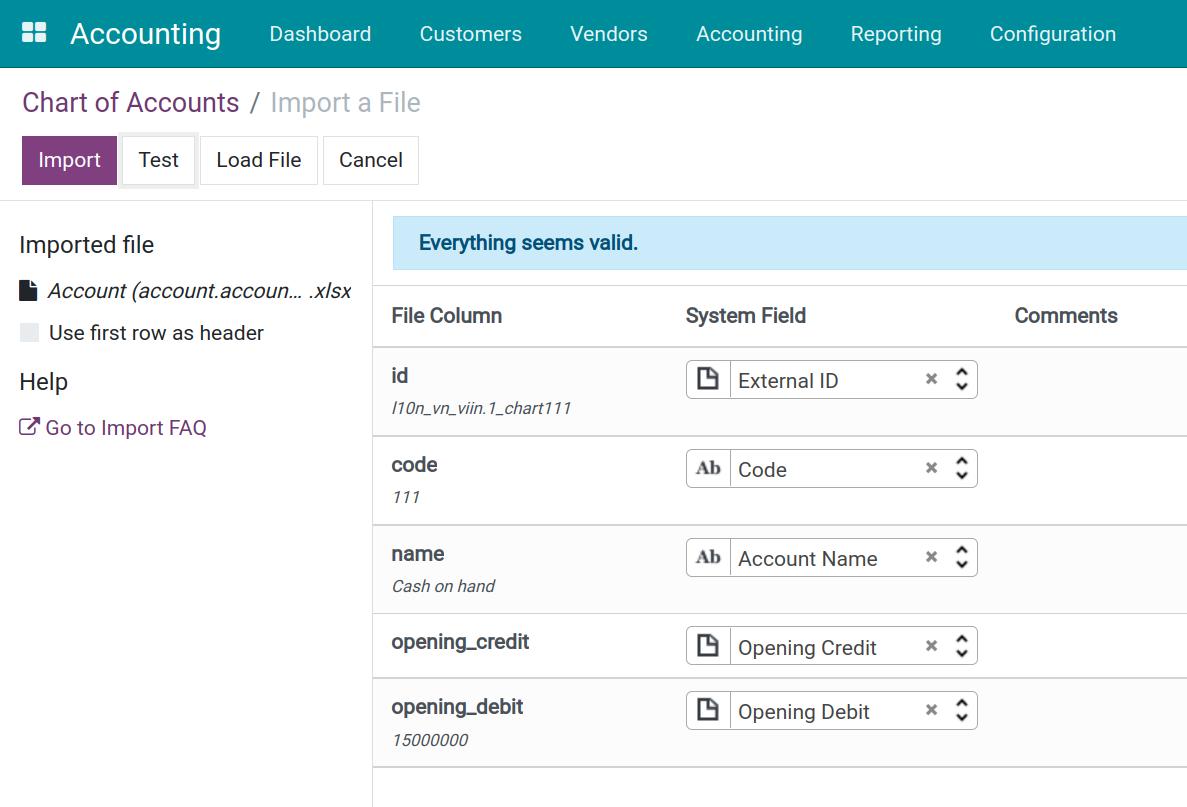
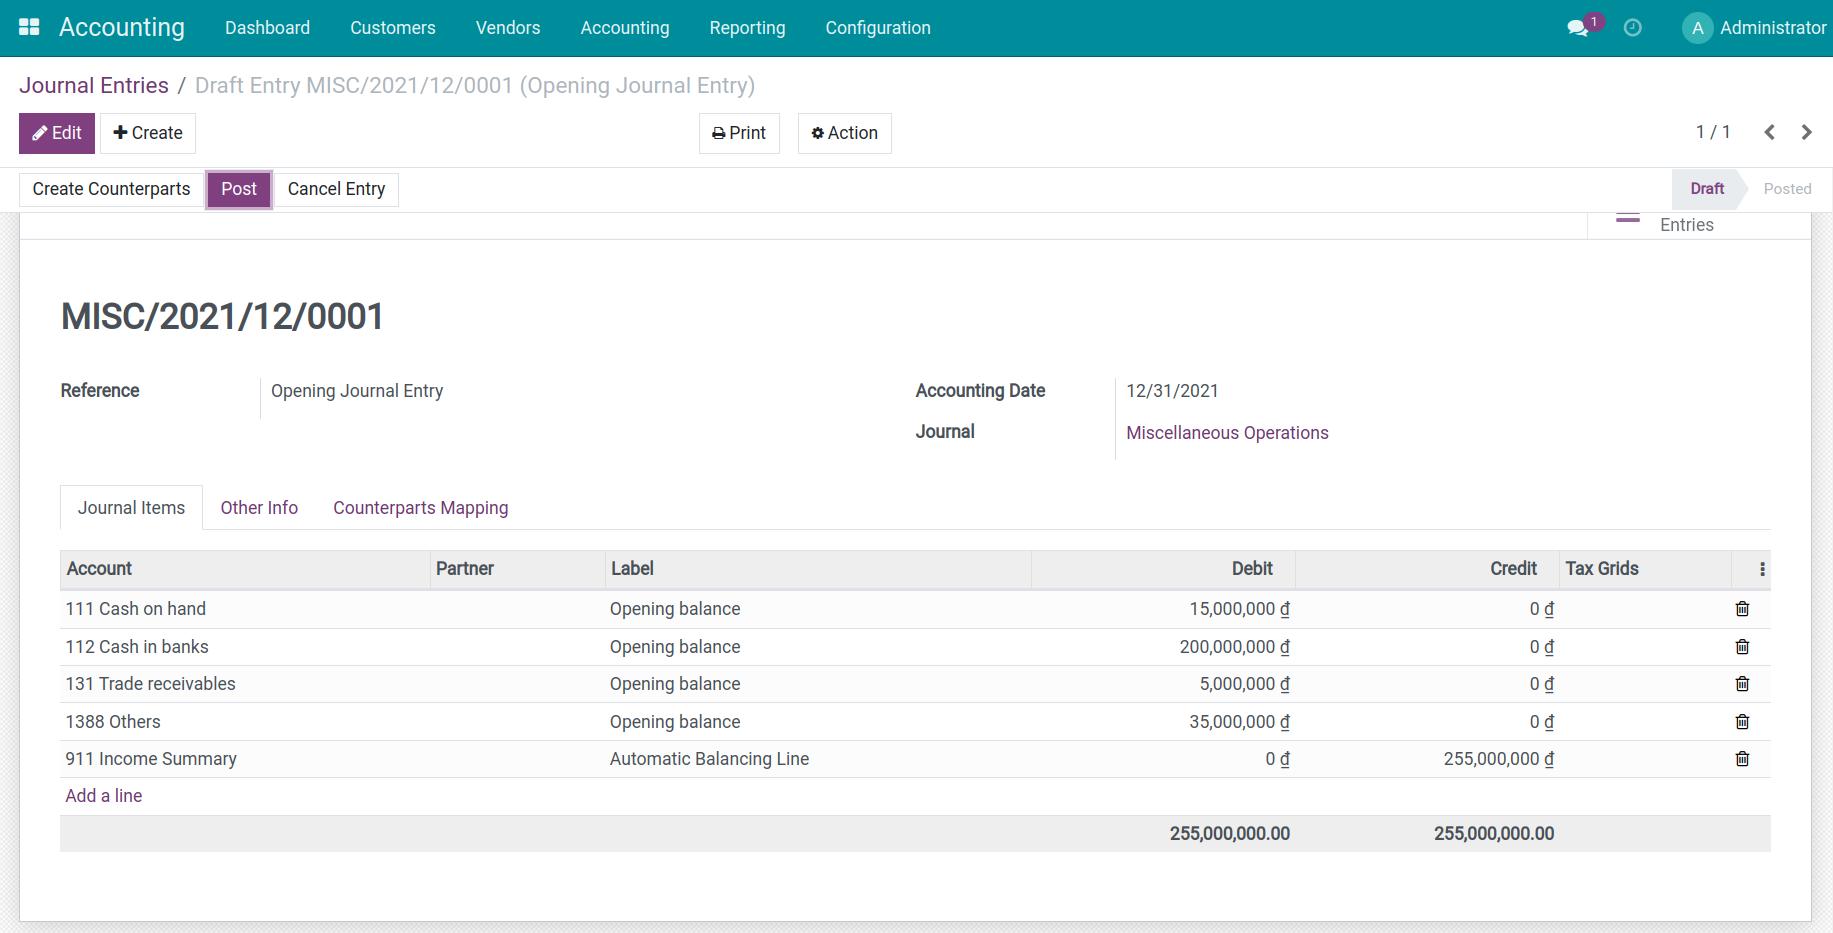
Once finish importing the opening balance to the system, a journal entry with all the journal items is automatically created with an Opening Journal Entry label. To view this entry, navigate to Accounting > Accounting > Journal Entries.
Adjust opening journal entry data
On the opening journal entry, journal item of each receivable/payable account is automatically created with the total balance of that account according to your input data. For accounts that involve various partners at the same time, you need to split the total balance into different journal items, one partner per item with the respective opening balance.
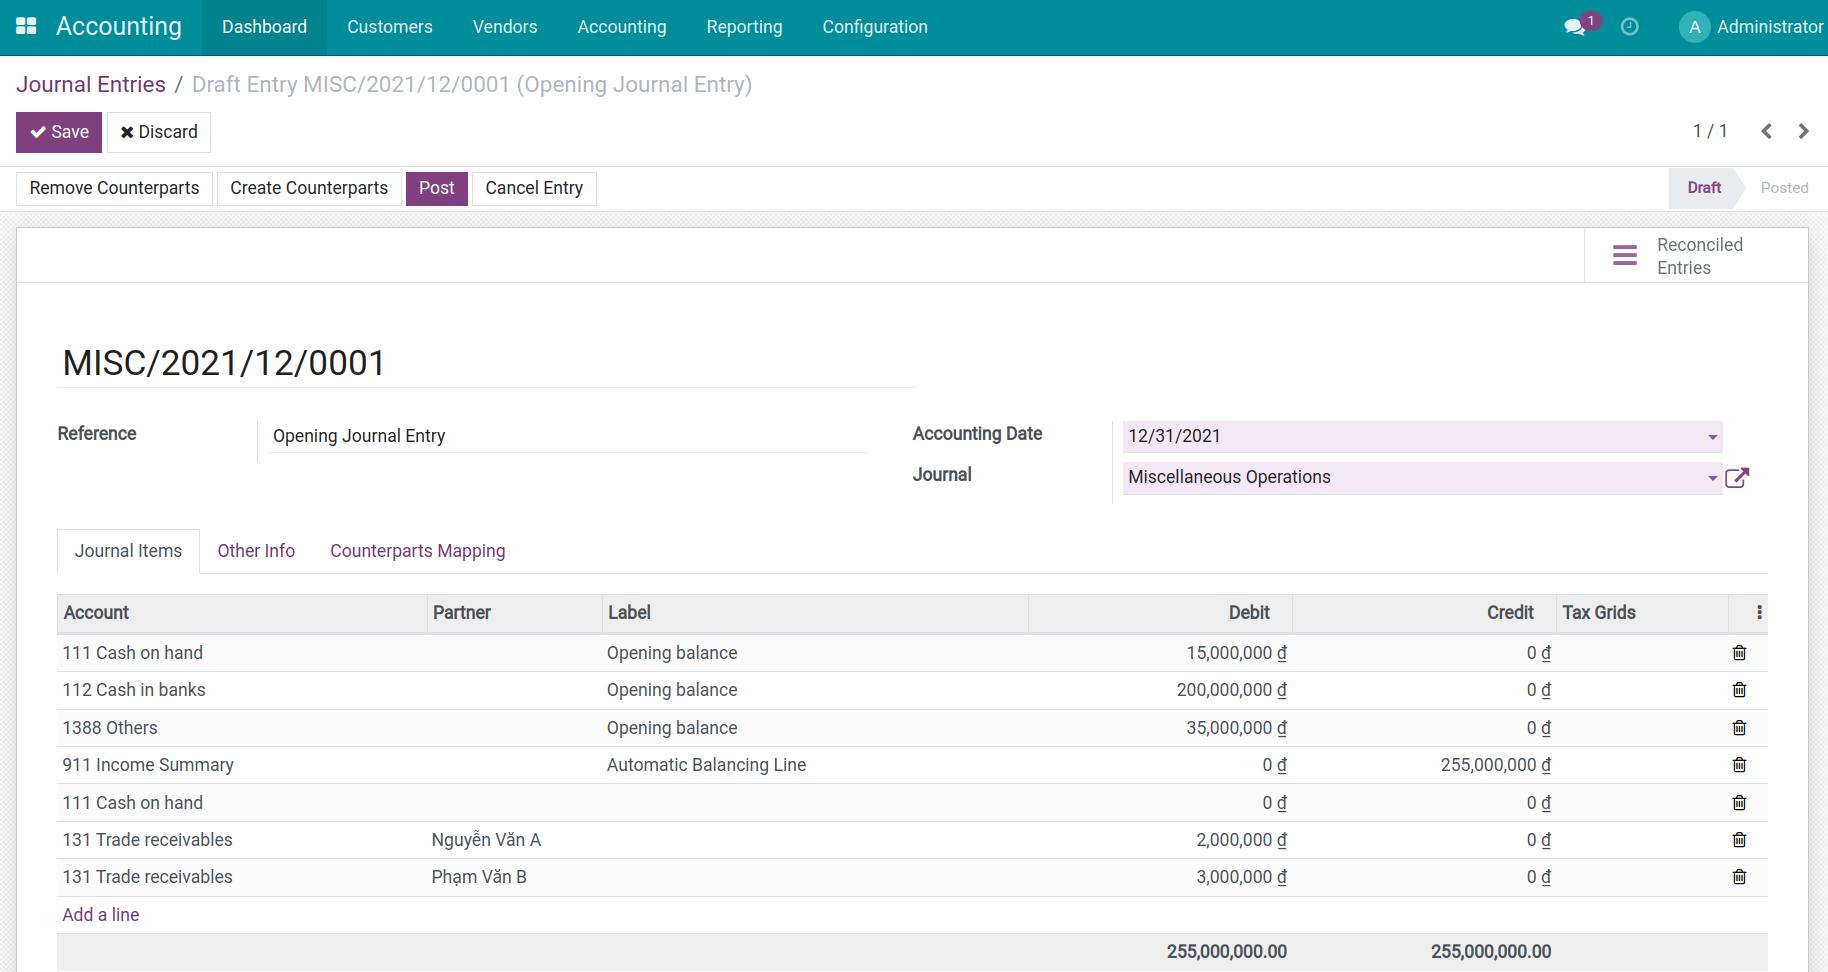
In case there are many accounting transactions related to various vendors, customers, or employees, use the import data input feature to save time.
To accurately import data, include the following fields in the data structure template:
Partner External ID;
Journal items External ID;
Journal External ID;
Journal items/Debit;
Journal items/Credit;
Journal entry reference.
After reviewing the Opening Balance Entry with your real accounting data, press Post to finish the importing opening balance process.
Note
Accounts involving employees (for example 334 - Employee Payables, 138 - Other Receivables, etc.): Use the employee’s personal account as partner information.
Account 141 - Advance: Select the Employee Advance Journal.