Create a new Contact in Viindoo
How to create a new contact in Viindoo
Let’s take the following steps to create a new contact:
Go to Contacts, click on the Create button.
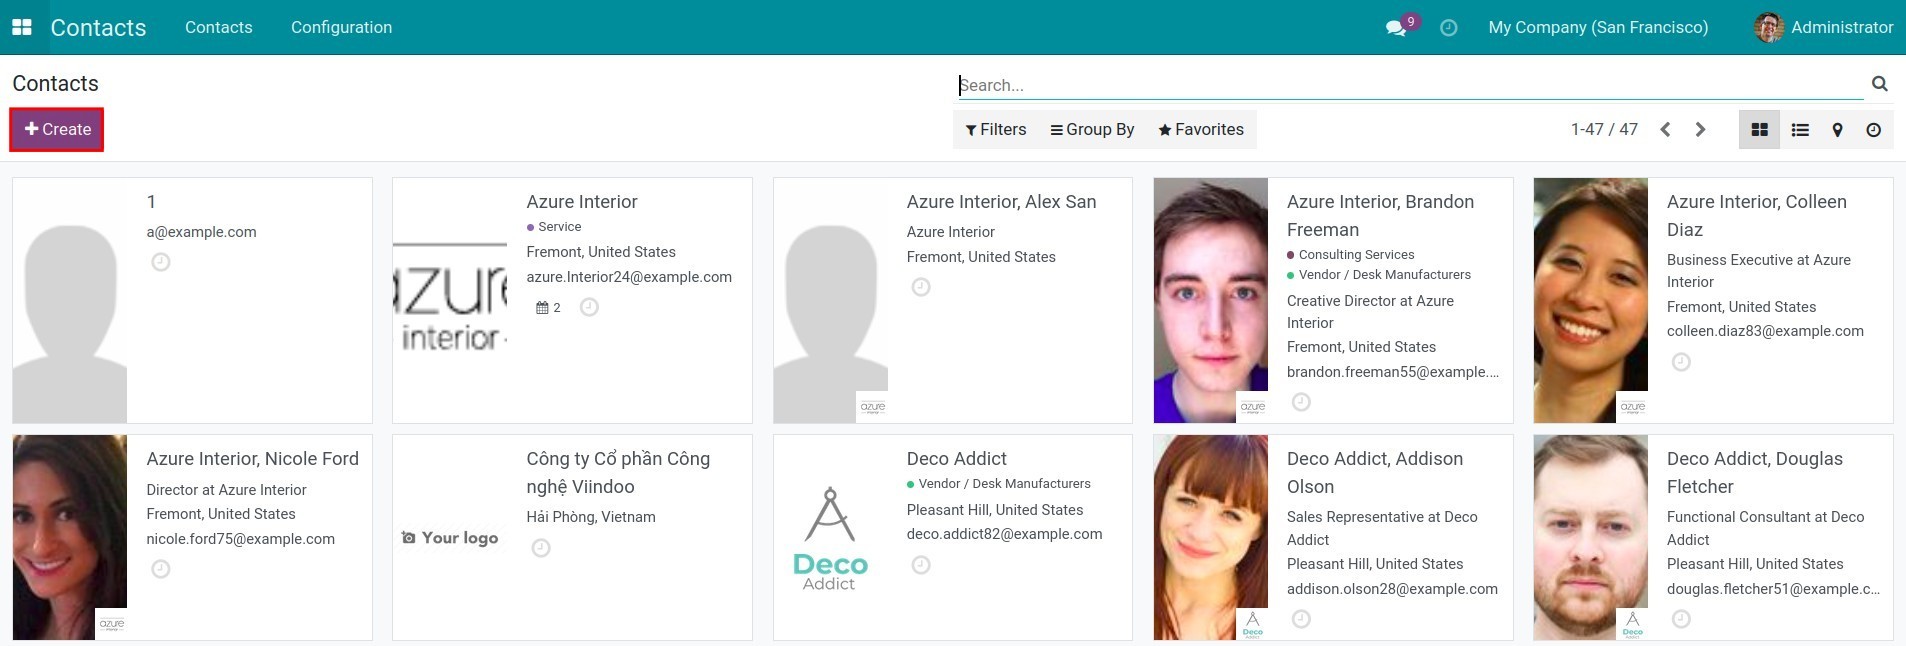
Fill in the information of the contact and click the button Save.
The information in a contact
Types of contact
There are two types of contact in Viindoo:
Individual: contains information of personal contacts such as individual customers, individual suppliers, personal information of business partners, contact addresses, personal information of employees, etc.
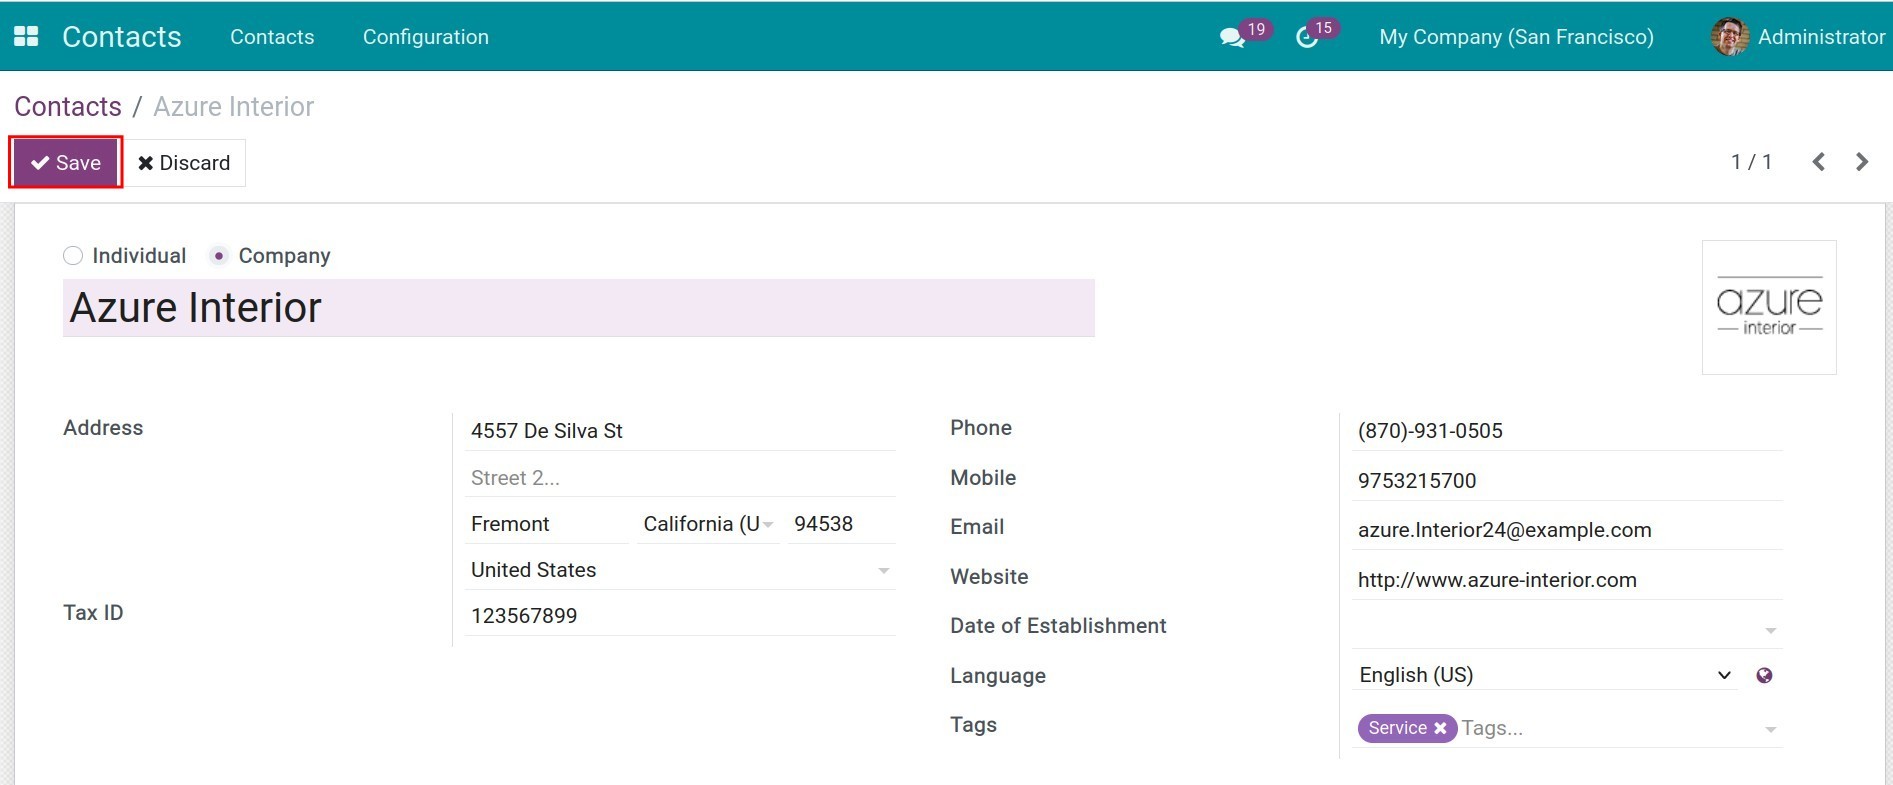
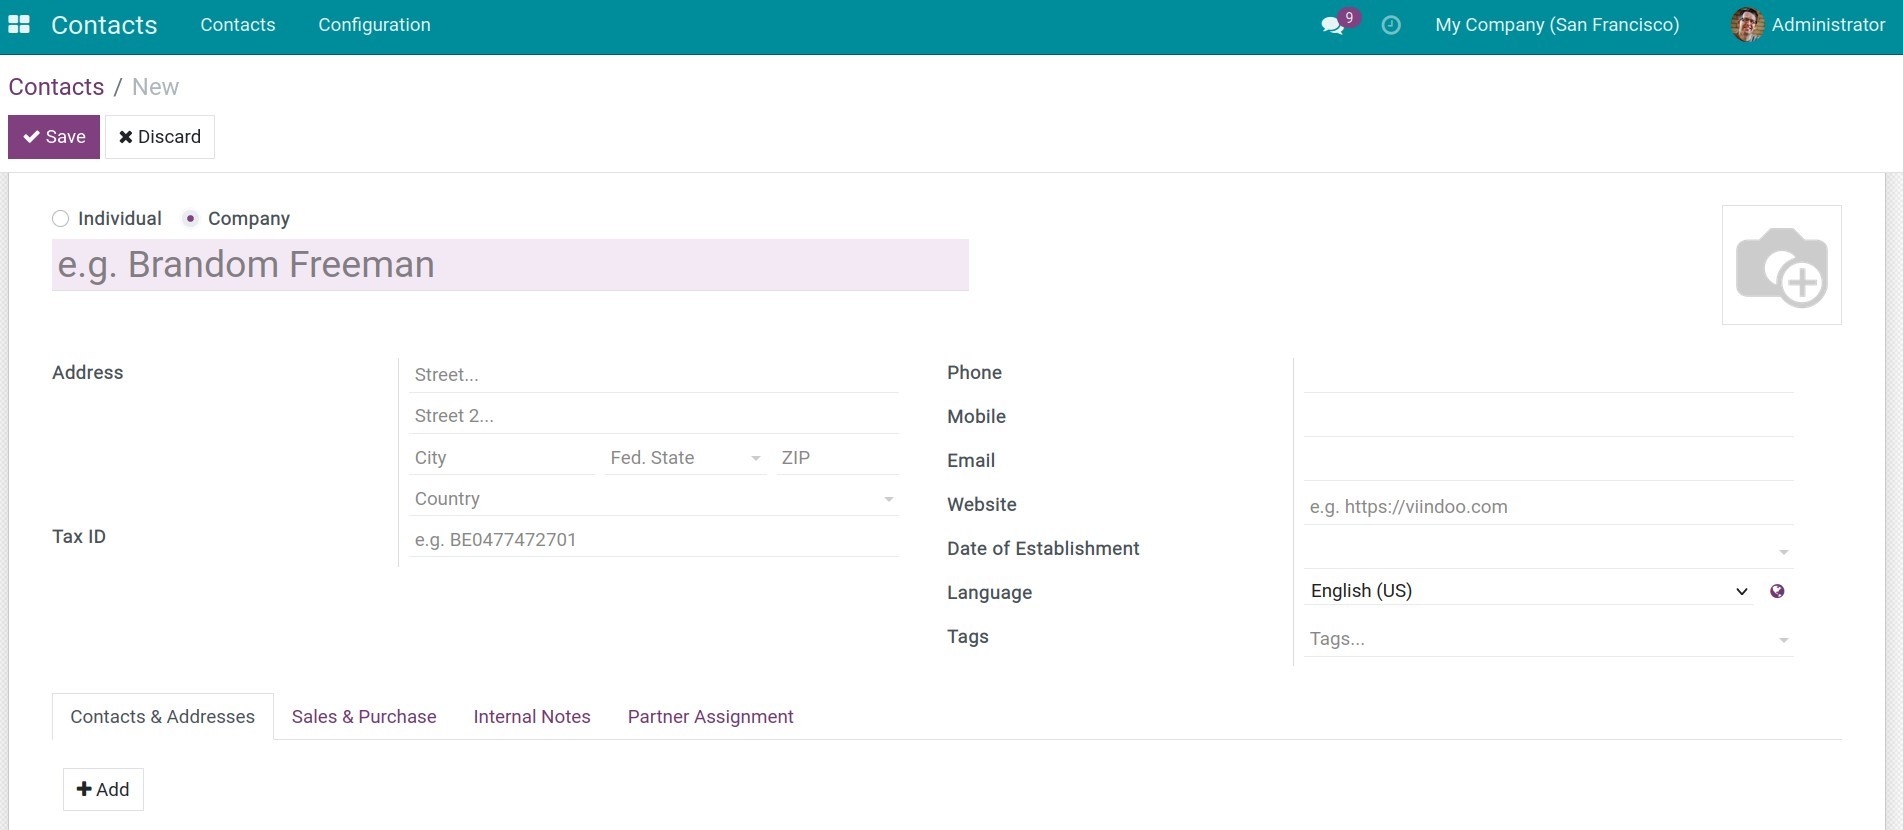
Company: contacts of legal entities, fully contain basic information and may have sub-contracts that are individual ones.
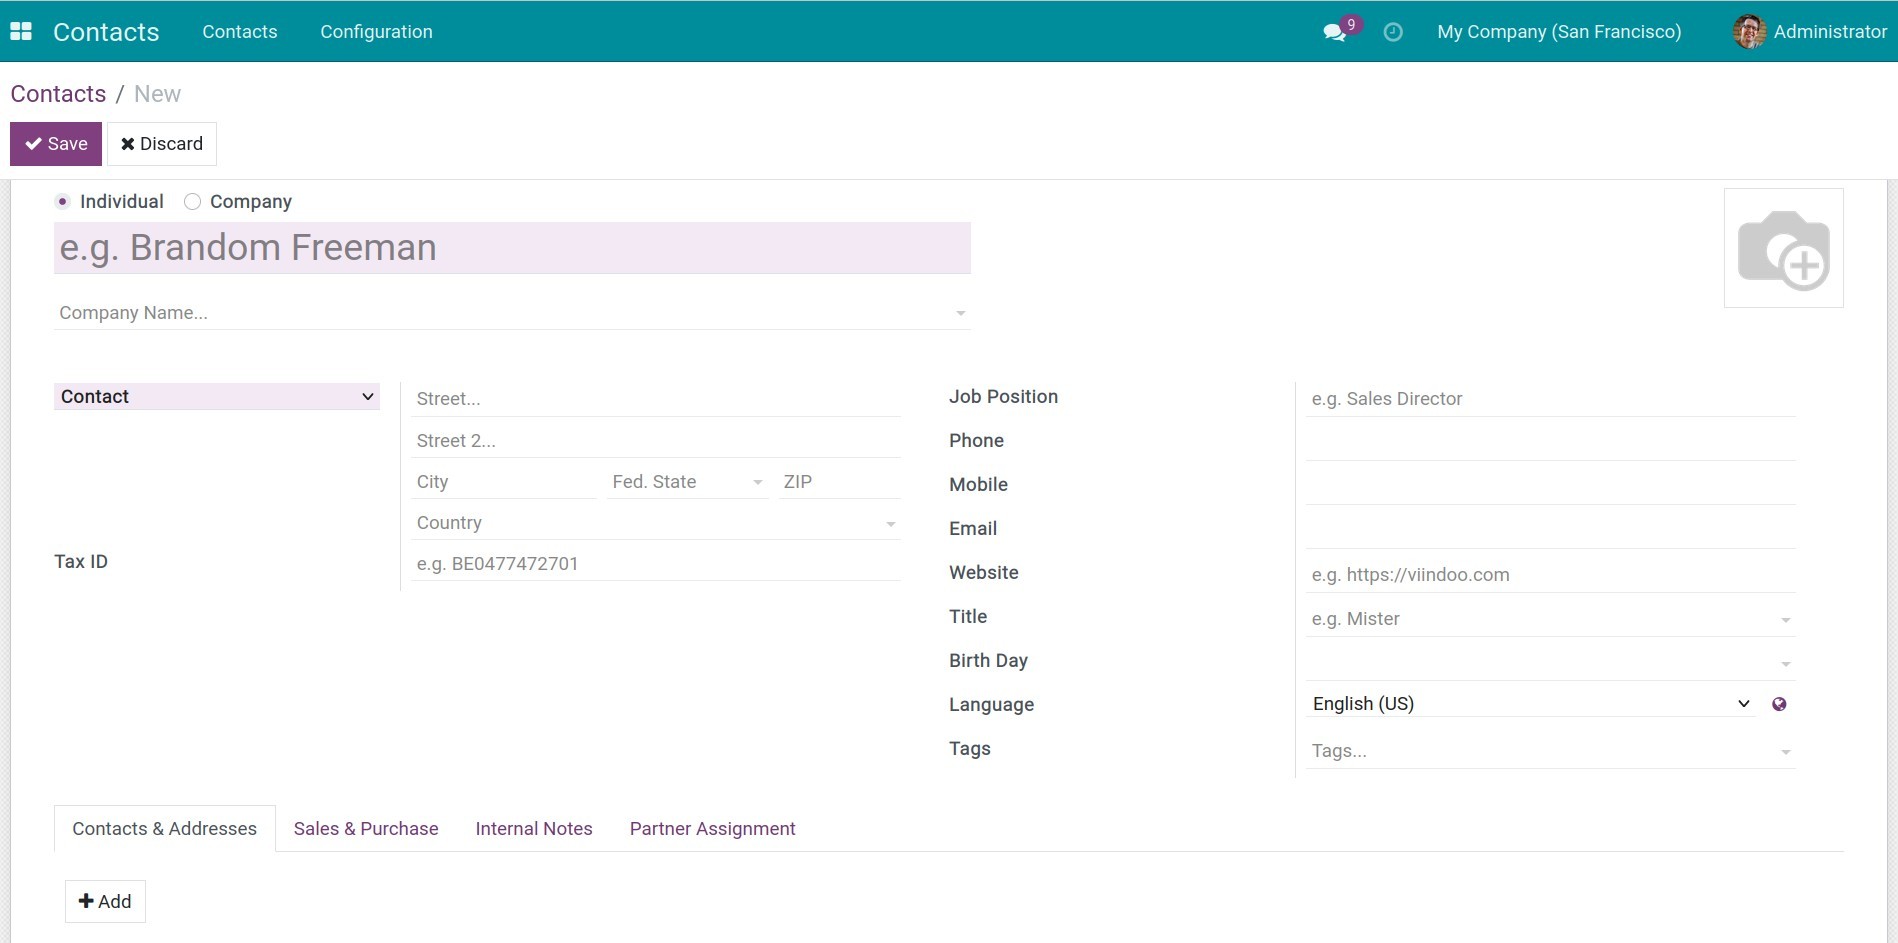
To make an individual/company contact, select the respective type.
The information in a contact
A contact contains all the necessary information.
Information in an individual contact
Company: the contact’s company. After saving, the information in the individual contact will be changed to the company’s ones.
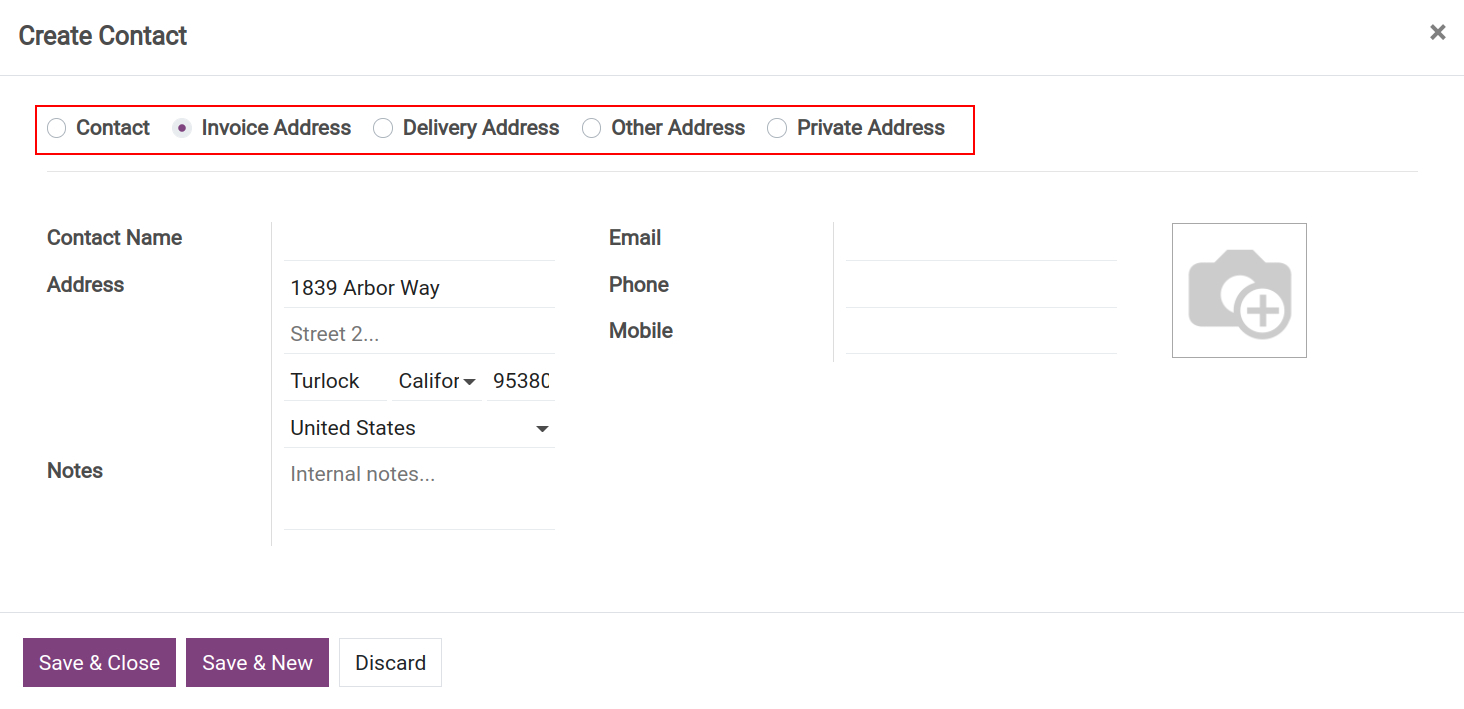
Contact type: select the type of contact you want to create from the following: contact, invoice address, delivery address, other address and private address.
Address: the personal address, if the contact links with a company contact, its address is the company address. Fill in the information as follow:
Street: type the address number and street name, e.g. 1839 Arbor Way.
Street 2: type the district (optional).
City: type the city name.
Fed. State: type the federal state.
ZIP: type the federal state zip code.
Country: select the country. Normally, it will be auto-filled after you select the federal state.
Tax ID: the personal tax code.
Job position: the job position of this individual in his/her company.
Phone: the phone number of the contact.
Mobile: the mobile phone number of the contact.
Email: the email of the contact.
Website: the website of the contact.
Title: the title of this individual. e.g. Mister, Madam, Miss, etc.
Birth Day: the birthday of this individual.
Language: to define the language of the email templates in the system that are used to send to this individual.
Tags: to clarify the contacts.
Information in a company contact
Address: the company’s address. See how to enter the address for an individual contact above.
Tax ID: the corporate tax code.
Phone: the phone number of the company.
Mobile: the mobile phone number of the company.
Email: the email of the company.
Website: the website of the company.
Date of Establishment: the date of establishment of the company.
Language: to define the language of the email templates in the system that are used to send to the company.
Tags: to clarify the contacts.
Other information
Contacts & Addresses: to add more related contacts/addresses, like other individual contacts, invoice addresses, delivery addresses, etc.
Sales & Purchase: the information related to sales and purchases between the contact and your company. You can assign this contact to an internal user in the system for better care and support.
Internal Notes: to note other information of the contact.
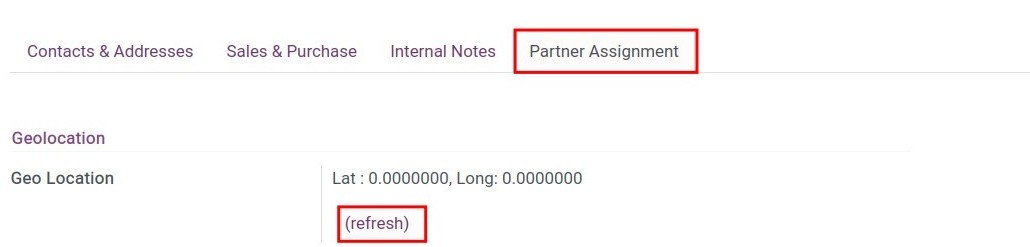
Partner Assignment: to locate the contact position on the maps (time, longitude, latitude).
Add more Contacts & Addresses
In the following cases, you may need to create more than one contact/address:
Add more individual contacts to a company contact.
The contact address is different from its invoice address.
The contact address is different from its delivery address.
The contact has another address.
The contact has private addresses.
Let’s create a new contact/address linked with that contact as follows:
Click on the Edit button on that contact. Then press Add in the Contacts & Addresses tab.
Select the contact type.
Contact: used to create an individual contact in the company/organization.
Invoice Address: the main registered business address of the company or its independent branch. This address is used on purchase/sales invoices with this partner.
Delivery Address: used in delivery slip with this partner.
Other Address: to add more addresses of the contact.
Private Address: to add more personal addresses, this information will be shown to some internal users in your system (if configured).
Edit the information and click on Save & Close.
Geolocation of a contact
Based on a contact address, Viindoo will show its geolocation on the maps.
To geolocate a contact, take the following steps:
Go to Contacts, select one contact.
On the contact view, go to Partner Assignment.
Click on (refresh), then the longitude and latitude will be generated.
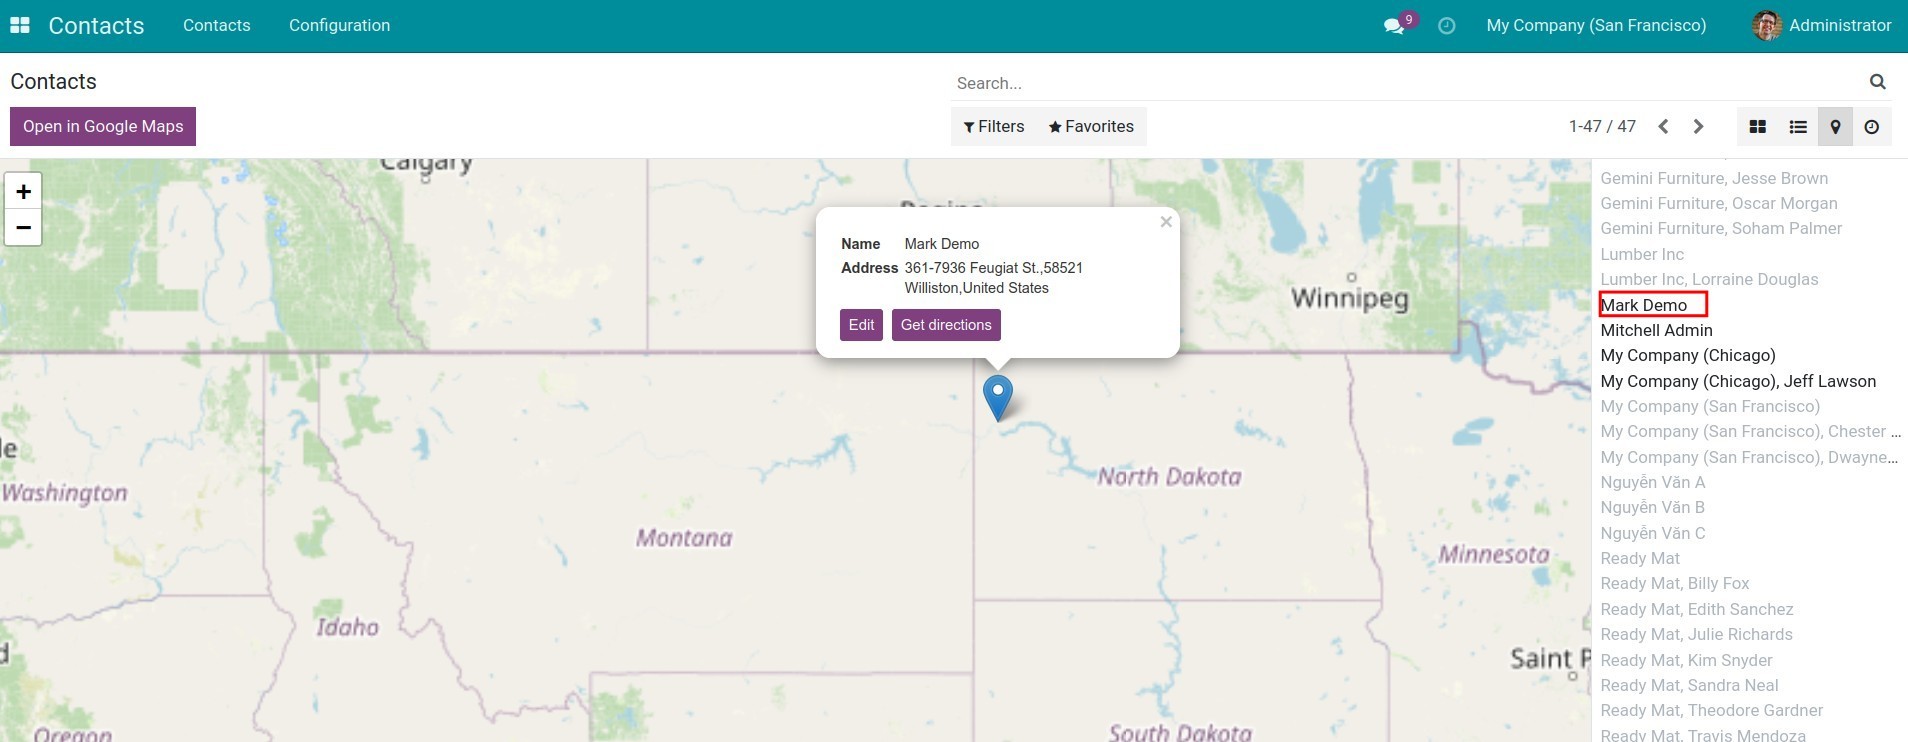
Go to Contacts, click on the View viin_map button on the top right corner.
Click on the contact, its geolocation will be marked on the maps.
Click on the Open in Google Maps to check its location in Google Maps.
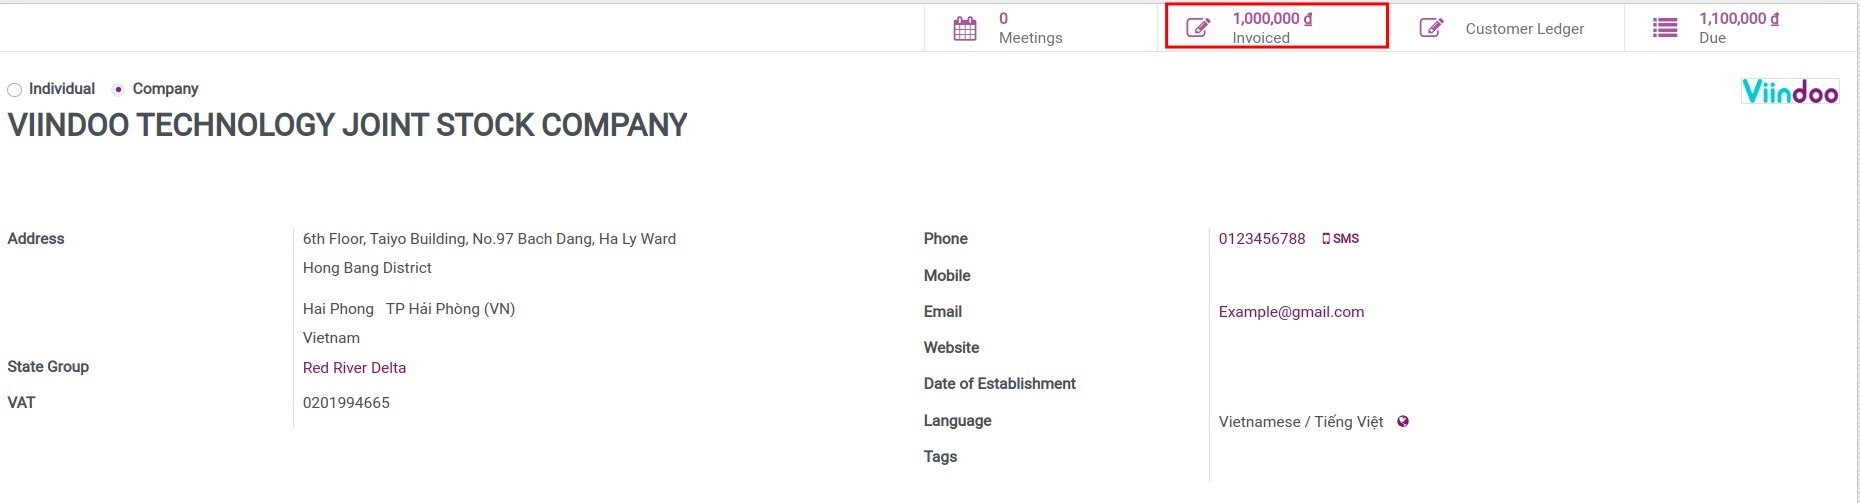
Integrate the contact with other apps in Viindoo
Other apps in Viindoo (ex: Purchase, Sales, Inventory, Accounting, Project, Employees, etc) will pick data of the related contact to use.
For example a case in the Accounting app:
Go to Accounting > Customers > Invoices and click on Create.
On the field Customer, select a contact.
Click on Save, then the system will pick data from the contact information to fill in the invoice form.
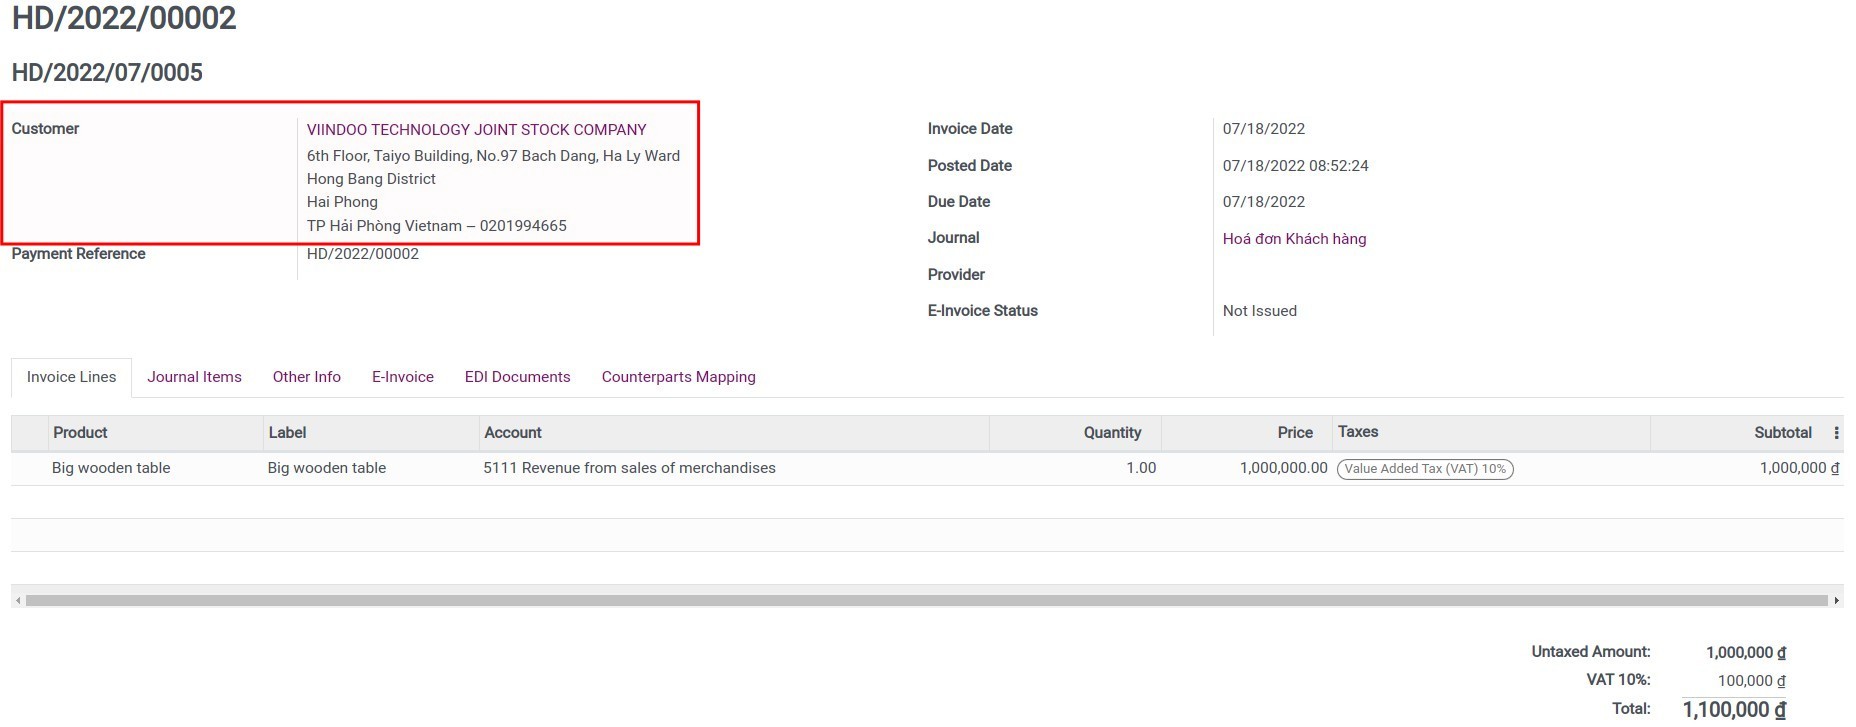
You can also check all the invoices of the contact right on that contact view.
See also
Related article
Optional module