Receipt with Three-step flow: Input, Quality check, and Stock
Requirements
This tutorial requires the installation of the following applications/modules:
Viindoo inventory
In purchasing goods, to determine whether the received products meet the quality requirements or not, many businesses have added a Quality Control step in the receiving process. Understanding that need, the Inventory app has developed the Three-step receipt process (Receiving, quality checking, warehousing).
Receipt with three-step process: After the goods have been received and gathered at the input location, they will be transported to the quality control location. Any low-quality goods might be returned at this point. After the inspection is completed, the satisfactory goods will be transferred to the stock for storage.
To activate the Receipt with three steps process, do the following:
Go to the Inventory application.
Navigate to menu .
Choose the warehouse that you want to configure.
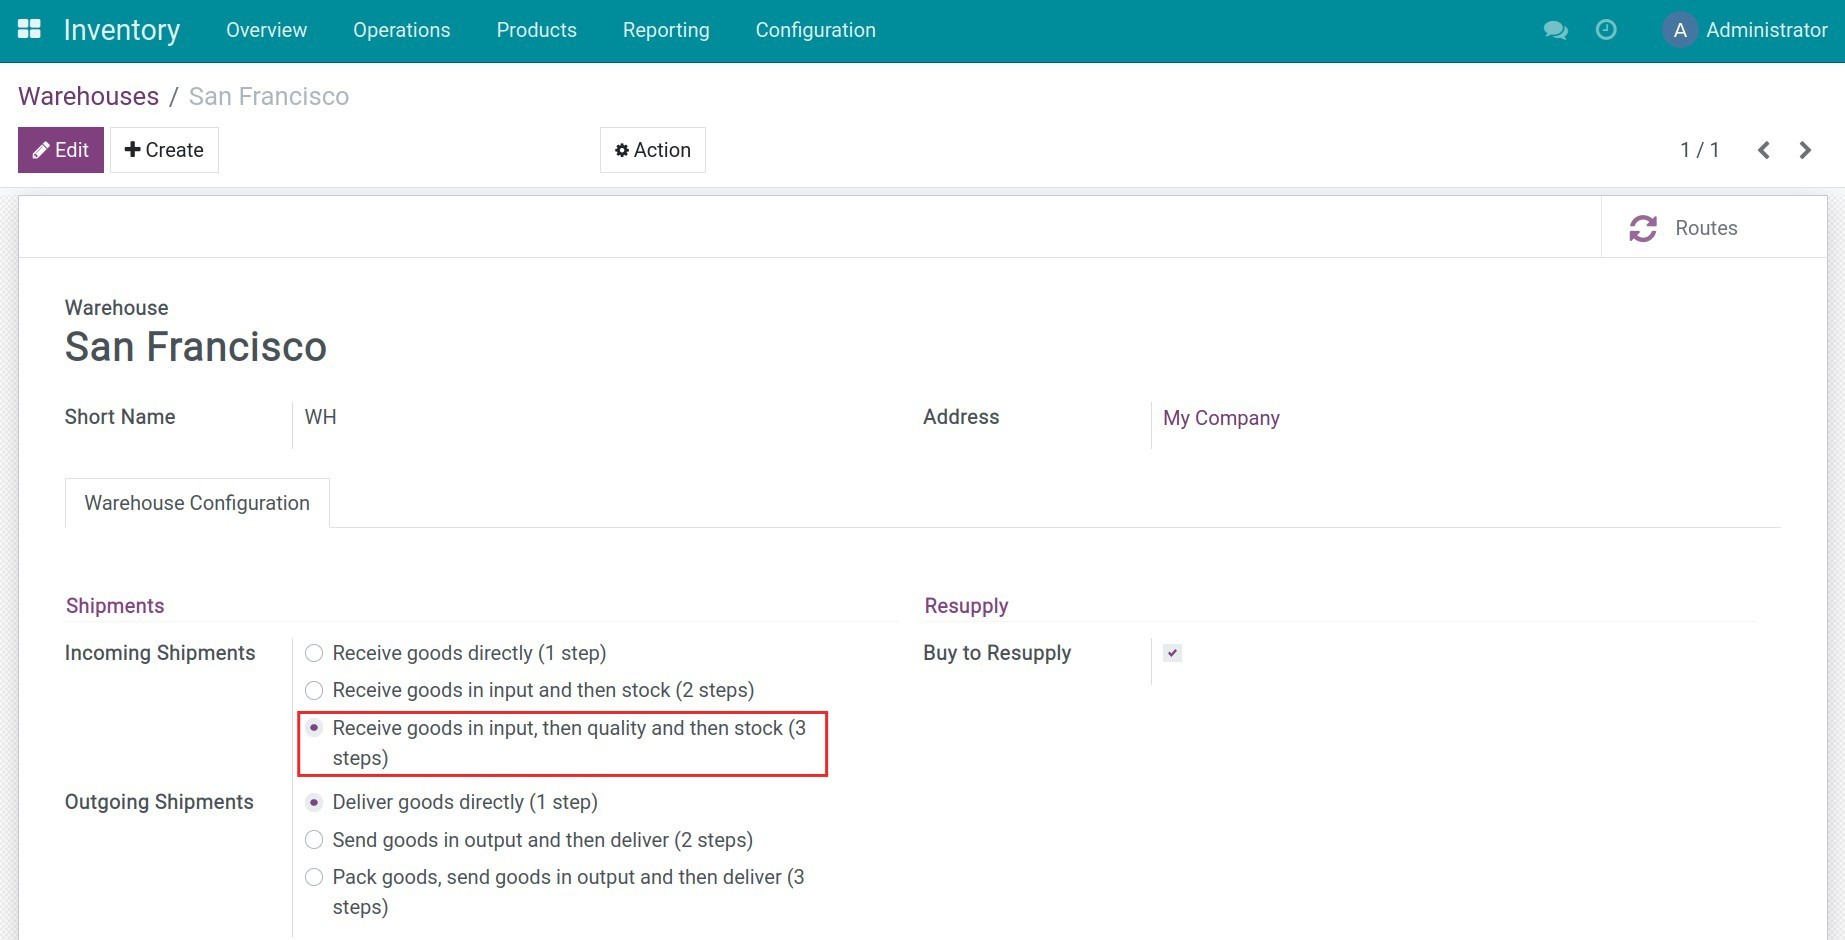
Locate the Incoming shipments section, then check the option Receive goods in input, then quality and then stock (3 steps).
Note
You need to activate Multi-step Routes to use this feature.
Afterward, either one of the following cases is occurred depending on the previous value of incoming Shipments:
If the flow is changed from Receive goods directly (1 step) to Receive goods in input, then quality and then stock (3 steps), an Input location and a Quality Control location are automatically created.
If the flow is changed from Receive goods in input and then stock (2 steps) to Receive goods in input, then quality and then stock (3 steps), only the Quality Control location is automatically created because the Input location already existed.
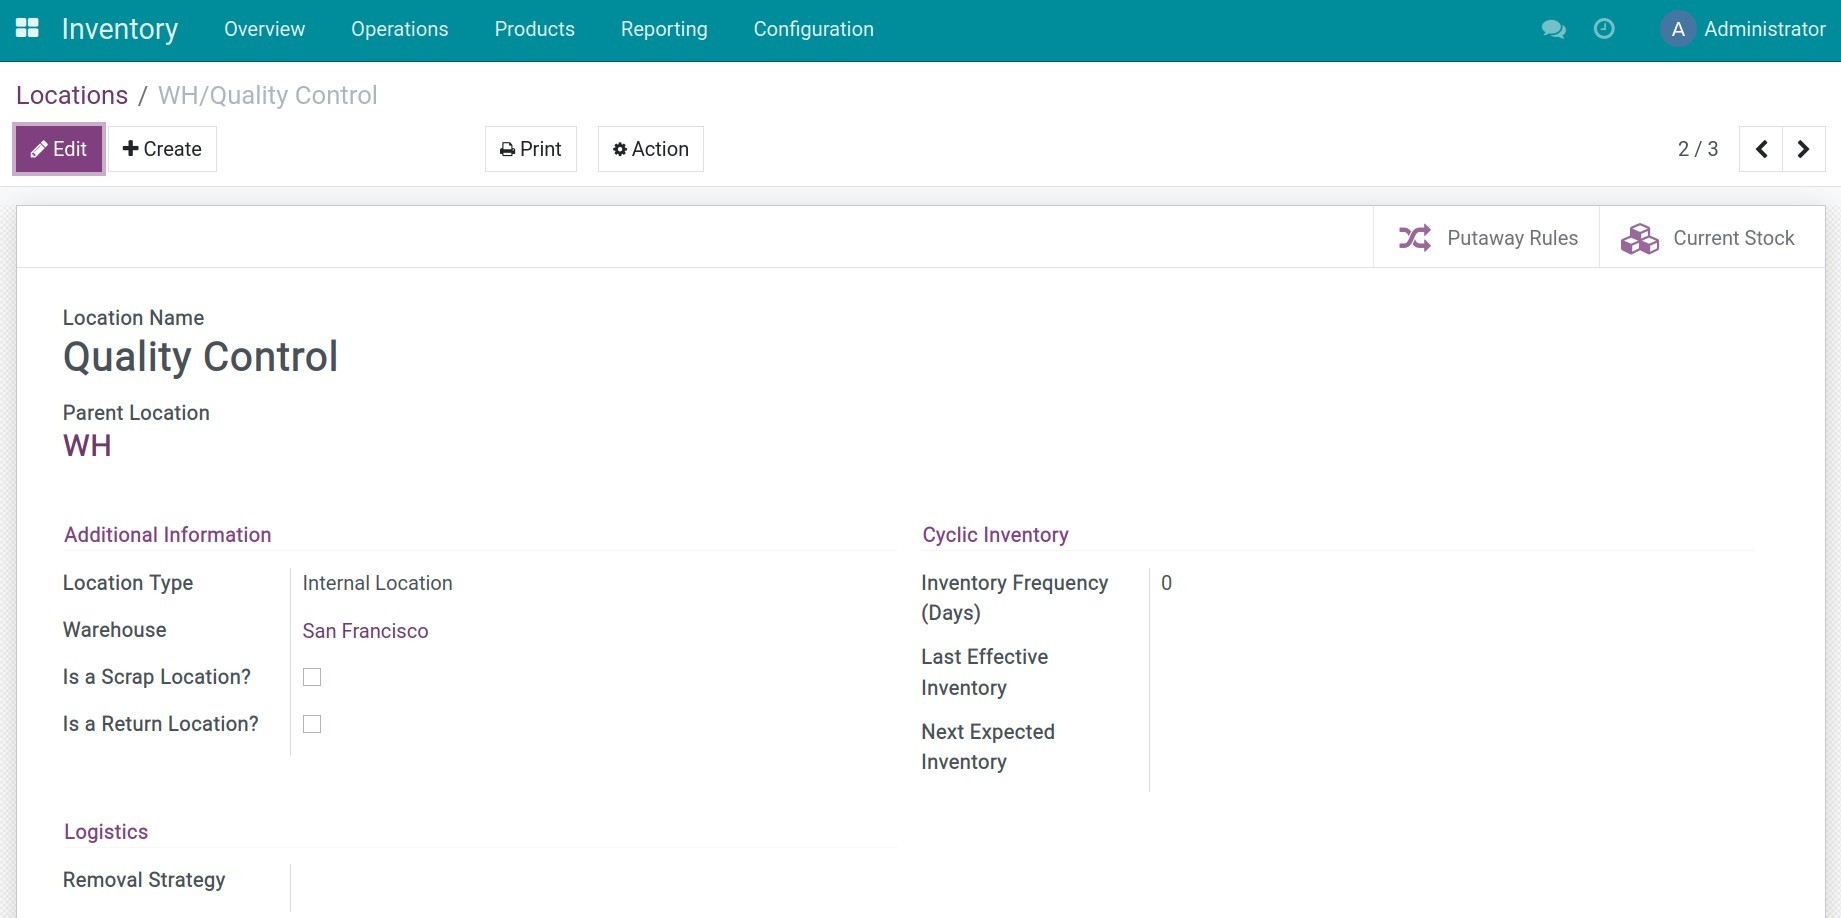
You can also change the name and edit the configuration of the locations. To do it, go to the Inventory app, access , then select the desired location.
Receive goods in input, then quality and then stock (3 steps) process
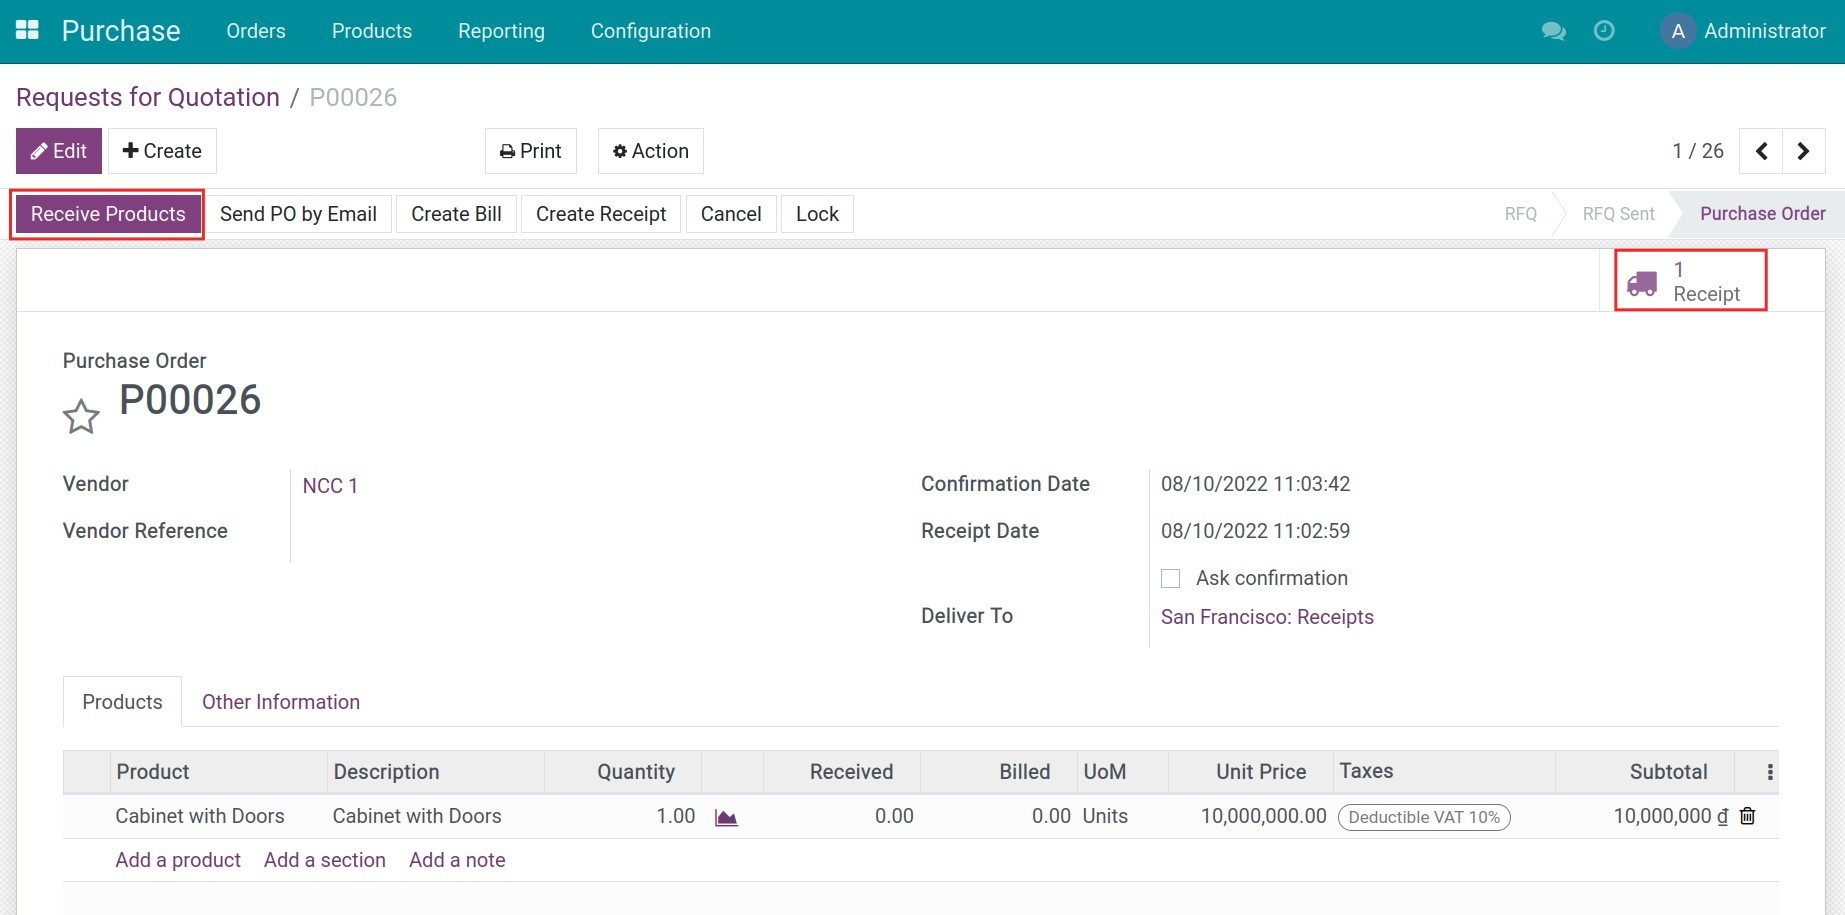
Once the quotation is confirmed, a receipt slip is generated and linked to the newly created purchase order. You can press the Receive Products button or choose the receipt icon. Doing either way will display the receipt slip at the Ready stage inside Purchase app. This slip indicates the transfer of goods from the Vendor location to the Input location.
The products will be transported through 3 consecutive steps:
First step: The products are received from the location of the Vendor to the Input location. This process is displayed on the receipt WH/IN/00008 at the Ready stage.
Second step: The products are moved from the Input location to the Quality Control location. This process is displayed on the WH/INT/00002 at the Waiting Another Operation stage.
Third step: After the inspection is done, the satisfactory products are moved into the Stock location. This process is displayed on the WH/INT/00003 at the Waiting Another Operation stage.
To check the receipt slips related to the purchase order, navigate to , search with purchase order reference in the search bar using Source Document criteria.

Note
Warehouse staffs must have user access right at the Purchase app to be able to receive goods from the purchase order interface.
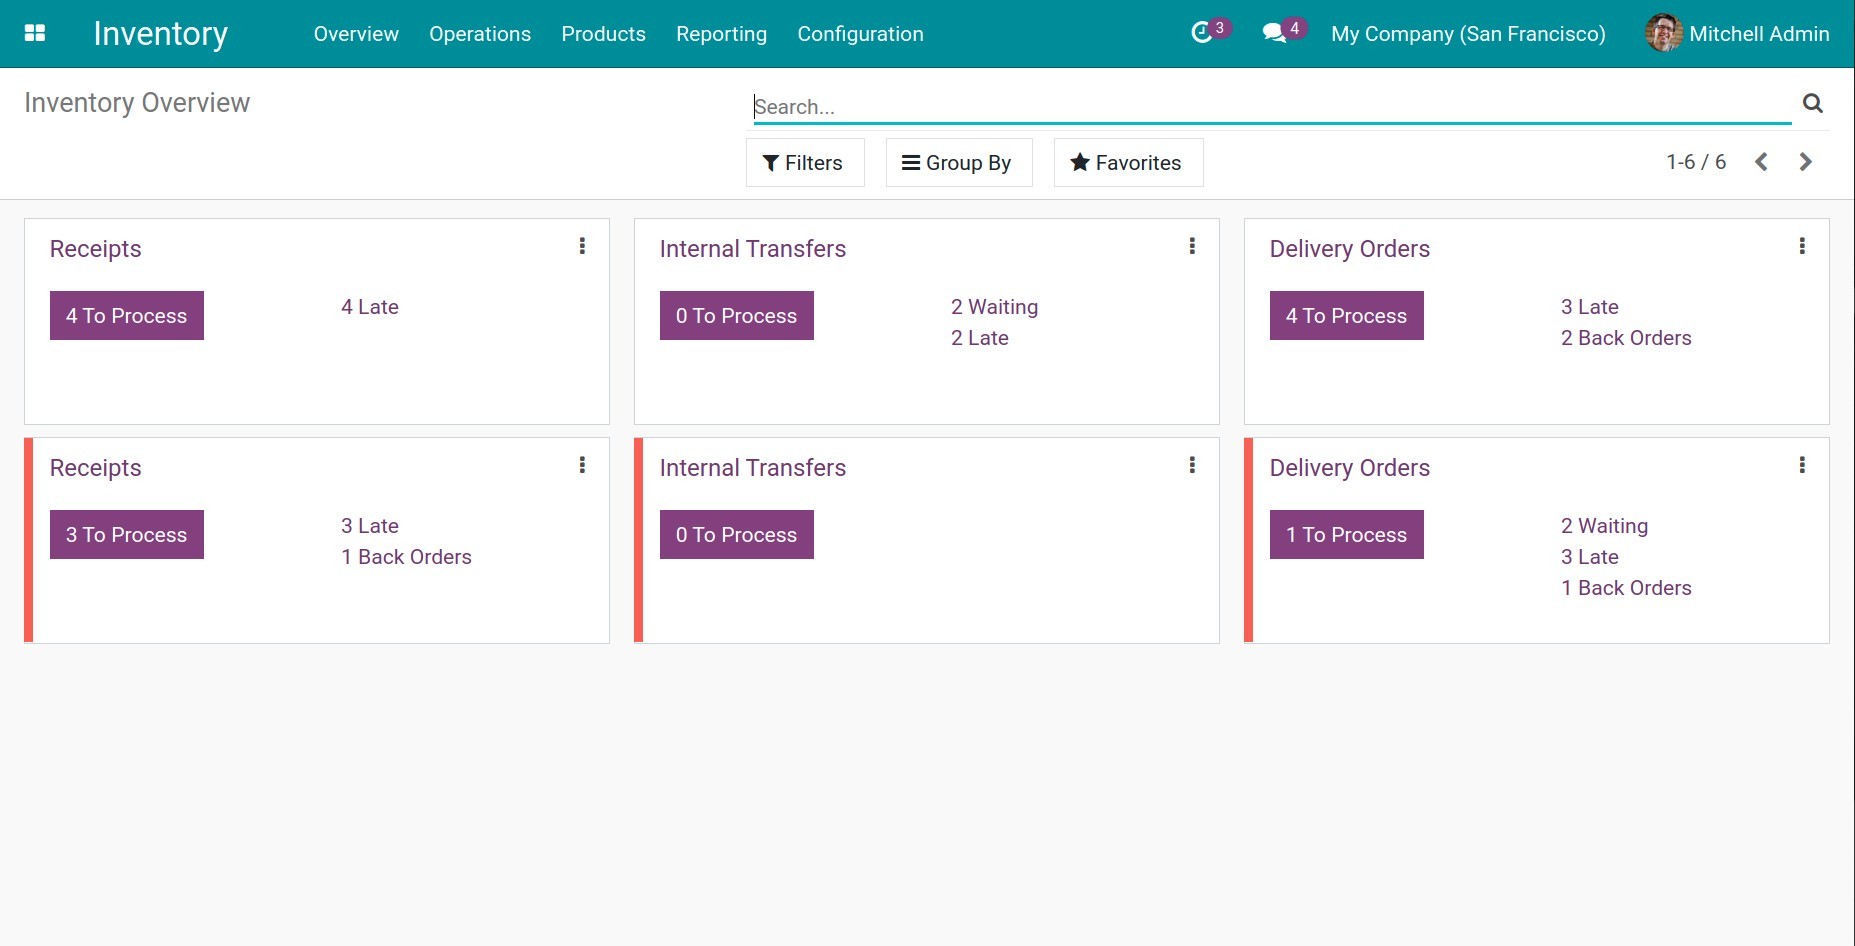
To have an overview of all receipt slips generated from different stock transfers, go to the Inventory app then access menu. All the warehouse steps are displayed here in a kanban view. You can view not only all the receipt slips by going into the Receipts card, but also view all the stock moves between Input, Quality Control, and Stock locations at Internal Transfers.
First step: Receive goods from a Vendor in the Input location
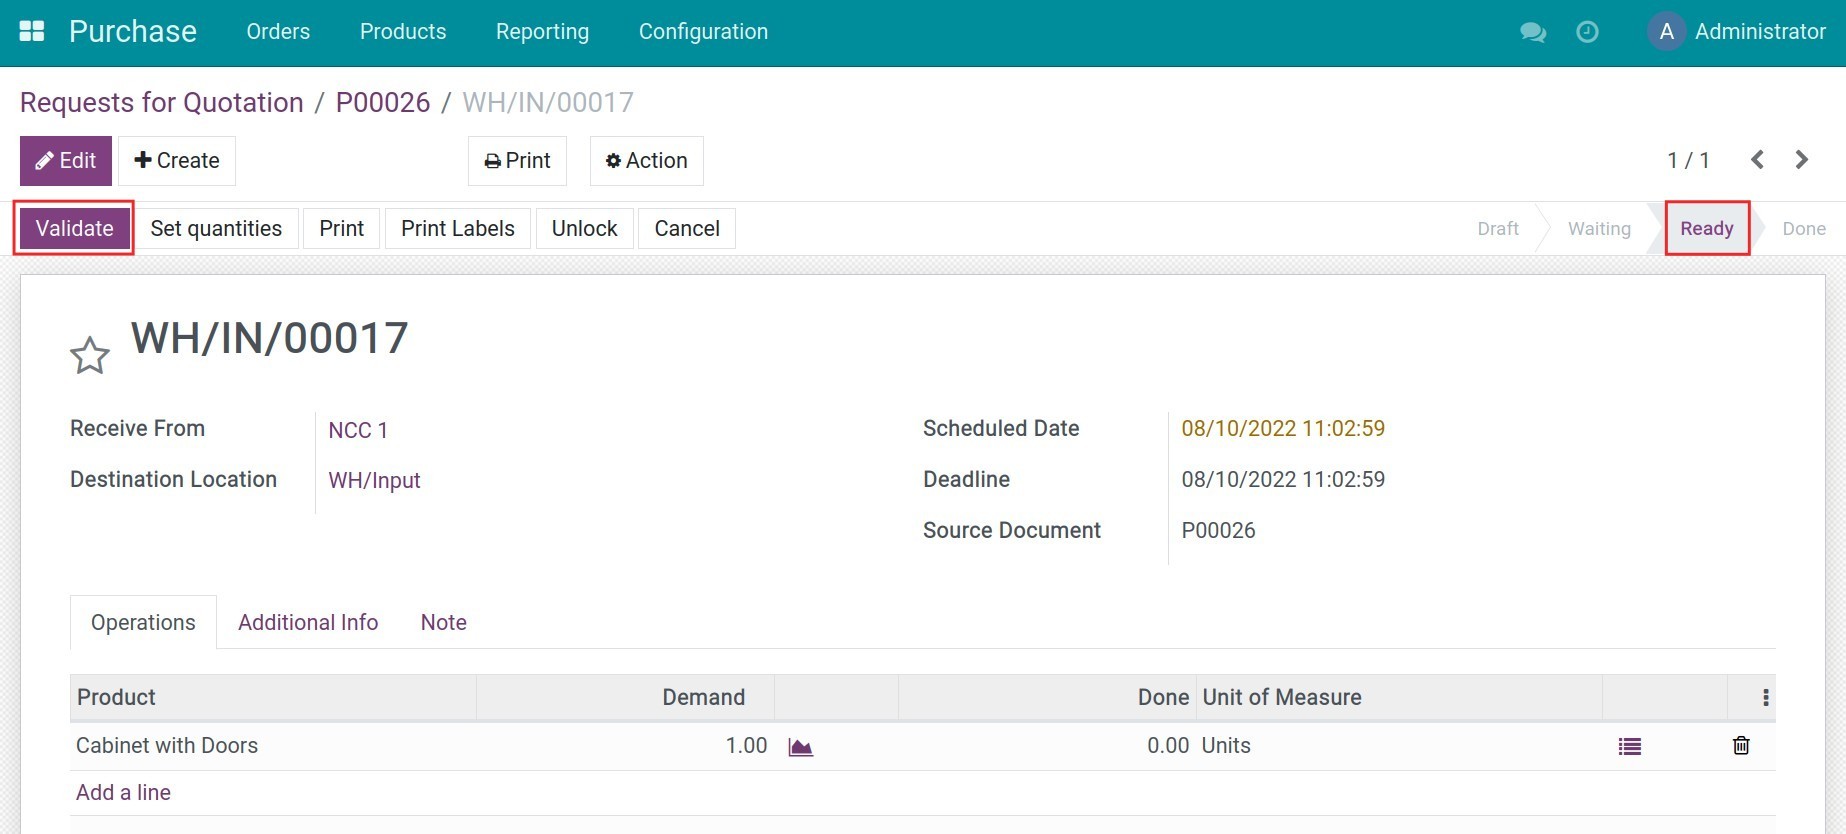
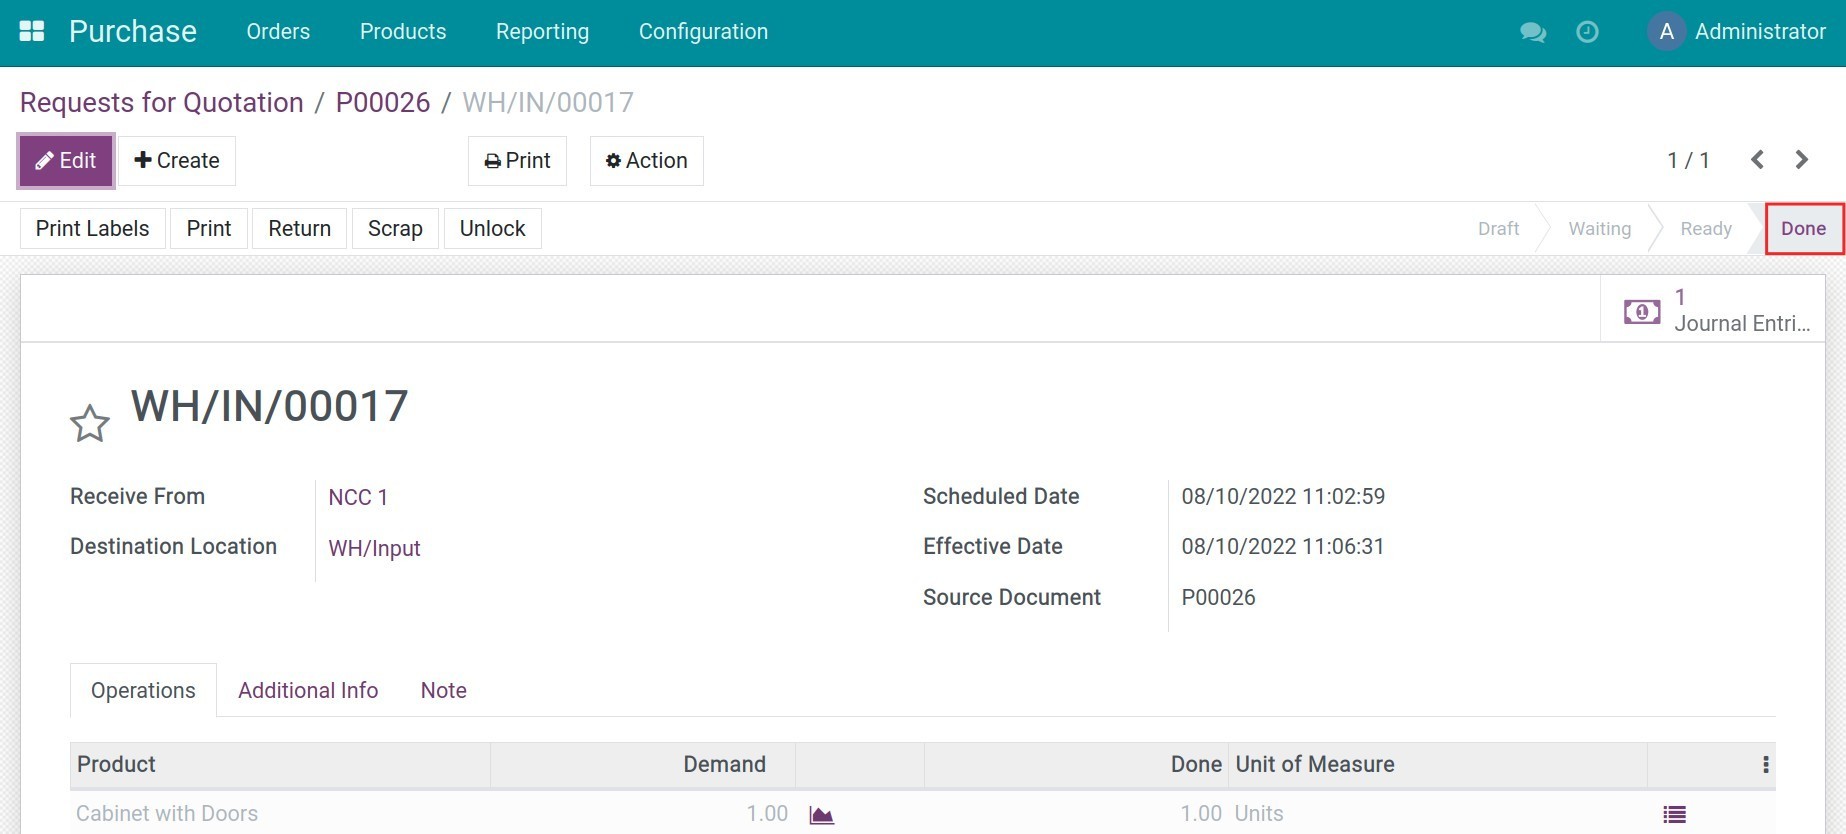
At this step, go to the Receipt kanban card and press To Process. Then select the desired transfer slip and press Confirm. The receipt status will be changed to Done and products from the vendor are received successfully at the Input location.
Second step: Transfer products from the Input location to the Quality Control location
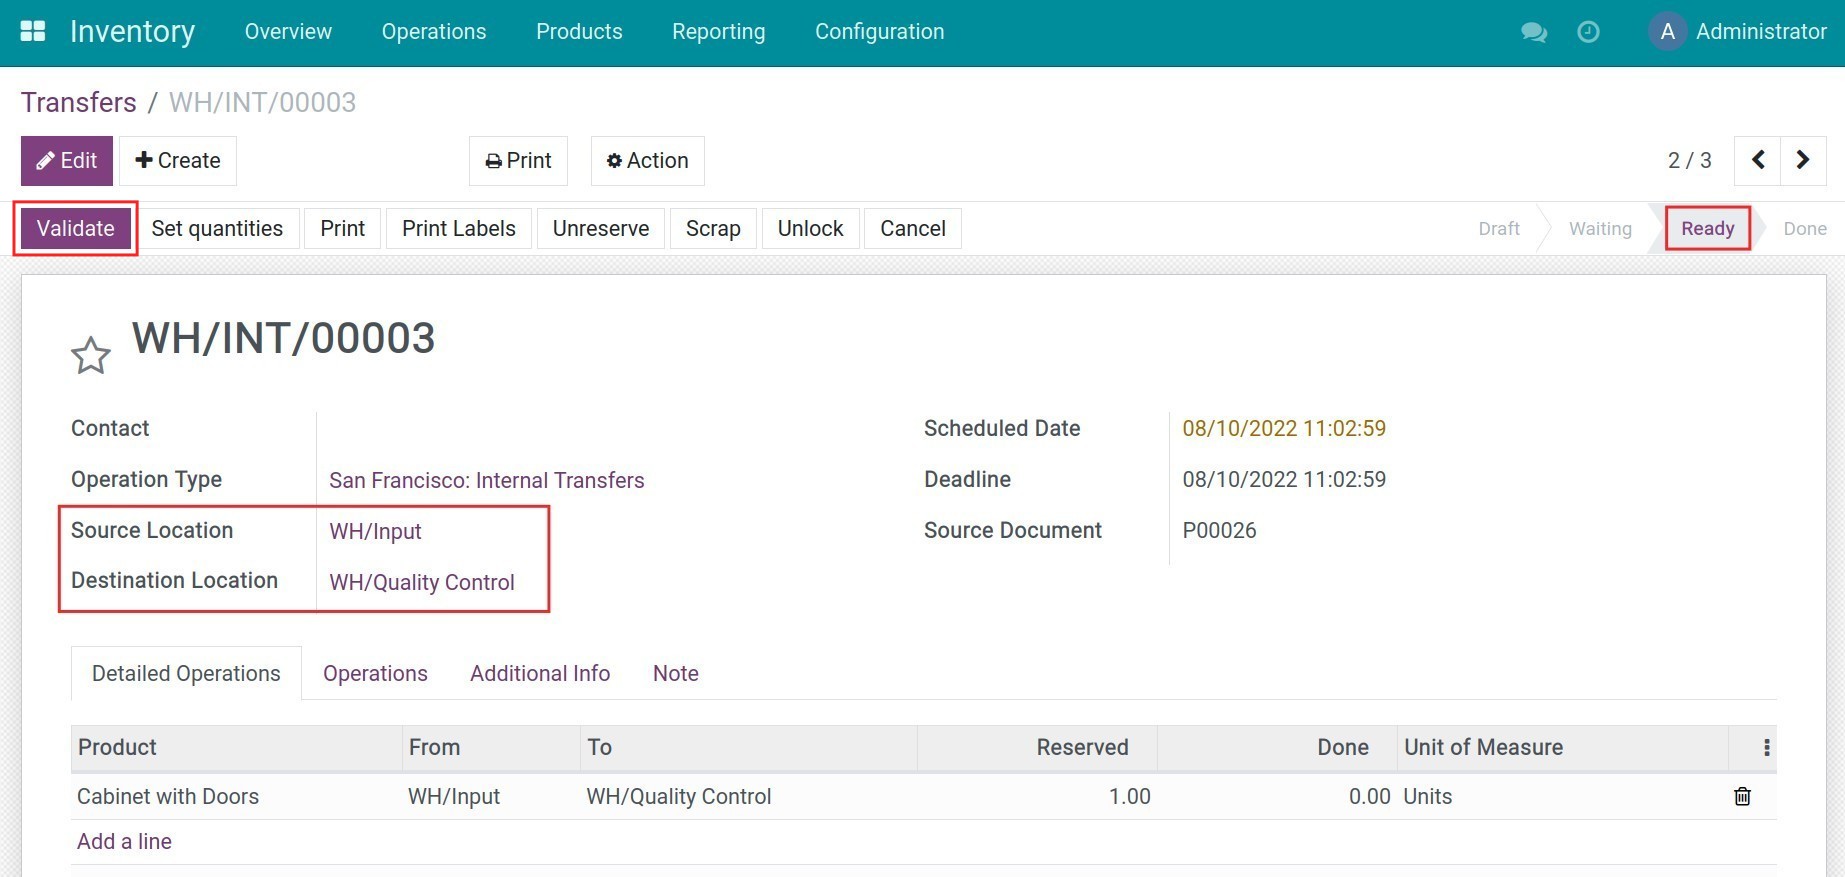
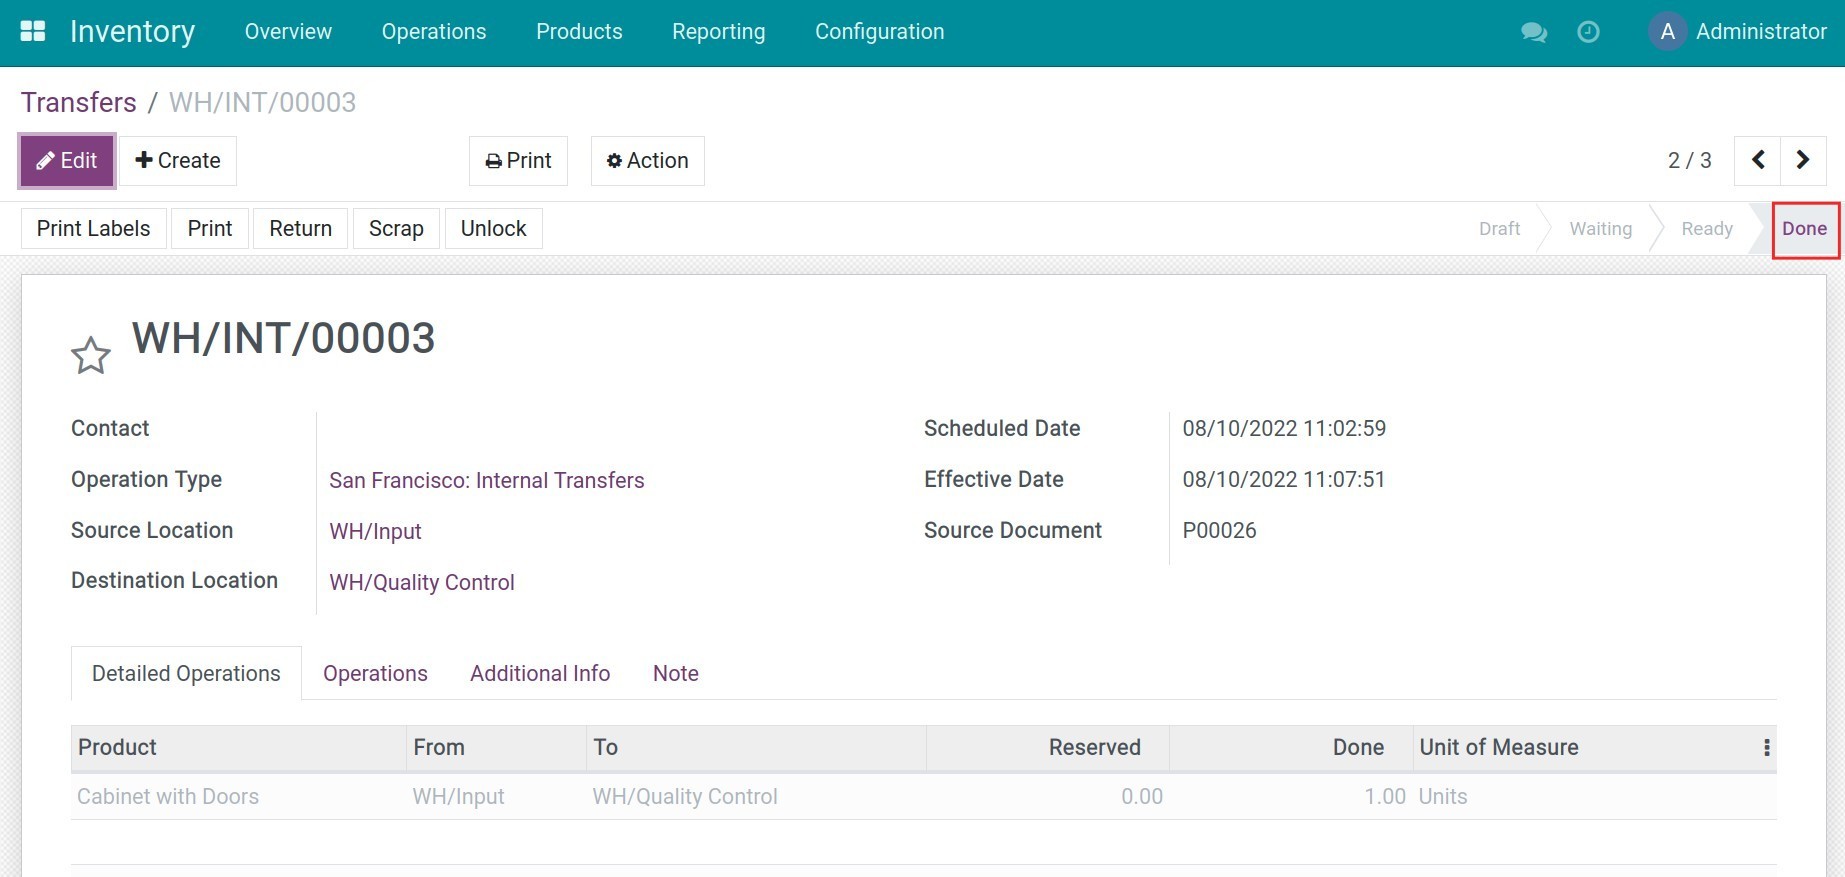
When the first step is done, the status of the internal transfer from the Input location to the Quality Control location is automatically changed to Ready. Go to the Internal Transfers kanban card and press the To Process button. Select the desired transfer slip and click Confirm. This transfer slip status is now changed to Done.
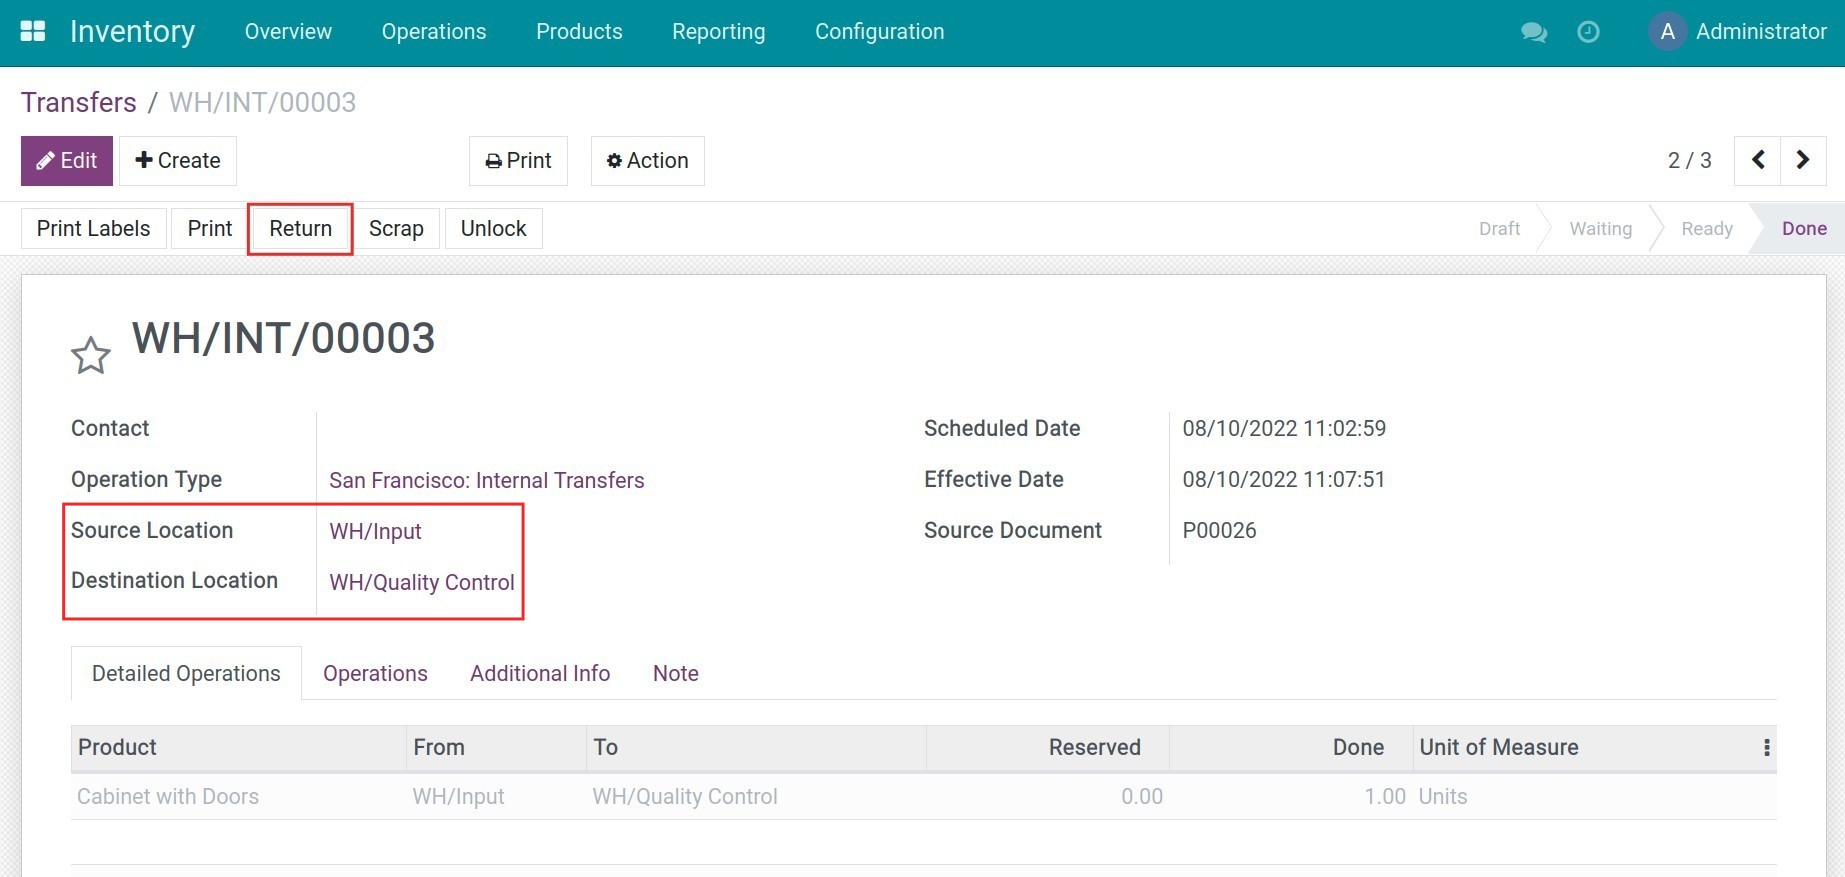
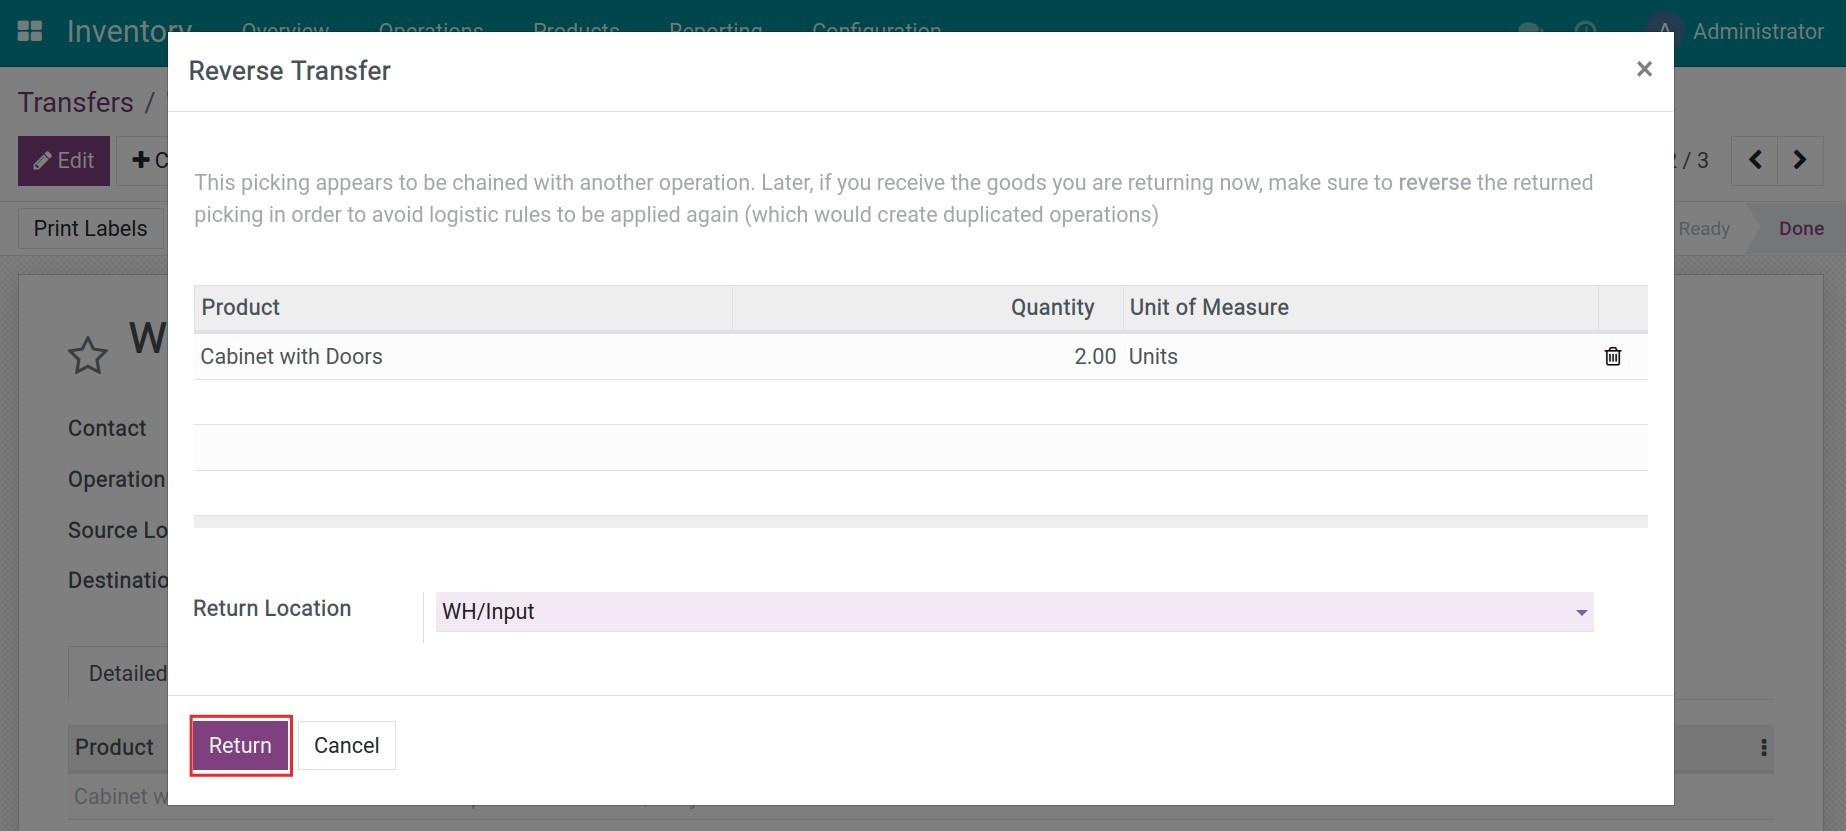
During the quality control step, any low-quality products can be returned to the vendor. To do so, press the Return button on the transfer slip. Then add the quantity to return and click Return.
Third step: Transfer products to the stock location
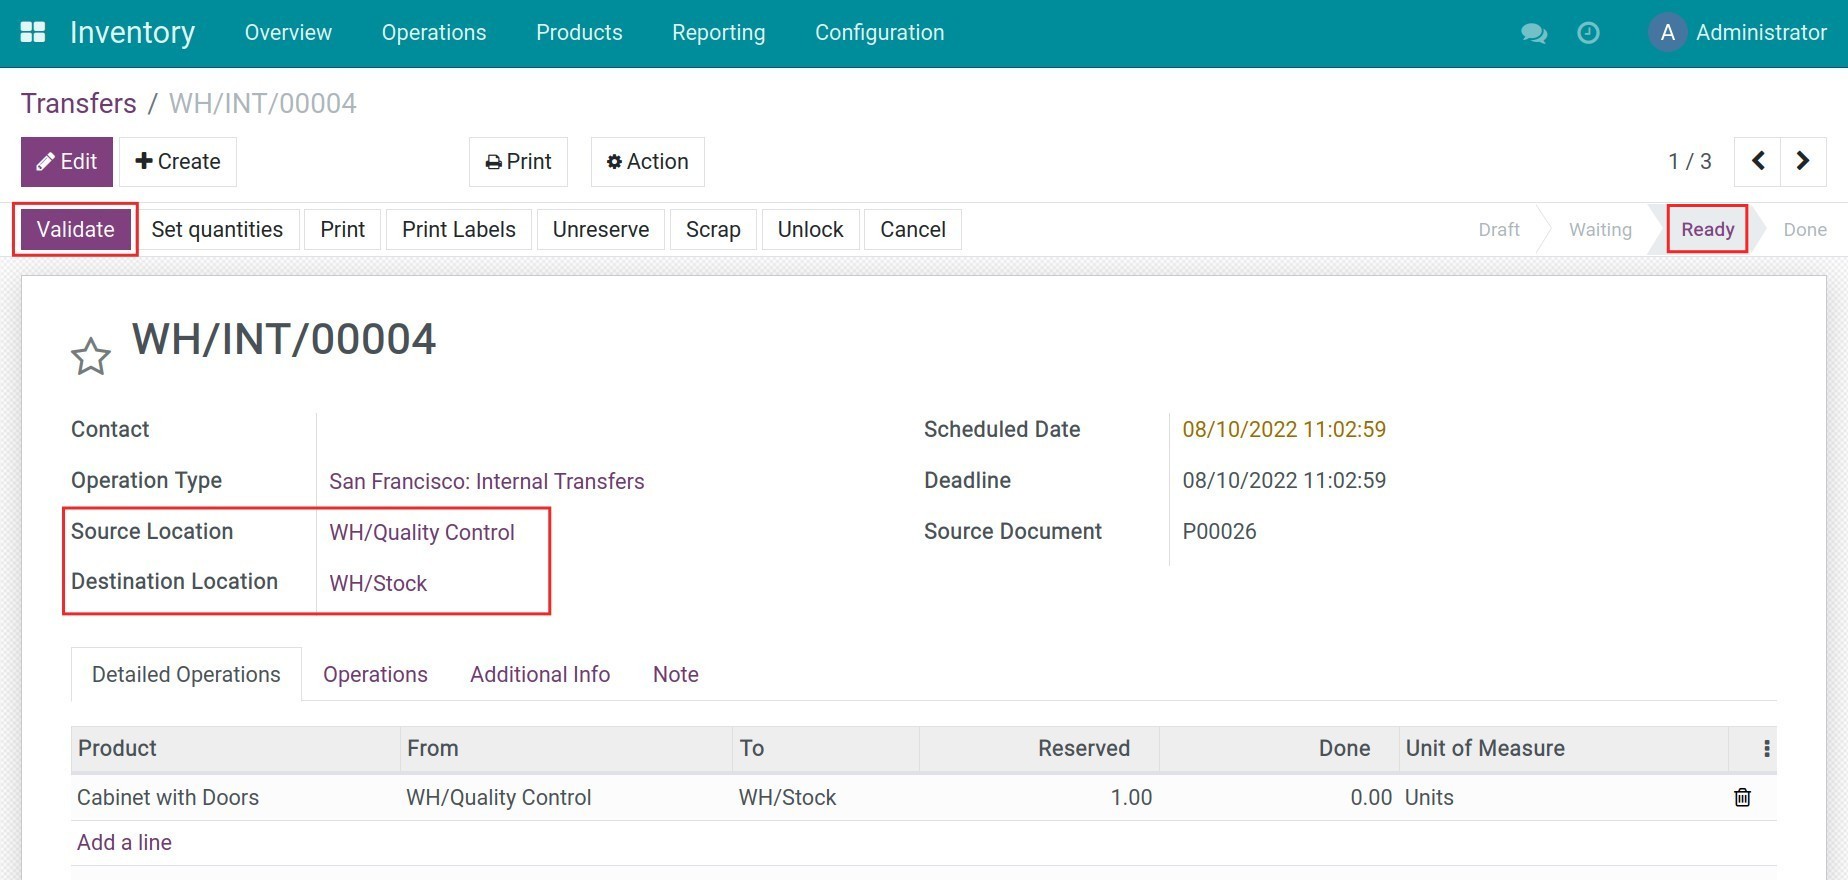
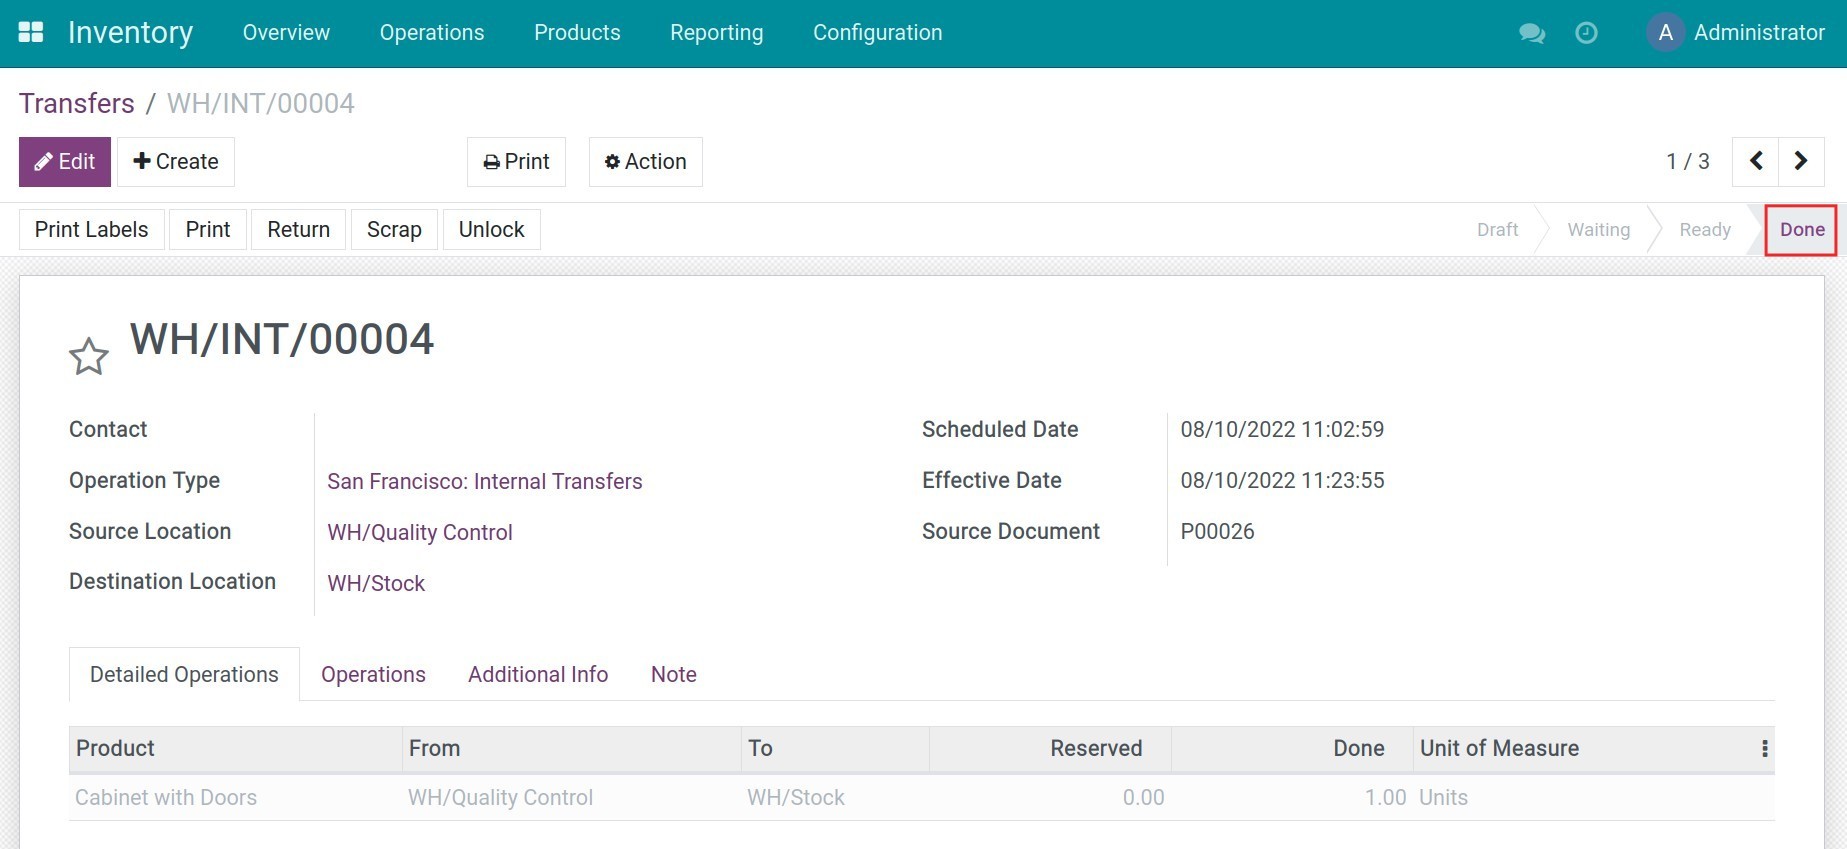
When the quality control is done, goods are moved to the Stock location for storage as the final step. The internal transfer of this stage will be automatically set to Ready. Similar to the previous steps, navigate to Internal Transfers ‣ To Process, select the desired transfer, and press Confirm to change the status to Done.
See also
Related article
Optional module