Create and manage eCommerce product categories on the website
Requirements
This tutorial requires the installation of the following applications/modules:
Ecommerce product categories configuration
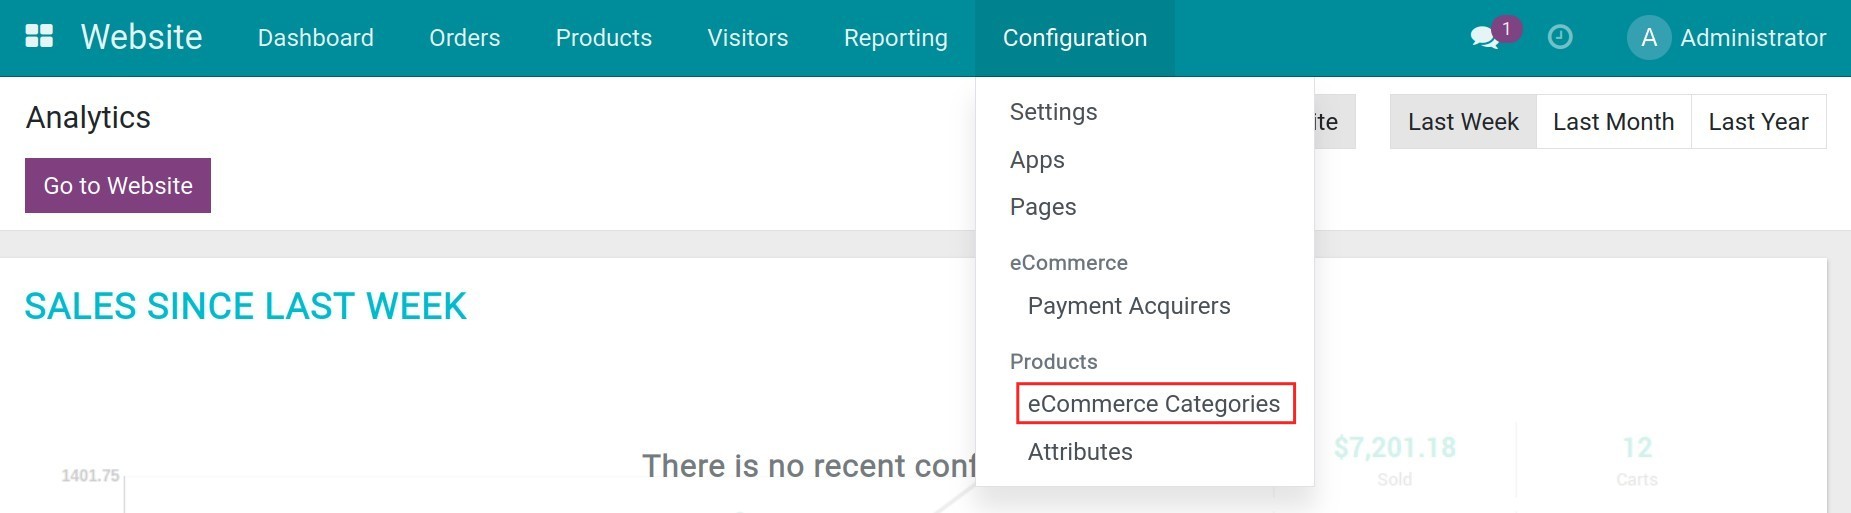
First, you need to configure the eCommerce Categories at Website > Configuration > eCommerce Categories.
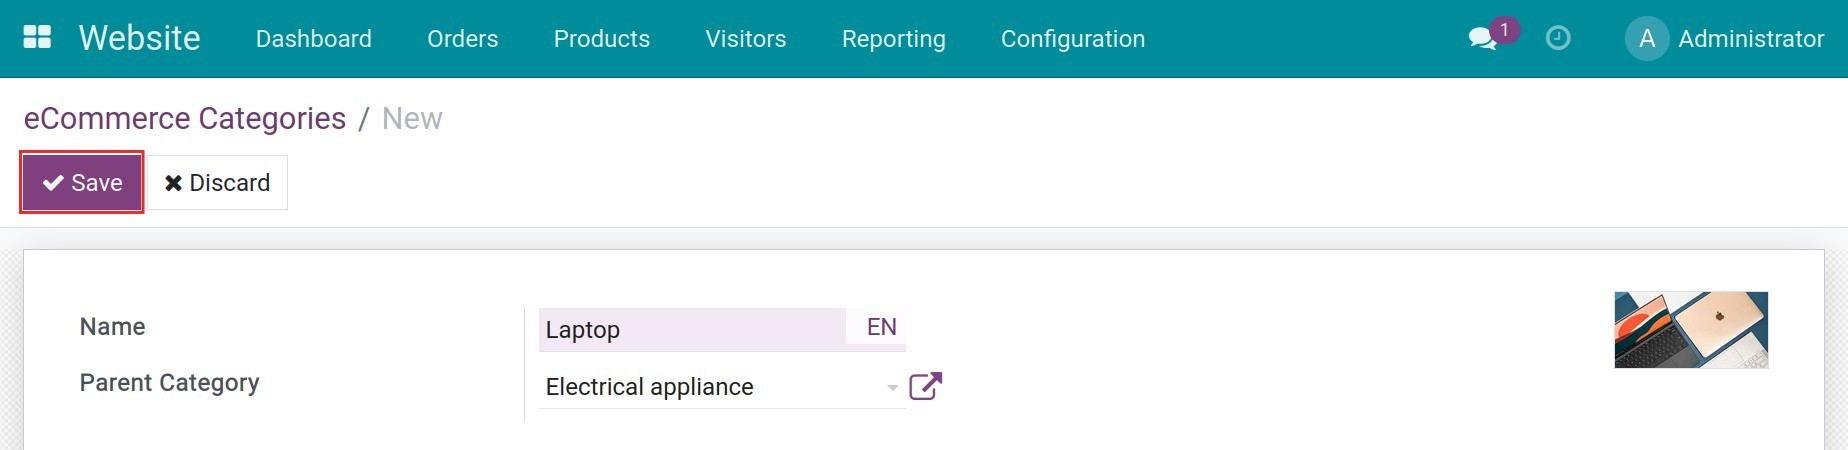
Next, hit on the Create button to create a new eCommerce Category.

Input information, then press Save.
To select which products belong to which categories, you navigate to Website > Products > Products. Select the product you want to configure, the product HP Laptop for instance.

In the product view, head to the Sales tab, and select the eCommerce categories at the Categories field.
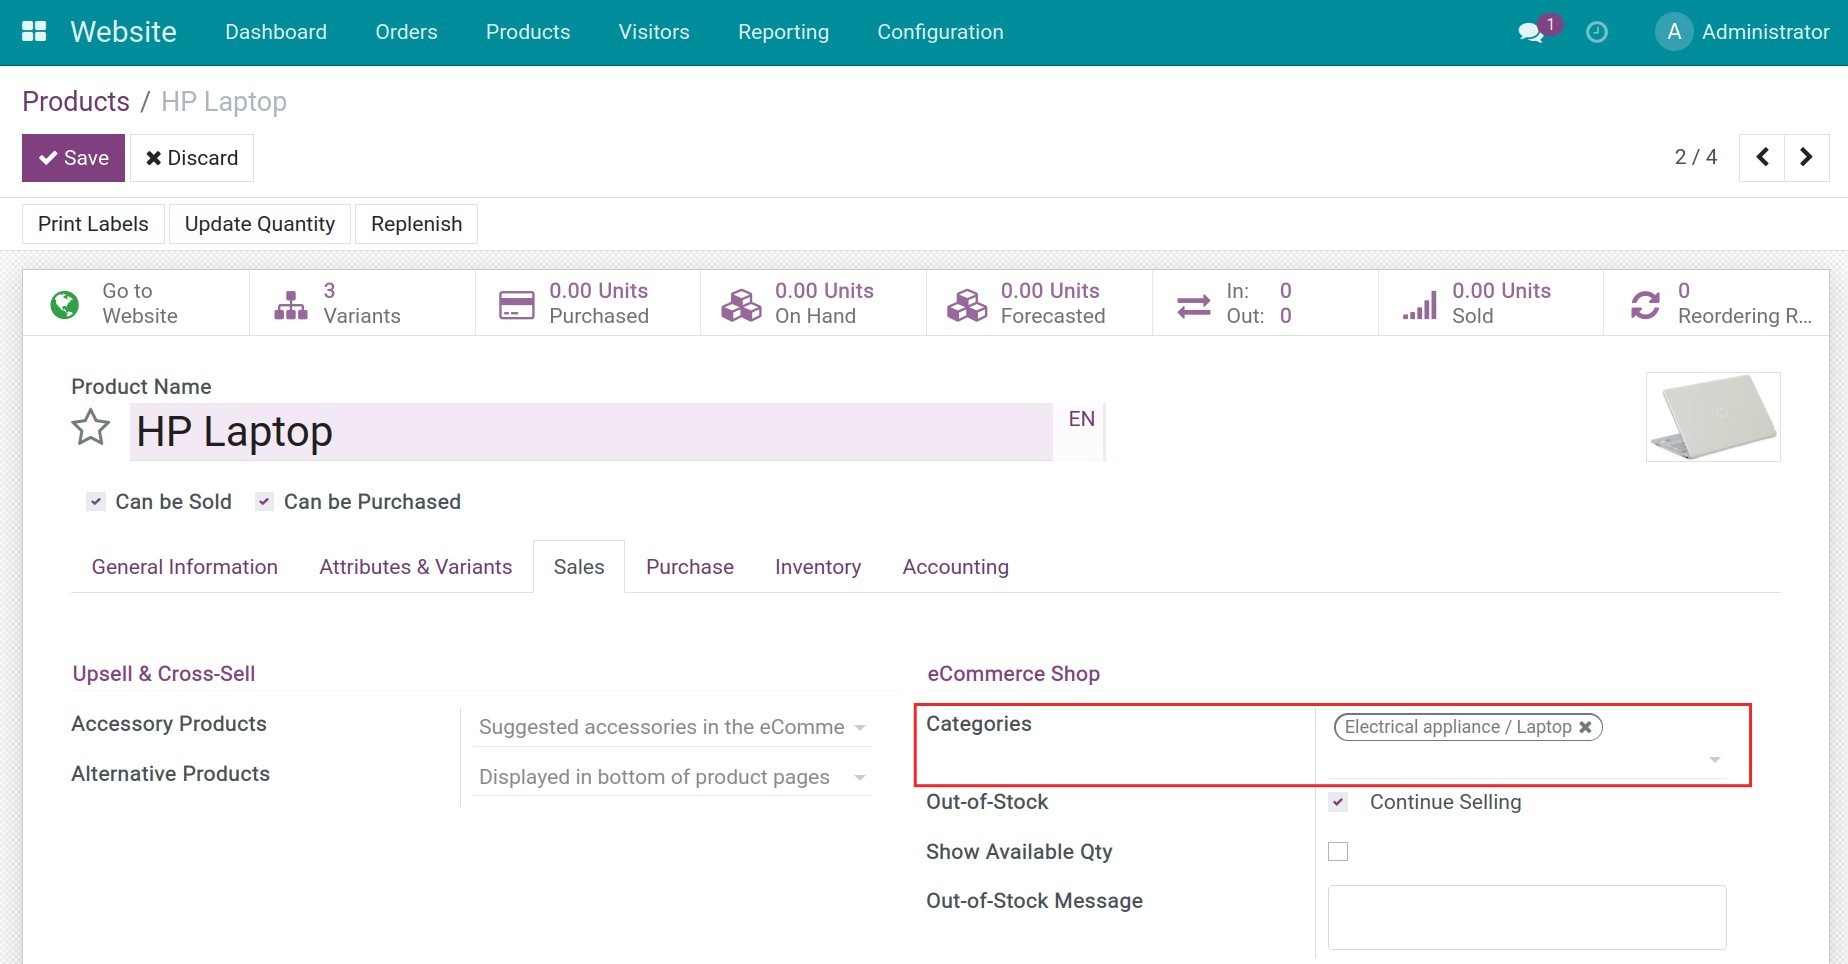
Click on the Save button to apply the setting.
You continue to do the same for all products you want to install.
Enable eCommerce categories feature
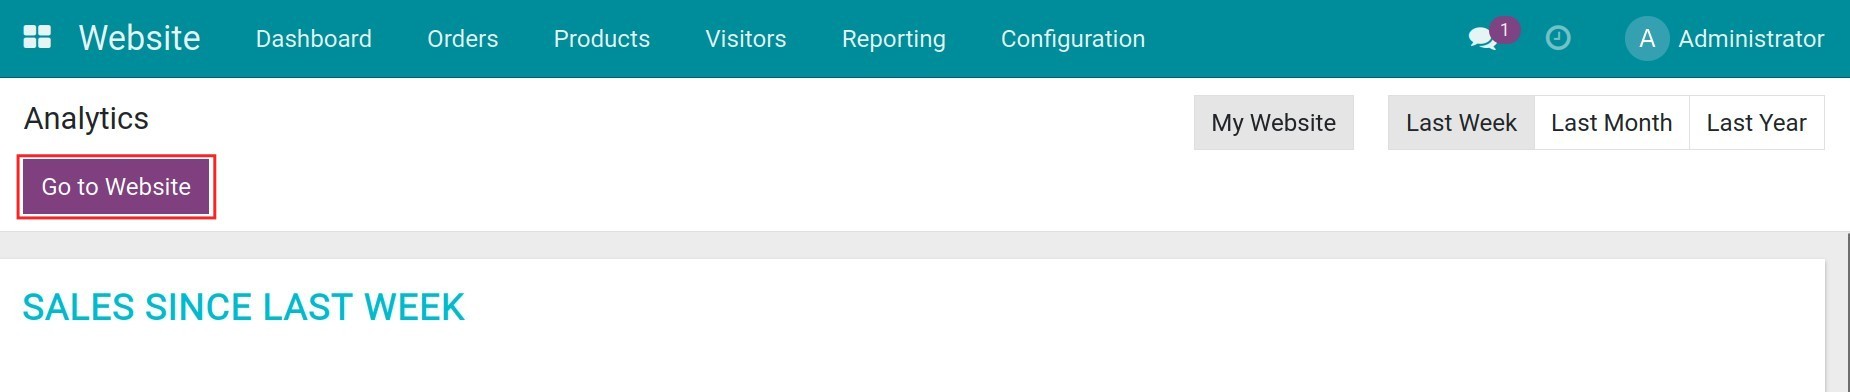
You navigate to the Website module, then click on the Go to Website button.
At the Shop view, you hit on the Customize menu, then activate the eCommerce Categories feature.
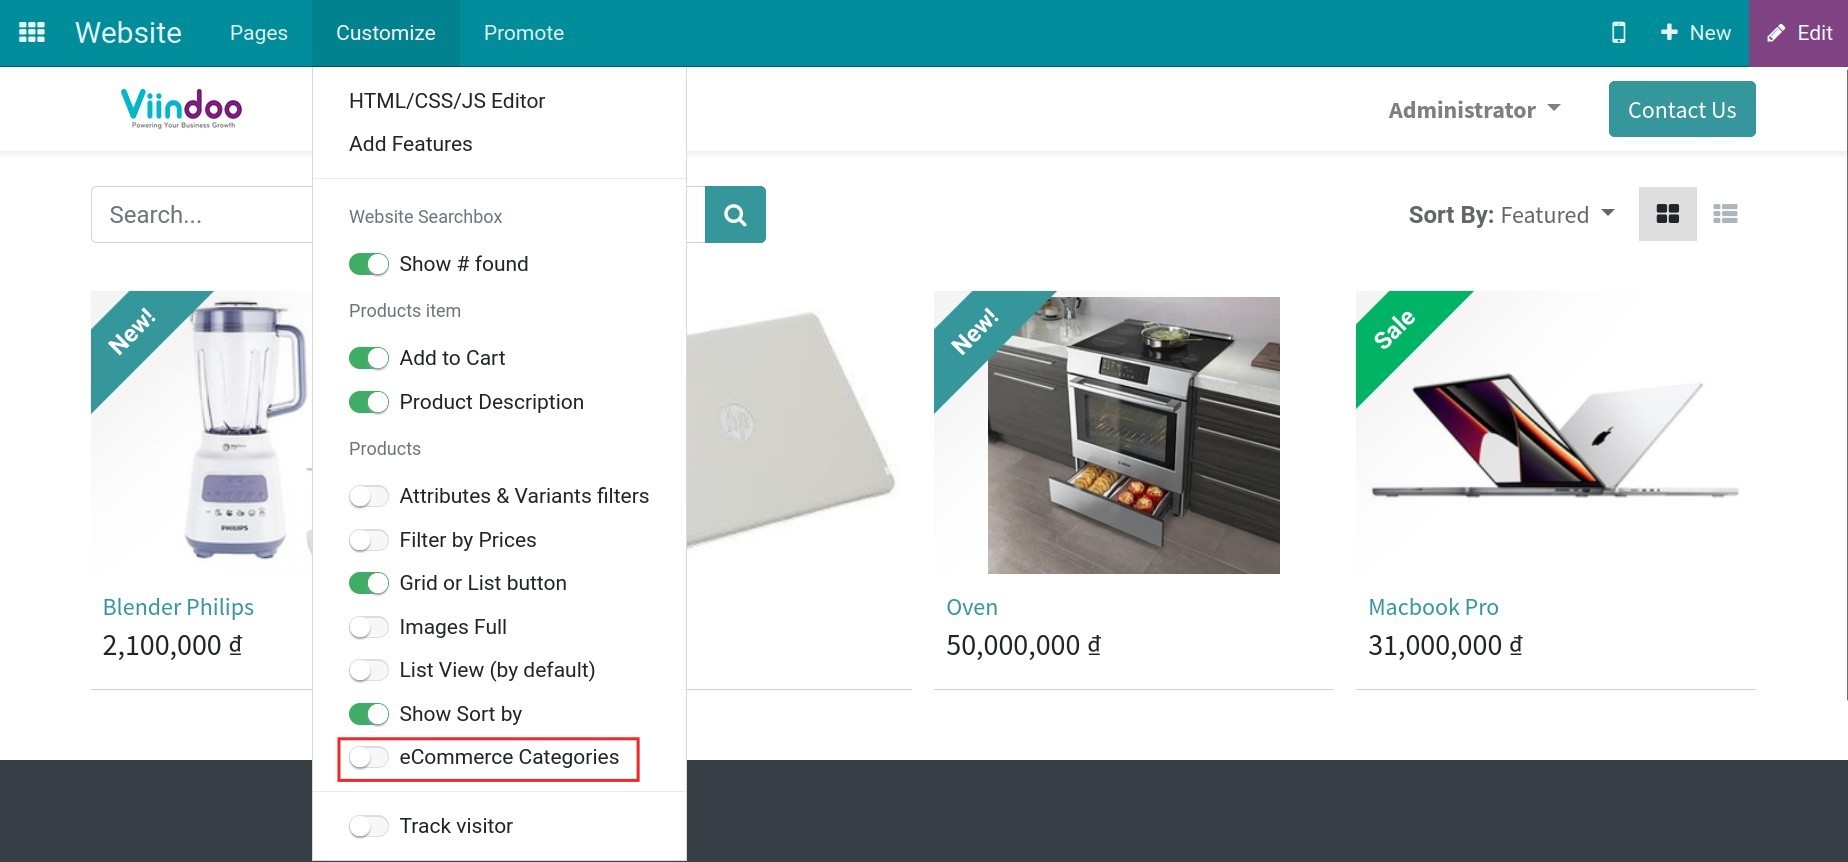
A list of eCommerce categories will appear on the left side of the screen and allow selection.

How to use eCommerce categories
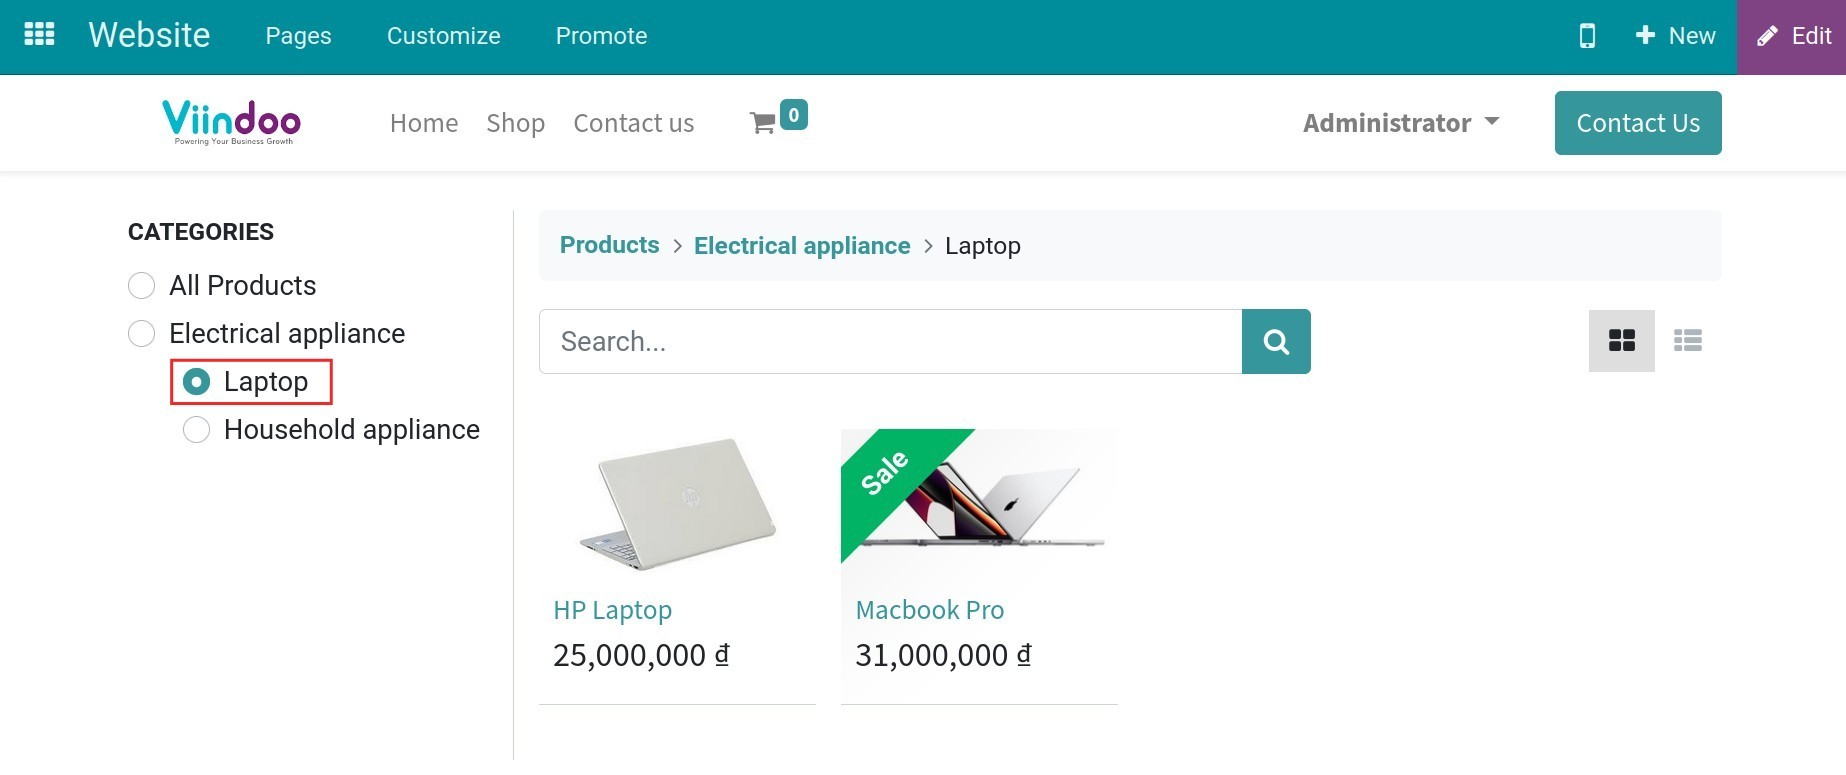
When clicking on each category, the system will display all products belonging to that category.
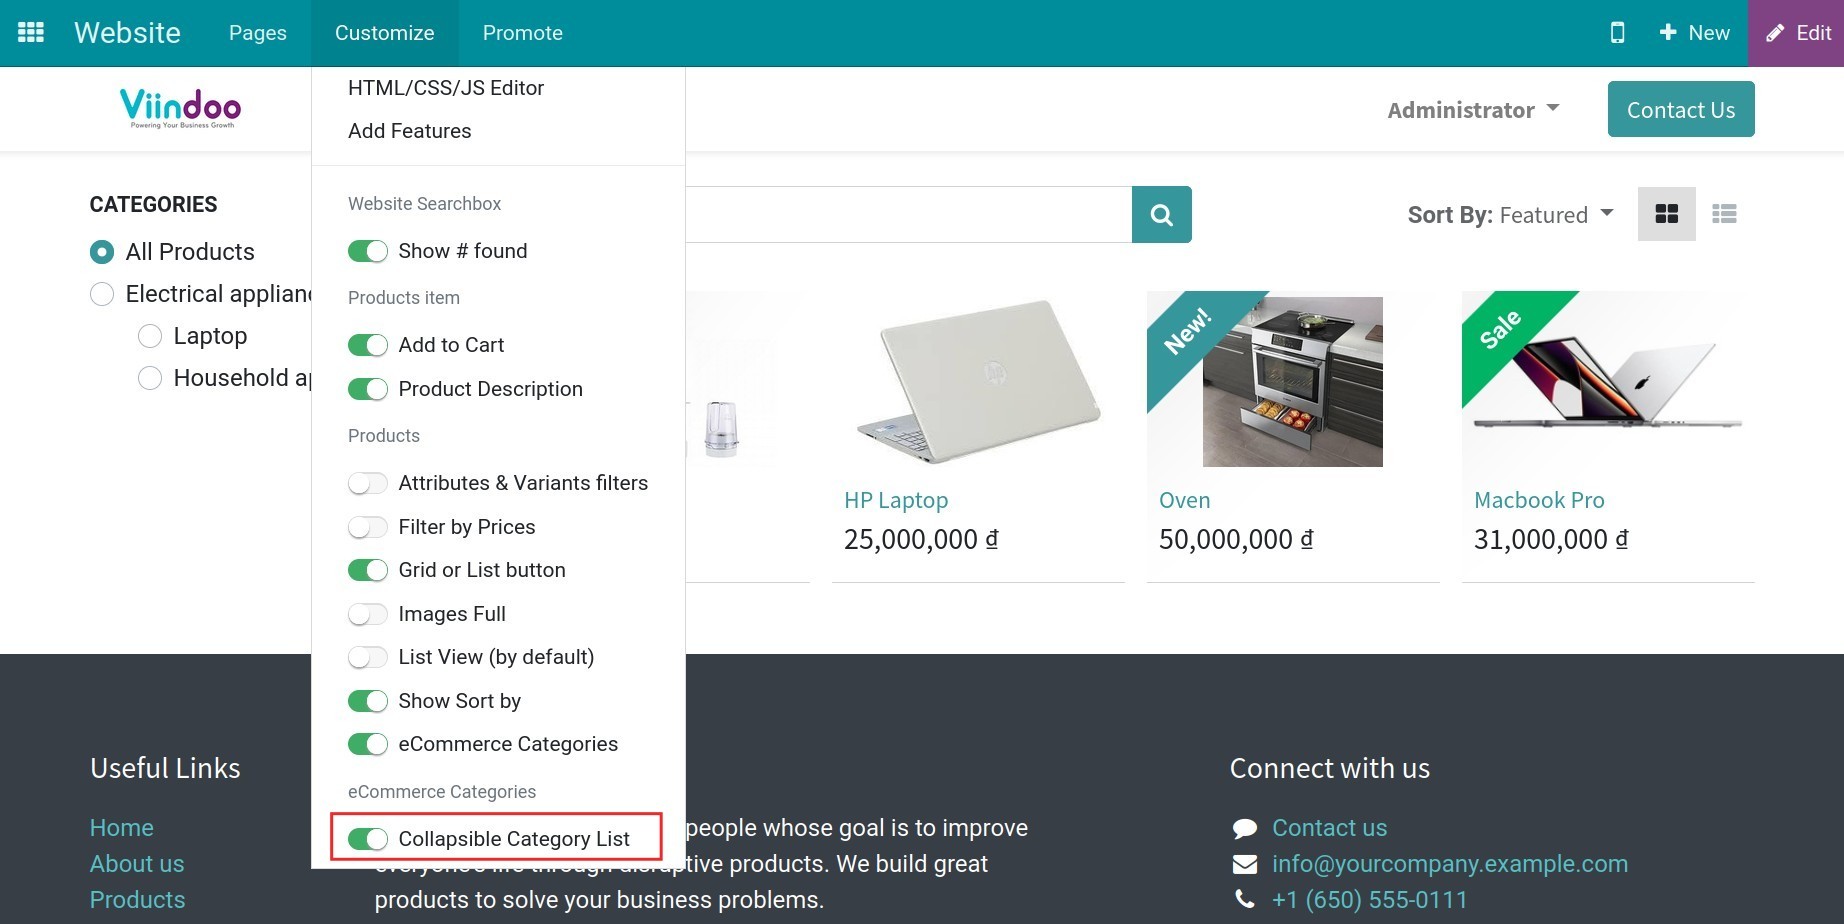
In addition, Viindoo eCommerce system provides the Collapsible Category List feature.
At the Customize menu, you enable the Collapsible Category List feature.
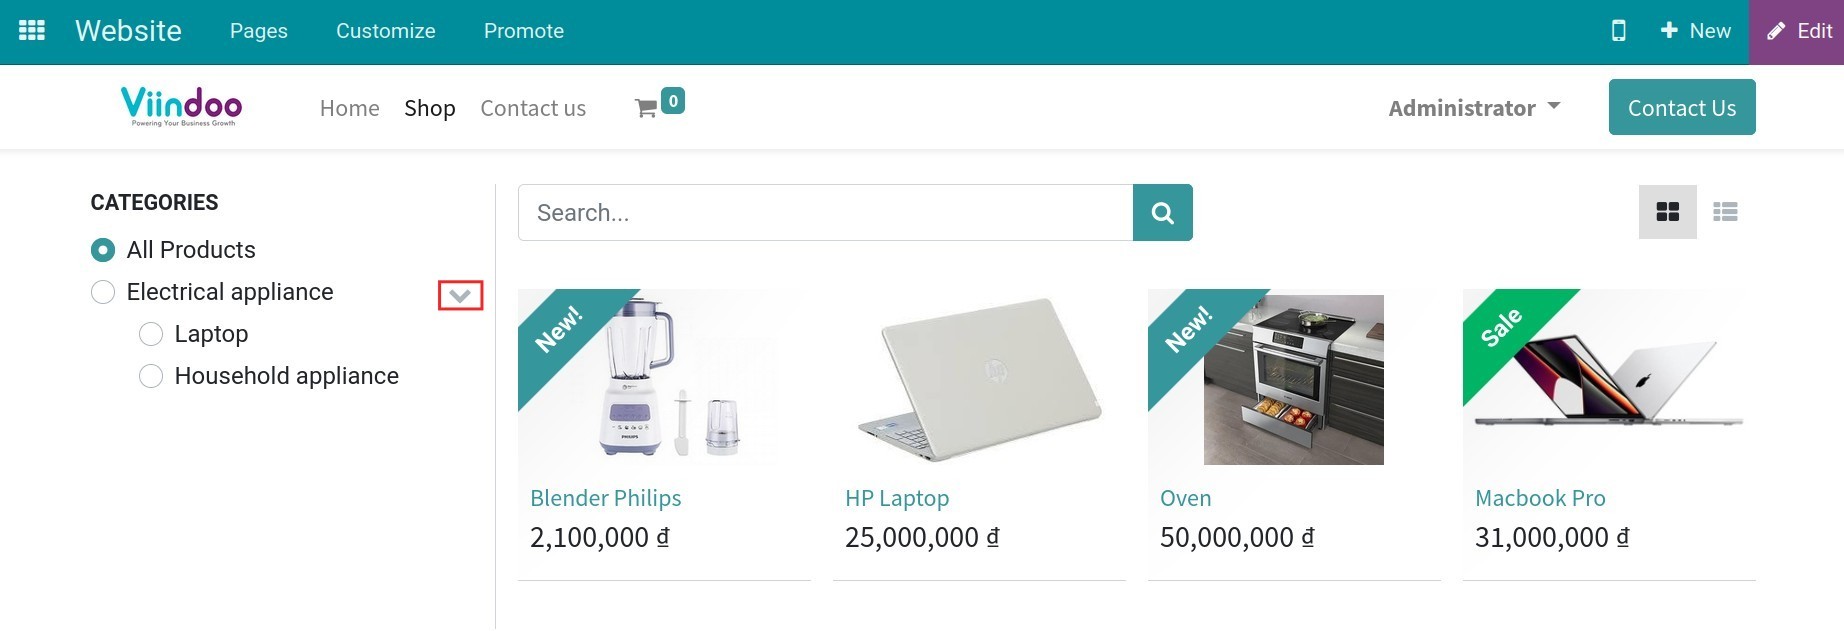
With this feature, you can collapse the eCommerce categories or open them to see the details of the products belonging to each of these categories.
See also
Related articles
Optional modules