How to configure Email Templates in Viindoo
Requirements
This tutorial requires the installation of the Viindoo all-in-one enterprise management system.
The email template is often used to send auto-notifications to:
Employees: Notify the related task when there are changes, reminders, or when someone sends a message, etc.
Partners: Notify when they receive quotations, confirm quotations, or changes in their related document, the payment due date, registration, etc, help to improve partner experience with the enterprise’s service.
Candidates: Notify when the profile is reviewed, between the interviewing stages, when passing/failing the interview, etc.
You only need to create an email template as the following instructions, the system will auto-fill the required information to the email when you send it. To do it, navigate to Settings > Technical > Templates.

Note
To see the Technical menu, you need to activate the developer mode.
Here, you can see the list of existing email templates. Press Create to create a new email template.

General Information
Name: Enter the template email’s name.
Applies to: Choose the object that uses this template.
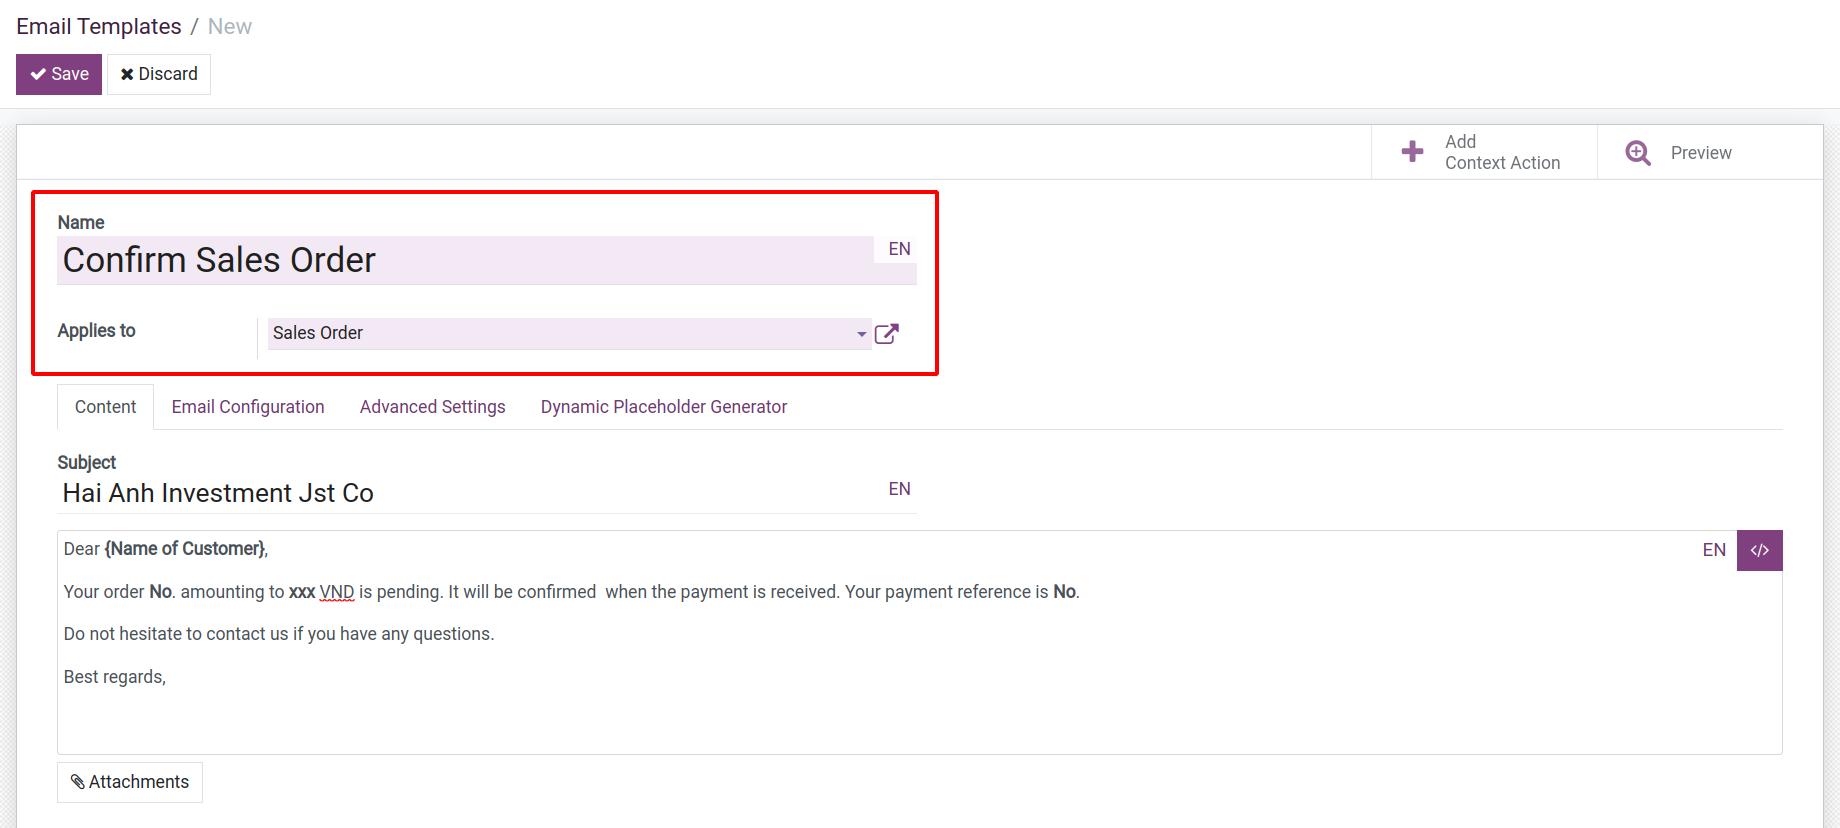
Content Tab
Create the content of email templates
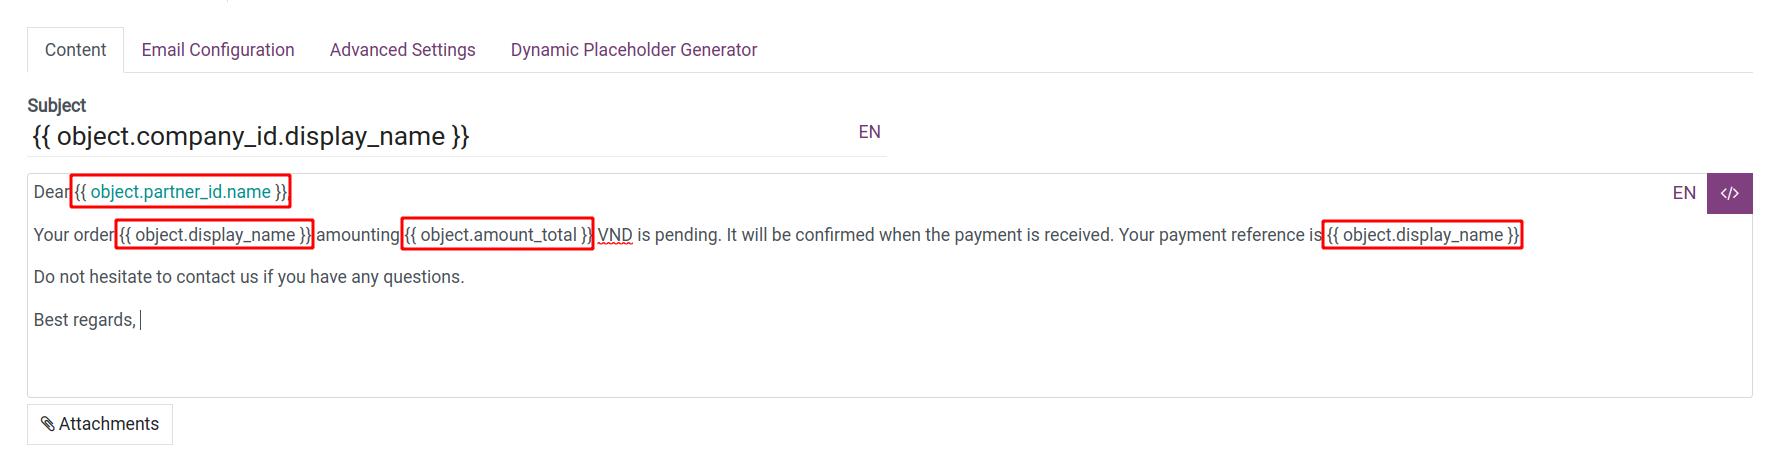
Subject: Enter the email’s subject.
Email content: Viindoo system supports you in editing the content of email templates with the toolbar. You can use it to edit text, style, add attachments, etc. The toolbar is activated when you click on a character or type “/” on the text editor.
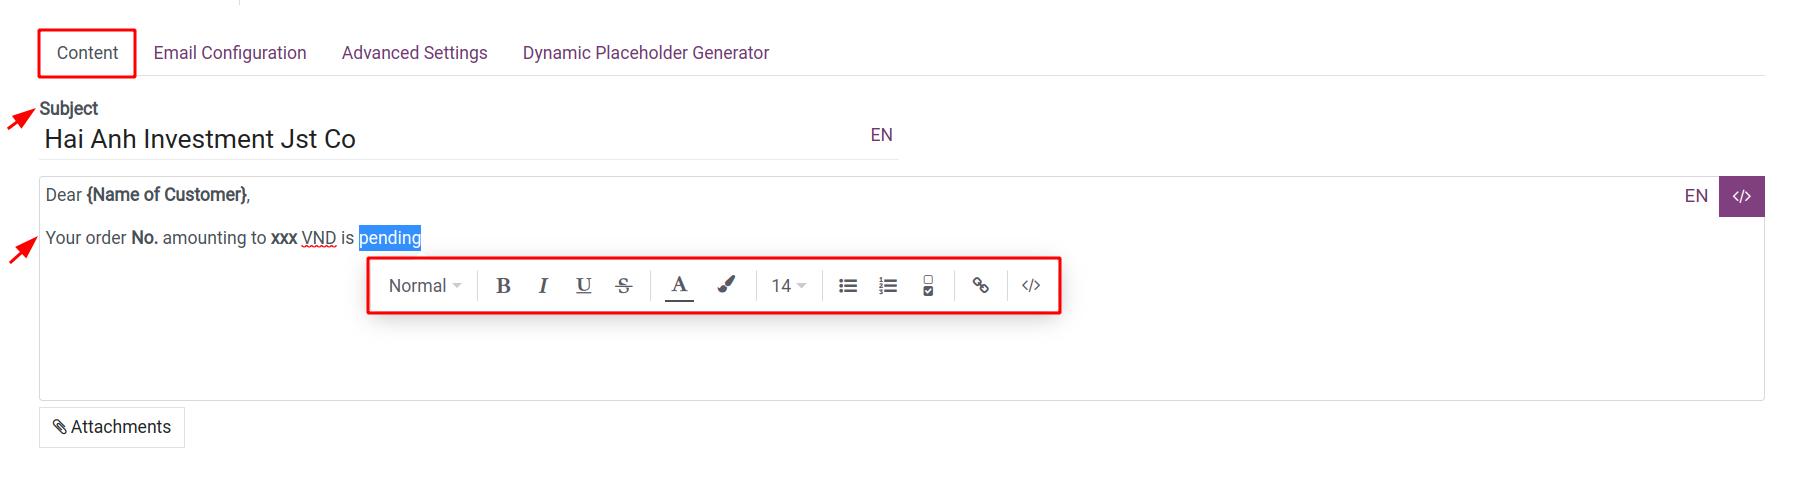
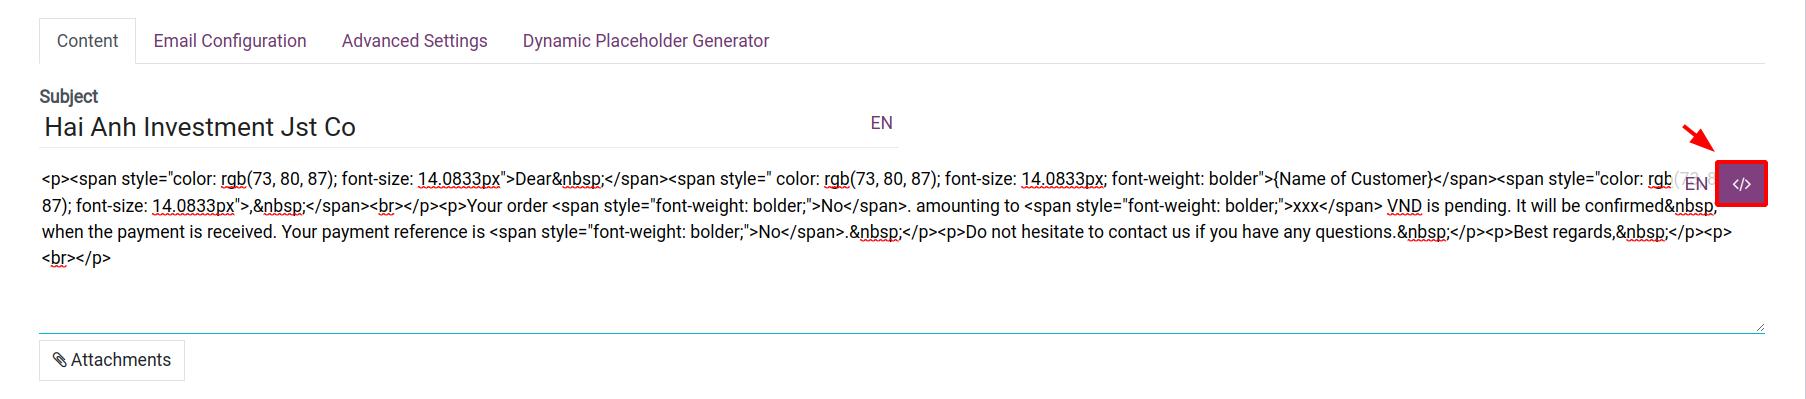
Moreover, you can use HTML/CSS to design an email template by switching to the Code view.
Tip
In the subject and body of email templates, you can use placeholders for the dynamic data such as name, emails, the sales orders’ number, the total amount of sales orders/invoices, etc. To choose the accurate placeholder, you can follow the instructions for creating the placeholders.
Create the translation for content
In the email template view, press the translating icon on the subject and the content:
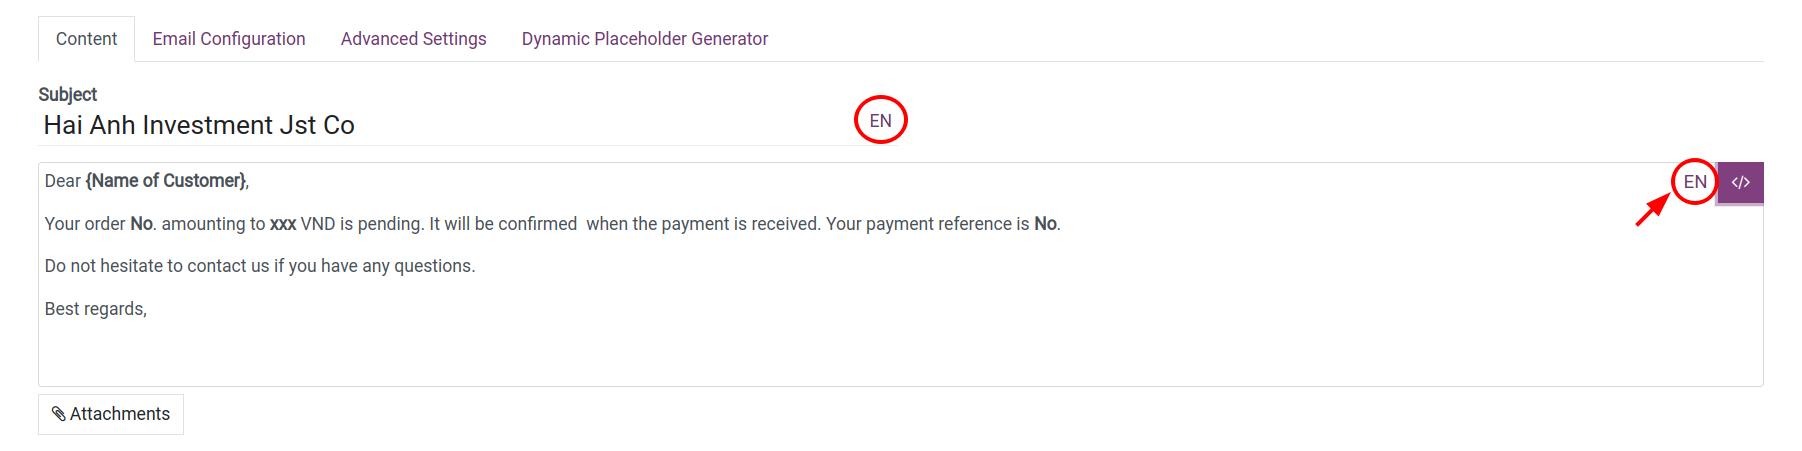
Enter the translations according to the corresponding languages.
Note
Based on the contact’s language setting, the system will send the email in the corresponding language.
Tab Email Configuration
Here you can do the setup for sending/receiving email:
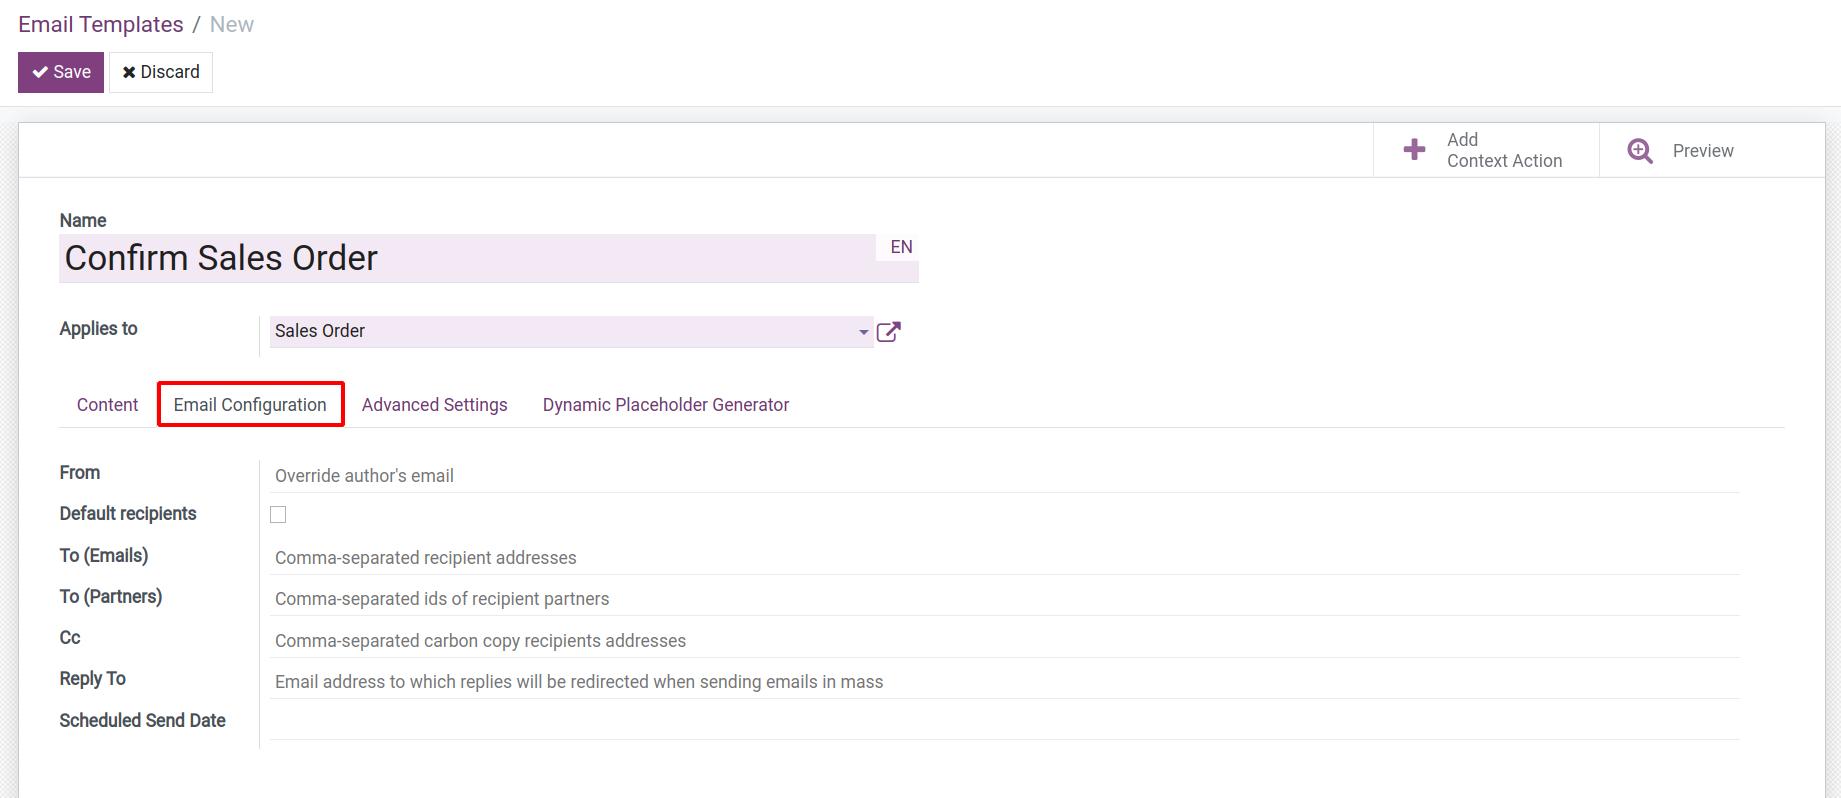
From: The sender’s email address, if not set, the default value is the author’s email alias if configured or the email address of your company.
Default recipient: Check this box if you want to send emails to the default recipient of the record such as the vendor in the purchase order, the customer in the invoices, etc.
To (Email): The recipients’ email addresses. If you enter a specific email address here, any emails generated from this template will have this email address by default on the recipient’s list.
To (Partners): The recipient’s partner that already created in the system. Enter here the IDs of the recipient partners to identify. Same with the To (Email) field, if you enter a specific ID here, any email generated from this template will have the email address of the partner that has this ID by default on the recipient’s list.
Note
The ID of partners is the number to identify that partner. You can see it at the address bar when you are at the specific partner’s form view.
![ID of partners]()
CC: The email addresses of the related parties.
Reply-To: The preferred response address.
Scheduled Send Date: The scheduled date of sending an email. If set, the email will be sent after the date. If not, it will be sent as soon as possible.

Tip
Use the comma to separate each email address or ID on the lists.
You also can use the placeholders for these fields to query the dynamic data.
Advanced Settings Tab
On this tab, you can do some settings for this template such as:
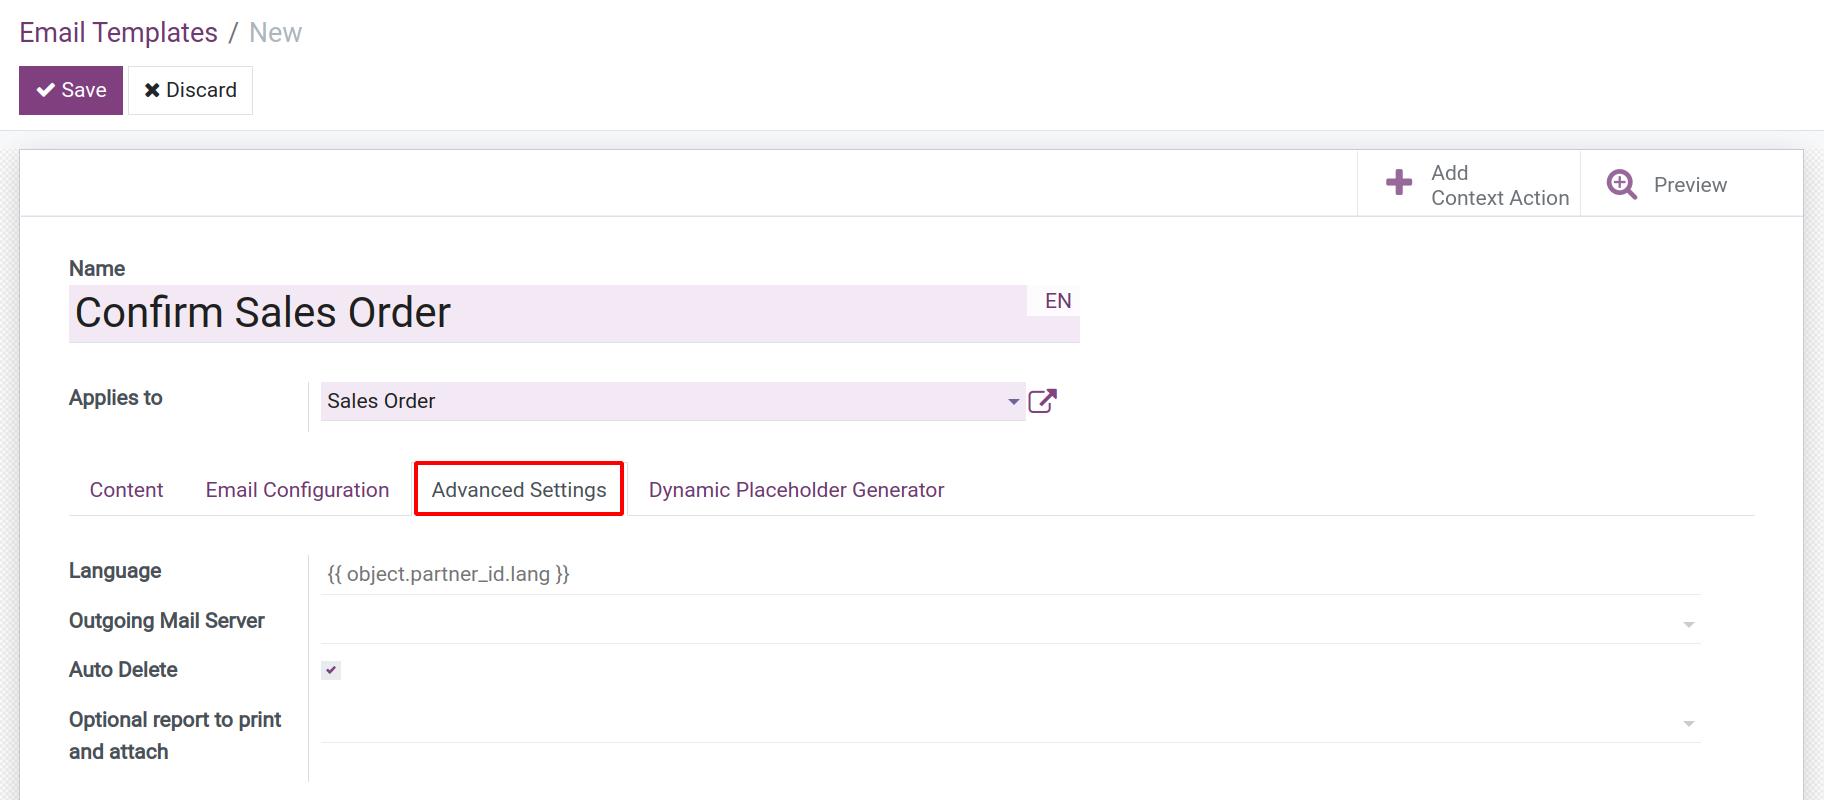
Language: Optional translation language (ISO code) to select when sending out the email. If not set, the English language will be used. You can prefer to use the placeholder expression such as {{object.partner_id.lang}} for using the appropriate language for each object.
Outgoing Mail Server: The preferred server for outgoing email. If not set, the highest priority one will be used.
Auto Delete: Check this box if you want to auto-delete the email after sending it.
Optional report to print and attach: Set up and configure the attach file of this template.
Dynamic Placeholder Generator Tab
A placeholder is a dynamic variable, used to query data from the system’s data store. Anywhere needs to query data, you can use a placeholder such as the list of recipients, the subject of this template, the customer’s name in the content, their email addresses, the total amount of the records, etc.
To generate a placeholder expression, you enter the needed information as follow:
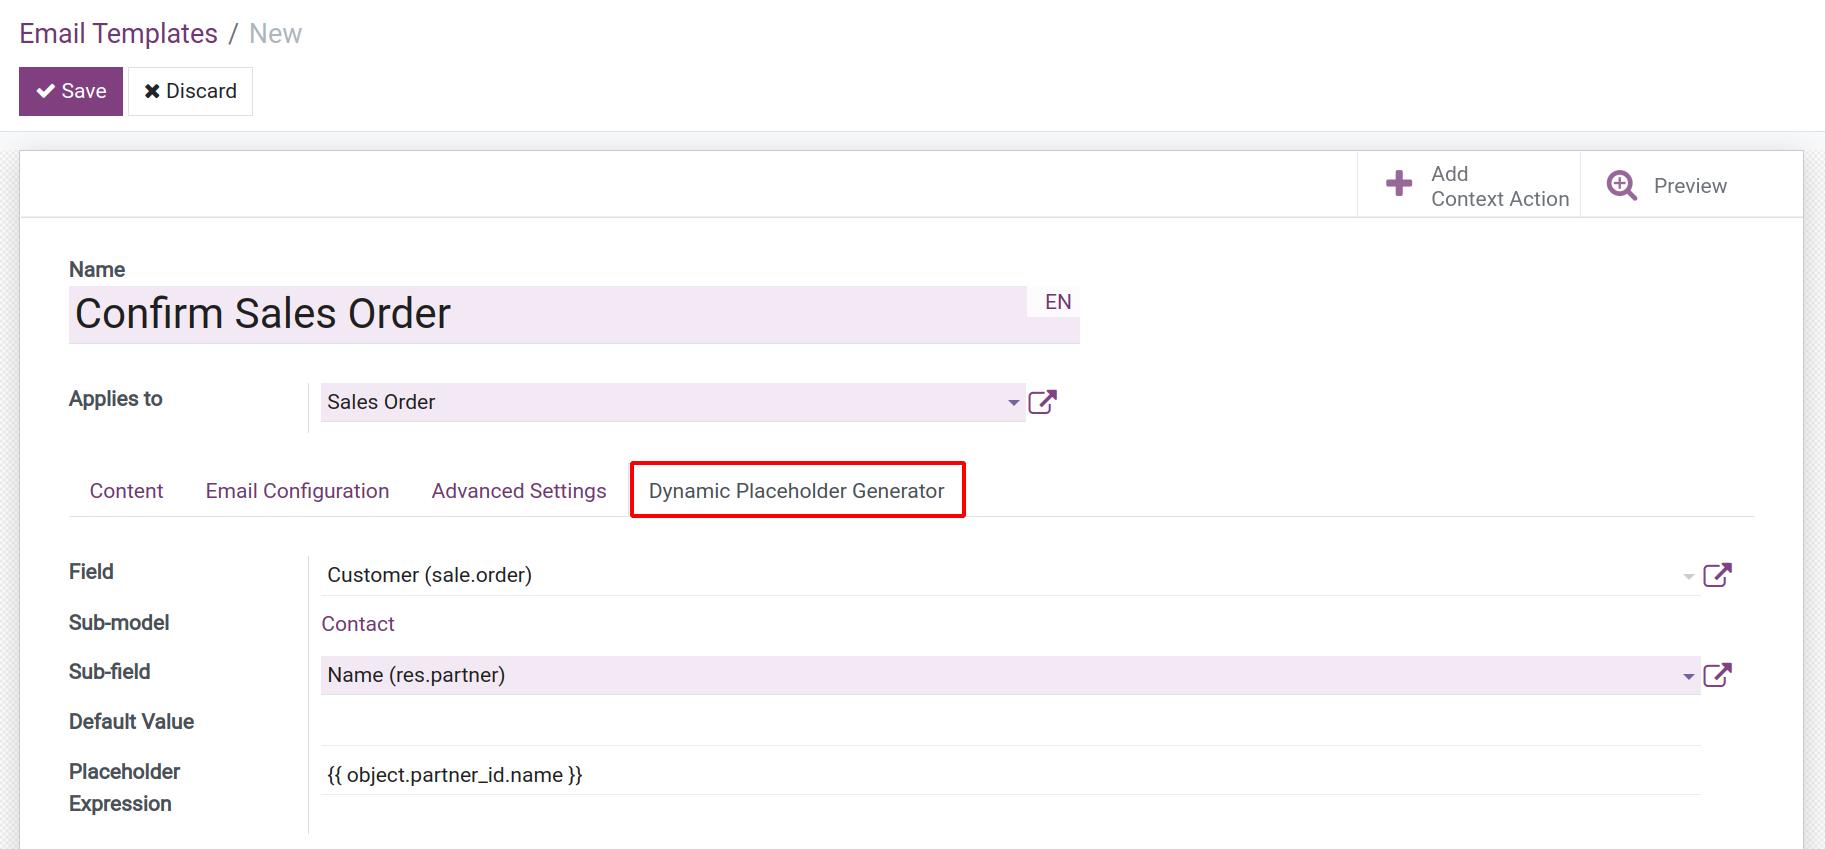
Field: Choose the field that you want to generate a placeholder. Note that, this field will be based on the selected subject on the Apply to field.
Sub-model: If the above-chosen field has a relationship model, it will be shown here.
Sub-field: Choose the destination field.
Default Value: Optional value to use if the target field is empty.
Placeholder Expression: After you fill in the above fields, the system will generate a placeholder expression here. So you can copy and paste it for the desired data.
See also
Related articles:
Optional modules: