The status of the document
In Viindoo Documents app, you can see of document’s status here:
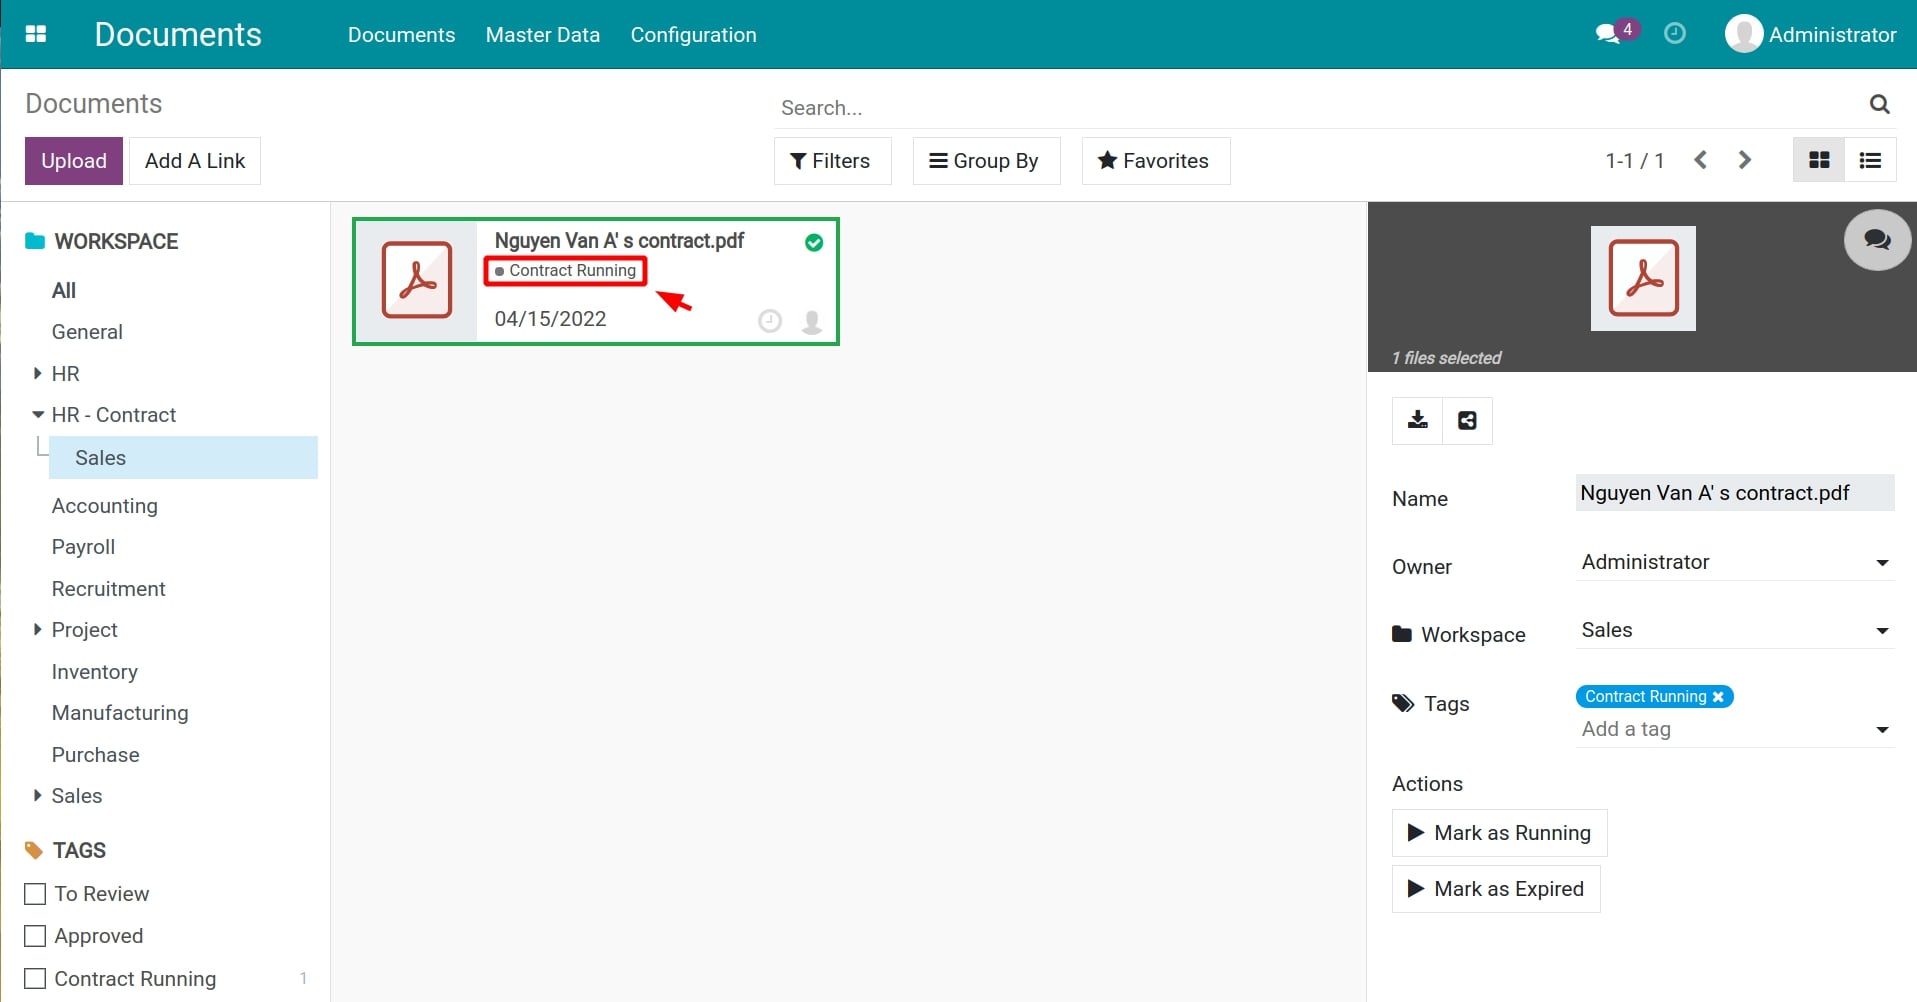
There are 2 ways to update the document’s status:
1st: Attach the status manually.
2nd: Auto-update the document’s status.
Requirements
This tutorial requires the installation of the following applications/modules:
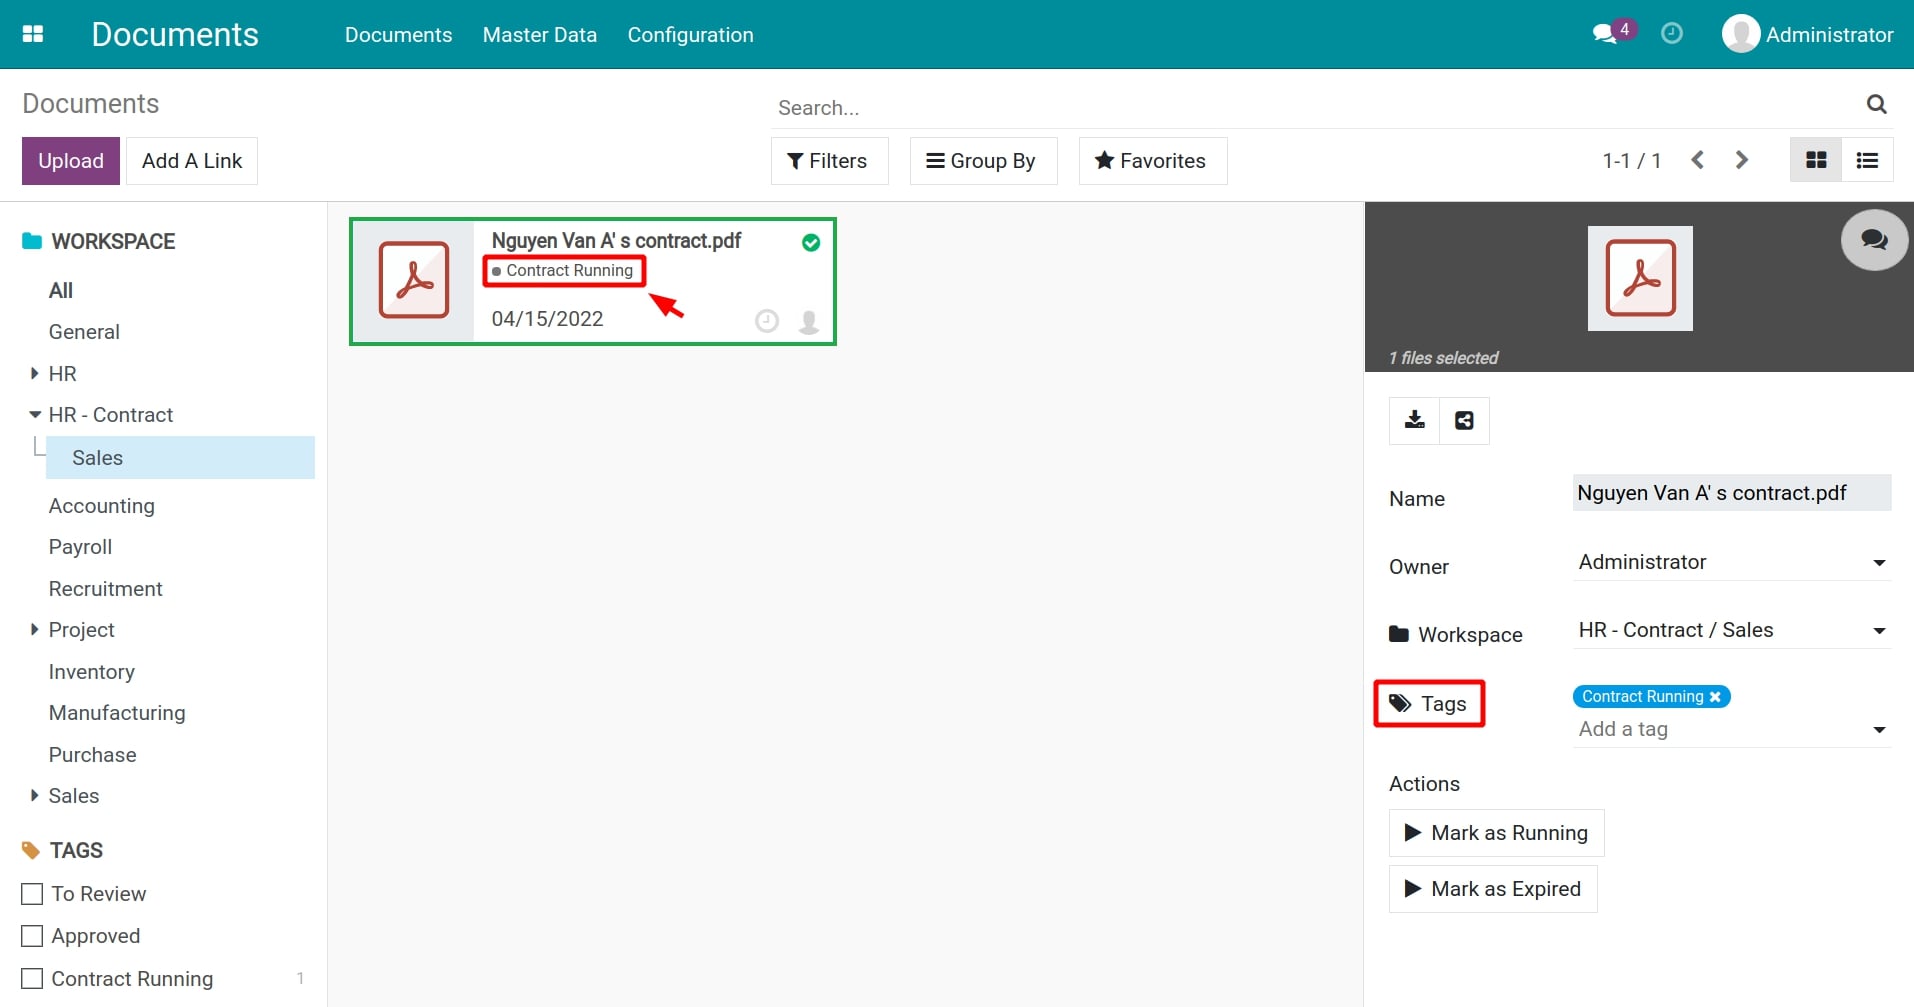
Attach document status manually
To attach document’s status manually, you need to create tag that have the same name as the document’s stages and add them to the Tags field in the document detail view.
Auto-update document status
To update the document’s status automatically, follow the steps below:
Step 01: set up actions.
Firstly, you need to set up actions by navigate to Documents > Configuration > Actions.
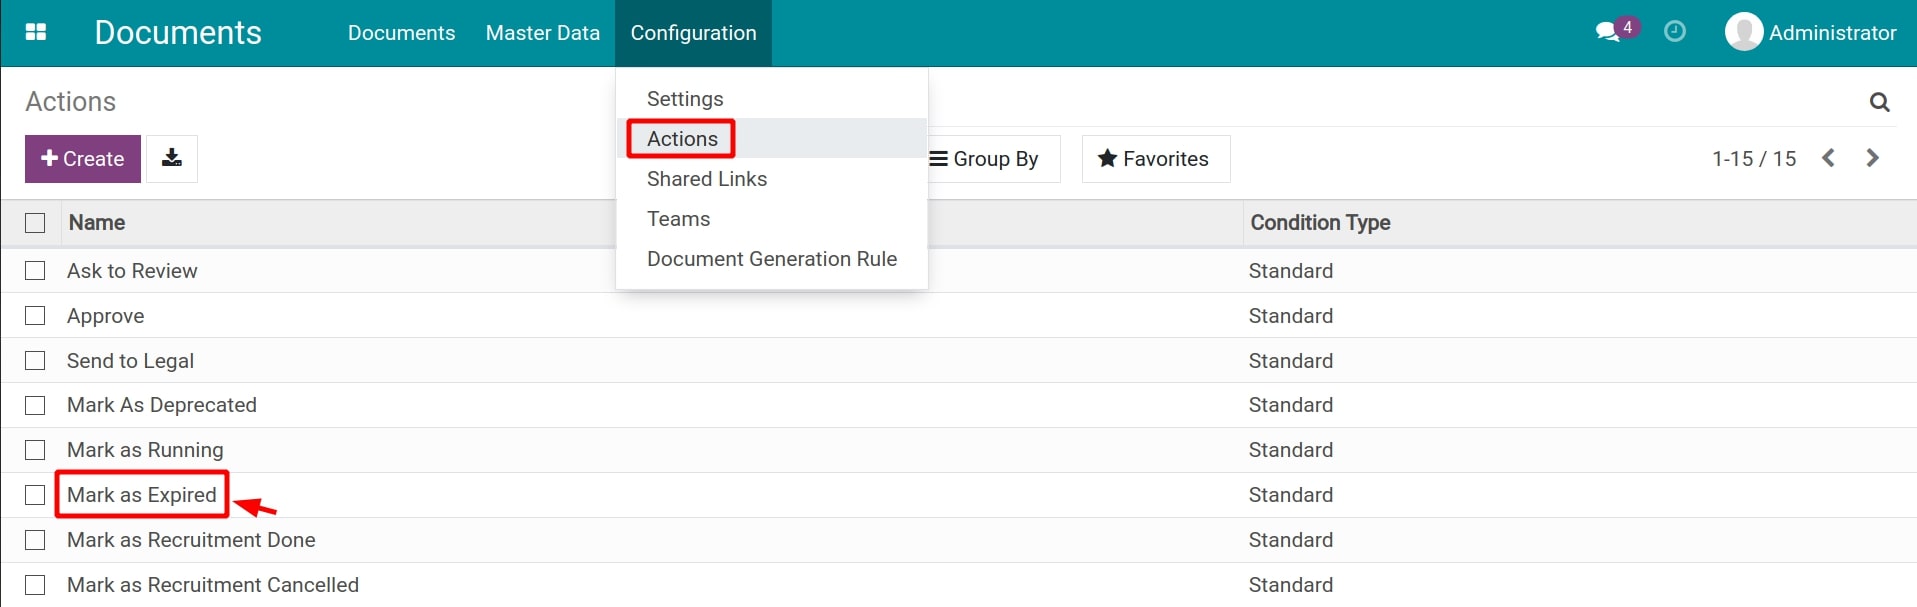
You can press Create to create a new action or select an existing action that needs to be set up.
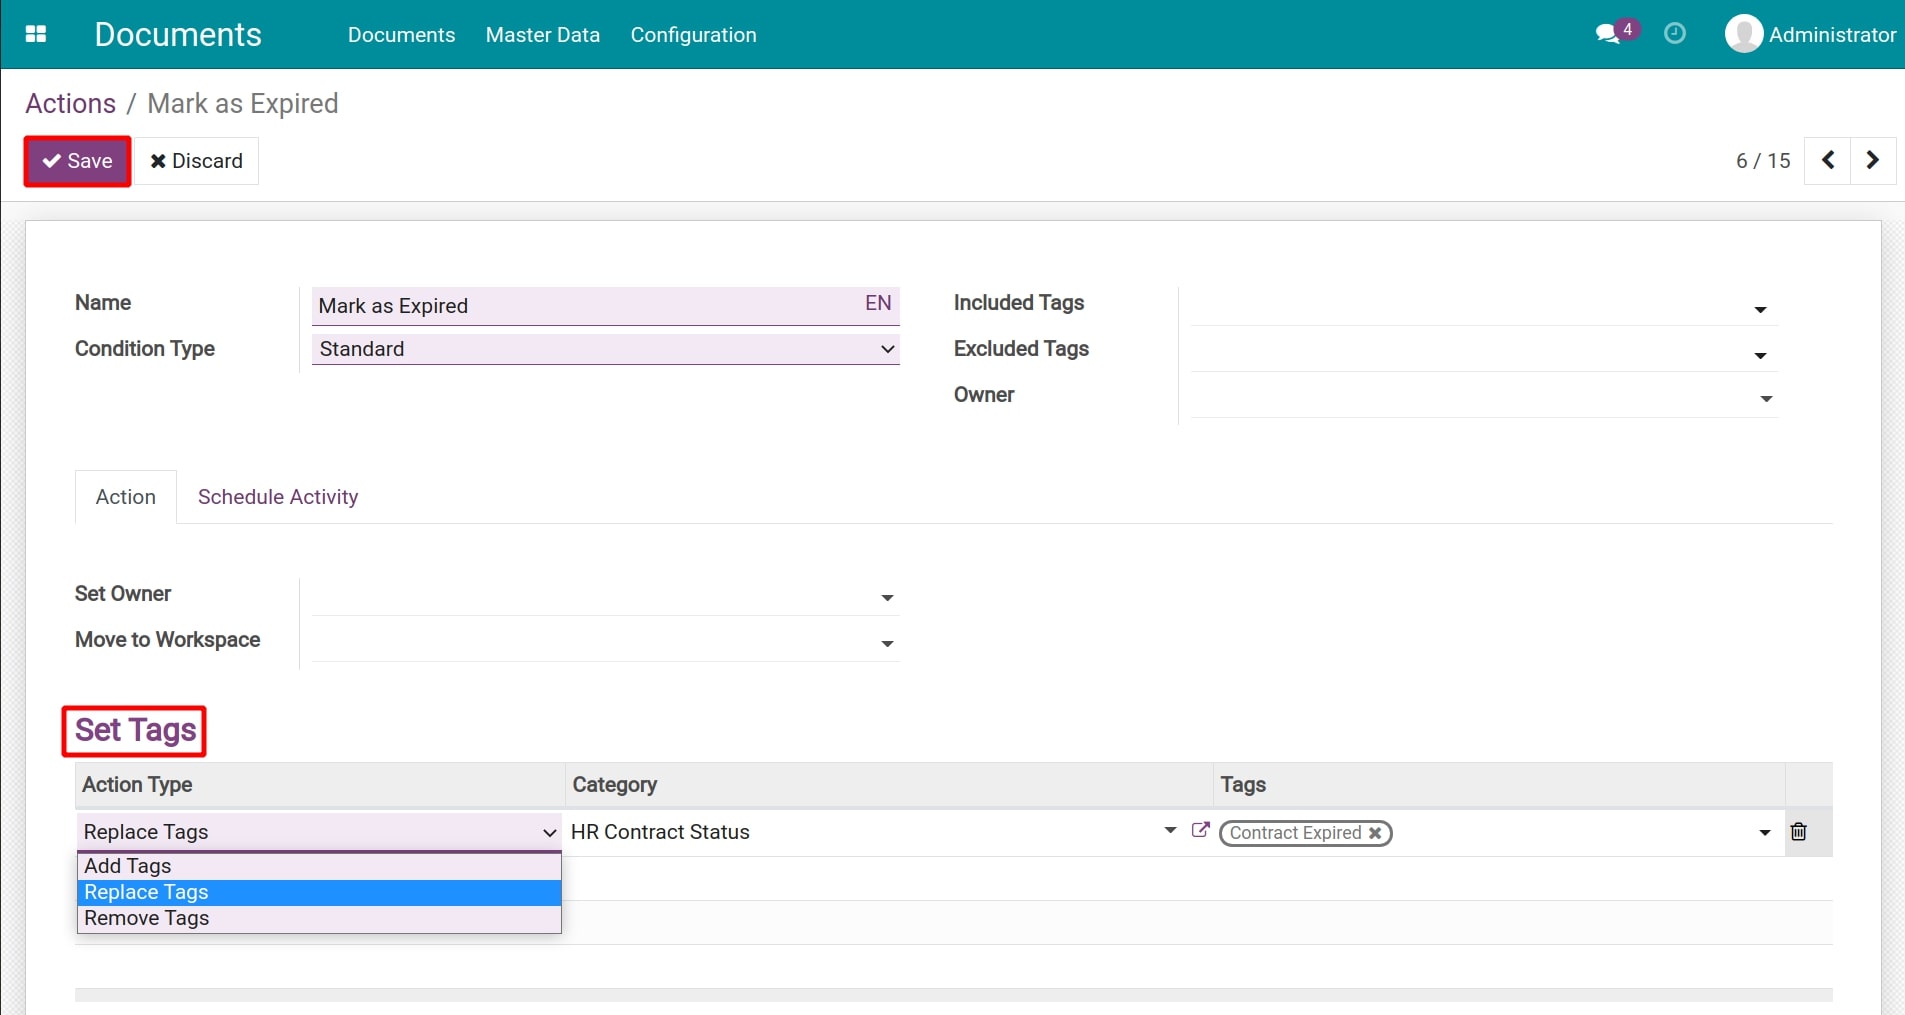
In this view, set up the information of the Set Tags section as follow:
Action Type: select one of the following action type:
Add Tags: Auto-add the selected tags when this action is activated on the uploaded document.
Replace Tags: Auto-remove the document’s current tag and replace it with this tag when this action is activated on the document.
Remove Tags: Remove this tag when this action is activated on the document.
Category: select the corresponding tag category for the document’s status.
Tags: select the corresponding tag for the document status.
After filling in the information, press Save to save the setting.
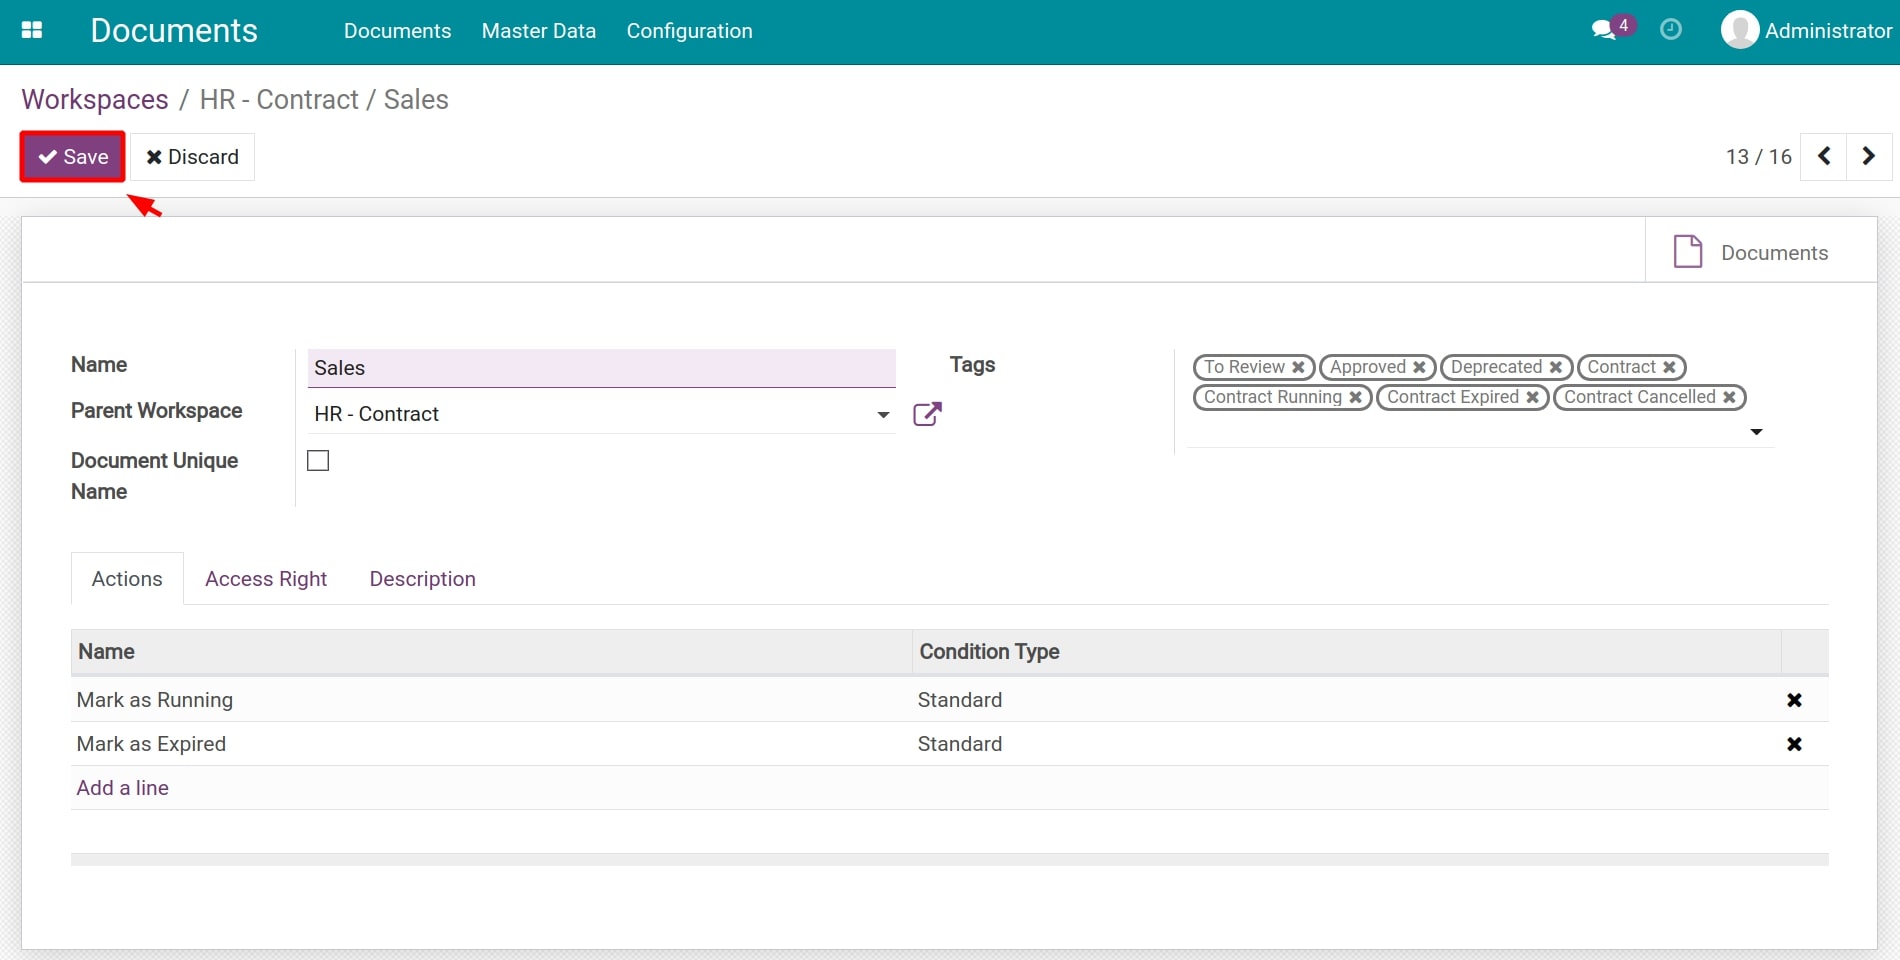
Step 02: attach the action to the document.
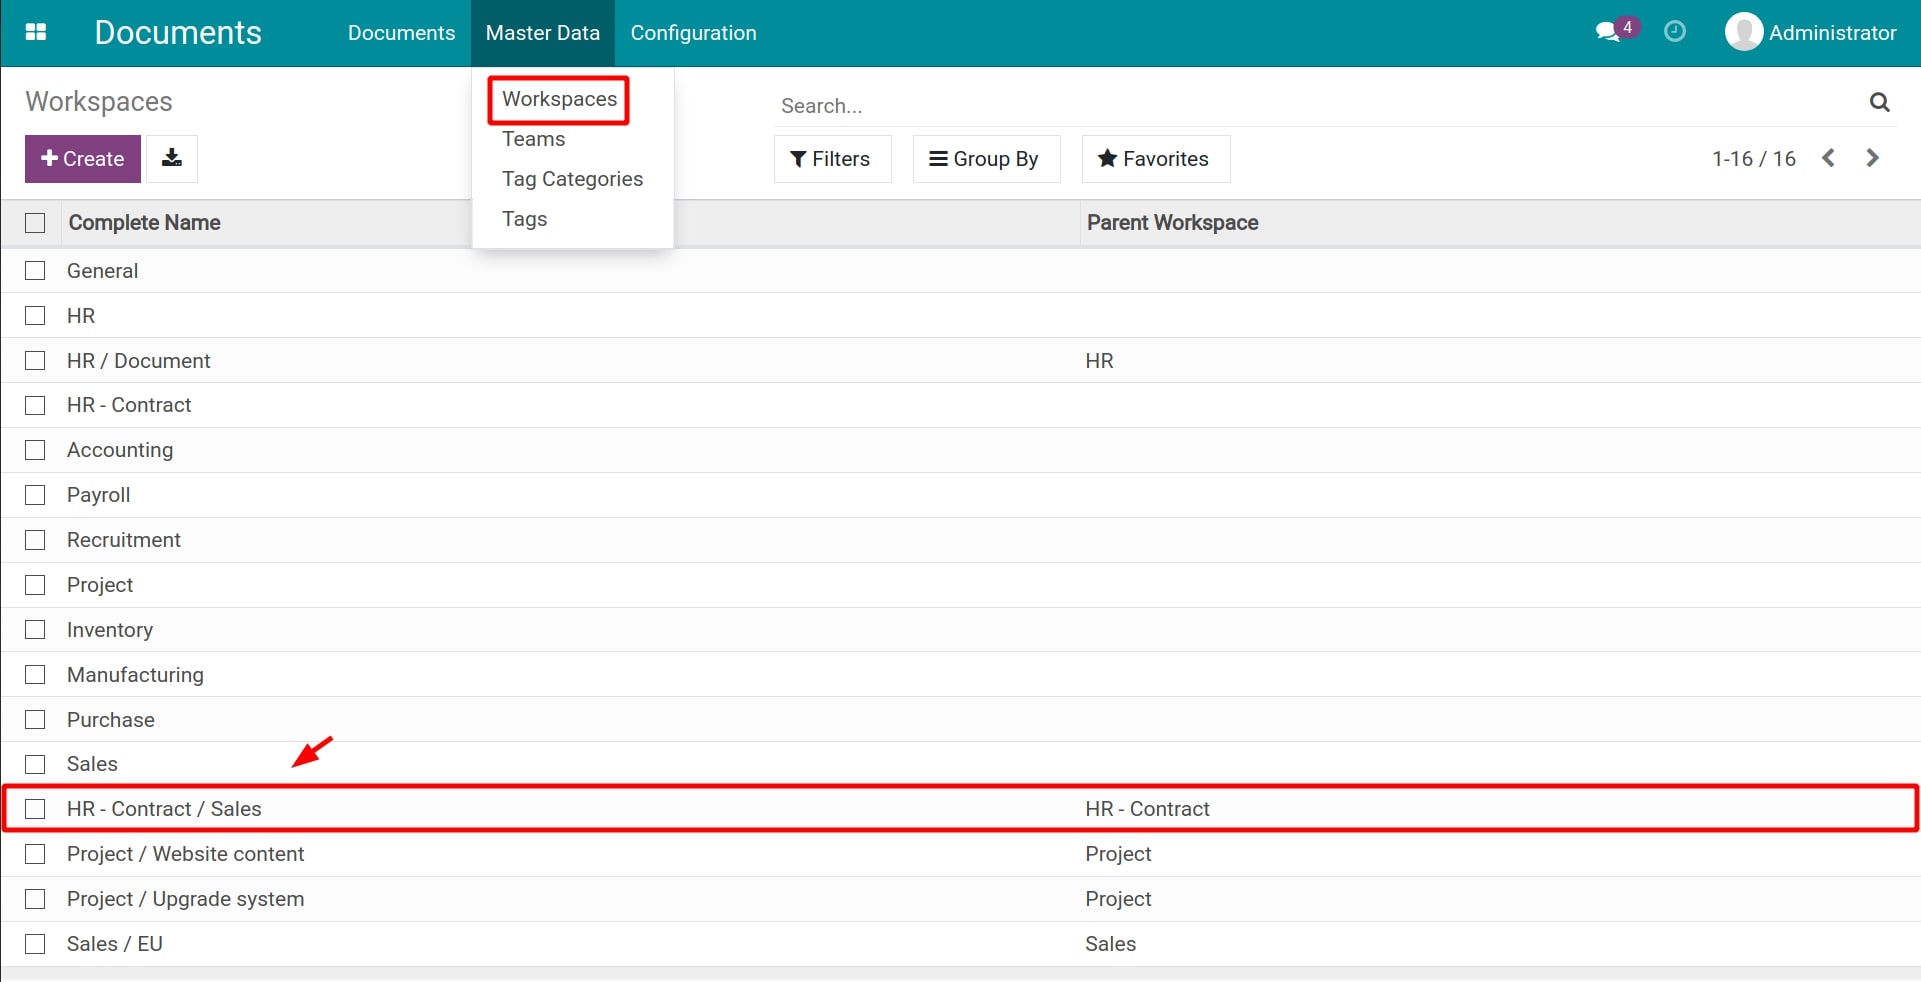
Navigate to Document > Master Data > Workspaces and select the workspace that has the document you want to set up.
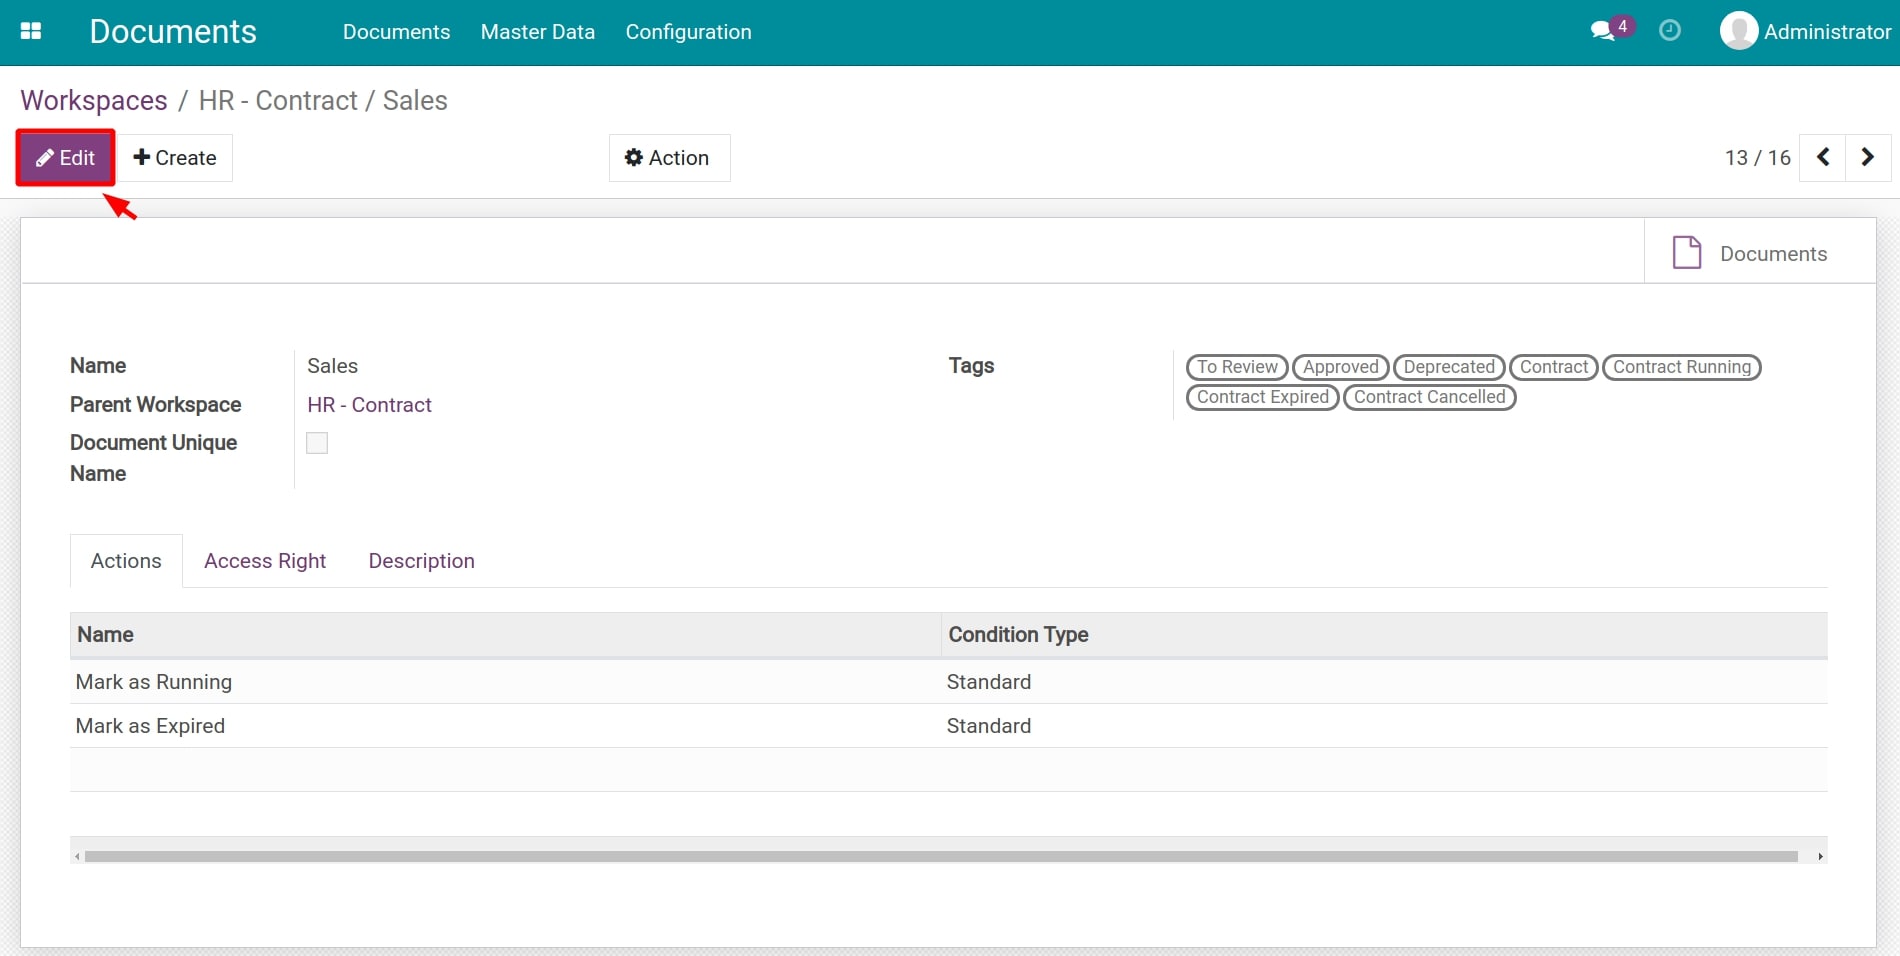
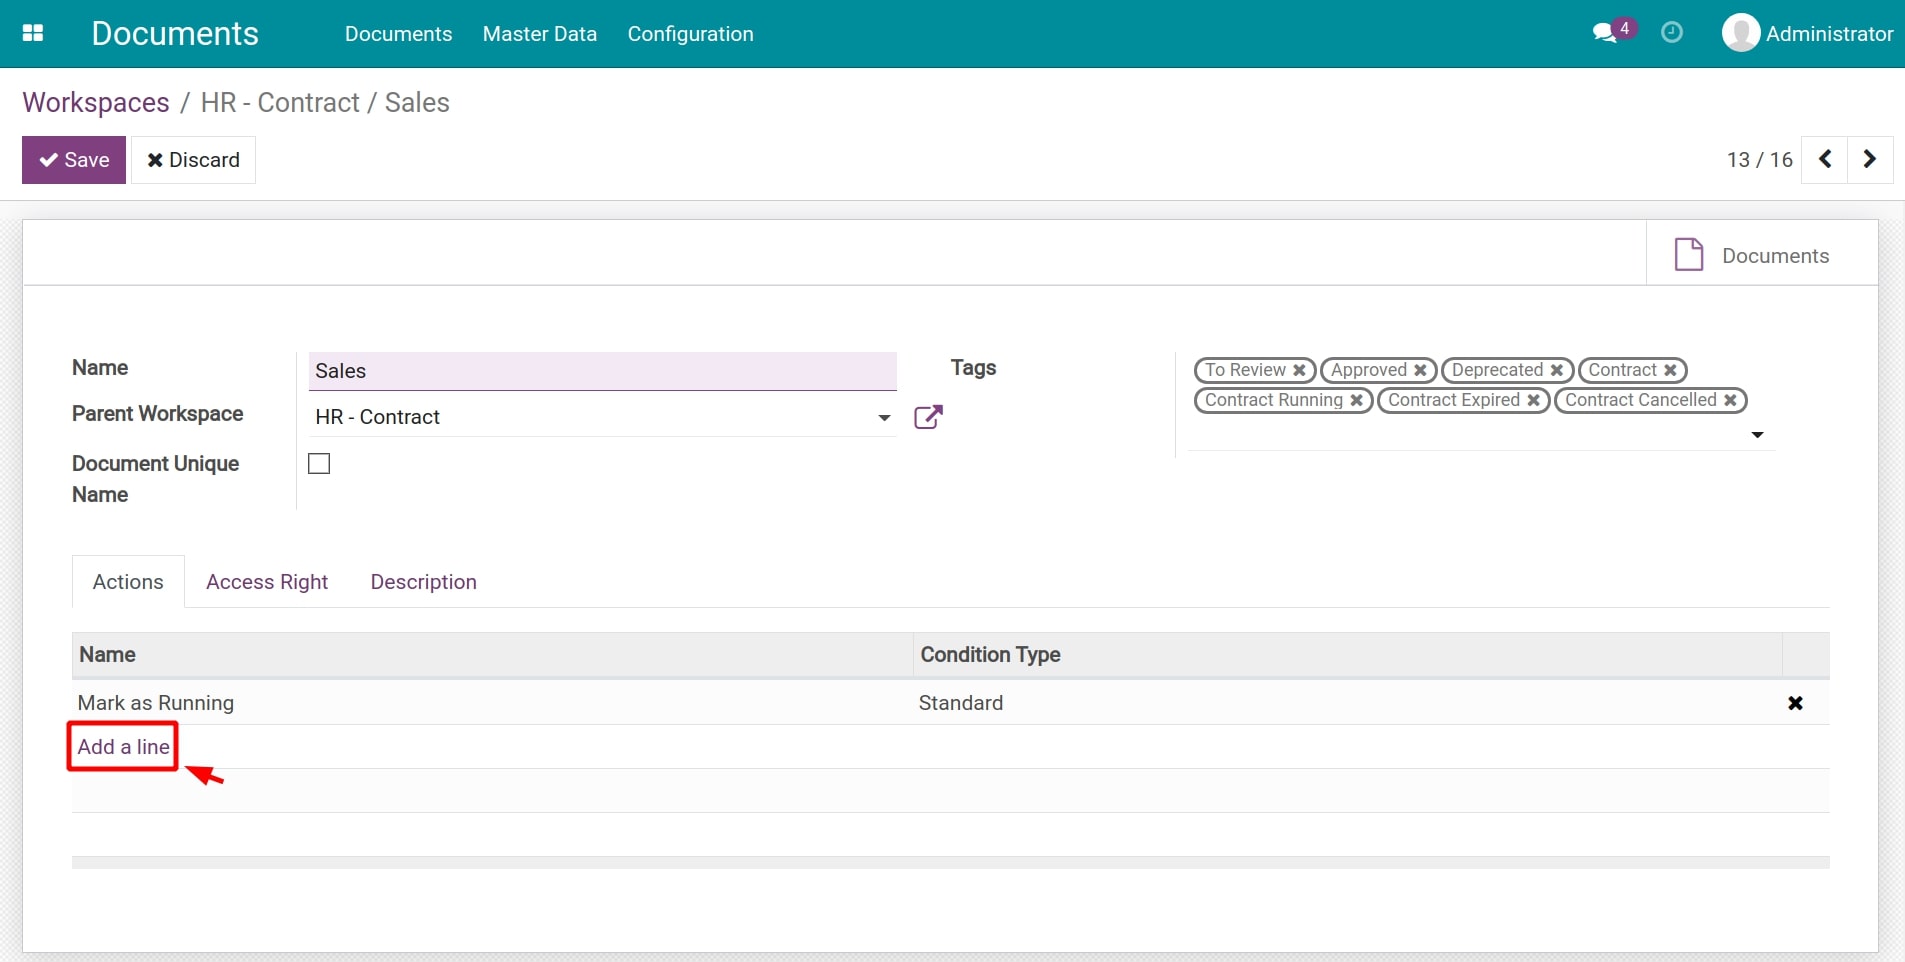
In the workspaces view, press Edit and Add a line on the Actions tab to add an action for the documents that belonged to this workspace.
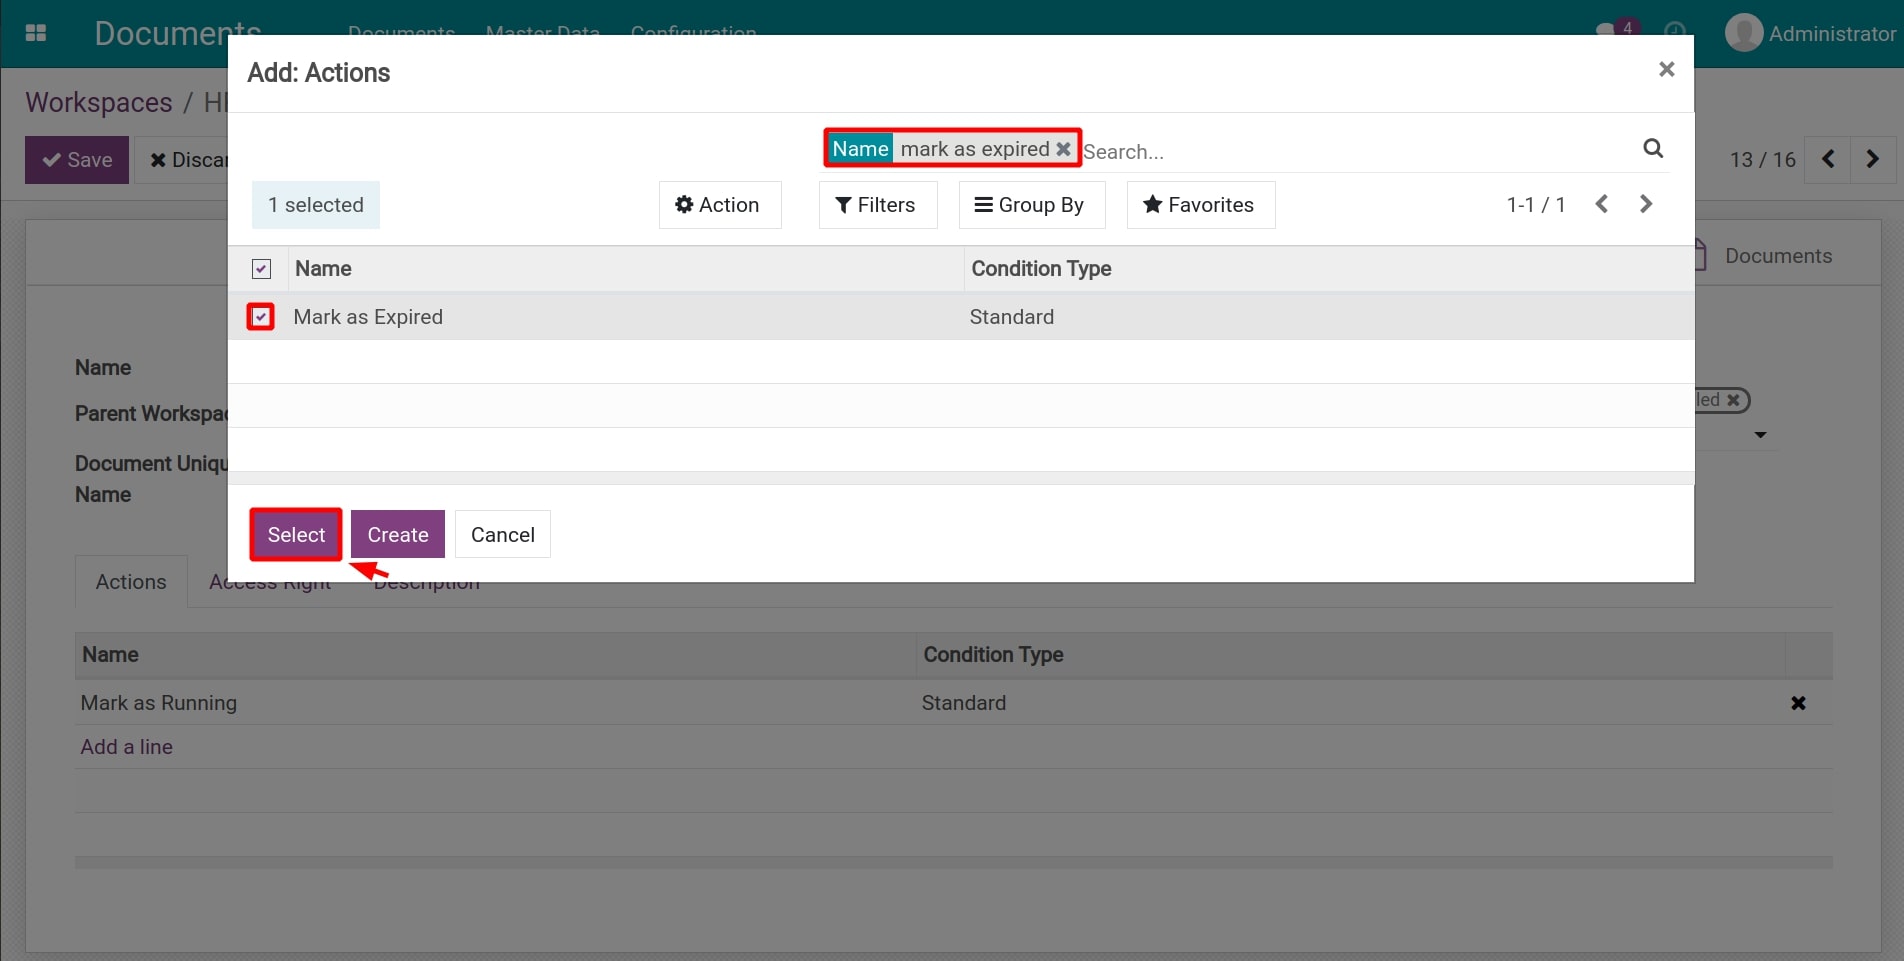
You will be navigated to the Actions list. Here, you can search for the action set in step 01 and press Select.
And then press Save to save the workspace settings.
Step 03: select the action on the document.
Navigate to Documents > Documents and select the document.
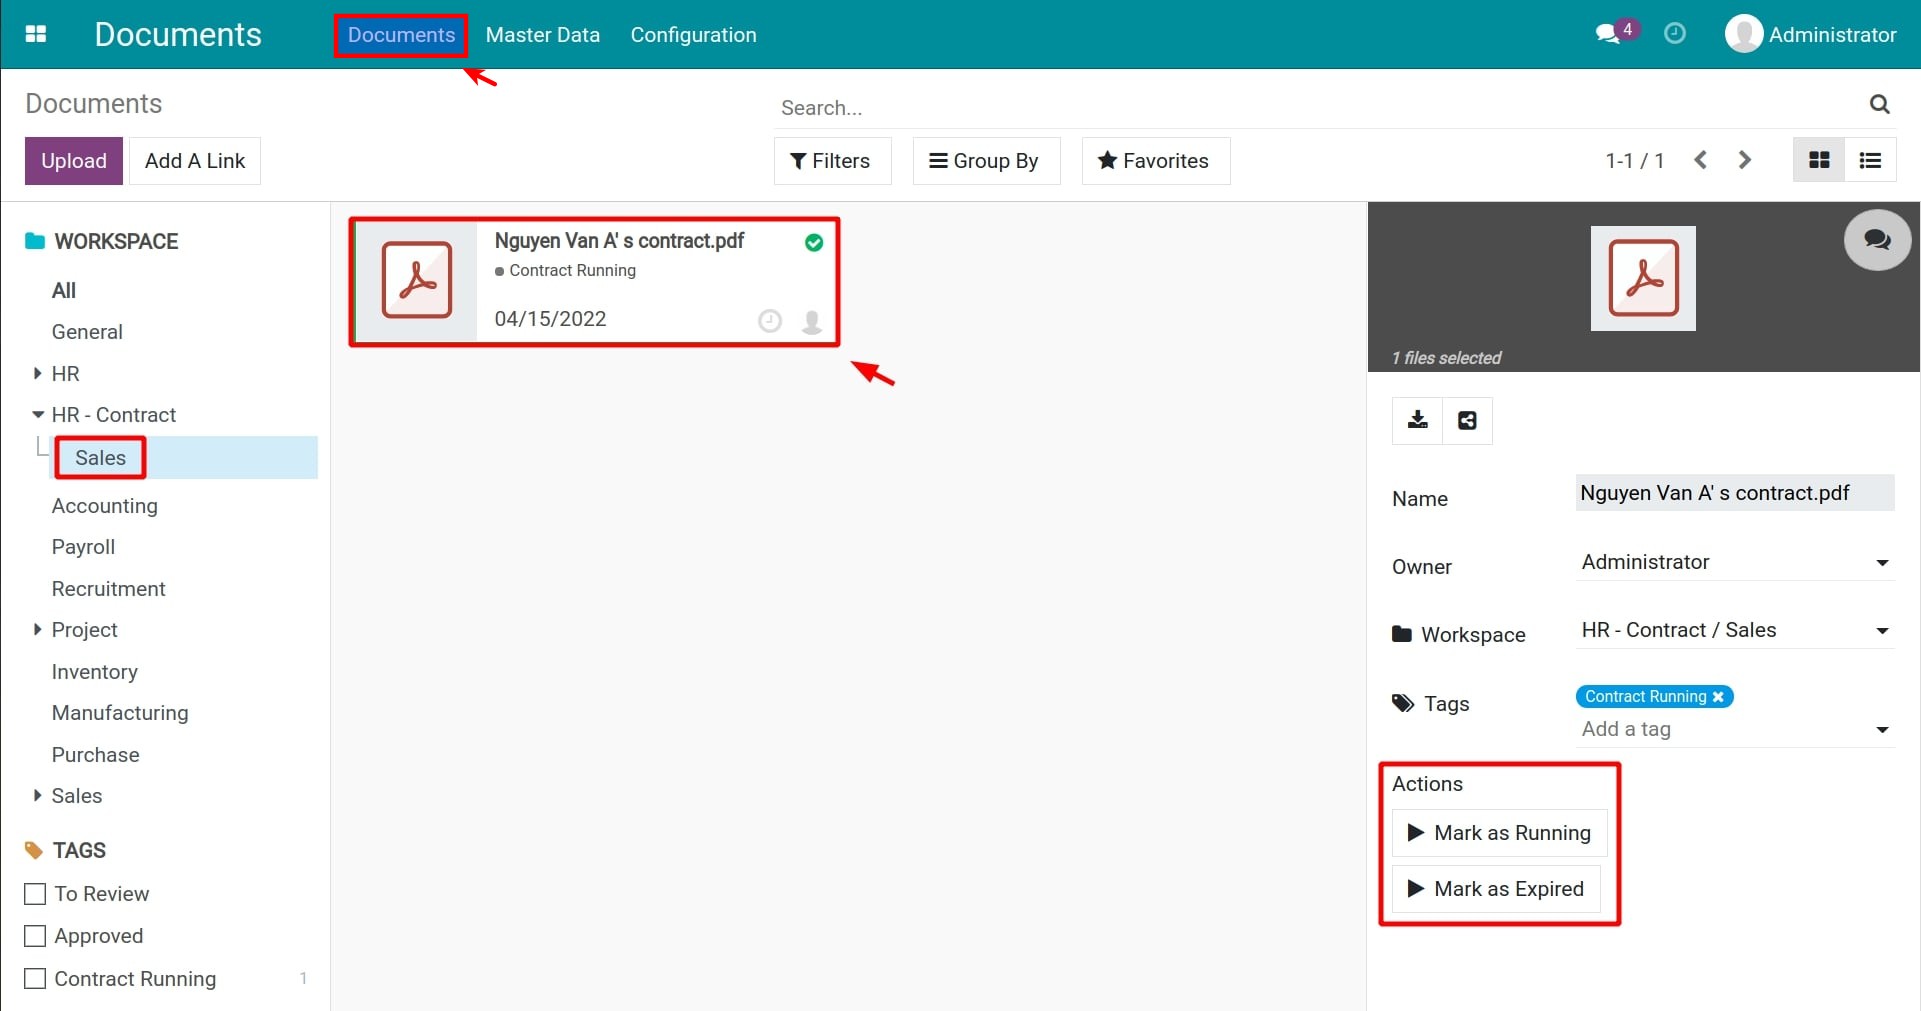
On the right side of the document, you can see a list of the actions set on the workspace of this document at step 02. Here, select the action you want to do with this document.
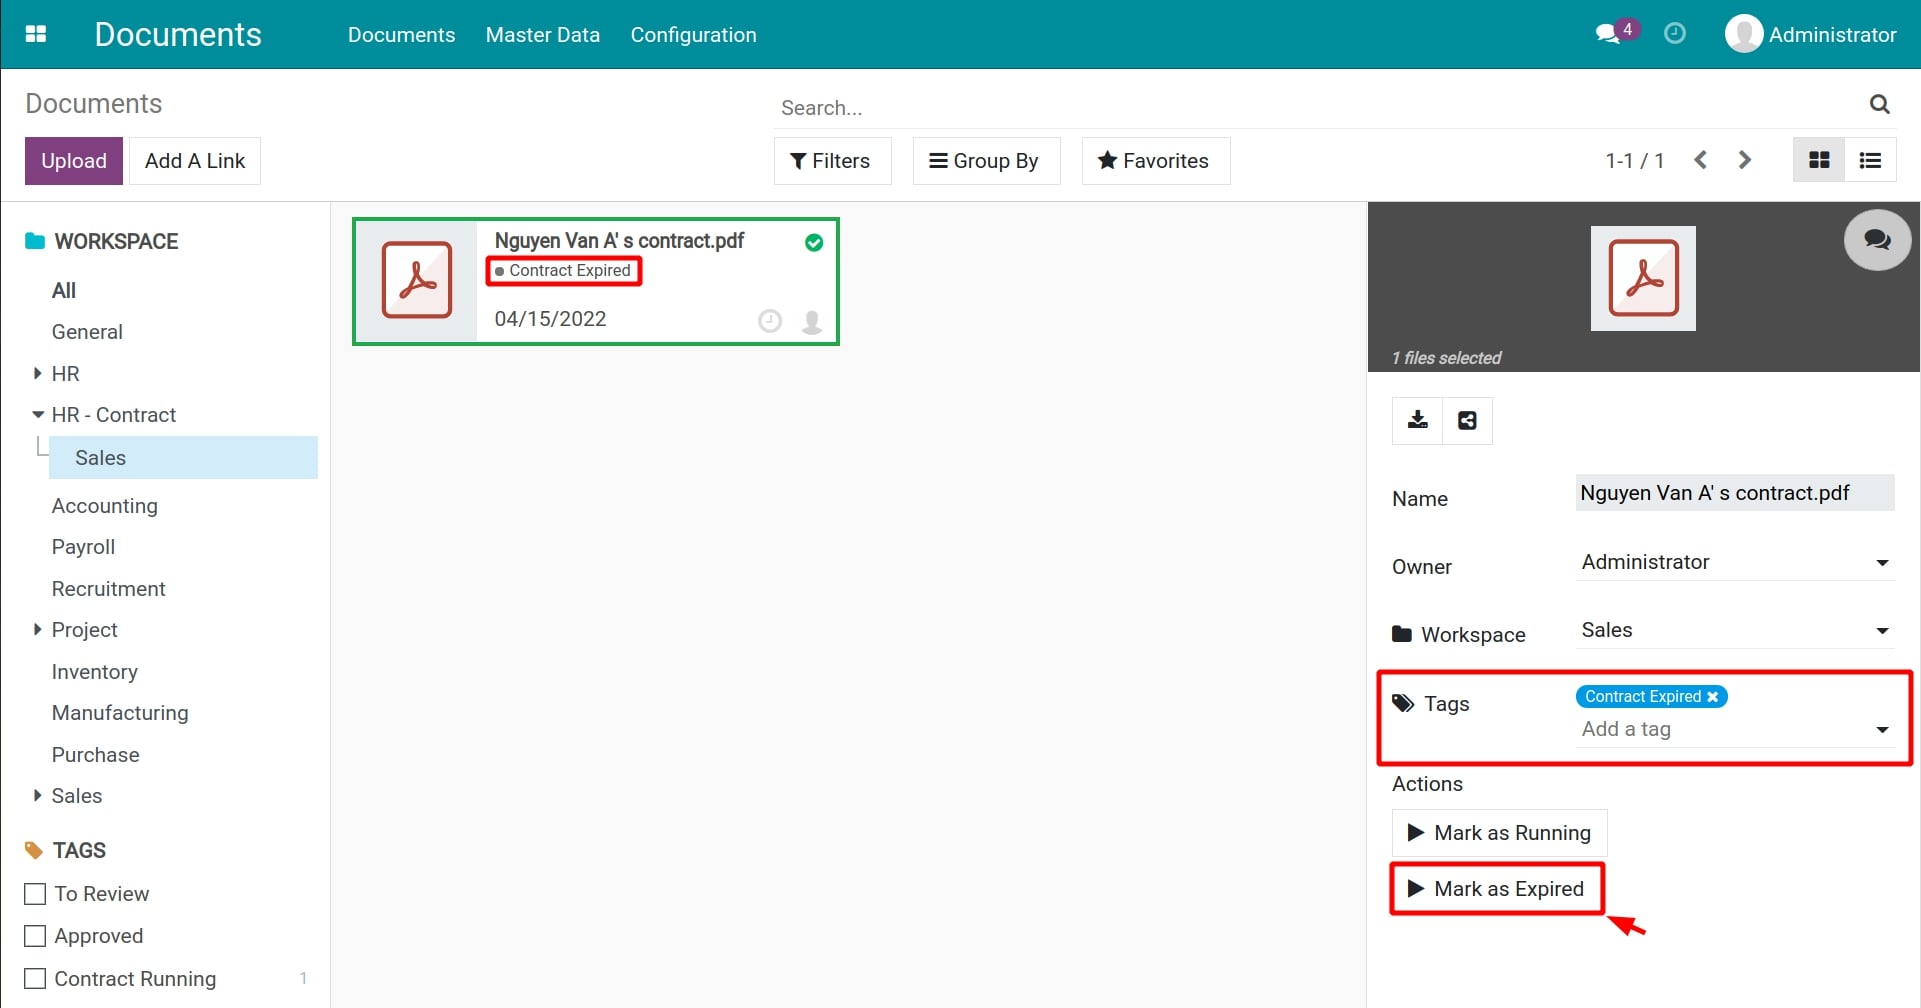
After selecting the action, the tag and the status of the document will be auto-added, replaced, or removed depending on the pre-set actions in step 01.
See also
Related articles
Optional modules