Vendor Bills Management
Vendor bills management in the Viindoo Accounting app is integrated and linked to the Purchase app (in case this app is already installed) or can also be used independently. Therefore, the feature is accessible from both the Purchase and Accounting modules.
Requirements
This tutorial requires the installation of the following applications/modules:
Manage Vendor bills in the Purchase app
Vendor bills created from a purchase order will inherit all the data such as product, price list, tax, payment terms, etc. of the original purchase order. For more information, have a look at the How to create vendor bills from purchase order article.
Manage Vendor Bills in the Accounting app
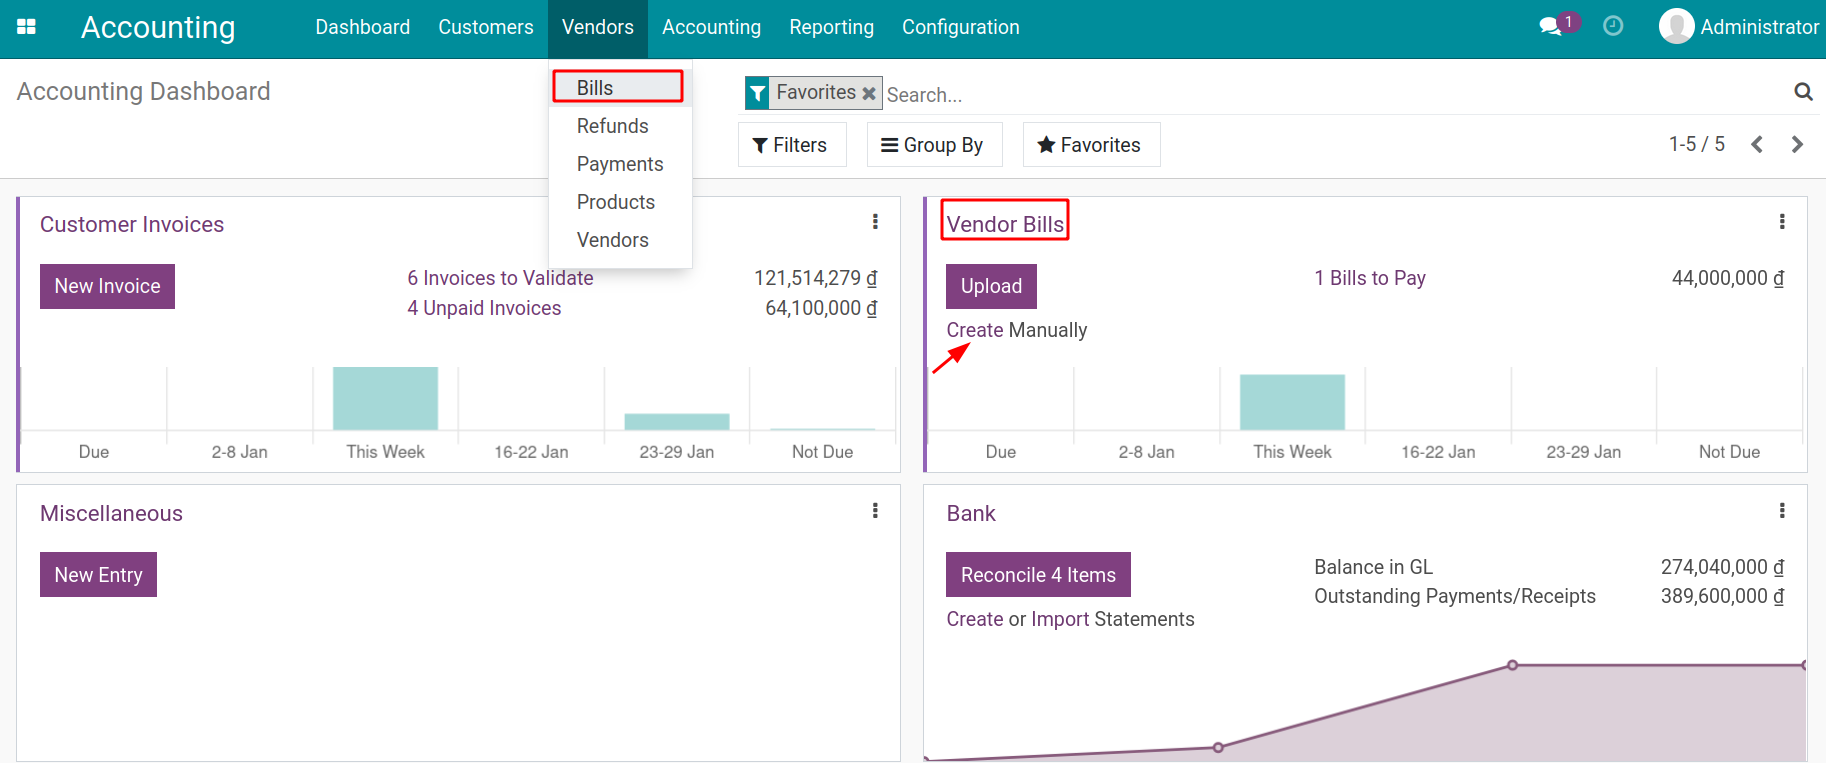
You can create a vendor bill by navigating to Accounting ‣ Vendors ‣ Bills ‣ Create or from Dashboard ‣ Vendor Bills ‣ Create Manually:

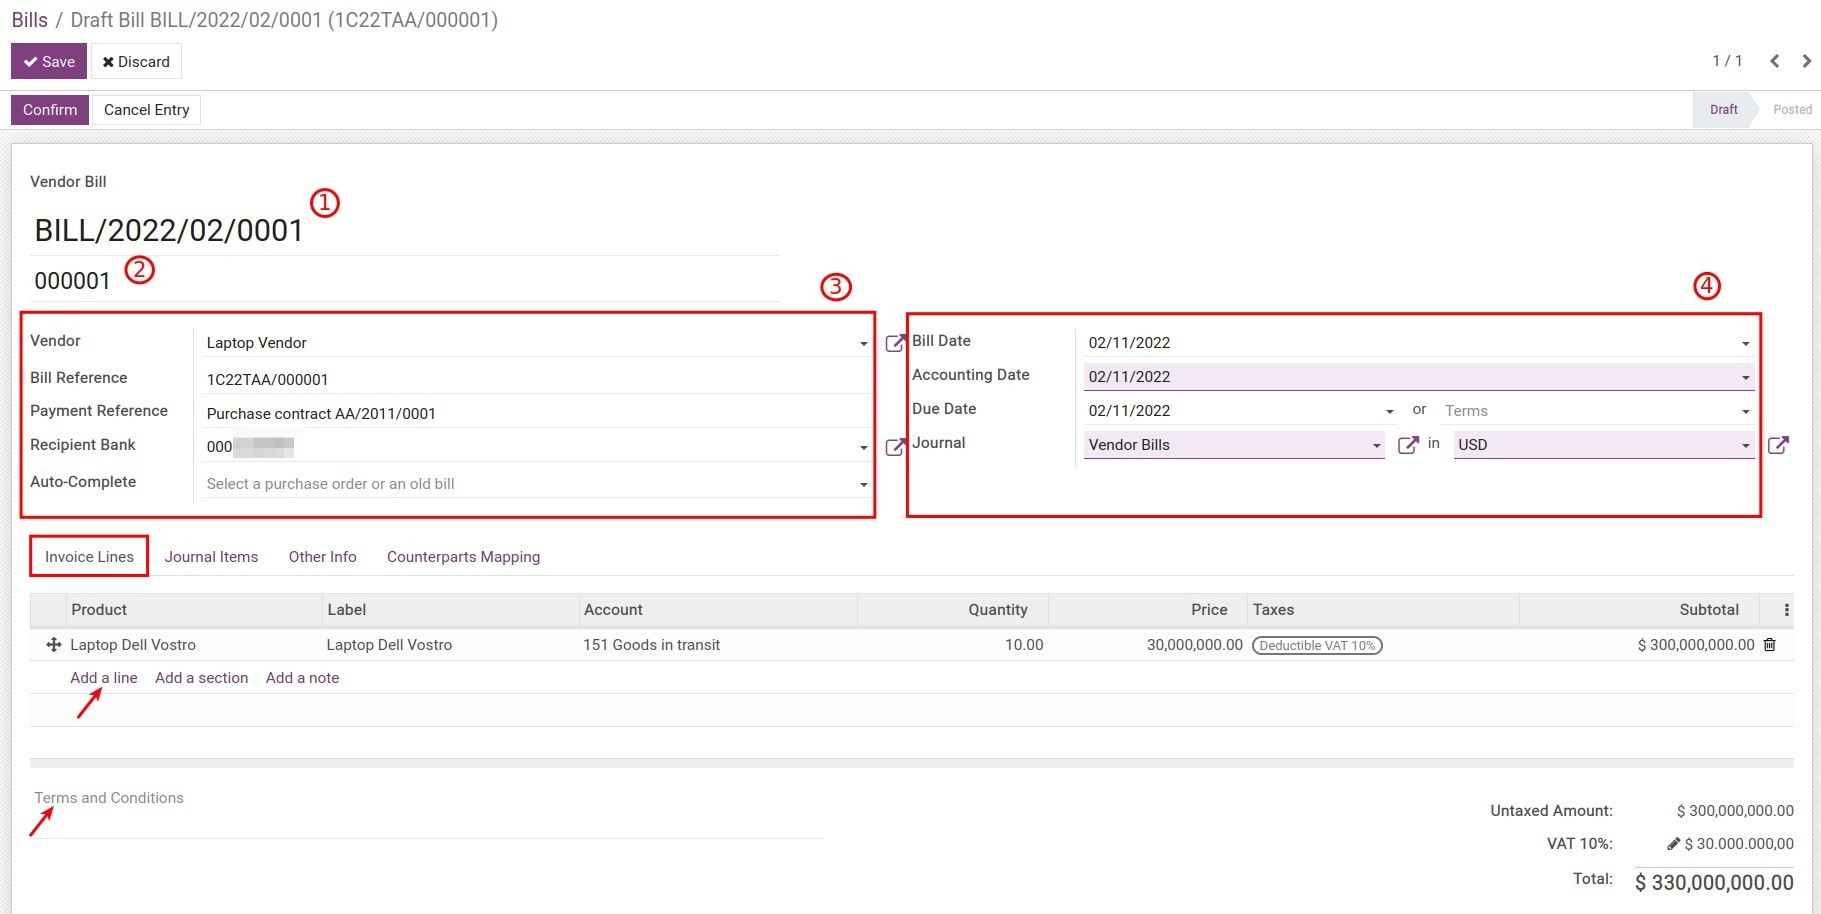
A bill view with all the details is shown below:

In which:
Vendor bill number is automatically created by the system;
Legal Number: The VAT number used for legal invoice identification purposes.
Vendor information:
- Vendor: Choose one from your Vendor list.
Bill Reference: Add the serial of the VAT number.
Payment Reference: The payment reference shown on the label of the account payable on the General Ledger, Account Detail Sheet, etc.
Recipient Bank: The vendor bank account number configured on the contact.
Auto-Complete: Select a purchase order or an old bill of the same vendor if you want to use the details of the previous bill on the current one.
Bill date information:
- Bill Date: The real bill date.
Accounting Date: The date when this bill is recorded in a journal.
Due Date: The payment date or choose a Payment term.
Journal: Choose a journal to record this vendor bill.
Currency (available if the Multi-currencies feature is activated).
Invoice Lines tab: Record details about products provided by the Vendor:
Press on Add a line to choose:
- Product: Choose one from the products, services list or you can create a new one.
Account: The account where the vendor bill is recorded once confirmed. (See more on Configure account on Product categories.)
Quantity: The quantity of the product/service.
UoM: The Purchase Unit of Measure of the product/service.
Price: Price of the product/service.
Taxes: Taxes applied on this bill. You can choose from the list of existing taxes.
Subtotal: Total value of the bill line before taxes.
Purchase Order: Information of the related purchase order if this bill is created from the purchase order view. Press on the purchase order to see detailed information.
![Information of the Purchase order linked with the bill.]()
When the price list of the products/services and taxes are applied, the untaxed amount, taxes amount, and the total value of the bill will be automatically calculated.
Besides, you can also record other terms such as delivery, storage, etc. in Terms and Conditions.
Journal Items tab: See all the journal items created from the bill:
![Journal items tab on Vendor bill - Viindoo accounting app]()
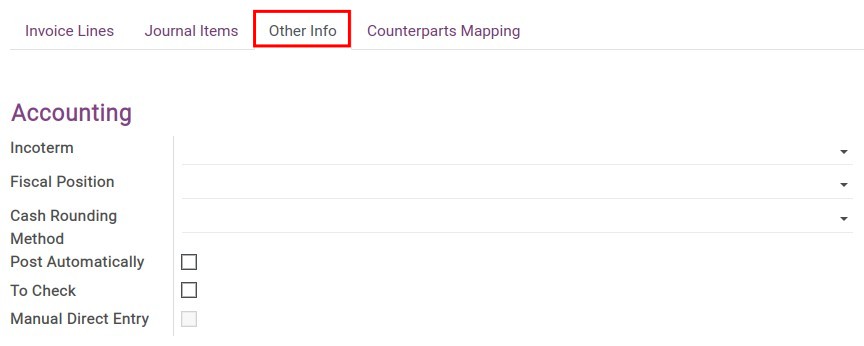
Other Info tab: Other accounting information:
![Other Info tab on Vendor bill - Viindoo accounting software]()
- Incoterm: Choose one of the Incoterm if this is an importation bill.
Fiscal Position: Select the fiscal position applied for this vendor’s bill.
Cash Rounding Method: Select the configured rounding method. This option shows only when you activate the Cash Rounding feature. Find more details in the Configure Cash Rounding method article.
Post Automatically: Once activated, the bill will be automatically recorded on the accounting date.
To Check: In case you are not sure about the information on the bill, you can activate this feature to mark it for a later check-up.
Manual Direct Entry: If you duplicate a journal entry of vendor bill from Accounting ‣ Accounting ‣ Journal Entries then this field is automatically activated.
Counterparts Mapping tab:
![Counterparts Mapping tab - Viindoo accounting software]()
- Provide information about counterparts of accounts in the vendor journal entries to get data on the targets in future reports.
Countered Status: This is the state of the counterpart status of this journal entry. When the invoice is confirmed, the system automatically generates the counterparts and the countered status is Fully Countered.
See also
Related Article
Optional Module


