Configure Bank Accounts
Requirements
This tutorial requires the installation of the following applications/modules:
Create a bank
To create a new Bank, navigate to Contacts ‣ Configuration ‣ Banks, click Create to create new bank information.
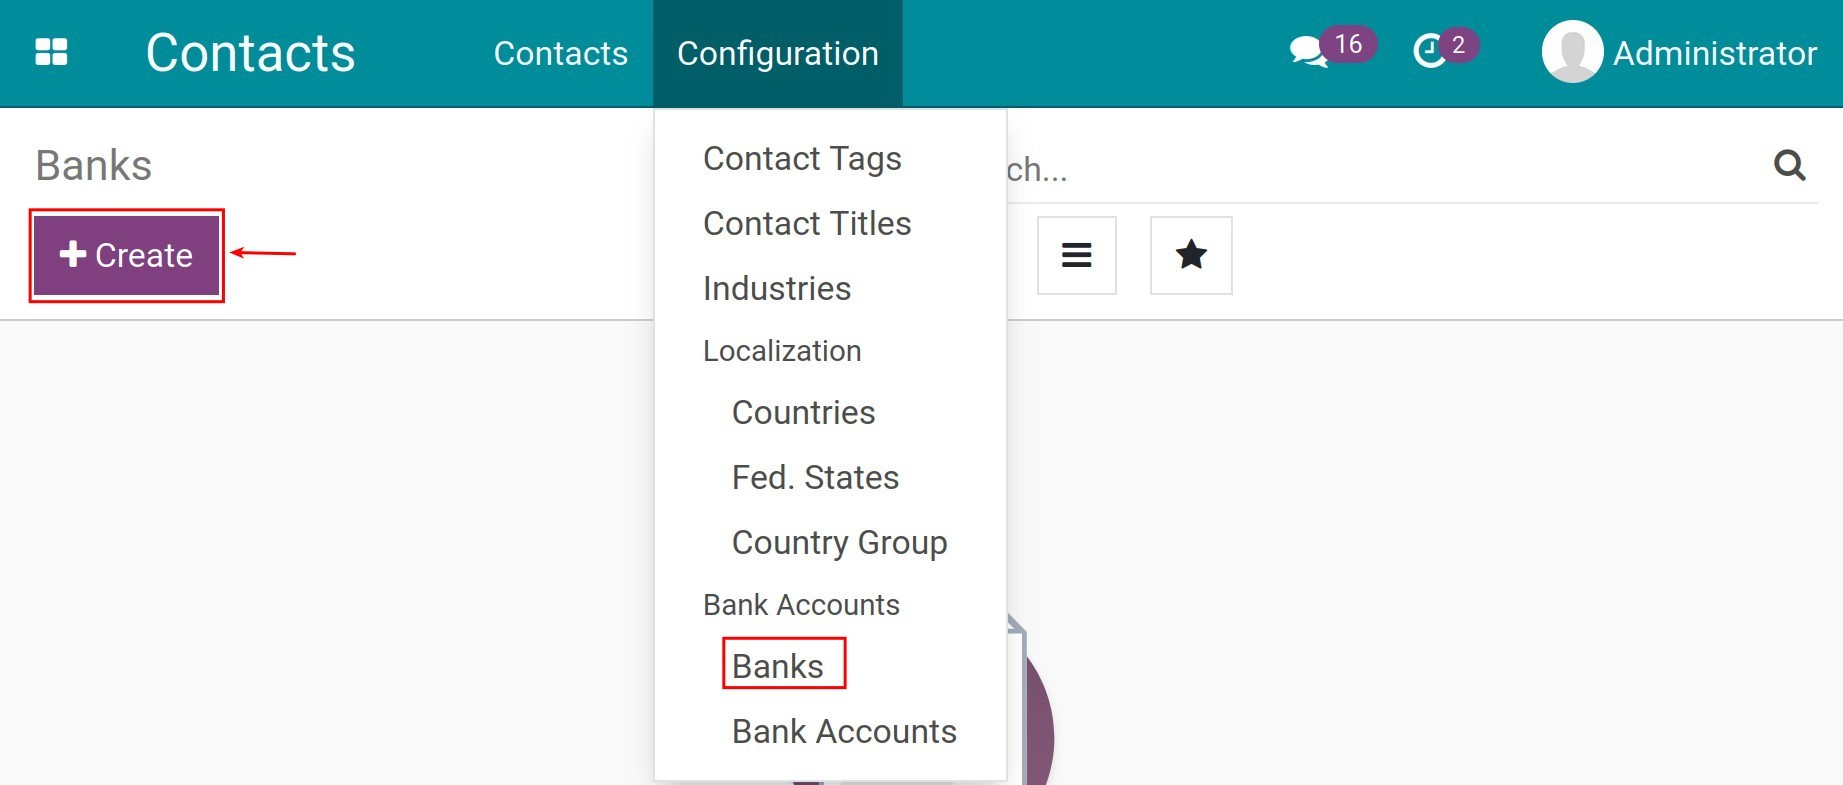
You need to fill information as follow:
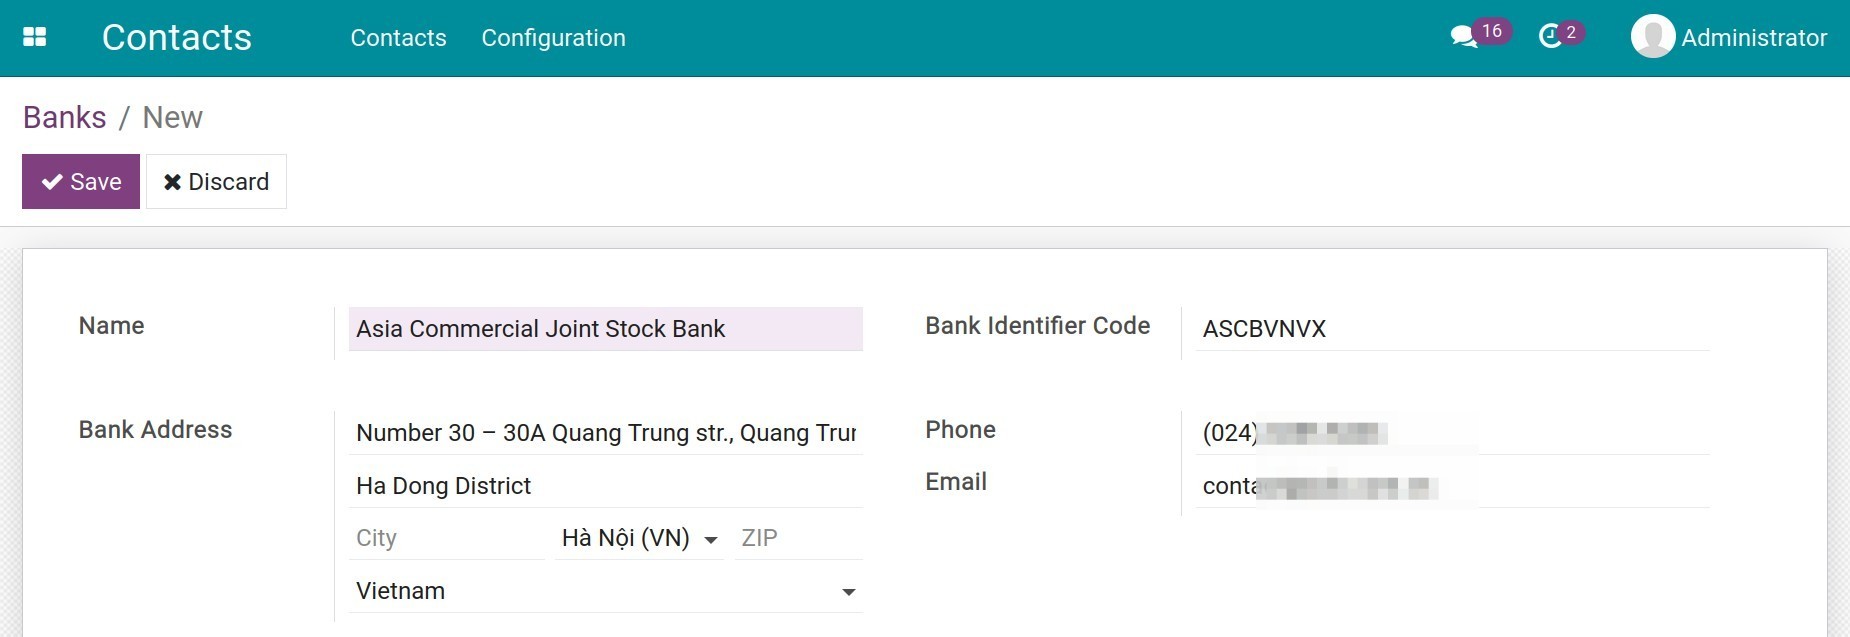
Name: Add your bank name.
Bank Identifier Code: The identifier code according to the international standard convention created by the Society for Worldwide Interbank Financial Telecommunication, also known as the BIC code or SWIFT code.
Bank Address: fully address including street, city, ZIP (if any), country.
Phone/Email: Phone number and email of the bank.
Click Save to save information.
Create a new bank account
To create a new Bank Account in Accounting & Finance Management software , navigate to Accounting ‣ Configuration ‣ Add a Bank Account :
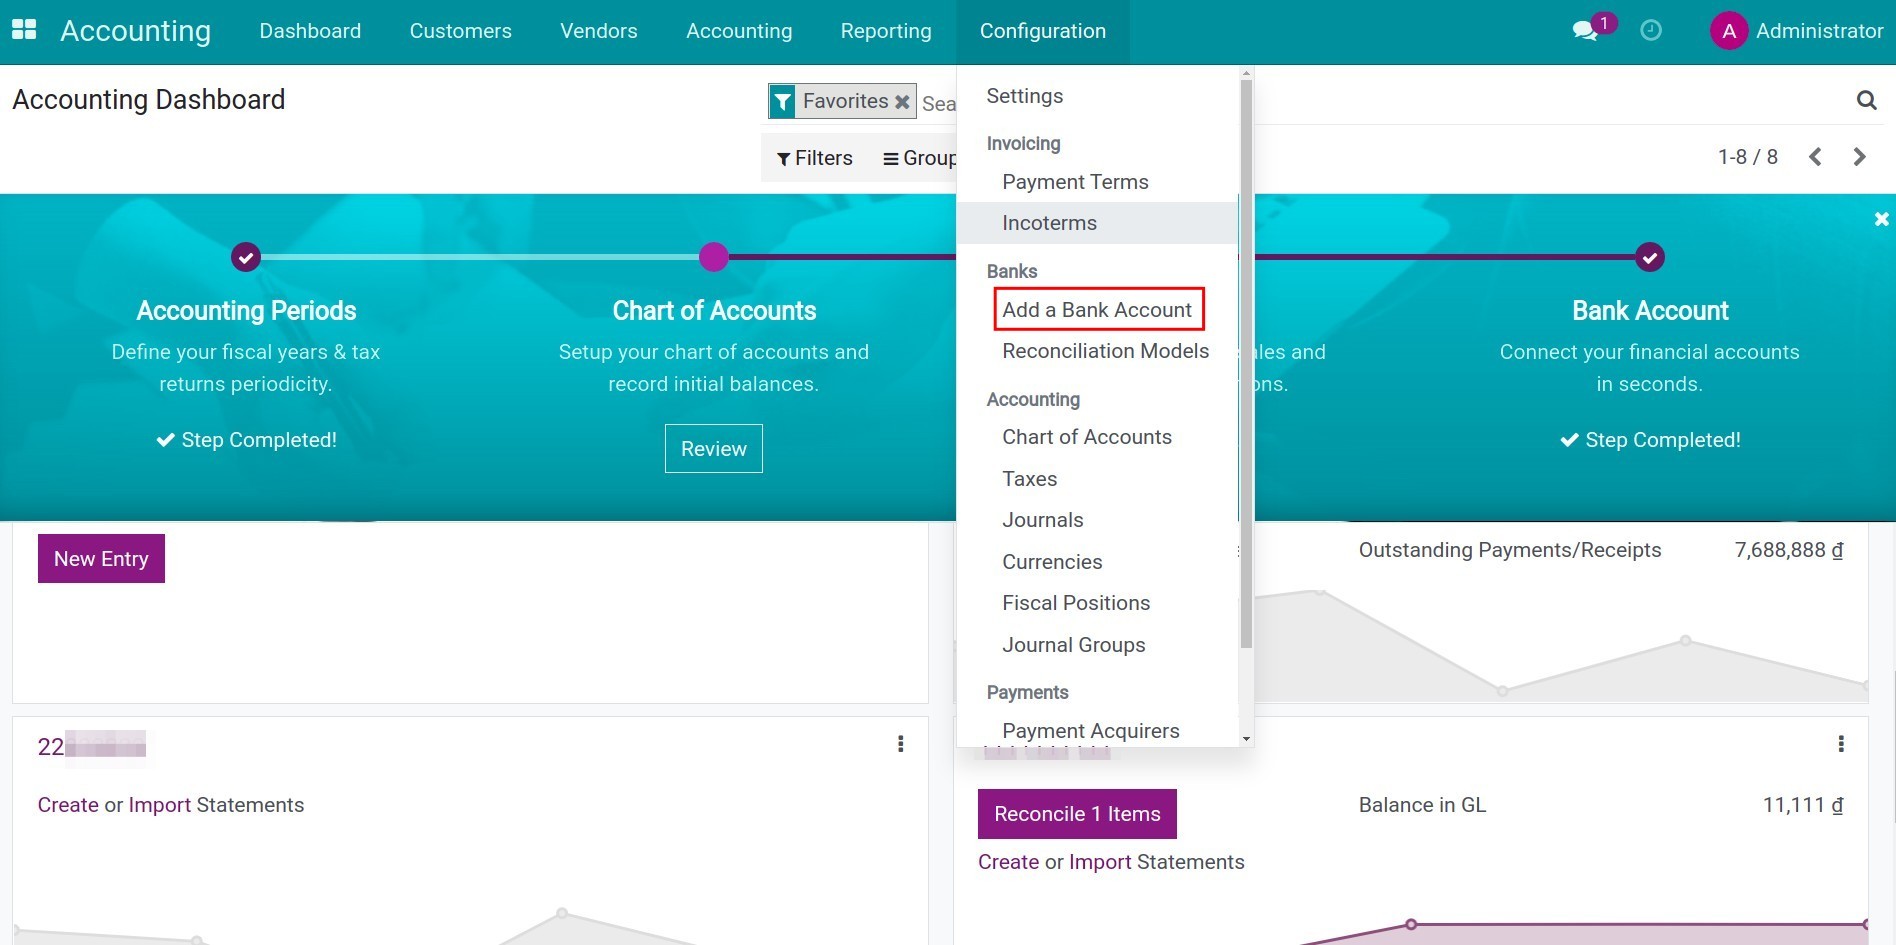
On the pop-up window, you need to fill in the following information:
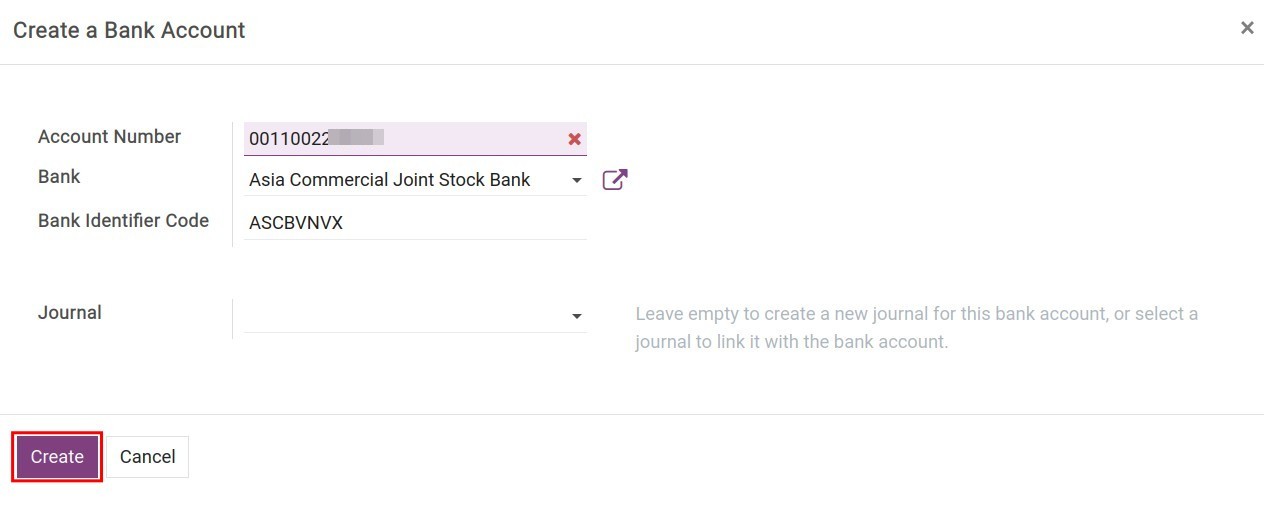
Account Number: Add your bank account number.
Bank: Choose a Bank from the existing bank list.
Bank Identified Code: Automatically filled from the setup bank information.
Journals: Choose from the existing Journals to link a Journal to the bank account. In case this field is empty, a new Journal will be automatically created for the new bank account.
Note
You can also create a new Bank Account by navigating to Contacts ‣ Configuration ‣ Bank Accounts. All the existing bank accounts in the system are compiled here, including your company bank accounts and your partners’ ones.
Warning
A Journal is created and linked to a newly created bank account only when said bank account is created from the Accounting app.
Configure Bank account Journal
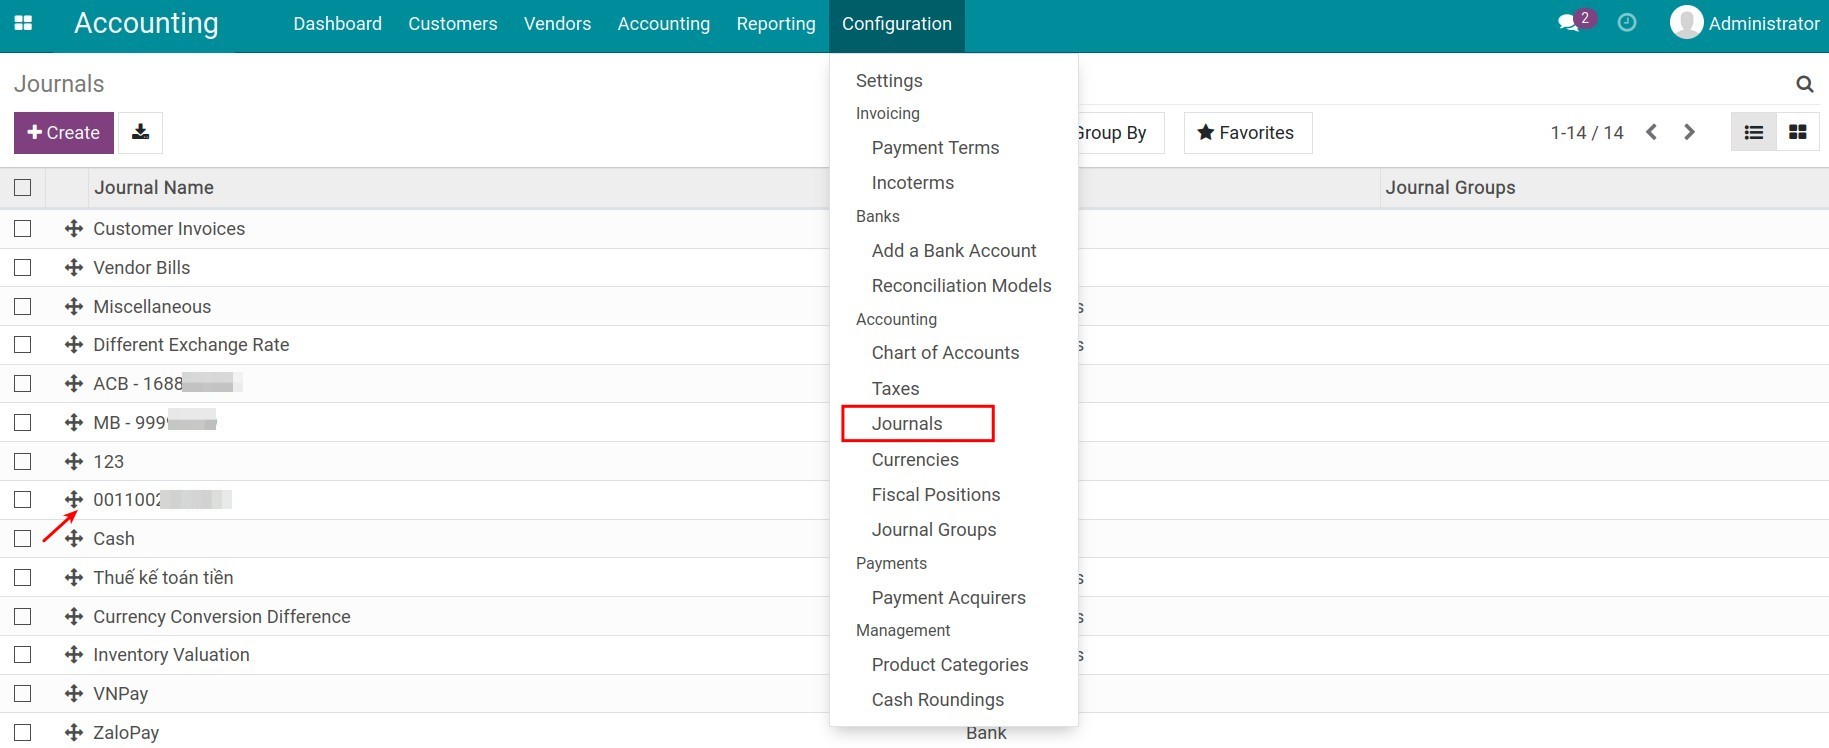
Navigate to Accounting ‣ Configuration ‣ Journals, find the Journal that you want to configure then press Edit:
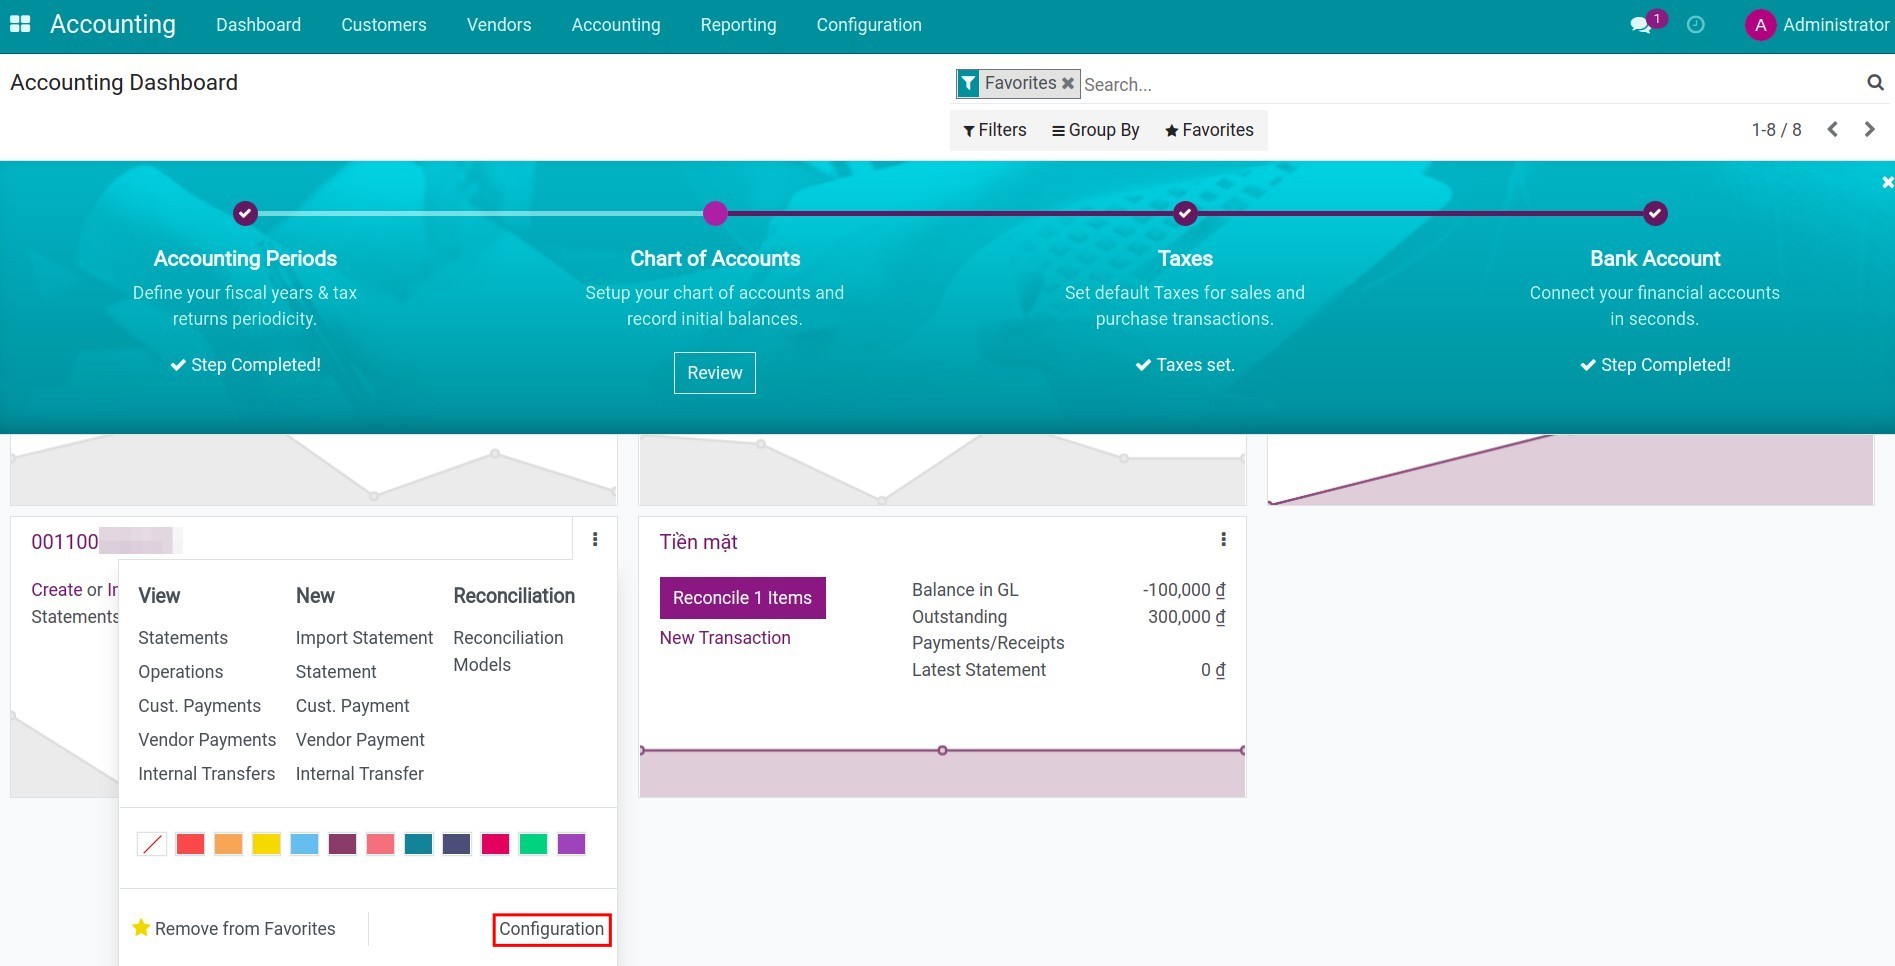
Or navigate directly from Accounting ‣ Dashboard, find the Journal to work on, and choose Configuration:
Some important information for the Journal configuration are:
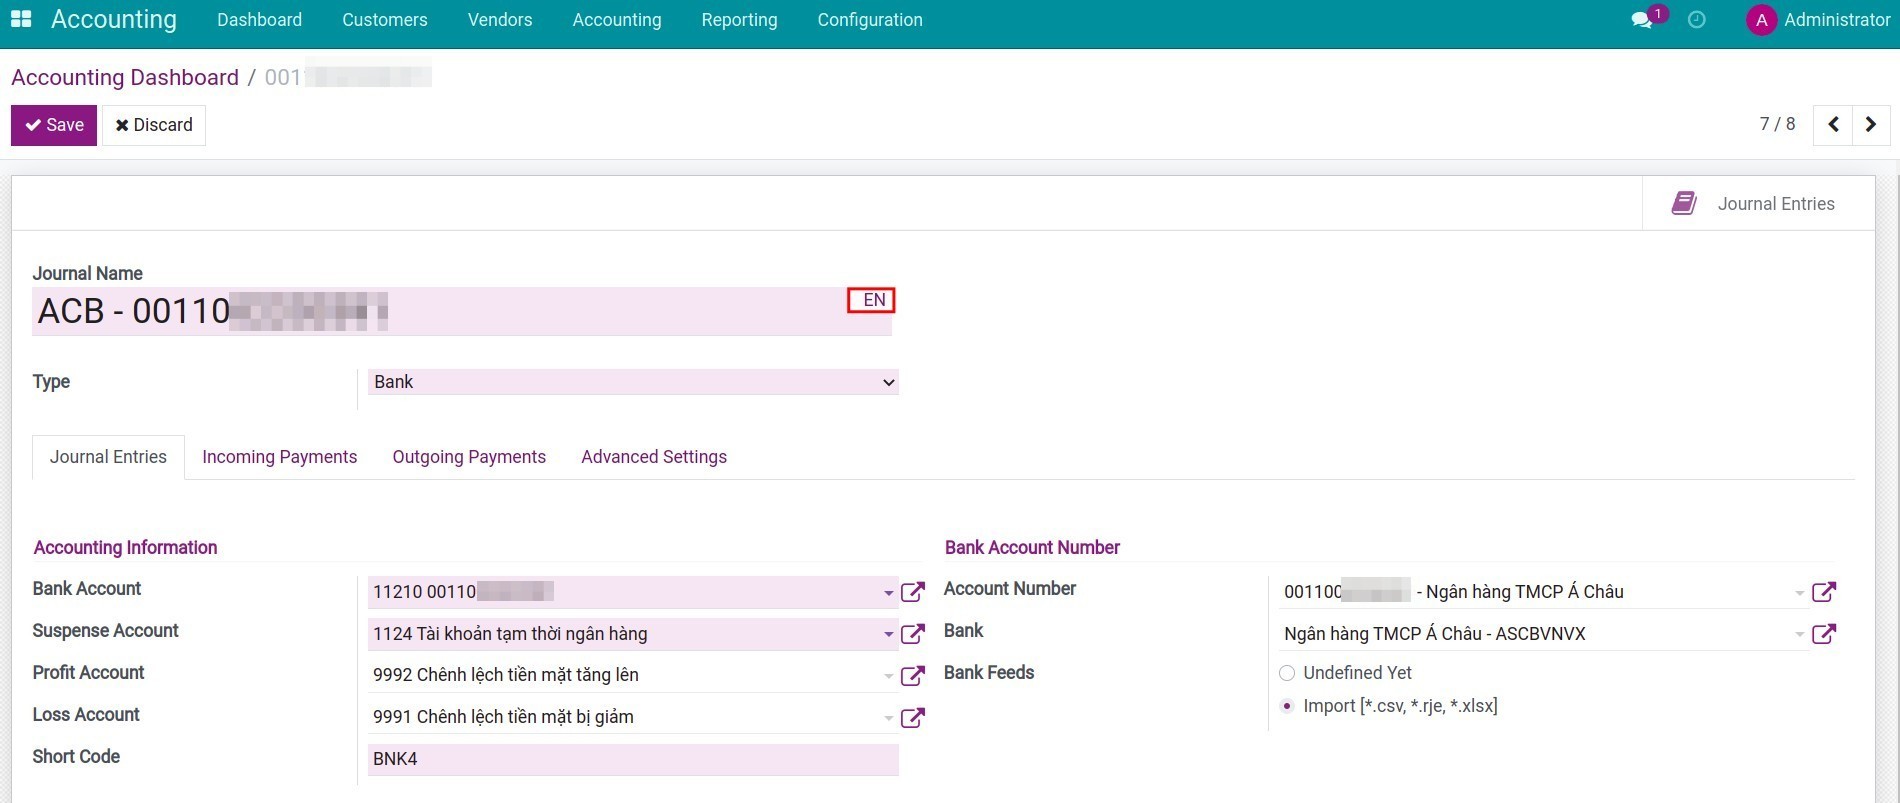
Journal Name: The bank account number is used by default. However, you can modify the Journal name as you desire.
Tip
You can press on the EN letters to translate your Journal name to other languages if you use more than 1 language in your software. To activate new language, see more on Installing & Using multilingual guidelines.
Type: Choose a Journal type fr-om the existing list. Since this Journal is generated from a bank account, the Journal Type is Bank by default.
Journal Entries tab:
Accounting information:
Bank Account: The system automatically generates a unique bank account code (Bank deposits) linked to the bank account number to record all the transactions related to the said bank account. Even so, you can edit the Bank Account label if needed. For further information, read our article on Chart of accounts.
Suspense Account: The default account is Bank Suspense Account: This account temporarily records lines from the bank statement and will be reconciled with payments recorded in the system.
Profit Account: The account is used to record the excess amount due to the difference between the bank statement and the posted data on the system.
Loss Account: The account is used to record the missing amount due to the difference between the bank statement and the posted data on the system.
Short Code: A code for the Journal is suggested here but you also can modify it if needed. However, please bear in mind that it must be a unique code in the system.
Currency: Choose a currency for the Journal. If left empty, the currency will be the default one set up for your company.
Bank Account Number:
Account Number: It’s the information provided when the bank account is created.
Bank: The information is inherited from the bank account creation.
Bank Feeds: Select a tool to import bank statements from CSV; RJE or XLXS format.
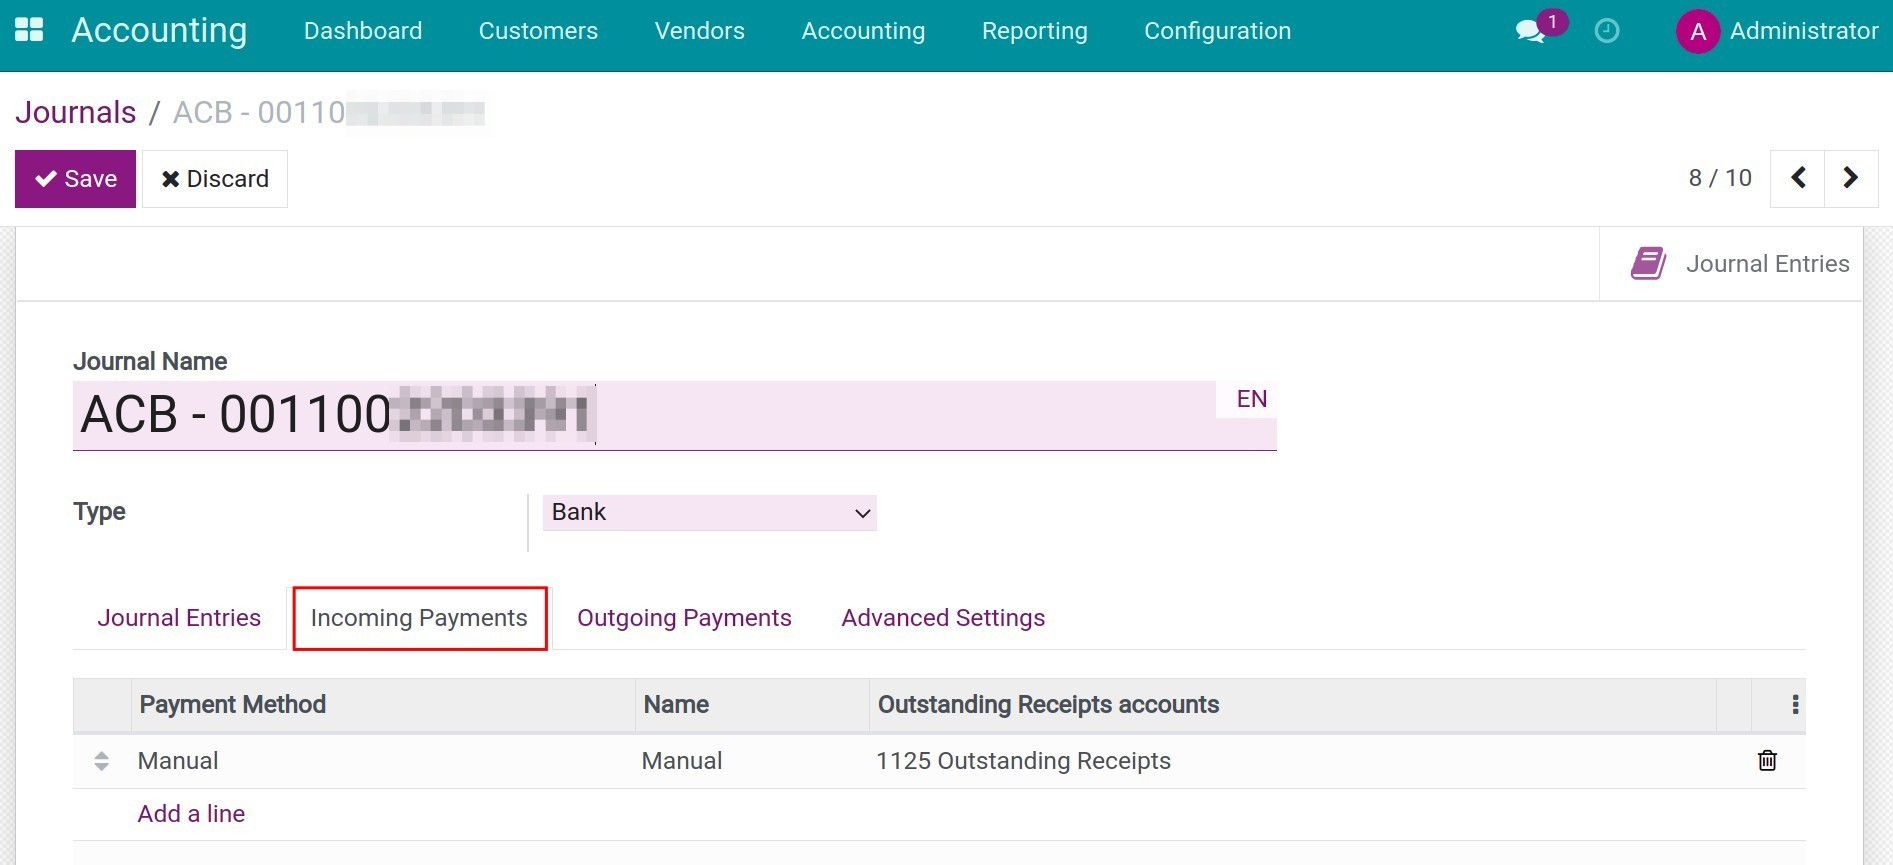
Incoming Payments tab:
![Incoming Payments configuration in Bank account journal - Viindoo Accounting software]()
Payment method: For the payment transactions outside of the system, such as cash, cheque, or Internet banking, manual payment creation is activated by default. Select Add a line to add other payment methods.
Name: Name of the payment method.
Outstanding receipts account: You choose the Outstanding receipts account to record related transactions such as collecting money from invoices or making payments. In the reconciliation process, the related transactions will be reconciled with the Outstanding receipts account instead of the Receivables account.
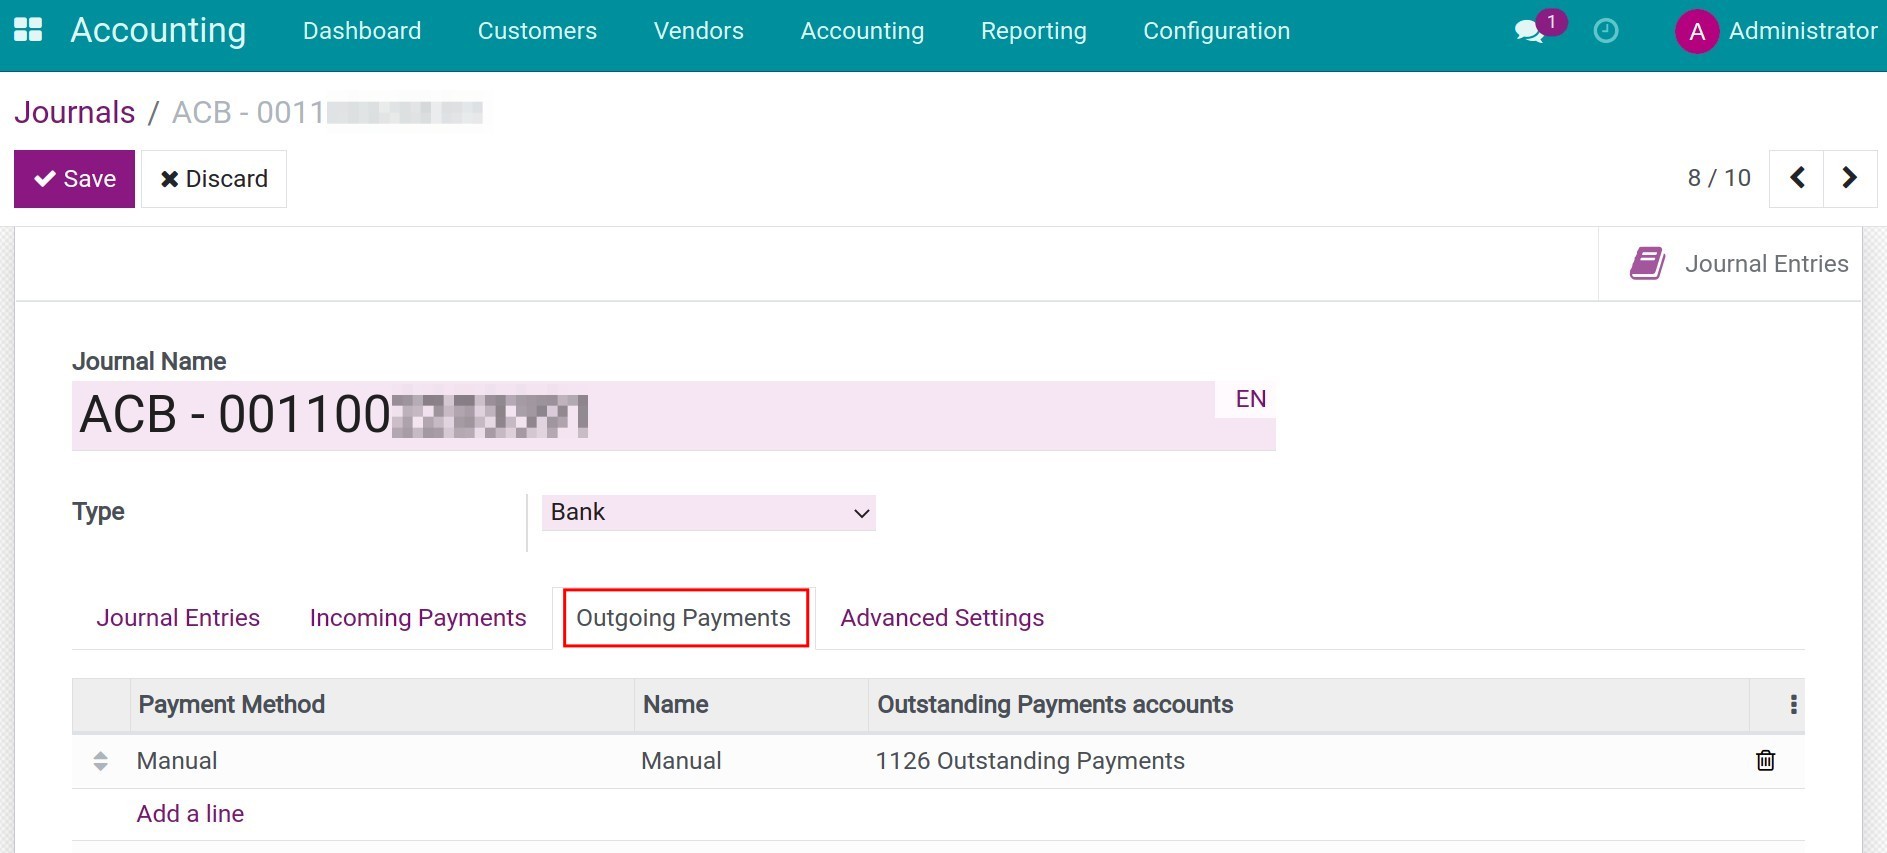
Outgoing Payments tab:
![Outgoing Payments configuration in Bank account journal - Viindoo Accounting software]()
Payments method: For the payment transactions outside of the system, such as cash, cheque, or Internet banking, manual payment creation is activated by default. Select Add a line to add other payment methods.
Name: Name of the payment method.
Outstanding payments accounts: You choose the Outstanding payments accounts to record related transactions such as paying money for a vendor bill or making payments. In the reconciliation process, these transactions are reconciled with the Outstanding Payments account instead of the Payables account.
Note
Outstanding Receipts and Outstanding Payments accounts are used to record accurately the incoming or outgoing payments at the moment such transactions happen.
Example: When you send a payment to a Vendor, you will make a transfer order to your bank and wait for the bank to perform that transaction. This transfer may take some time to move money from your bank account to the Vendor’s bank account. At this moment, your transfer order creation is credited to your Outstanding Payments account. Upon receiving your bank statement regarding this transfer order, you will be able to record and reconcile it to nullify the value of the Outstanding Payments account.
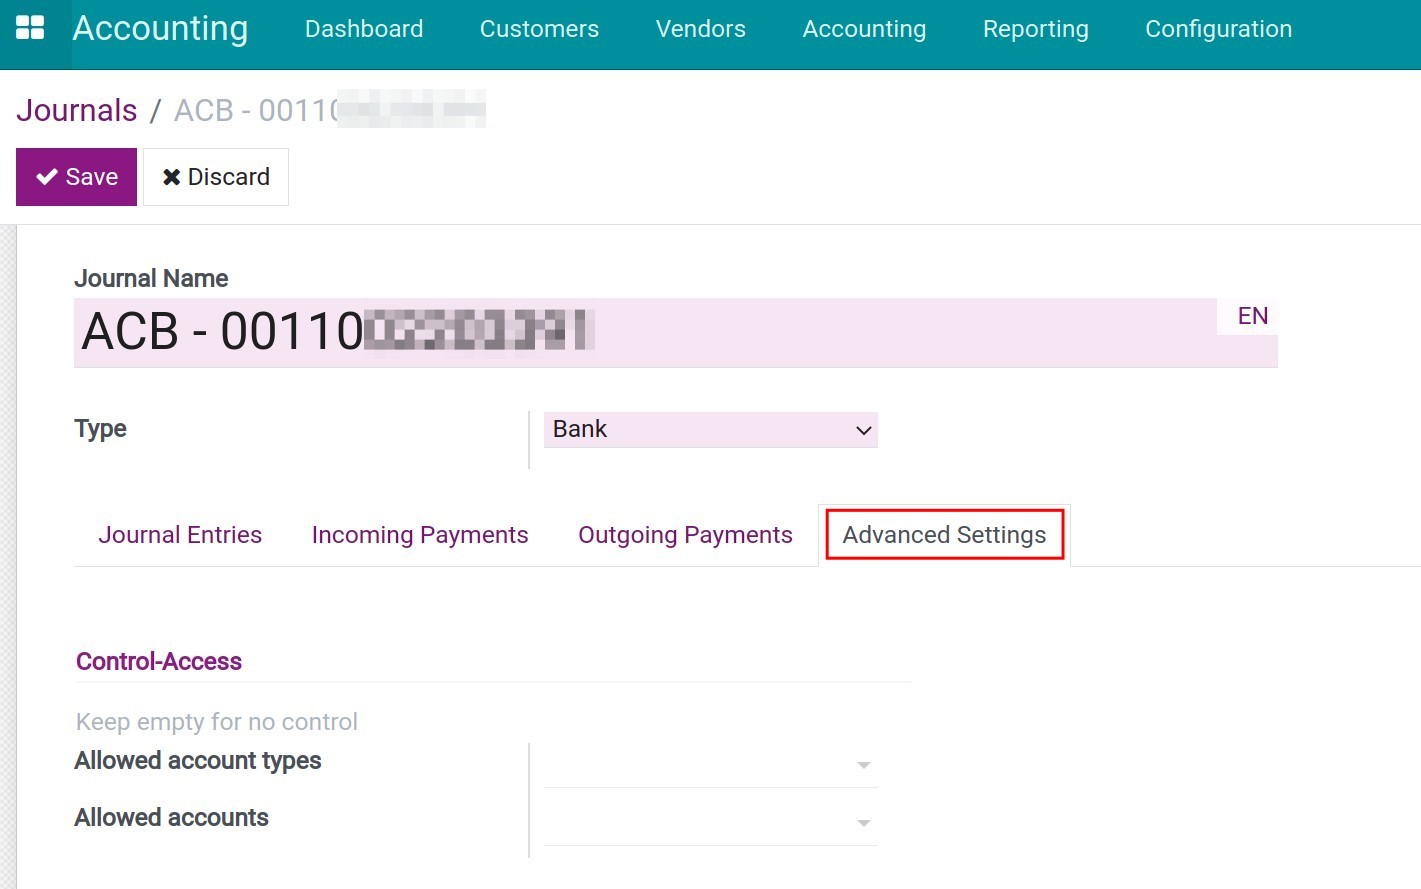
Advanced Settings tab: You can set up allowed account types and account to control selection or keep them empty for no control in this Journal.
Click Save to save the bank journal setting information.
