Rental Product Configuration
Requirements
This tutorial requires the installation of the following application:
Viindoo software allows you to create products in many different modules such as Sales, Purchasing, Accounting,… This article will only mention the difference in the configuration of rental products. For detailed instructions on how to configure the product in general, see the article Steps to create a new product.
General settings of Rental product
Setting Default Delay Costs for Rental product
Default Delay Costs are charges that are set by default if the goods are returned later than the rental period on the Rental Orders. To set Default Delay Costs, you go to Rental > Configuration > Settings.
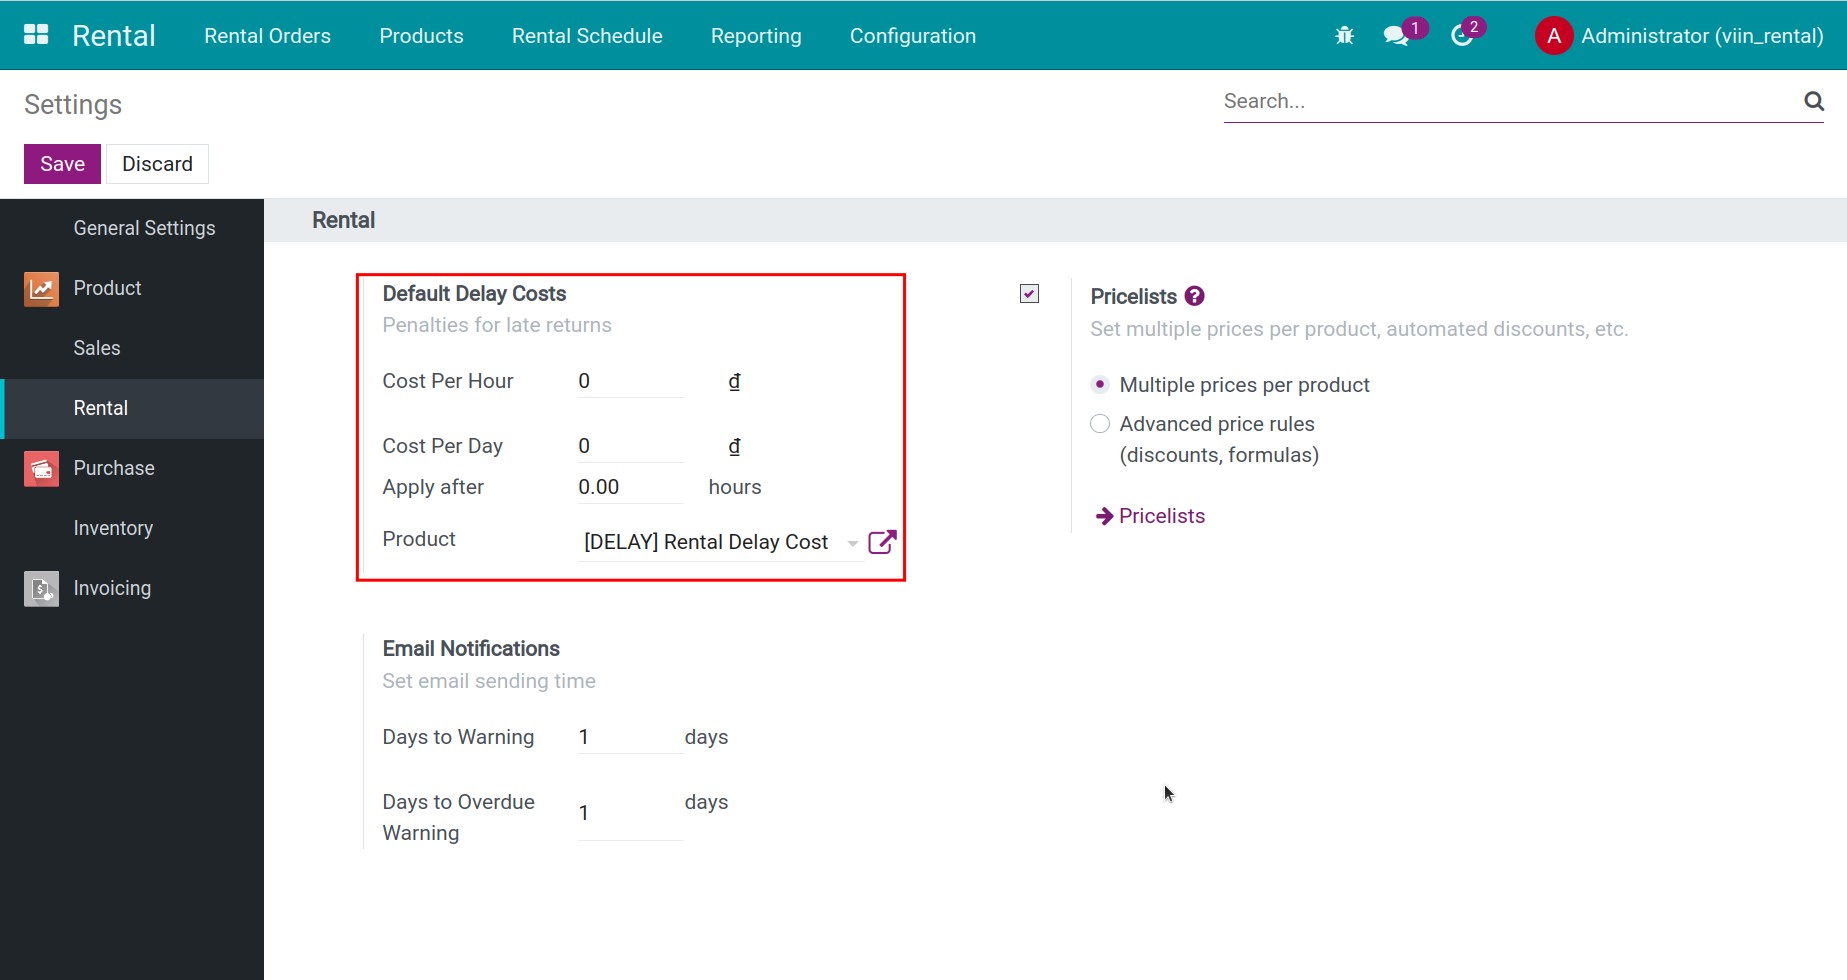
Cost Per Hour: The amount the customer has to pay extra per hour late.
Cost Per Day: The amount the customer has to pay extra on a day of late payment.
Apply after: Understand that after how many hours from the end of the rental to calculate the late payment fee for the customer.
Product: The product that represents the cost incurred when the customer returns the goods late.
Example: Product X is set to Default Delay Costs as follows:
Cost Per Hour: 100$
Apply after: 1 hour
On January 1, 20X3, customer A rented product X from 7:00 a.m. to 9:00 a.m. At 14:00 on the same day, customer A returns product X. So the additional cost that customer A needs to pay is:
Extra cost = (Time customer return a product - Time to return a product on Rental Orders - Time to set up at Apply after) x Amount of late payment set up in Cost Per Hour = (14 - 9 - 1) x 100 = 400$
Note
In case the product already has a Delay Cost setting in the Time Based Pricing Tab, the extra amount to be charged will take precedence over the product’s configuration.
Set up Recurrence of Rental product discounts
Recurrence of Rental product discounts is the period during which the rental price of the rental product will be periodically reduced if the number of days to rent the product equals or exceeds the discount period. To set up Recurrence, go to the Rental > Configuration > Recurrence > Create application.
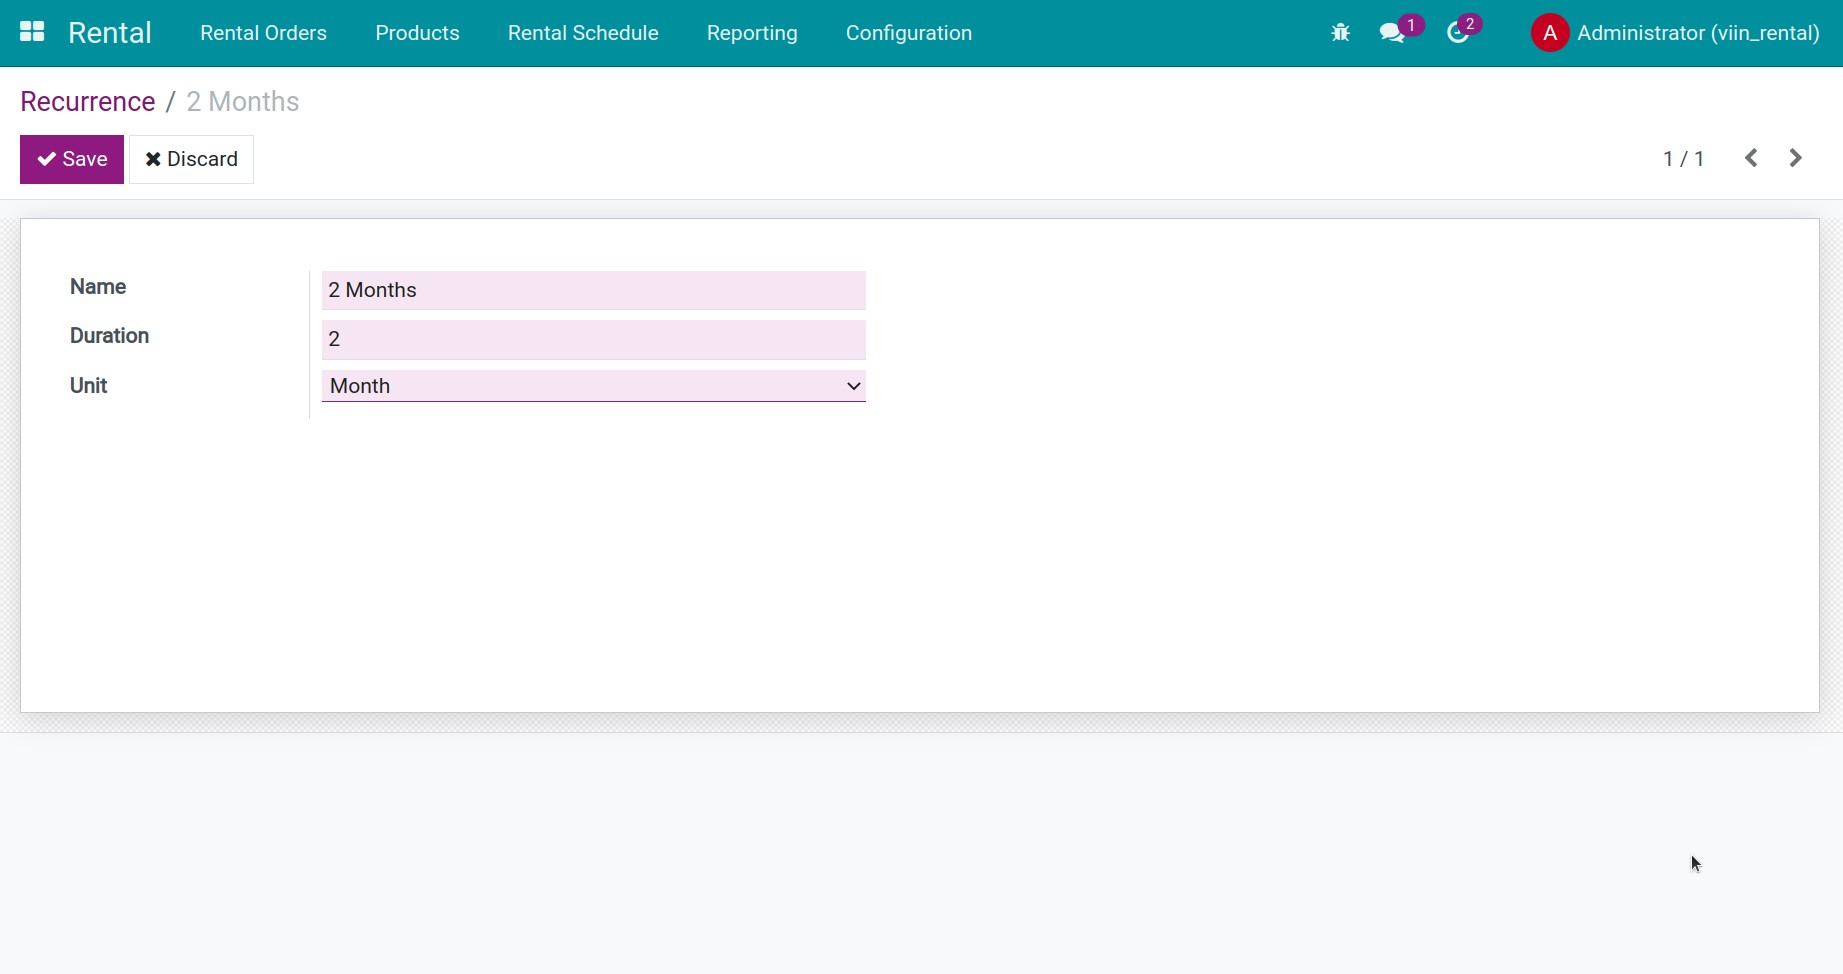
Name: The name of the recurring discount, representing the time period in the cycle. For example: 1 day, 1 week, 1 month,…
Duration: Set up periodic recurring discount.
Unit: Set unit recurring discount.
General configuration of Rental product
Basic information tab
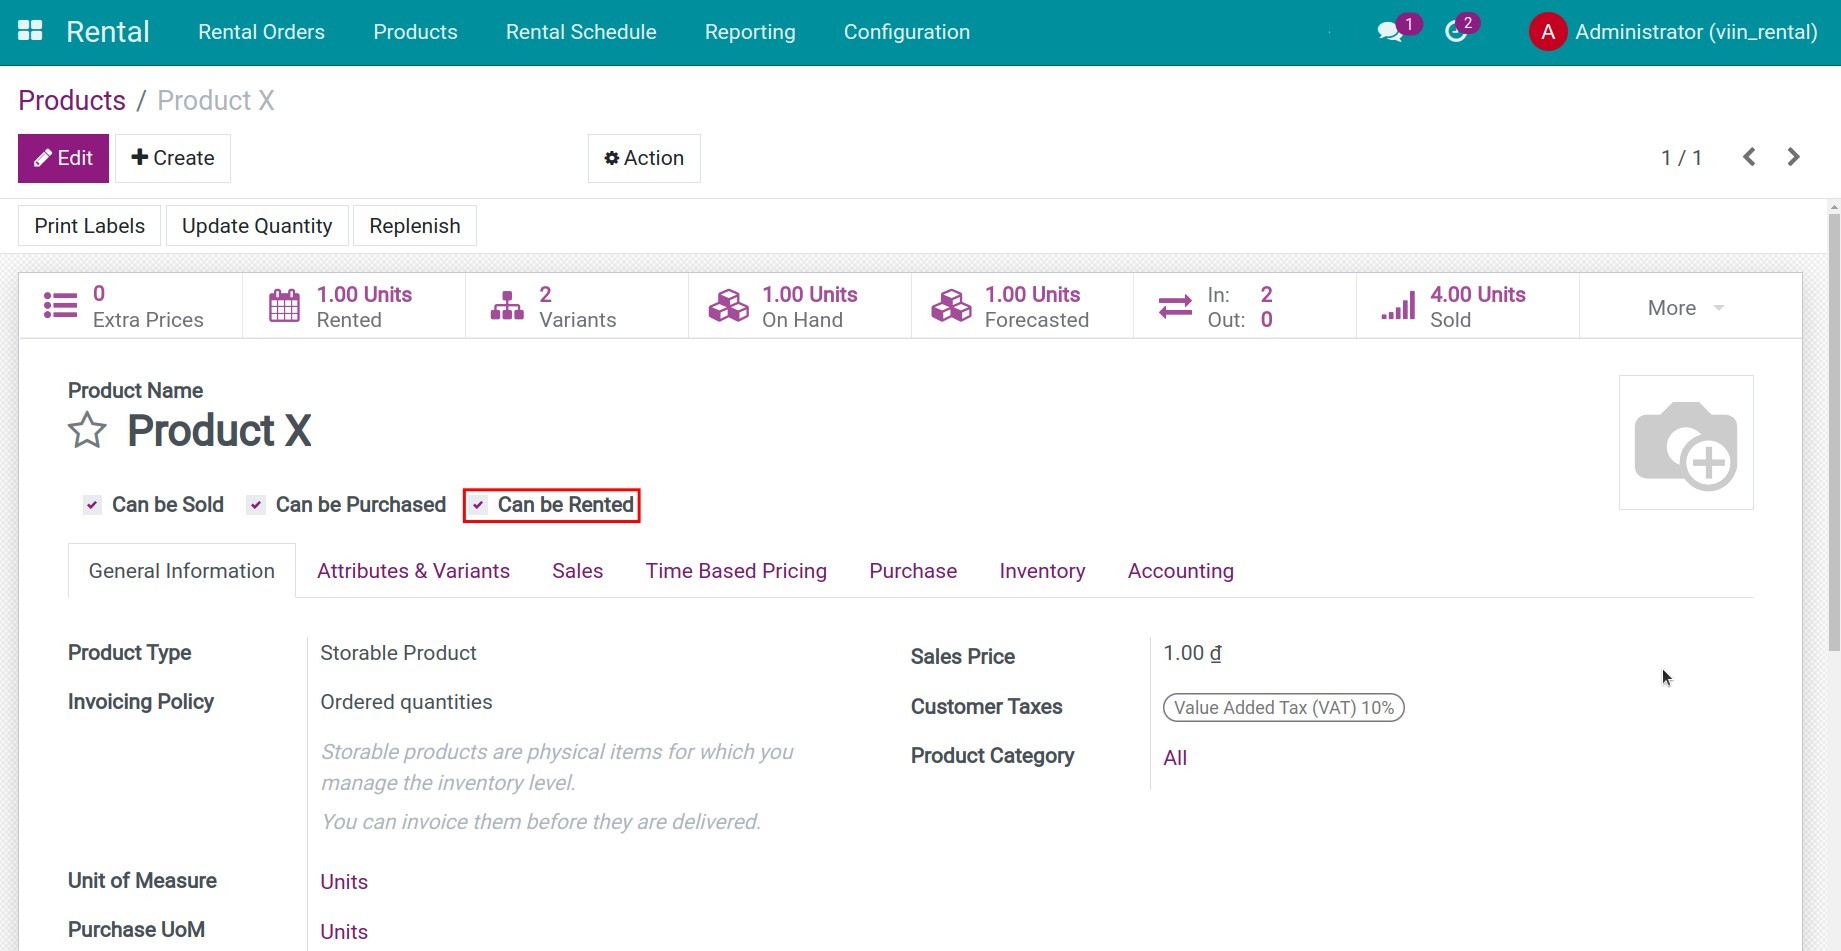
Can be Rented: Check this box so that the product can be used for rental.
General Information tab
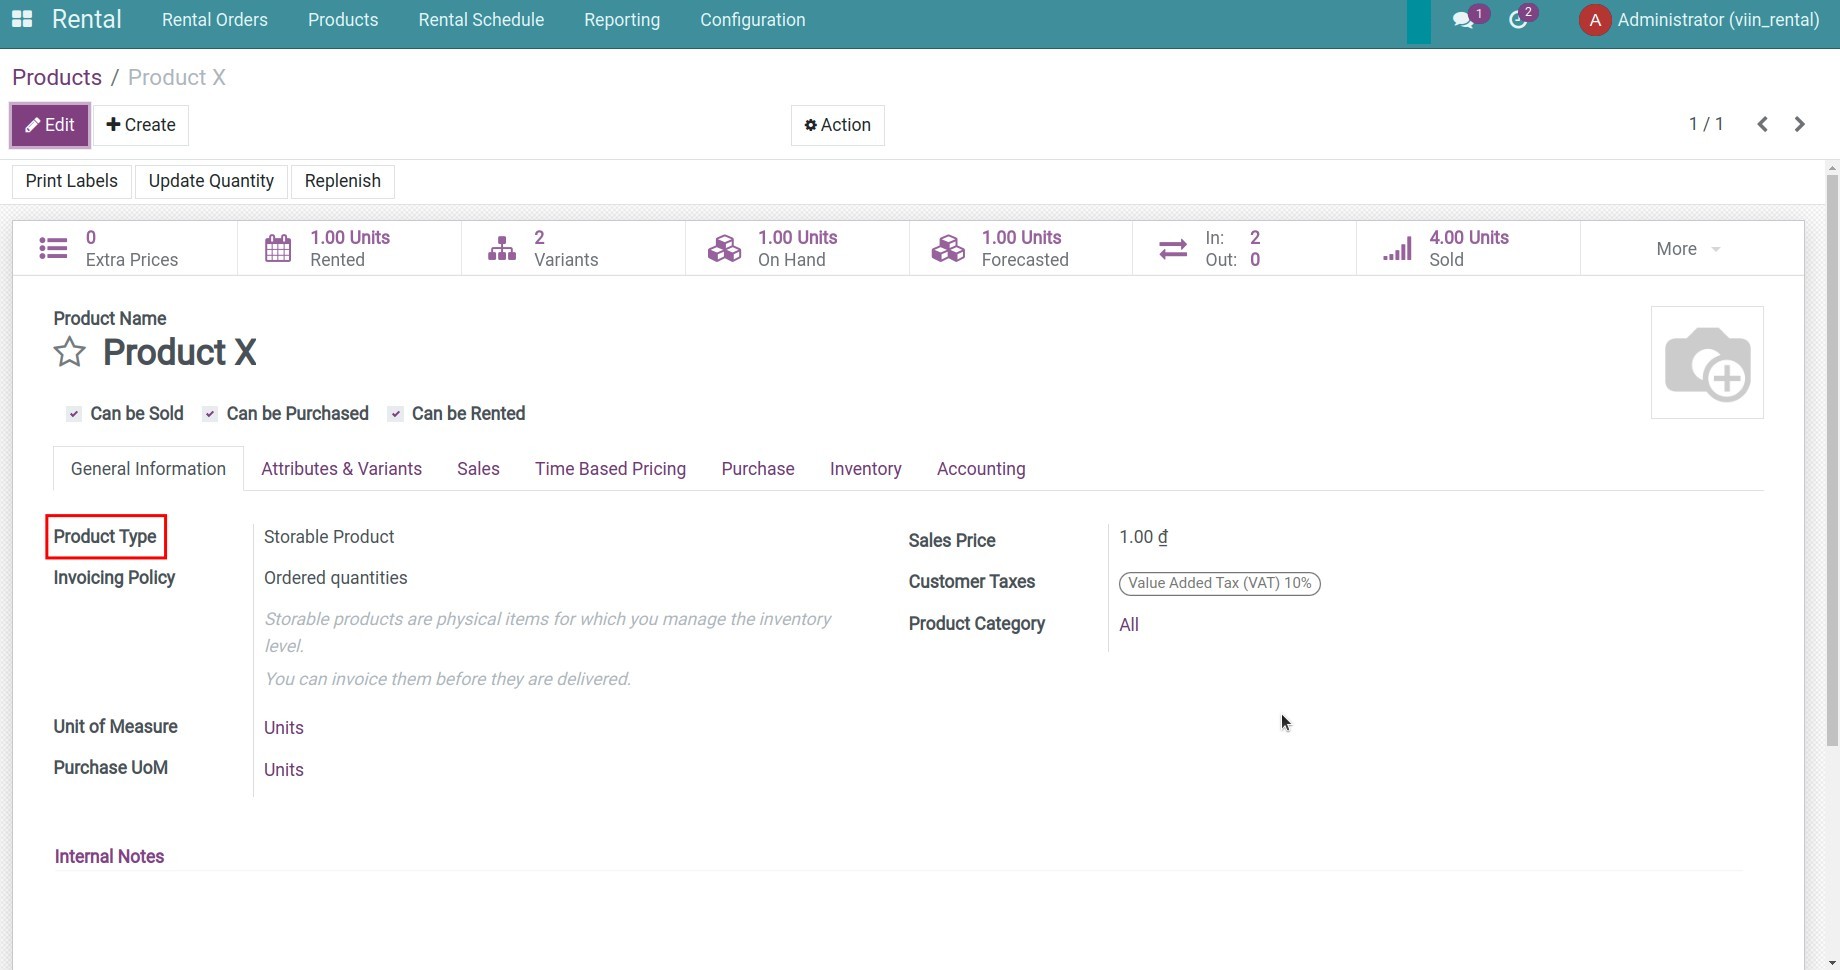
Product Type: Rental products need to be selected as Storable Product or Consumable.
See also
Time Based Pricing tab
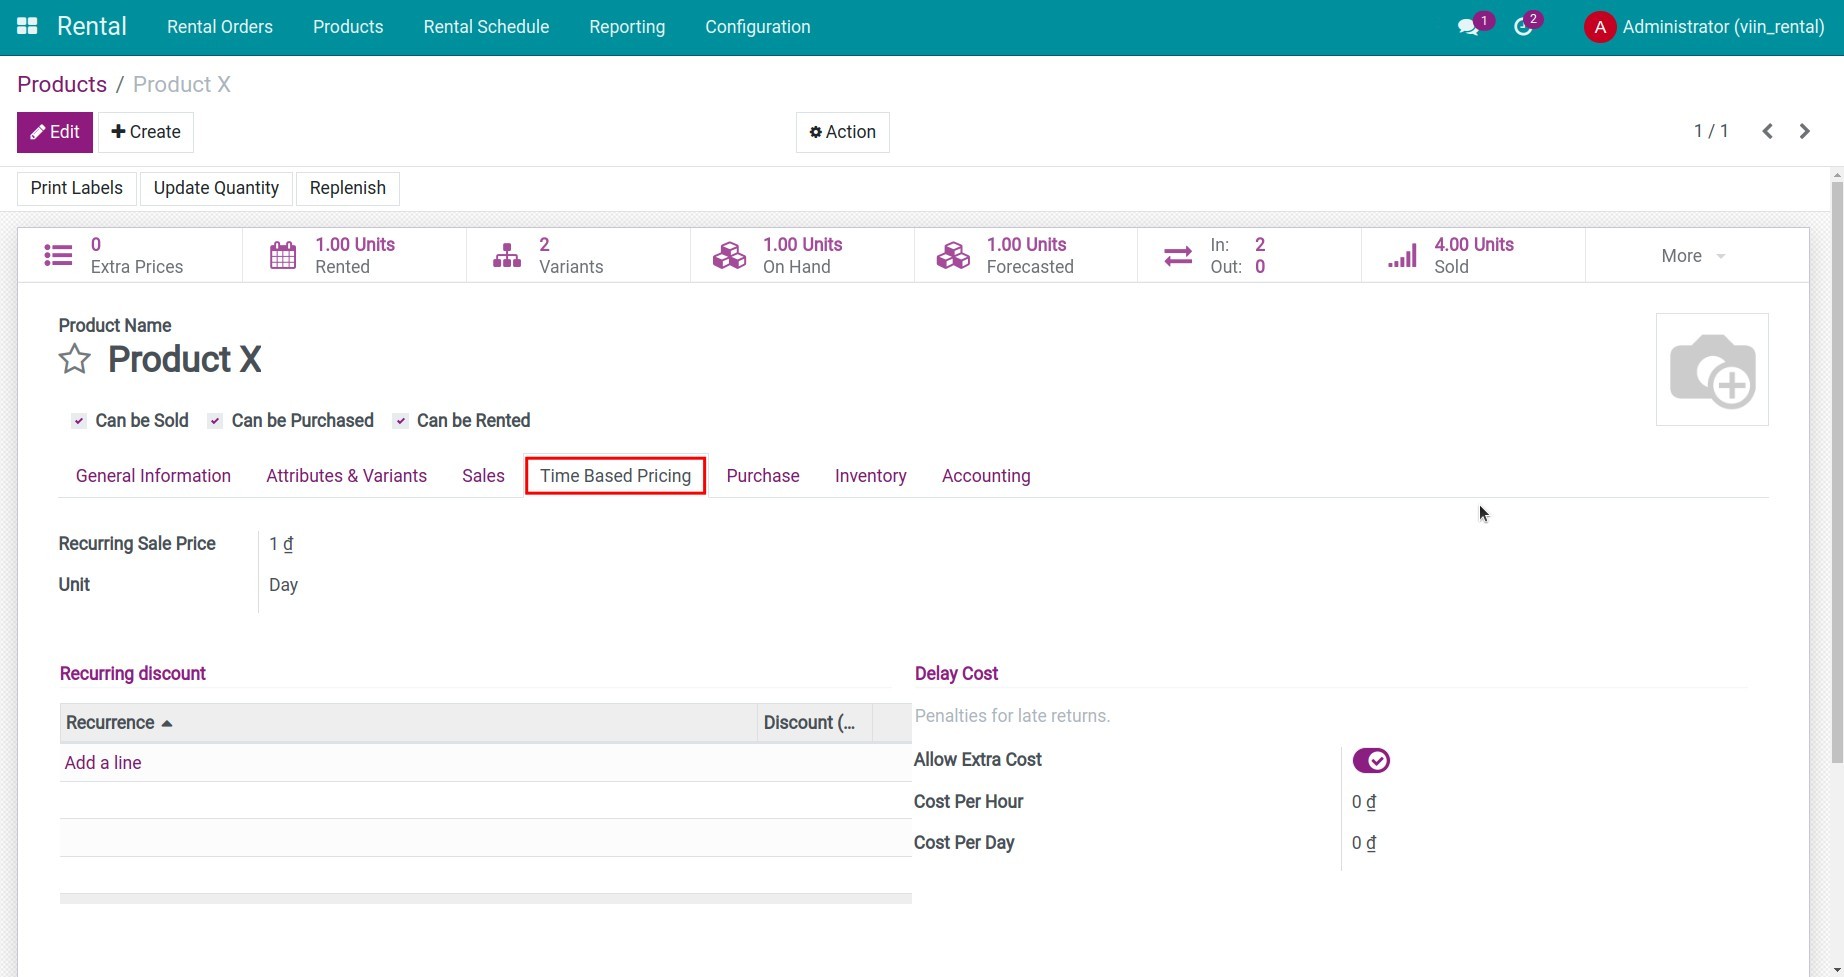
Recurring Sale Price: Enter the default rental price of the product for a specified period in the Unit field.
Unit: Enter the time period to calculate the default rental price of the product.
Example: A product is set to rent at $300 for a month (30 days). Product rented within 07 days will be charged as follows:
Amount to be paid = Recurring Sale Price x (Number of rental days/30 days) = 300 x (7/30) = $70
Recurring Discount: Allows you to set up a rental cycle discount. Before setting up discounts, you need to set up Recurrence of Rental product discounts. When the number of rental days reaches the set number of days in the recurrence, the rent will be reduced correspondingly to the percentage set in the Discount (%) column.
Delay Costs: Allows you to set up costs incurred when goods are late.
Allow Extra Cost: Enable the system to automatically calculate and add costs incurred if the goods are paid.
Cost Per Hour: The amount the customer has to pay extra per hour late.
Cost Per Day: The amount the customer has to pay extra on a day of late payment.
The application period for Delay Costs will be established in Default Delay Costs.
Set up automatic accounting of rental income
Note
For the system to automatically record entries related to product rental revenue, you need to set Inventory Valuation as Automated on Product Categories.
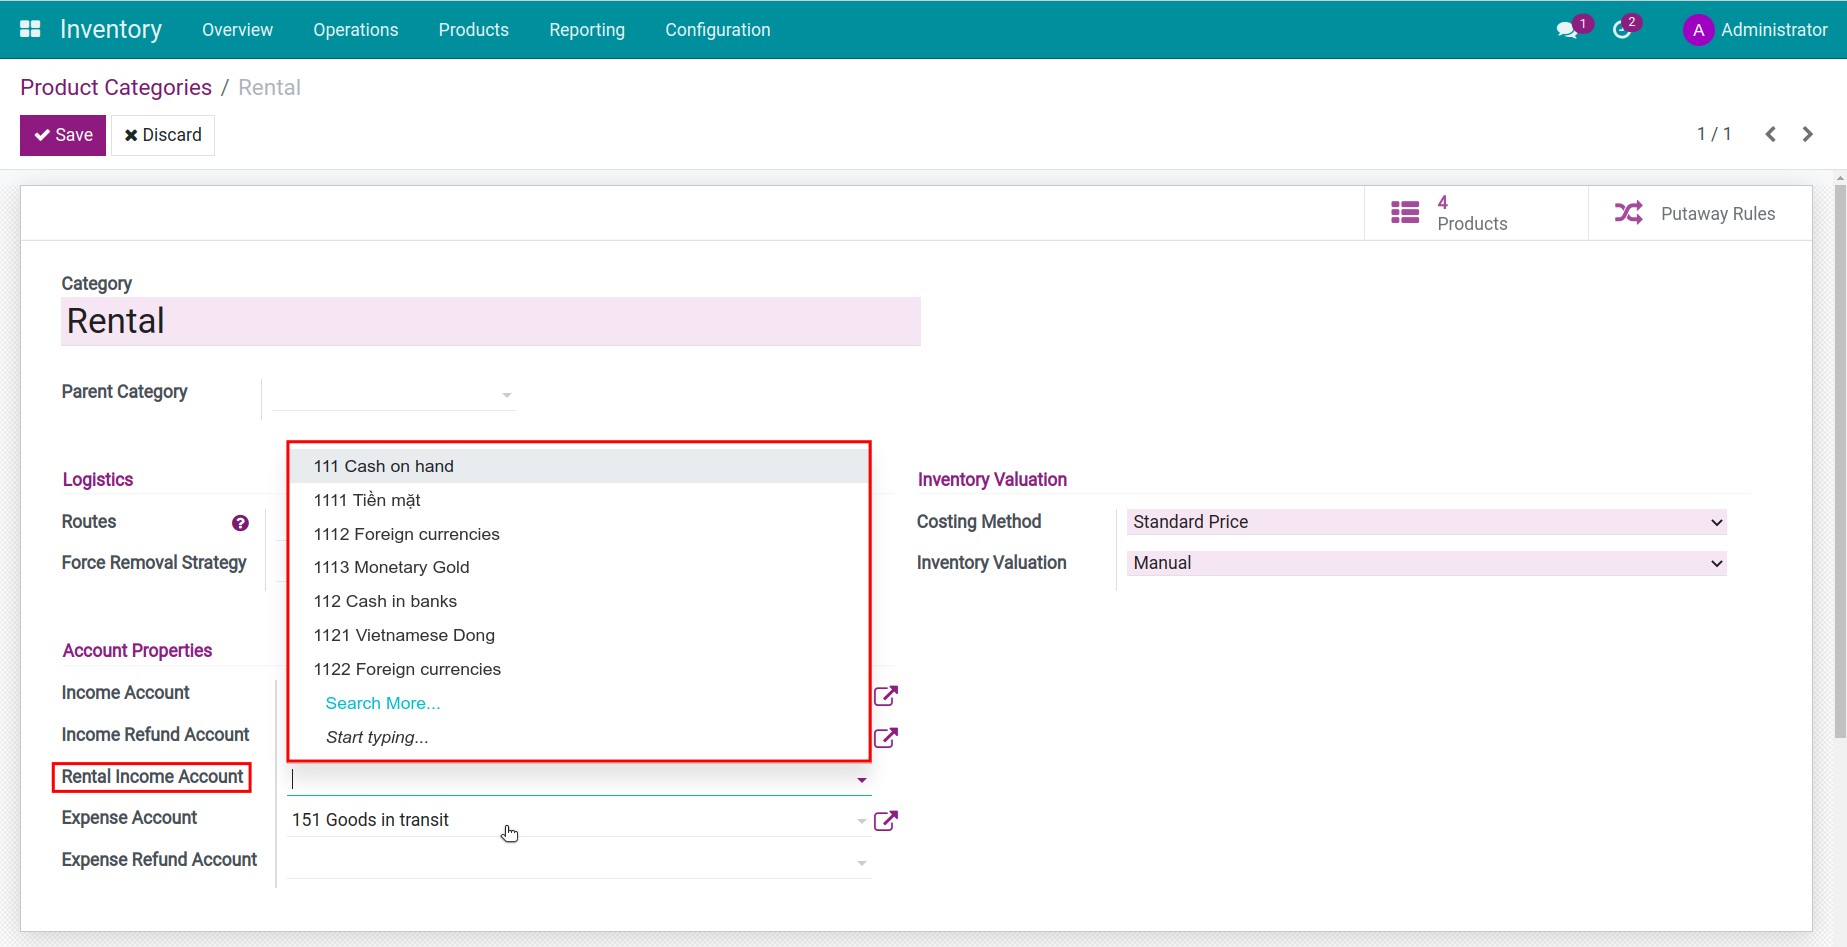
Scenario 1: Record rental revenue for all products on the same accounting account
Go to Inventory > Configuration > Product Categories, click Edit. In the Rental Income Account field, select the account that recognizes rental revenue for the product. When finished, press the Save button.
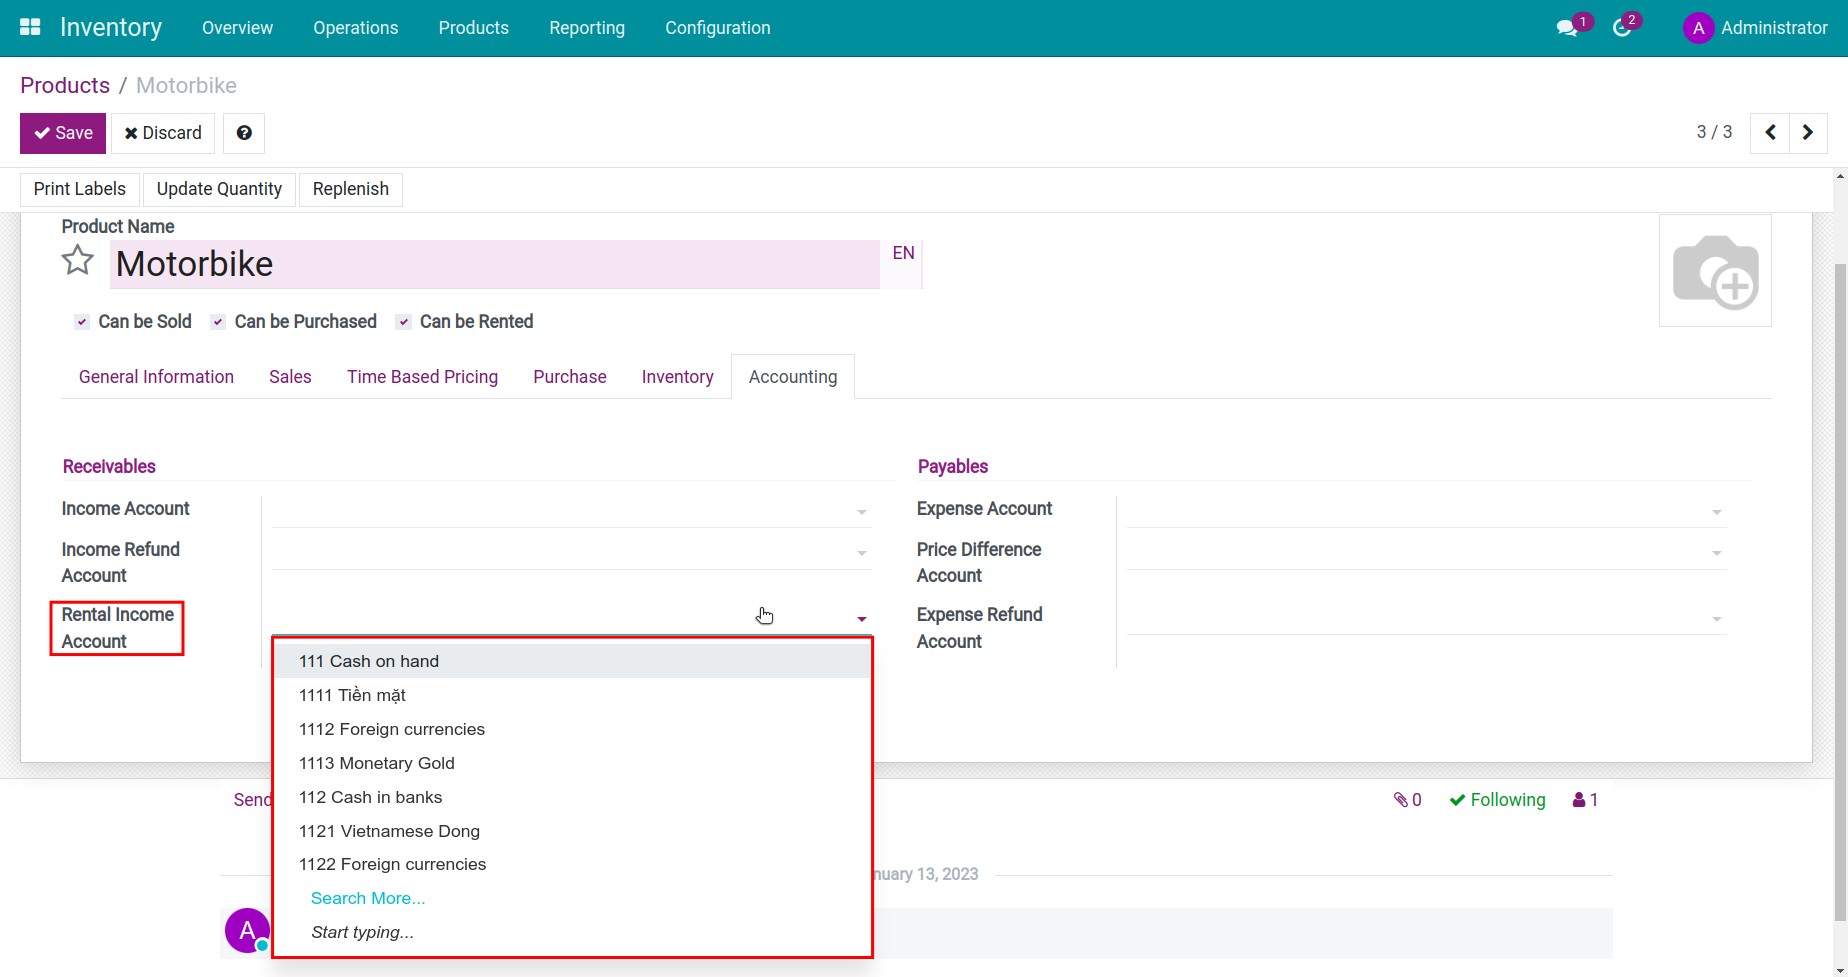
Scenario 2: Between rental products recorded on different revenue accounts
Access the product interface, select Accounting tab, click Edit. In the Rental Income Account field, click on the account that recognizes the rental revenue of the product. When finished, press the Save button.
See also
Related articles:
Optional module: