Steps to import opening balance for Asset
Requirement
This tutorial requires the installation of the following applications/modules:
When you first start using the Viindoo All-in-one Enterprise Management Software, there might be some data from your old bookkeeping system such as the balance of the accounting journals, bank accounts balance, payables/receivables balance, etc. This article will guide you through the opening balance importing process of assets in your business.
To import the opening balance of assets, do the following steps:
Prepare assets data;
Export the Viindoo system data structure;
Add real data to the data template;
Import data to the system.
Prepare assets data
Example:
Software start date: 09/01/2022.
Assets opening balance import date: 08/31/2022.
Data collection date: end of 08/31/2022.
Export system data structure
Export the data structure of asset categories
After creating the asset categories, export the data to get the External ID of each asset category. Navigate to Accounting > Configuration > Asset Categories, on the list view, select the asset category that you want to work with.

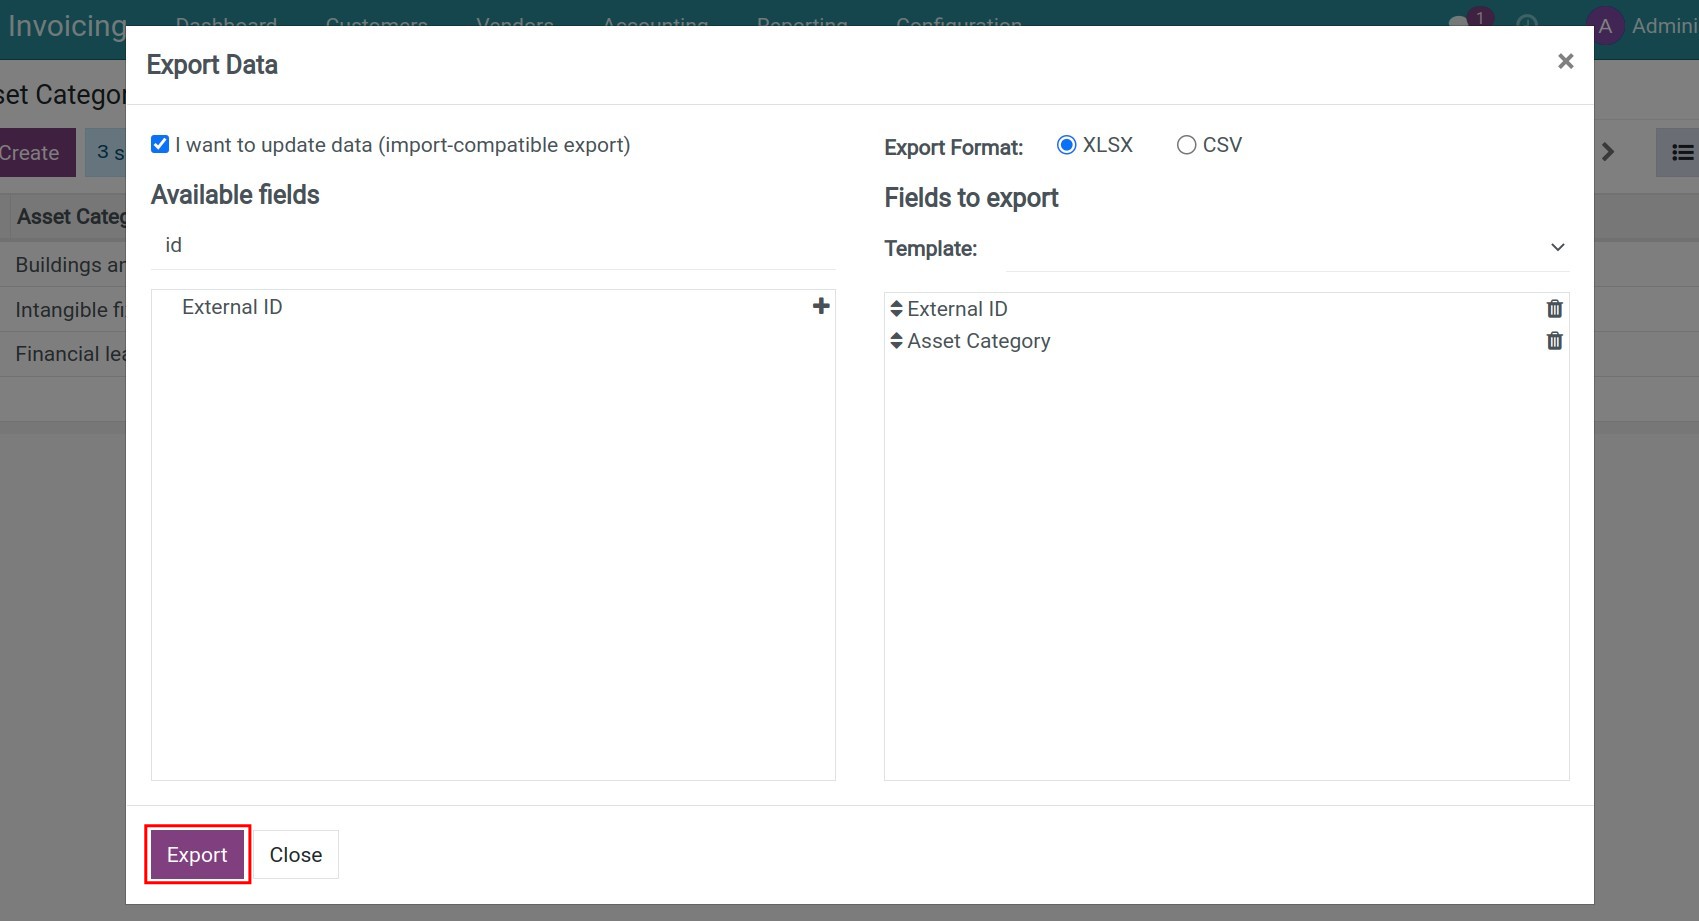
Press Action > Export, the Export Data window is displayed:
Enable the I want to update data (import-compatible export) option.
Export Format: Select XLSX or CSV.
Available fields: Select fields to import data in the XLSX or CSV format. Press + to add a desired field to the Fields to export column.
Fields to export: Indicates which fields will be exported. In this example, you will need to export the asset categories reference, including:
External ID;
Asset Category name.

Press Export, a XLSX or CSV file will be exported with your selected information.

Similarly, export the External ID of accounting accounts that will be used automatically by the system during the depreciation period.
Export asset data structure template
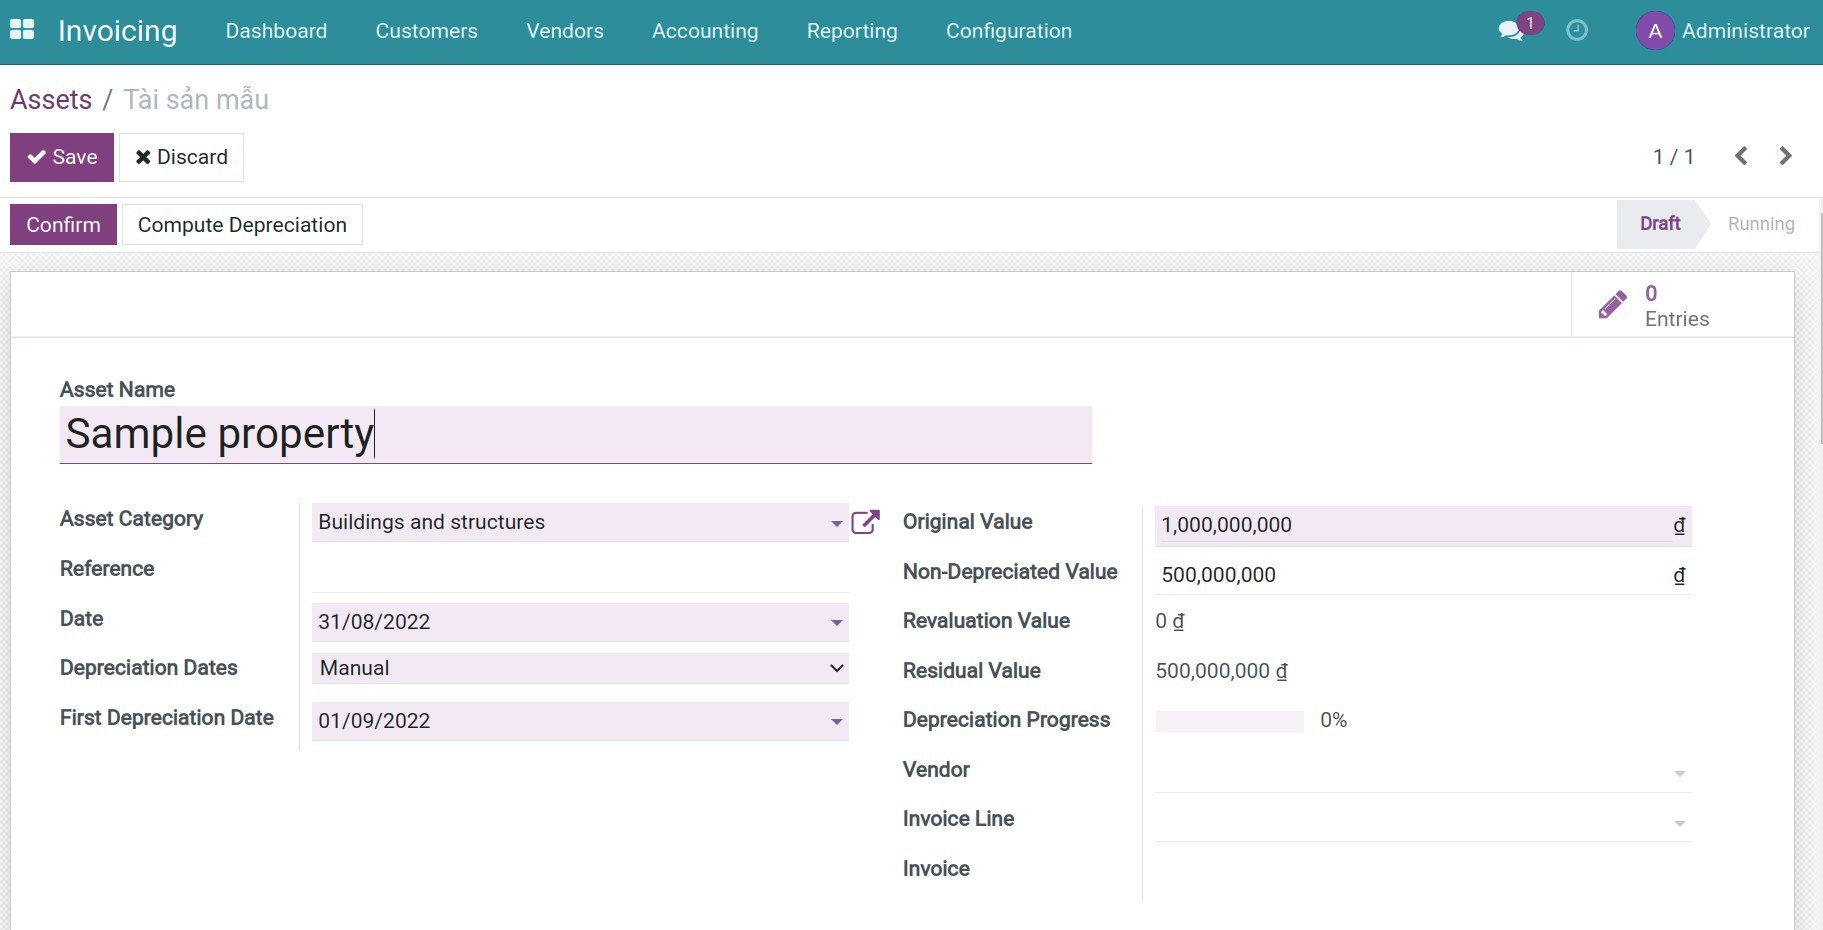
Navigate to Accounting > Accounting > Assets > Create to create an asset template.

See also
Export the data structure using the asset template: navigate to Accounting > Accounting > Assets. From the assets list view, select this newly created asset template.

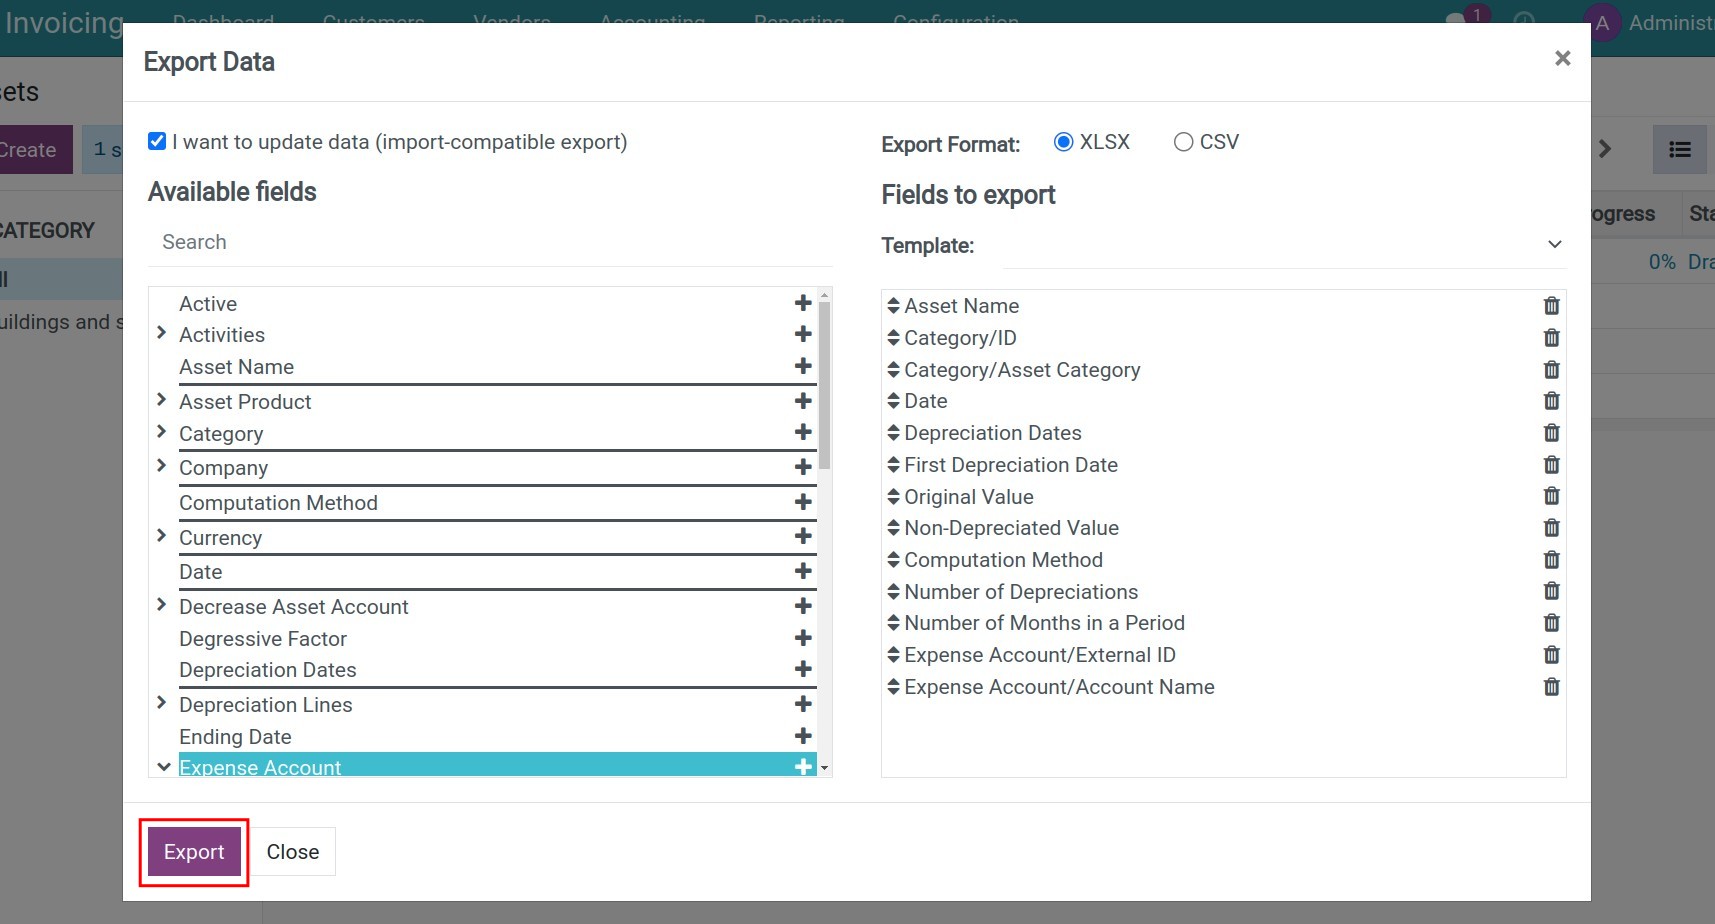
Press Action > Export, the Export Data will be displayed. Similar to exporting asset categories, select the asset template and export the following fields:
Asset Name;
Category/ID;
Category/Asset Category;
Date;
Depreciation Date;
First Depreciation Date;
Original Value;
Non-Depreciated Value;
Computation Method;
Number of Depreciations;
Expense Account/External ID;
Expense Account/Account Name.

Press Export, a XLSX or CSV file will be exported with your selected information.

Add real data to the data template
Add information of asset fields to the exported data template. For our example, you need to add data as below:

Note
Add data following the format on the template.
Select the correct External ID and accounting account of the asset categories.
Import data to the system
Once the data structure file is imported, navigate to Accounting > Accounting > Assets, go to Favourites > Import records.

Press Upload File and select the file with real data that you prepared in the previous step.

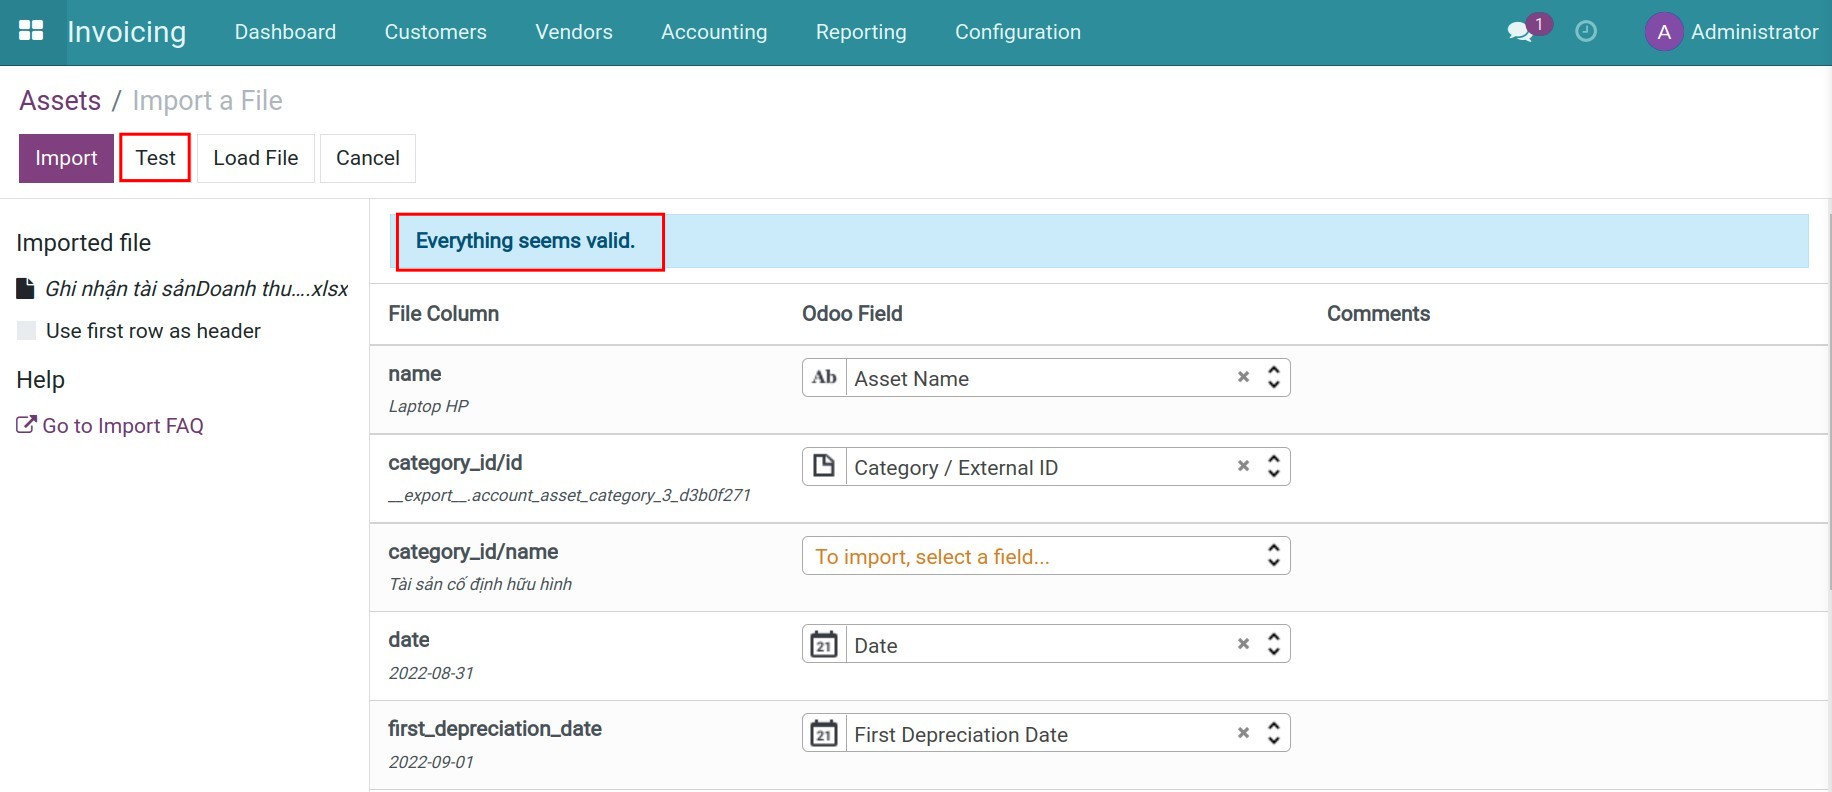
The data file will be uploaded and display the importing window, press Test to check your input data. If everything is ok, the Everything seems valid notification will be displayed.

Press Import to upload the oficial data to the system. Go back to the asset view to check the imported assets quantities and values.

See also
Related article
Optional module