How to create approval types and approval levels
Create approval types
To create approval types, navigate to Approval > Configuration > Approval types > Create.
Note
You need to have the Administrator access right of Approval app in Viindoo in order to create approval types.

And then, fill in the needed information:
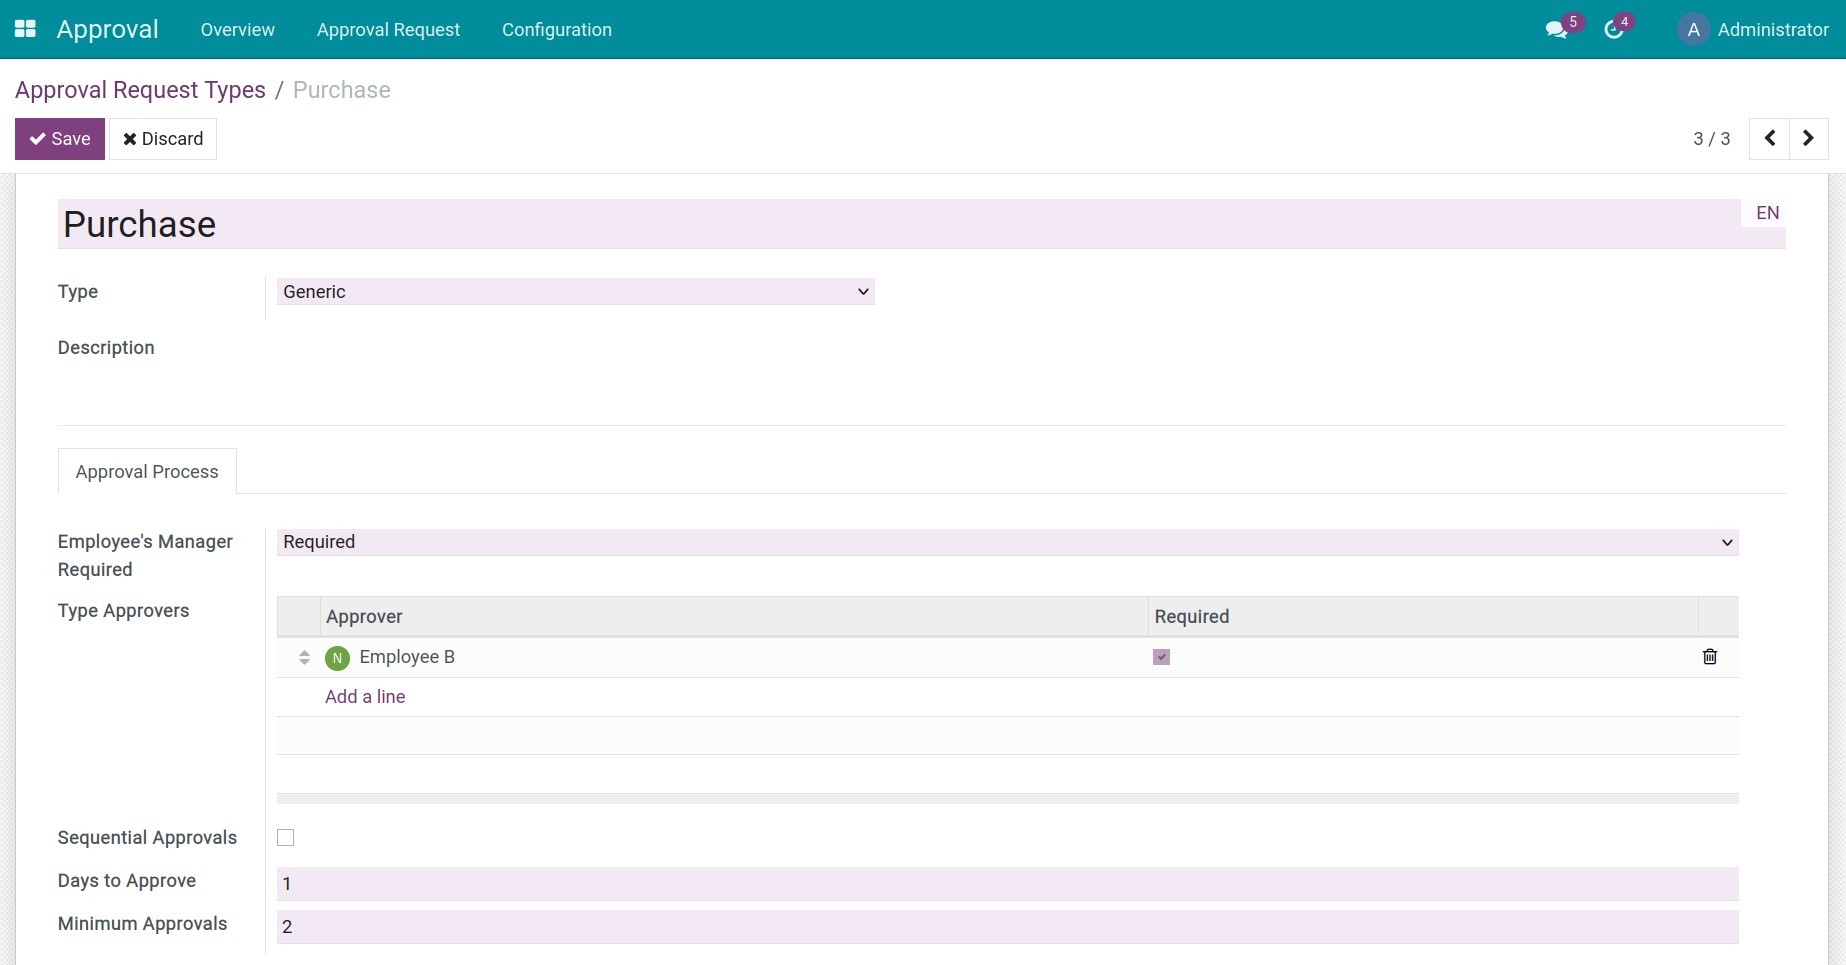
Type the Approval title.
Type: This field will help categorize, statistics approval types. Different approval types can have different information fields to fit the approval requests.
Employee’s Manager Required: Manage how the managers join the approval process of the approval requests belonging to this type.
None: The managers won’t join the approval process.
Optional: The manager will be one of the approvers but won’t be a required one. The request can still be approved if it reaches the minimum approvals and all the required approvers are approved.
Required: The employee’s manager is one of the required approvers. That means if the manager doesn’t approve the request, it will be refused.
Note
The manager must have the Team Approver access right to the Approval module and is set as the direct manager of the employee to be an approver of the approval type.
Type Approvers: List the approvers for this approval type (without employee’s manager).
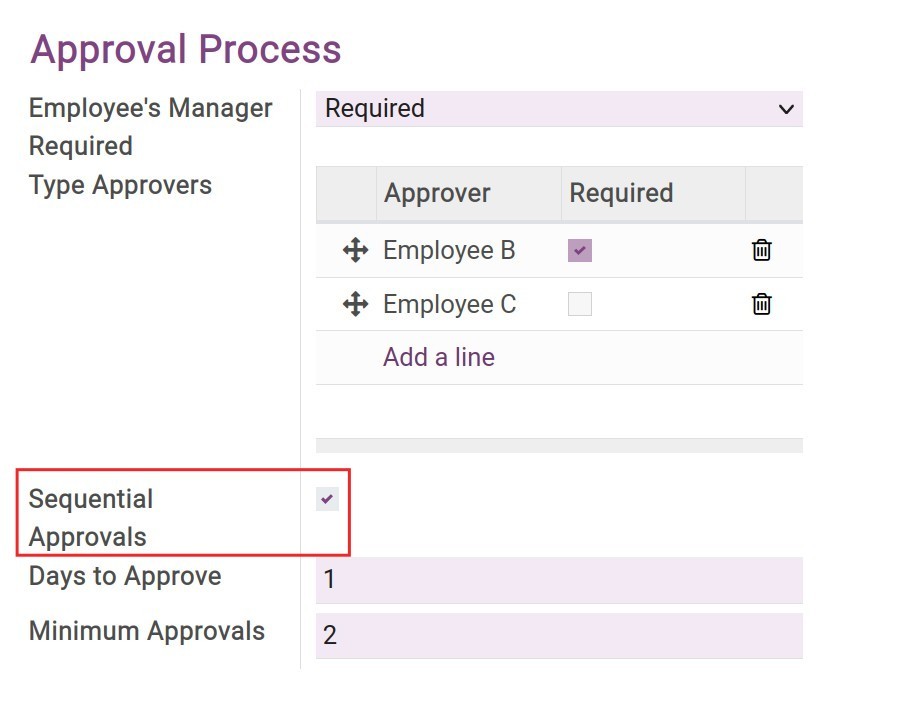
Sequential Approvals: If selected, the approvers will receive approval notifications in a sequence from the top to the bottom.
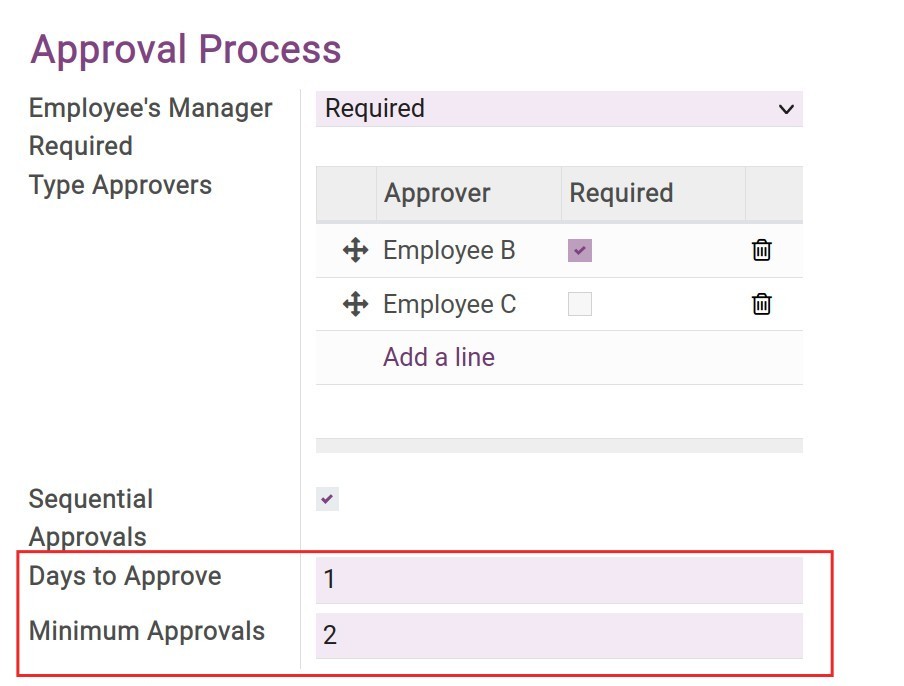
Days to Approve: The number of days for the approvers to approve the requests belongs to this type. You can use this information to calculate the deadline for the requests.
Minimum Approvals: The minimum times that Approval requests of this type need to be approved.
Description: Describe the content that needs to be approved.
After filling in all the information, press Save to save the approval request type.
Set up approval levels
To set up approval levels of an approval type, navigate to Approval > Configuration > Approval Types, select the approval type you want to set up, and then press Edit.

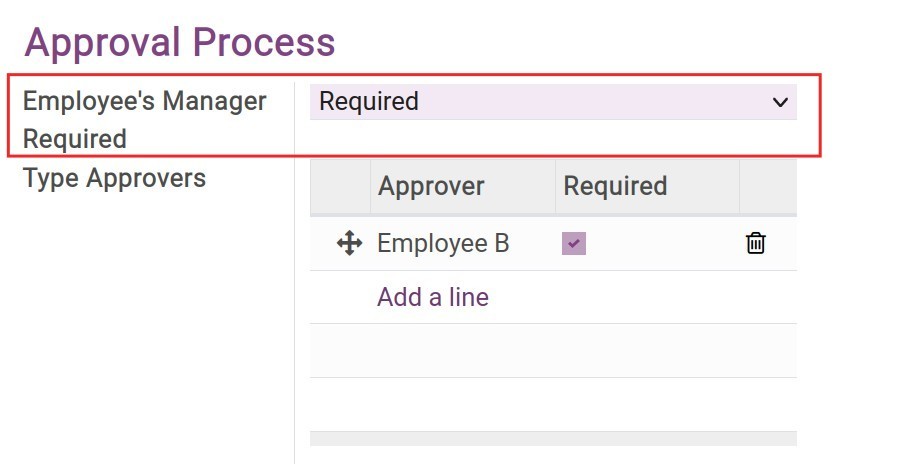
In the Approval Process section, on the Employee’s Manager Required field, select Optional or Required to make the Manager of the employee become the first approver. If you select None the person on top of the “Type Approvers” list will become the first approver.
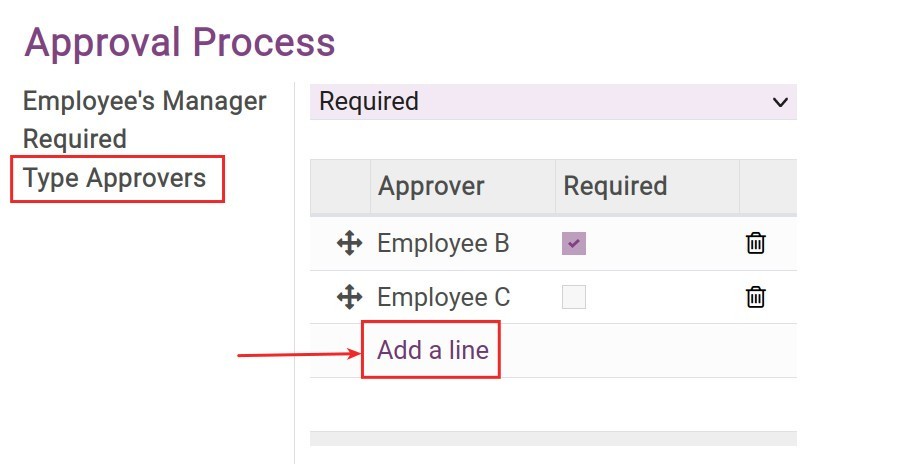
At the Type Approvers list, press Add a line to add the second and the third approver, etc. The approval levels will follow a sequence from the top to the bottom of the list. In our example below, “Approver B” will be the second approver, and “Approver C” is the last approver.
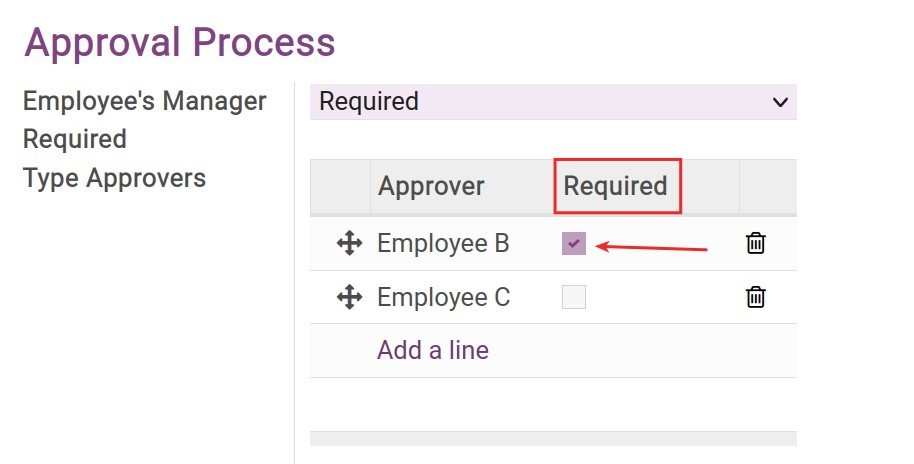
If you select the Required box next to the approver’s name:
If that approver Approve the request. That request will be moved to the next approval level or the next stage.
If that approver Refuse the request. That request will be moved to the Refused stage and won’t be moved to the next approval levels.
After setting up the approver list, select Sequential Approvals to activate the sequential approvals feature. If not selected, all the approvers will receive approval notification at once.
Set up Days to Approvals and Minimum Approvals
The approval request deadline = The approval request created date + Days to Approvals.
The total number of required approvals ≤ Minimum Approvals ≤ Total amount of approvers.
After finishing setting up, press Save. Then, the approval requests belonging to this type will have the approval levels as you set up.
See also
Related articles
Optional modules