
How to create and manage online surveys
Requirements
This tutorial requires the installation of the following applications/modules:
Create Surveys
To create a survey, go to the Surveys app, and click on New. See details about overview and configuration in Survey app: Getting started with Survey.
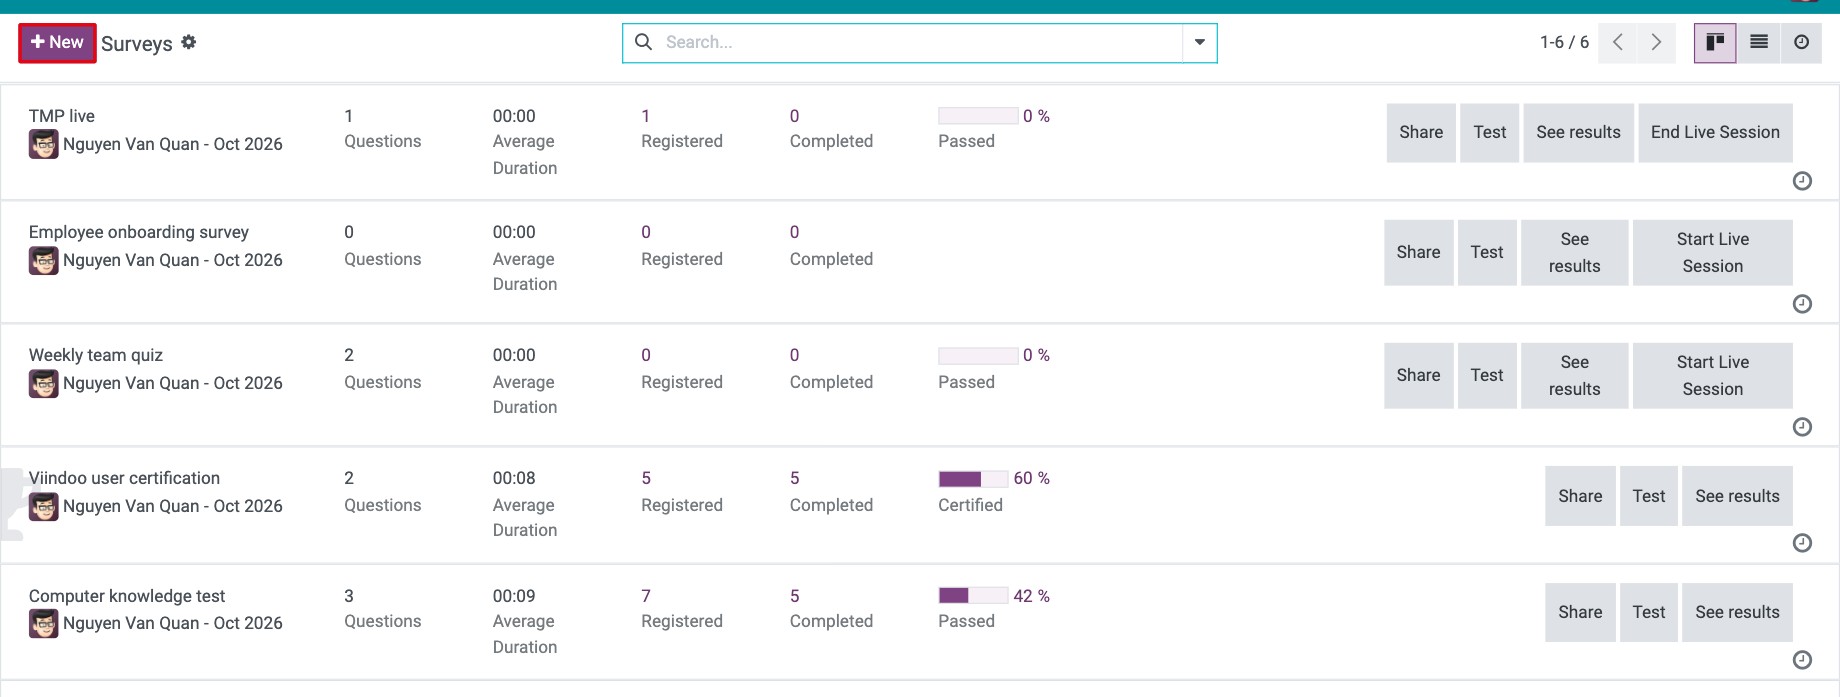
A survey form can be used for many purposes, such as administering tests or collecting data for evaluation. You can select the type of survey to create from the options at the top of the survey form.
Survey: This includes a standard survey form, used to collect feedback from clients. It has no scoring and no time limit.
Live session: In online courses, live sessions are used to conduct online assessments.
Assessment: This is used to create tests and certification exams. Participants are invited by link or email and their answers are scored. After completing the survey with a passing score, participants can receive a certificate.
Custom: This is the default option, applied to specific survey purposes that you customize.
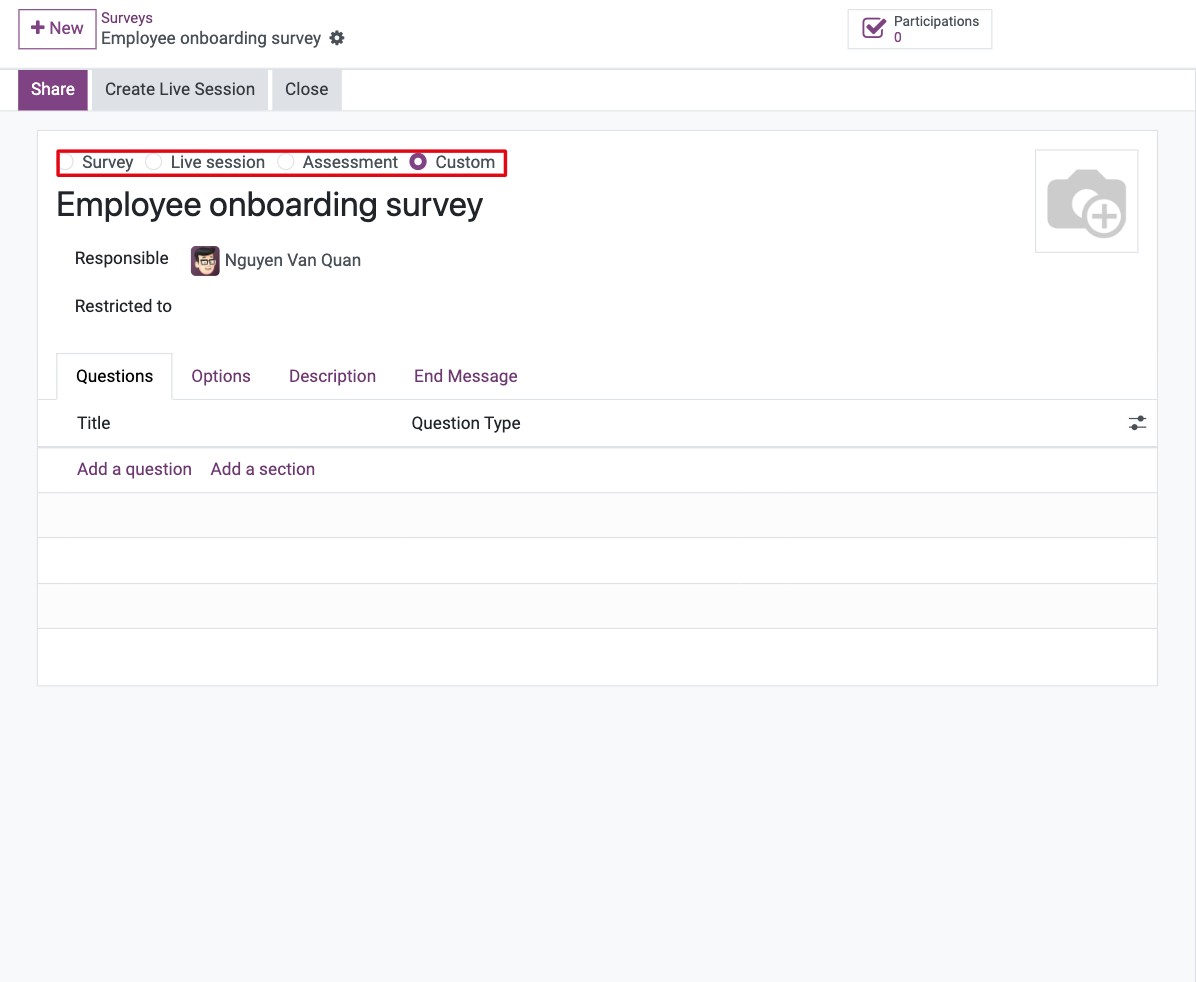
After that, add a survey title and set up details for the survey as below:
Set up survey questions
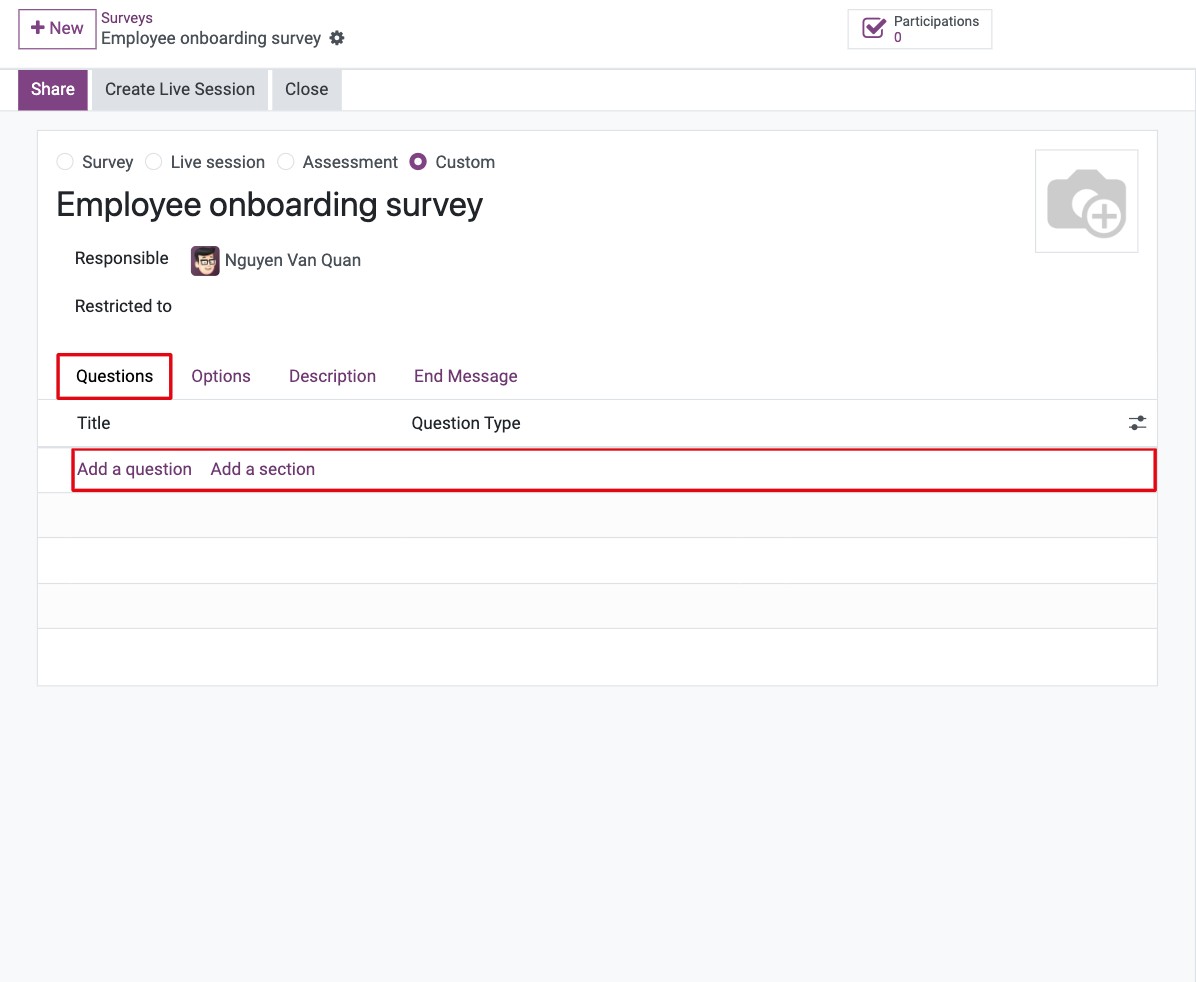
At the Questions tab, click on Add a question or Add a section to create a question or a section.
Tip
You can use Question bank to reduce manipulation.
Set up survey options
At the survey view click on the Options tab. You can customize the features of the survey with the following options:
Questions:
Pagination: Set up the layout of the survey.
One page per question: Each question will be displayed on one page.
One page per section: Questions under a section will be displayed one the same page.
One page with all the questions: All questions will be displayed on one page.
Display Progress as:
Percentage left: Shows the percentage of the survey completion progress (e.g. questions complete 1/10, progress will be 10%).
Number: Shows progress by quantity (e.g. questions complete 1/10, progress will be 1/10).
Question Selection: Display all questions or randomized per section.
Allow Roaming: Allows to go back to previous pages.
Participants:
Access Mode: Allow anyone with the link or invited people only.
Require Login: Survey participants are required to log into the system.
Limit Attempts: Available when the survey is for invited people only or requires login. Set the maximum number of attempts that each participant can make.
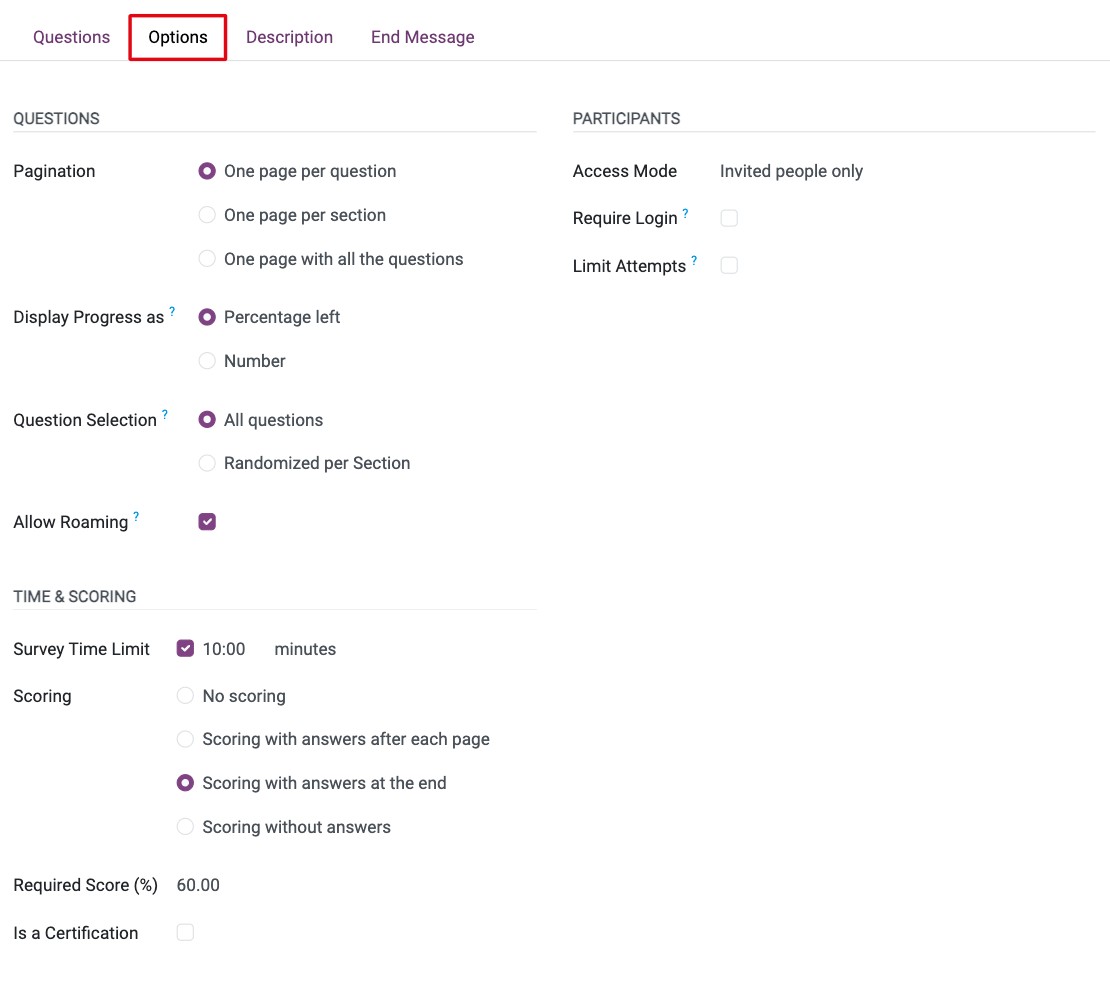
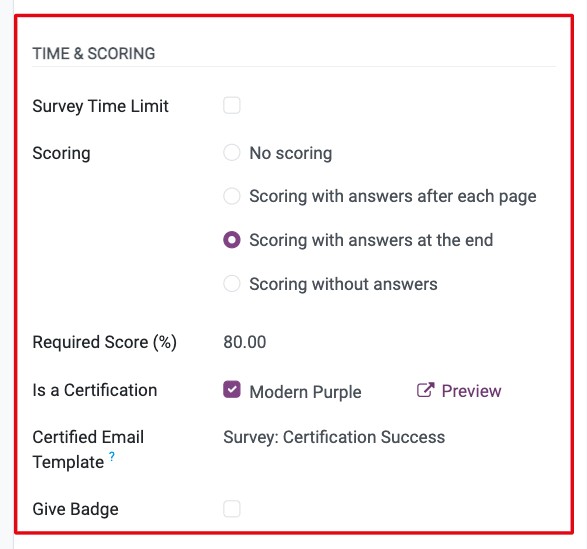
Time & Scoring: This group is not shown for the Survey type.
Survey Time Limit: Set time limit and create survey live sessions.
Scoring: Set up a scoring method for the survey: No scoring, Scoring with answers after each page, Scoring with answers at the end, or Scoring without answers. If you select to have a score, the information fields below need to be set up.
Required Score (%): If this survey is used for certification, you set the score requirement that participants need to achieve in order to be awarded the certification here. The score requirement is expressed as a percentage of correct answers on the survey.
Is a Certification: Check this if you want to set up an exam, then you can select a certificate template. You can preview the certificate template by clicking Preview.
Certified Email Template: Select a certificate email template. This email will be automatically sent to participants who earn the certification.
Give Badge: Available when participants must log in. Check this to award a badge to participants who earn the certification.
Live Session: Create survey live sessions.
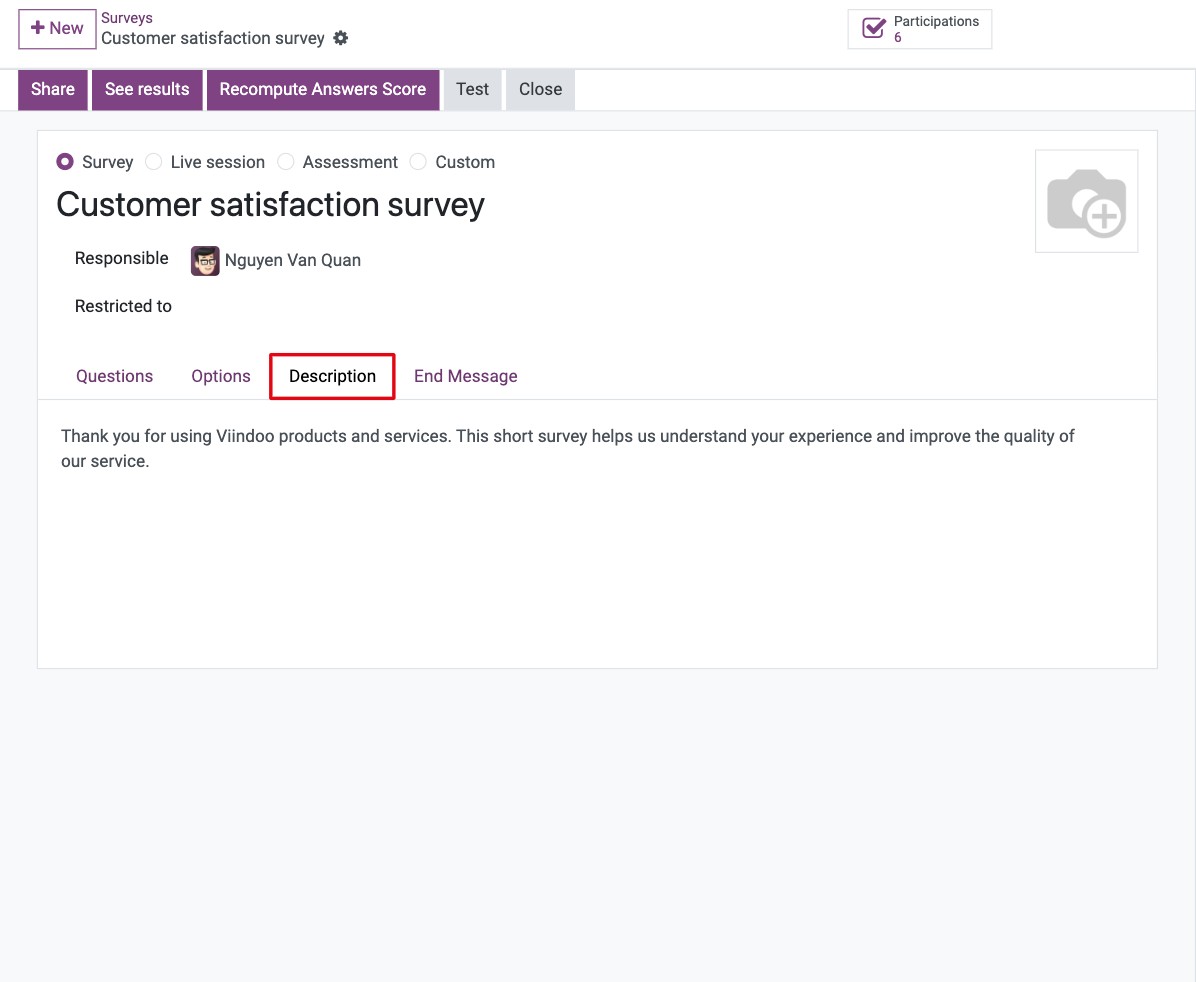
Description of the survey
The description will be displayed on the home page of the survey. You can use this to give the purpose and guidelines to your candidates before they start it.
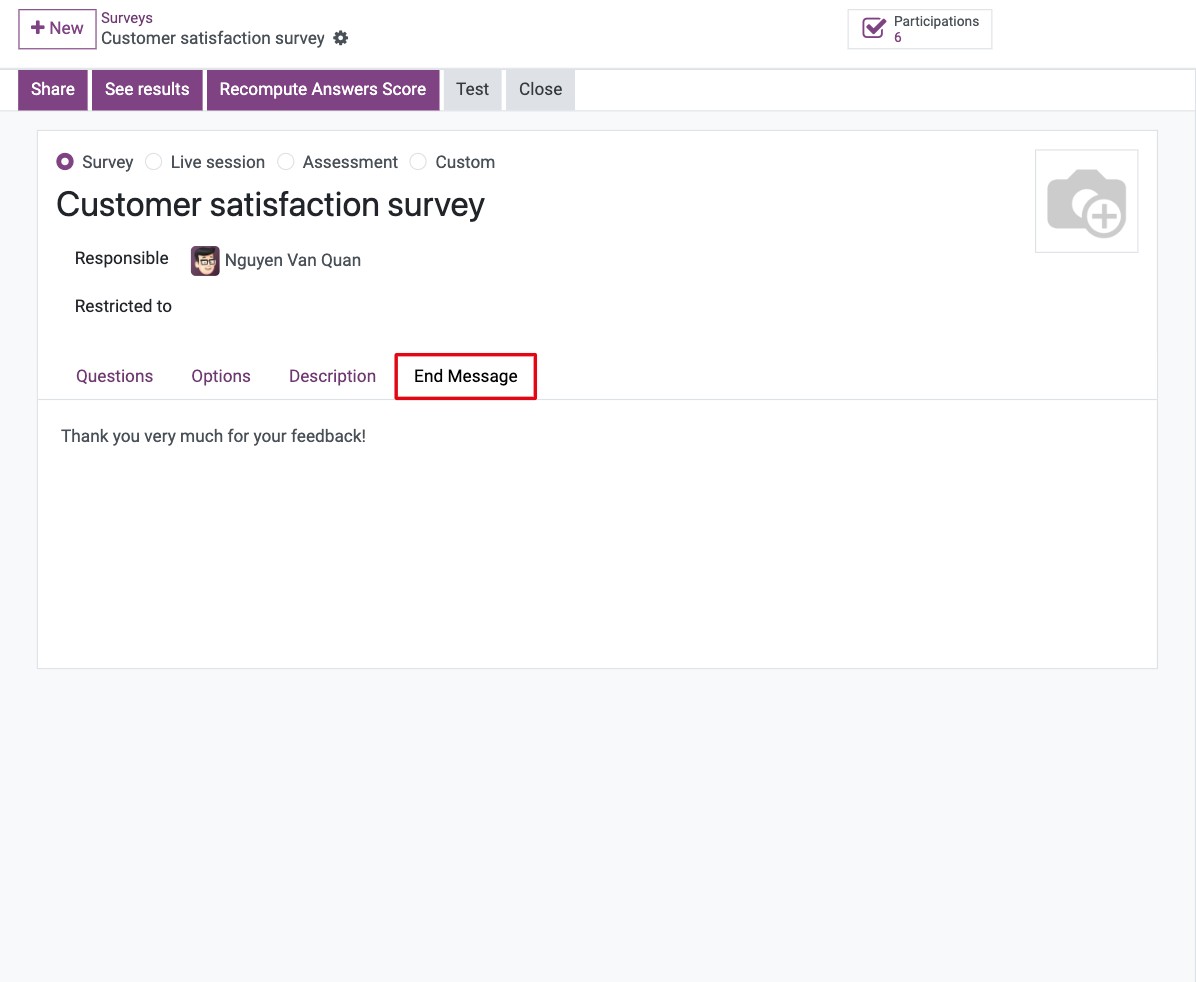
End message of the survey
End message will be appeared at the end of the survey. You can give thanks to participants.
Click on save icon to create survey.
Start Survey
To check if a survey is working as desired, click on Test.
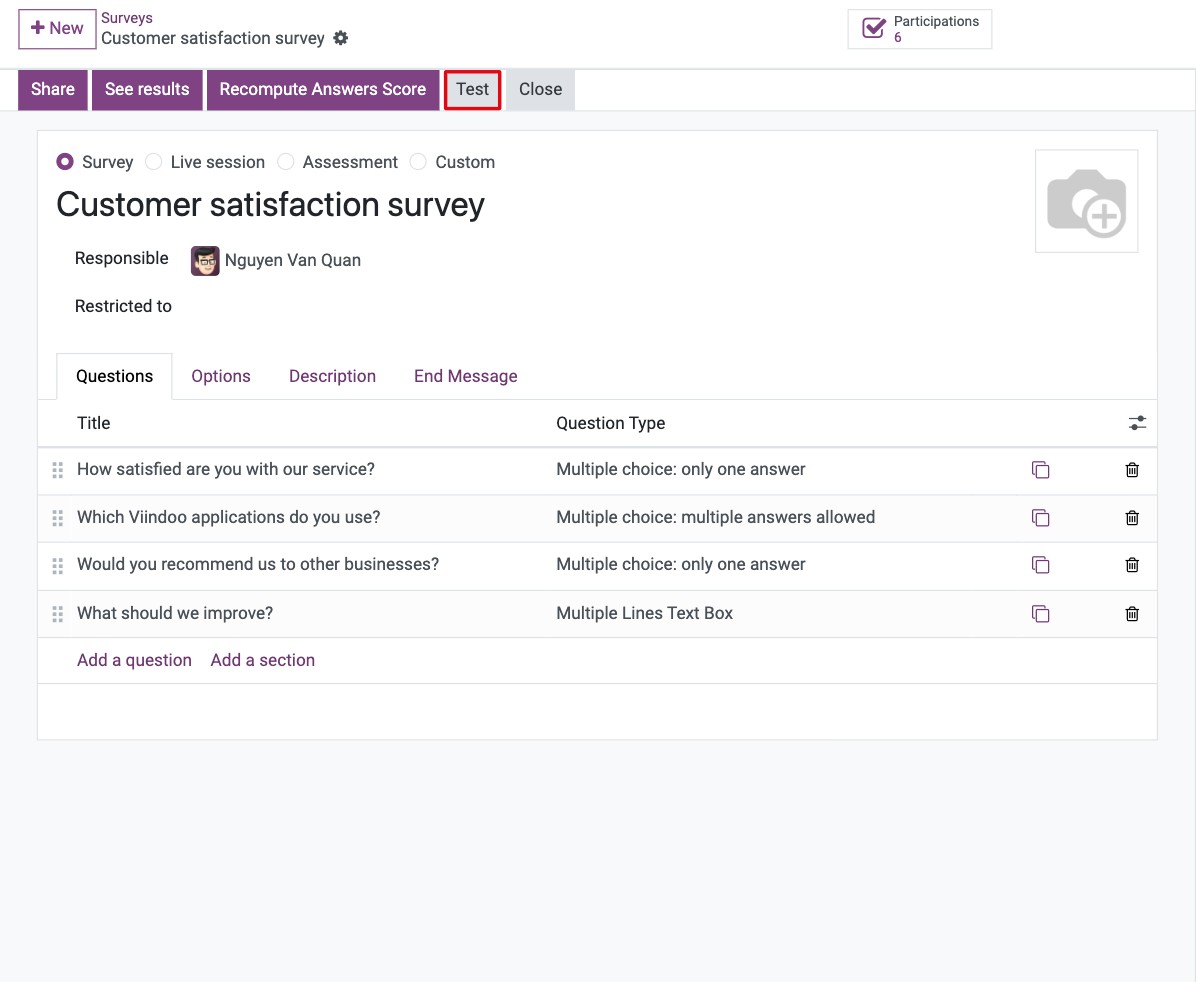
To go back to the survey view, click on Go to Survey at the top of the test page.

Click on Share to send this survey to participants. In the Share a Survey window, copy the Survey Link to send it yourself, or turn on Send by Email to invite participants directly by entering the recipients, the subject and the message, then click Send.

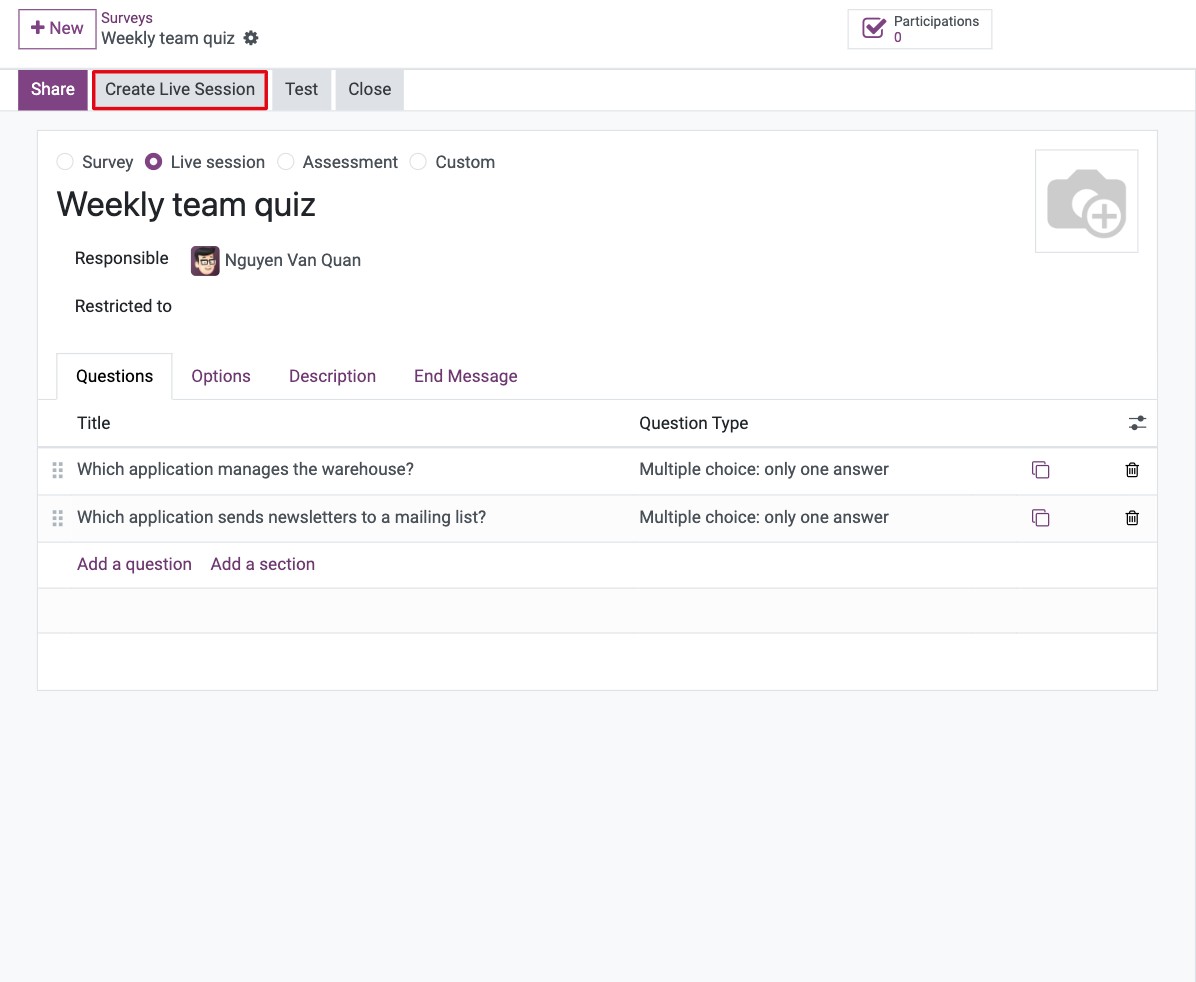
To run the survey as a live session (for example in a class), click on Create Live Session. This button is available for the Live session and Custom types, except when the survey is a certification. See Set time limit and Create live survey sessions.
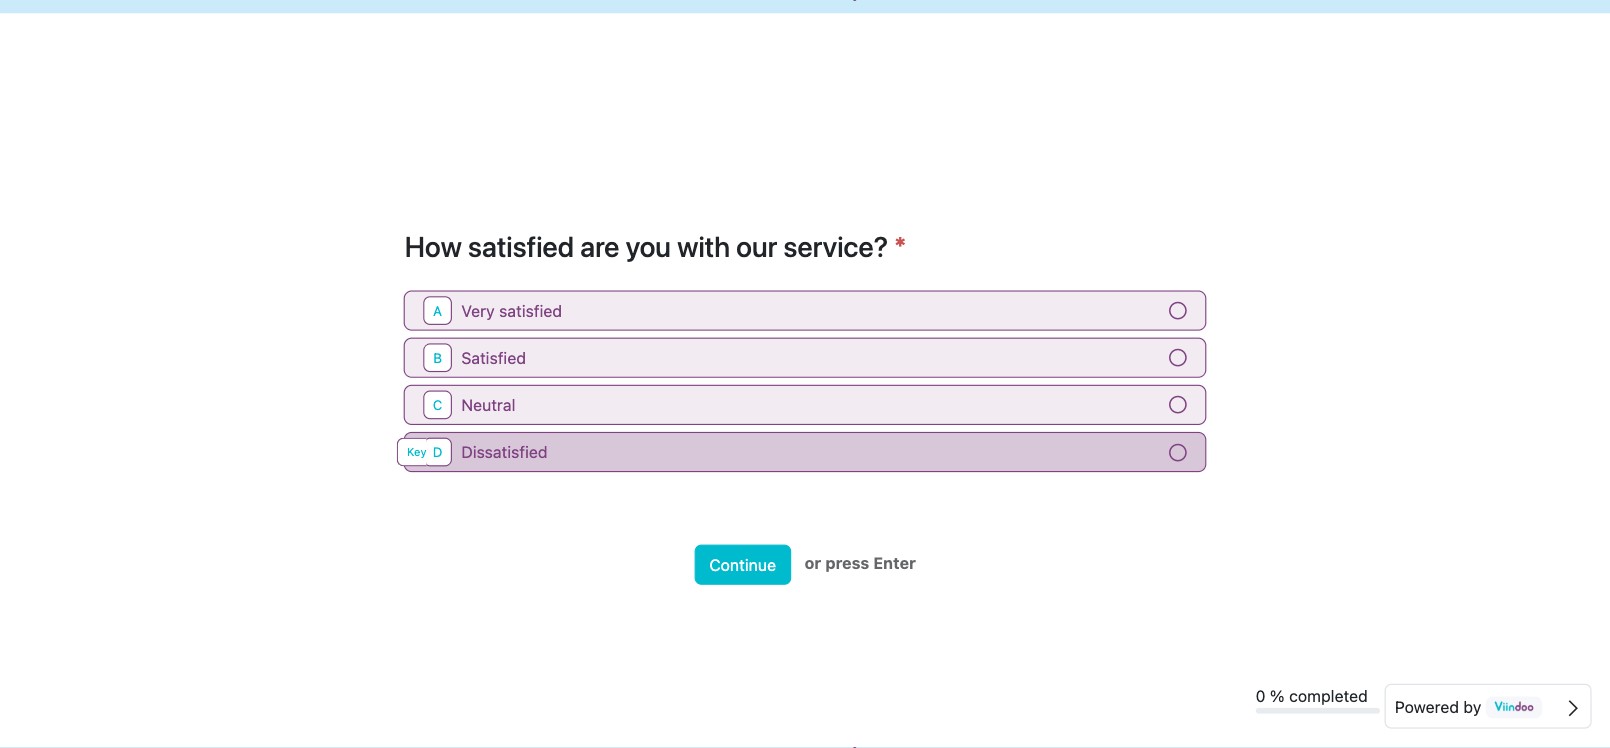
Participants can now open the link and answer the survey.
Manage surveys
Manage participations
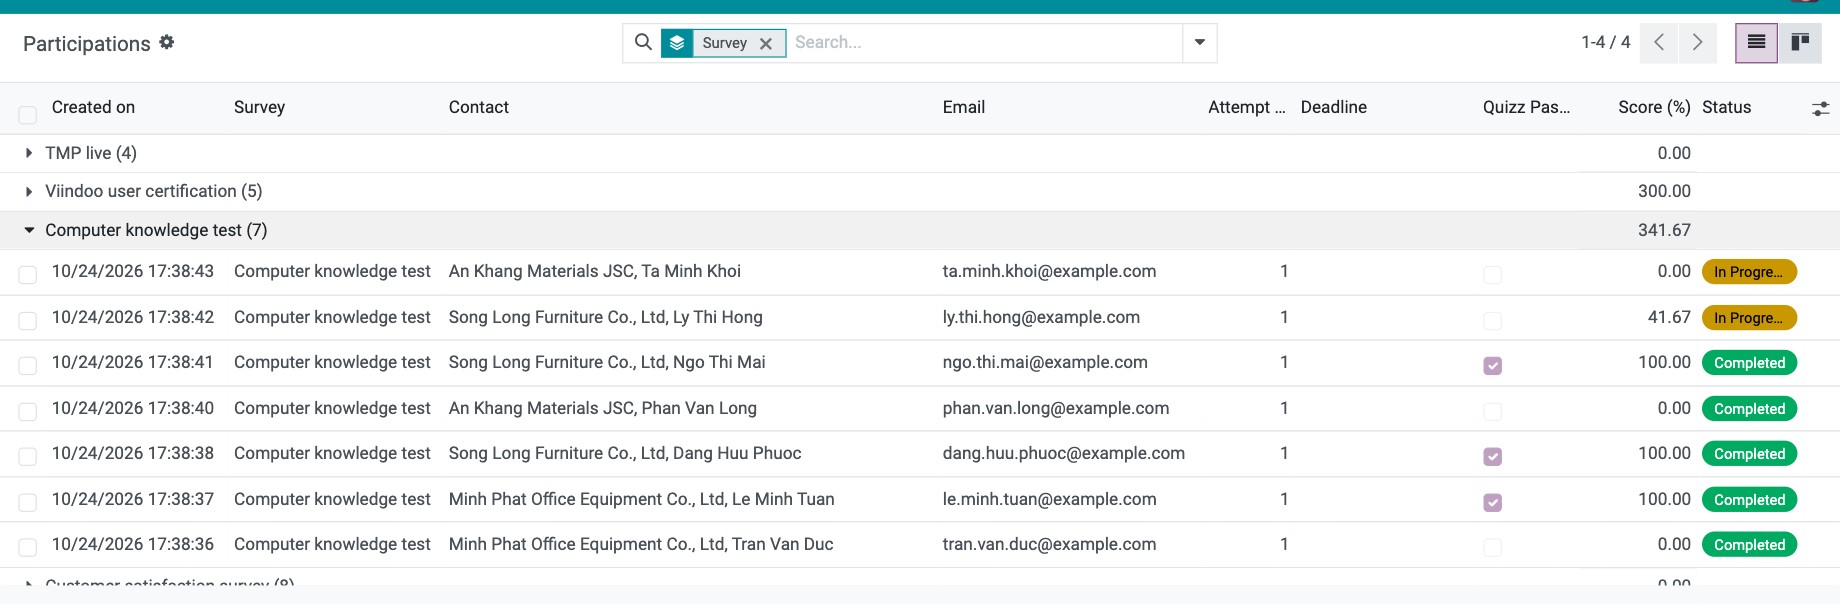
You can check the participation of surveys by navigating to Surveys ‣ Participations. The list is grouped by survey.
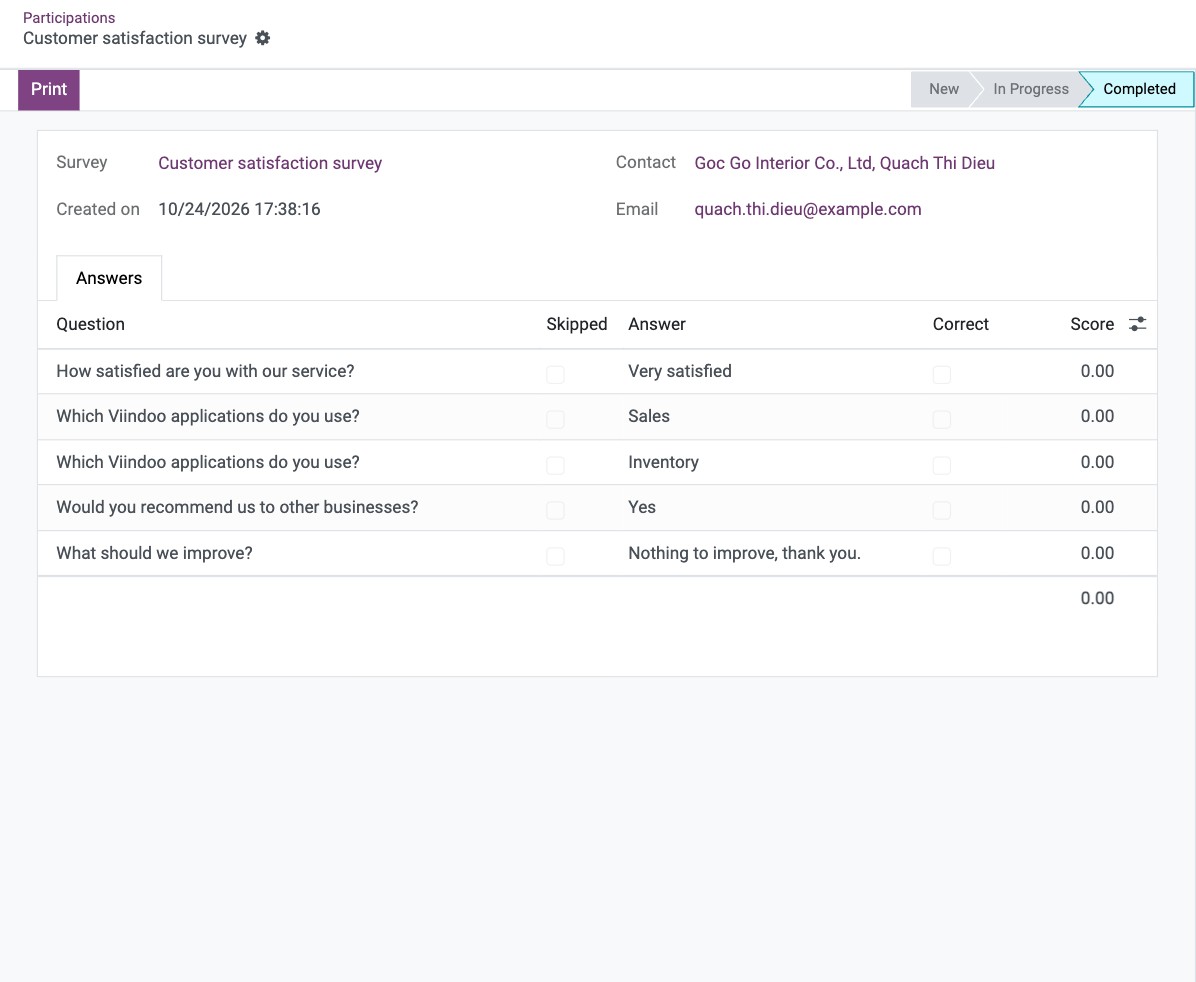
To check the detailed answers, click on that participation.
Manage surveys
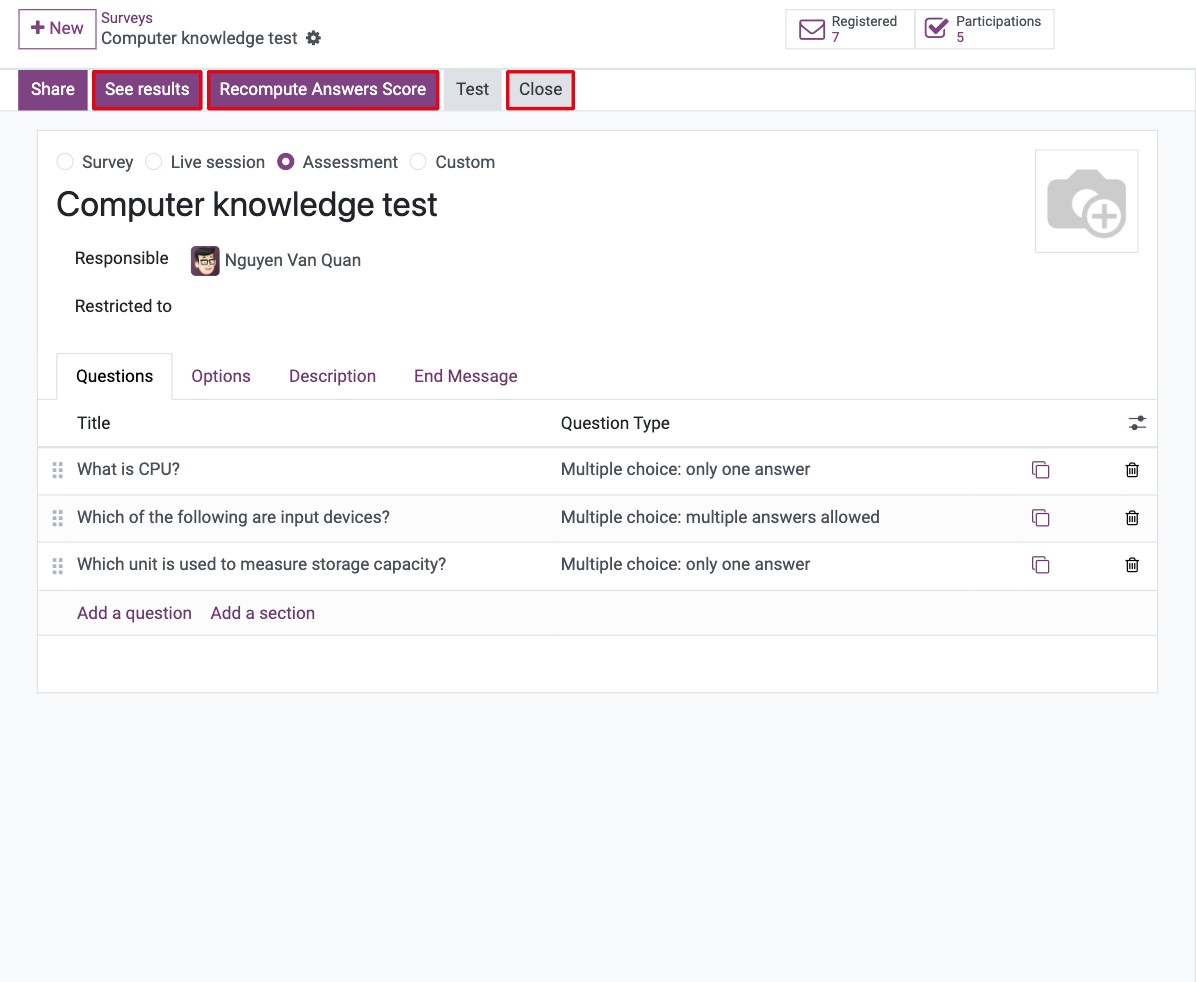
Navigate to the Surveys ‣ Surveys, choose the survey that you want to manage:
Click on See results to check the figures and charts of the survey.
Click on Recompute Answers Score to score again the answers that were already submitted. Use it after you correct the correct answers or the scores of the questions: answers collected before the correction keep the old score until they are recomputed. The button is available to Survey Administrators once the survey has completed participations.
Click on Close to stop this survey. The survey is archived and shows the Archived ribbon; click on Reopen to activate it again.
Click on Participations to view all participation in this survey.
Base on this answers, the manager can evaluate the E-Learning results.
See also
Related article
Optional module