
How to create a purchase order
To buy from a vendor in Viindoo, go to Purchase ‣ Orders ‣ Requests for Quotation, click New, choose the Vendor and add the products on the Products tab. Send the request to the vendor with Send by Email or Print RFQ. When the vendor agrees on price and date, click Confirm Order: the request for quotation (RFQ) becomes a purchase order, from which you record the vendor bill. An RFQ and a purchase order are the same document at two stages.
Who |
A Purchase user (User or Administrator access to Purchase). Approving orders above the approval amount requires the Purchase Administrator. |
App |
Purchase |
Before you start
Install the Purchase app.
Create the vendor with an email address, and the products you buy.
To send RFQs by email, your database must be able to send emails.
How do I create a request for quotation?
Go to Purchase ‣ Orders ‣ Requests for Quotation and click New.
![Orders menu of the Viindoo Purchase app with Requests for Quotation highlighted]()
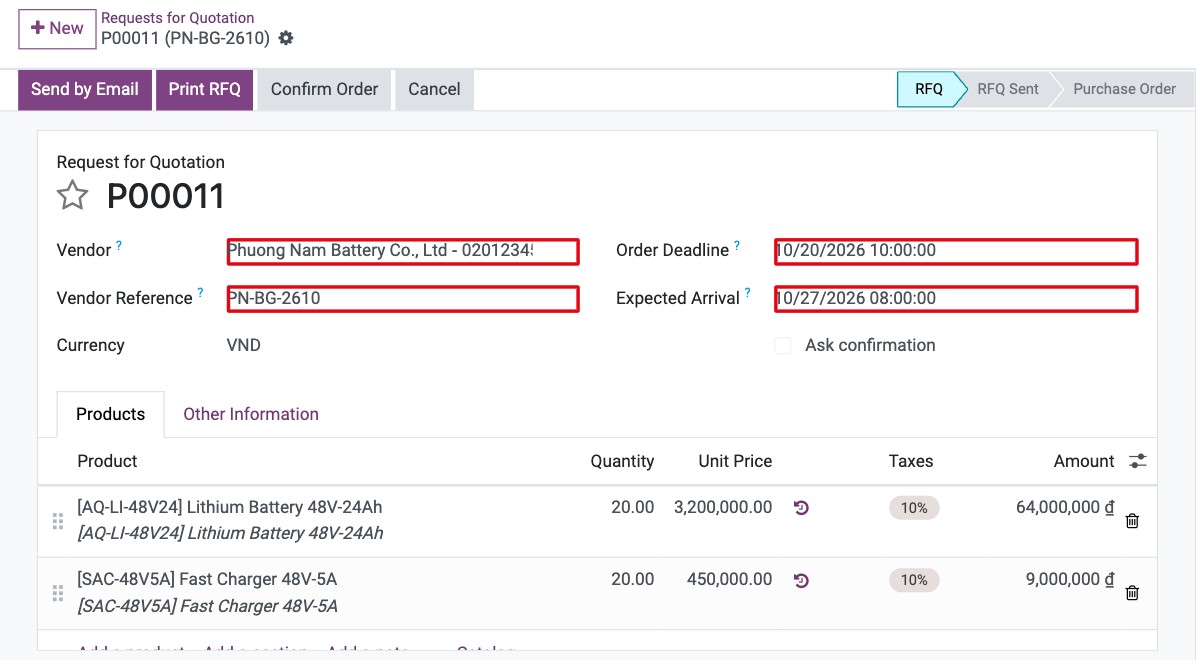
Choose the Vendor and fill in the header (see the table below). The vendor’s payment terms, purchase currency and fiscal position are filled in automatically.
![Header of a request for quotation with Vendor, Vendor Reference, Order Deadline and Expected Arrival]()
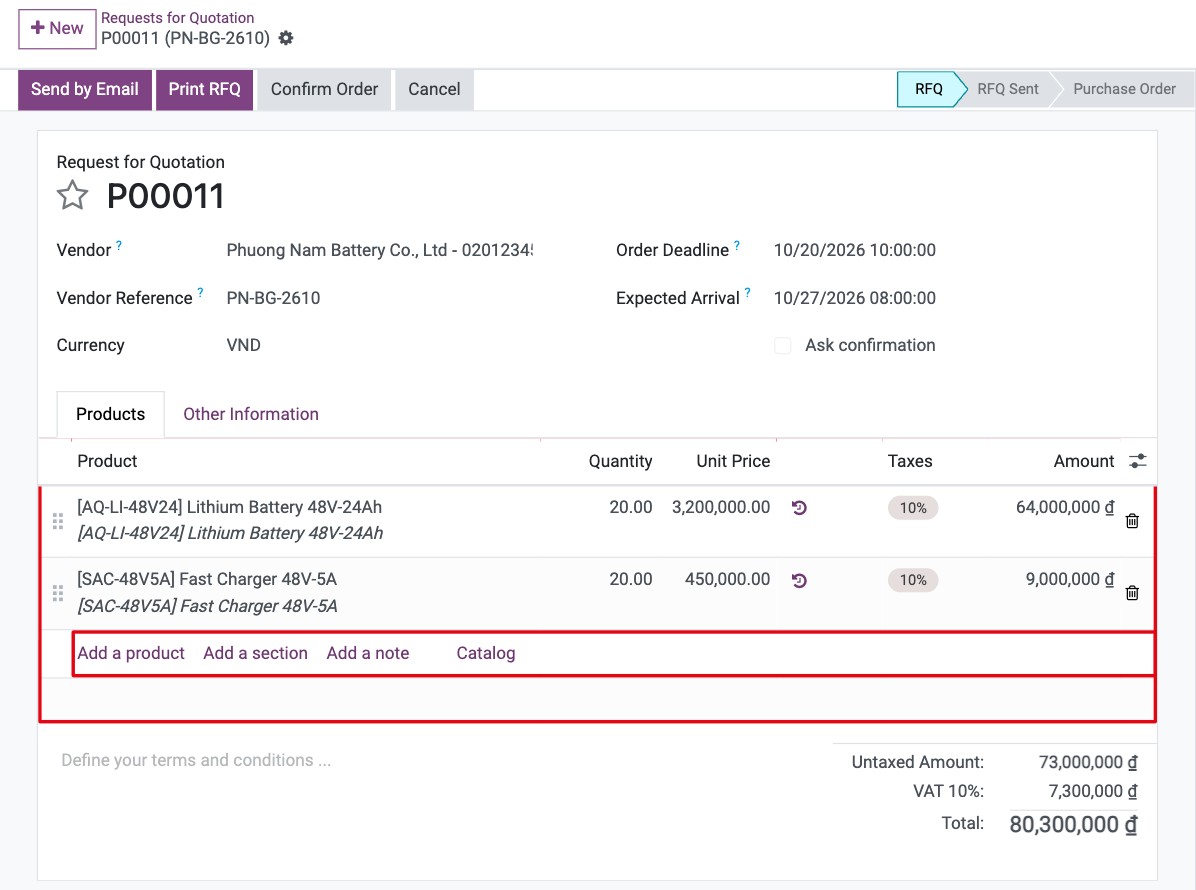
On the Products tab, click Add a product, choose the product and set the Quantity. The Unit Price comes from the vendor’s price list when the vendor has a price for this product, otherwise from the product cost; change it if the vendor quotes another price. Use Add a section to group lines under a title and Add a note to add a line of free text for the vendor.
![Products tab of a request for quotation with quantities, unit prices, taxes and totals]()
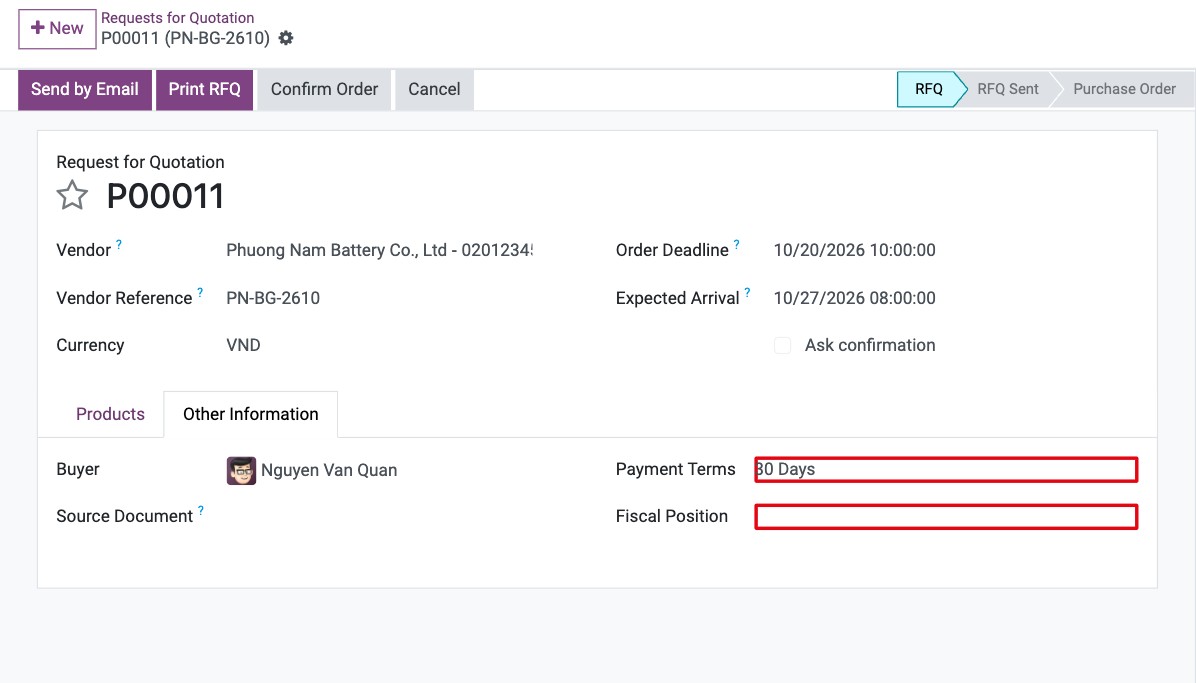
Check the Other Information tab: Buyer, Source Document, Payment Terms and Fiscal Position.
![Other Information tab of a request for quotation with Buyer, Payment Terms and Fiscal Position]()

The RFQ is saved automatically. It has the status RFQ until you send or print it.
Which fields matter on the request for quotation?
Field |
What it does |
|---|---|
Vendor |
Who you buy from. You can search by name, tax ID, email or reference. The vendor’s language decides the language of the RFQ and of the email. Required. |
Vendor Reference |
The vendor’s own quotation or order number. It is shown next to the RFQ number, printed on the documents and copied to the vendor bill, so you can match them later. |
Order Deadline |
The date by which the vendor should accept the RFQ. In the RFQ list it shows how many days are left, in red once it is past. |
Expected Arrival |
The delivery date promised by the vendor. It is filled in from the vendor’s lead time on the vendor price list (see How to plan receipts, deliveries and production with lead times). |
Ask confirmation |
Shown while Receipt Reminder is enabled in Purchase ‣ Configuration ‣ Settings (enabled by default). After you confirm the order, Viindoo emails the vendor the set number of days before the expected arrival and asks them to confirm the date. |
Unit Price, Taxes |
Price before tax and purchase taxes of each line (see Taxes and tax rules configuration). |
Buyer (Other Information) |
The purchaser in charge: you by default, or the buyer set on the vendor. Used to filter and analyse purchases. |
Source Document (Other Information) |
The document that generated this RFQ, for example a purchase agreement. Leave it empty when you create the RFQ by hand. |
Payment Terms (Other Information) |
When you must pay the vendor; copied to the vendor bill (see How to set up payment terms). |
Fiscal Position (Other Information) |
Replaces taxes and accounts for this vendor, for example for imports (see Steps to setup Fiscal Position (Taxes and Accounts)). |
If you also install Inventory, the RFQ has a Deliver To field (the warehouse that receives the goods) and the Incoterm field on the Other Information tab.
If you also install Purchase Agreements, the RFQ has an Agreement field (see How to buy from a vendor with a blanket order) and, with Purchase Alternatives enabled, an Alternatives tab (see How to compare vendor offers (call for tenders)).
How do I send the RFQ to the vendor?
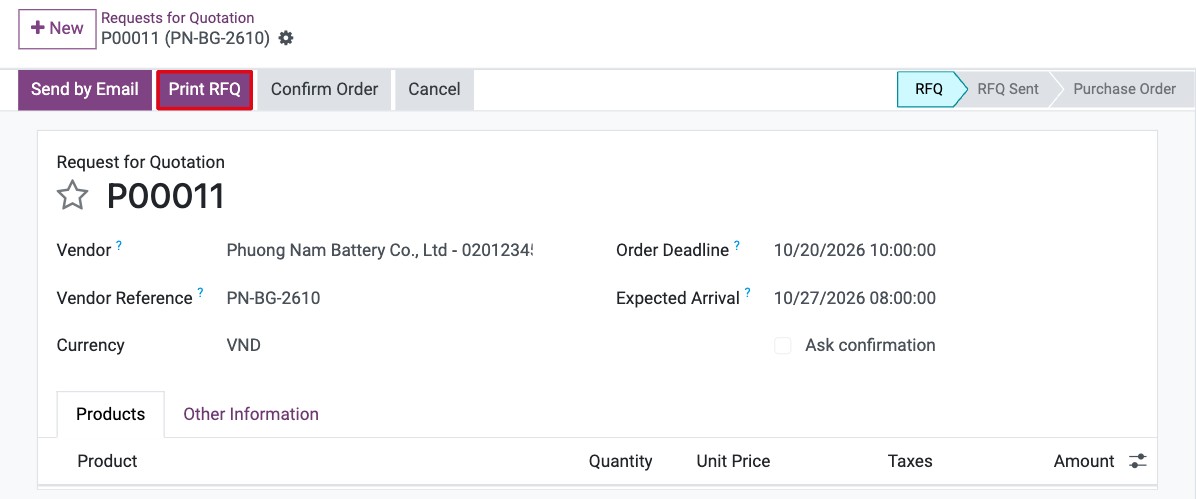
To print it, click Print RFQ. Viindoo downloads the RFQ as a PDF that you can send to the vendor yourself.
![Print RFQ button on a request for quotation]()
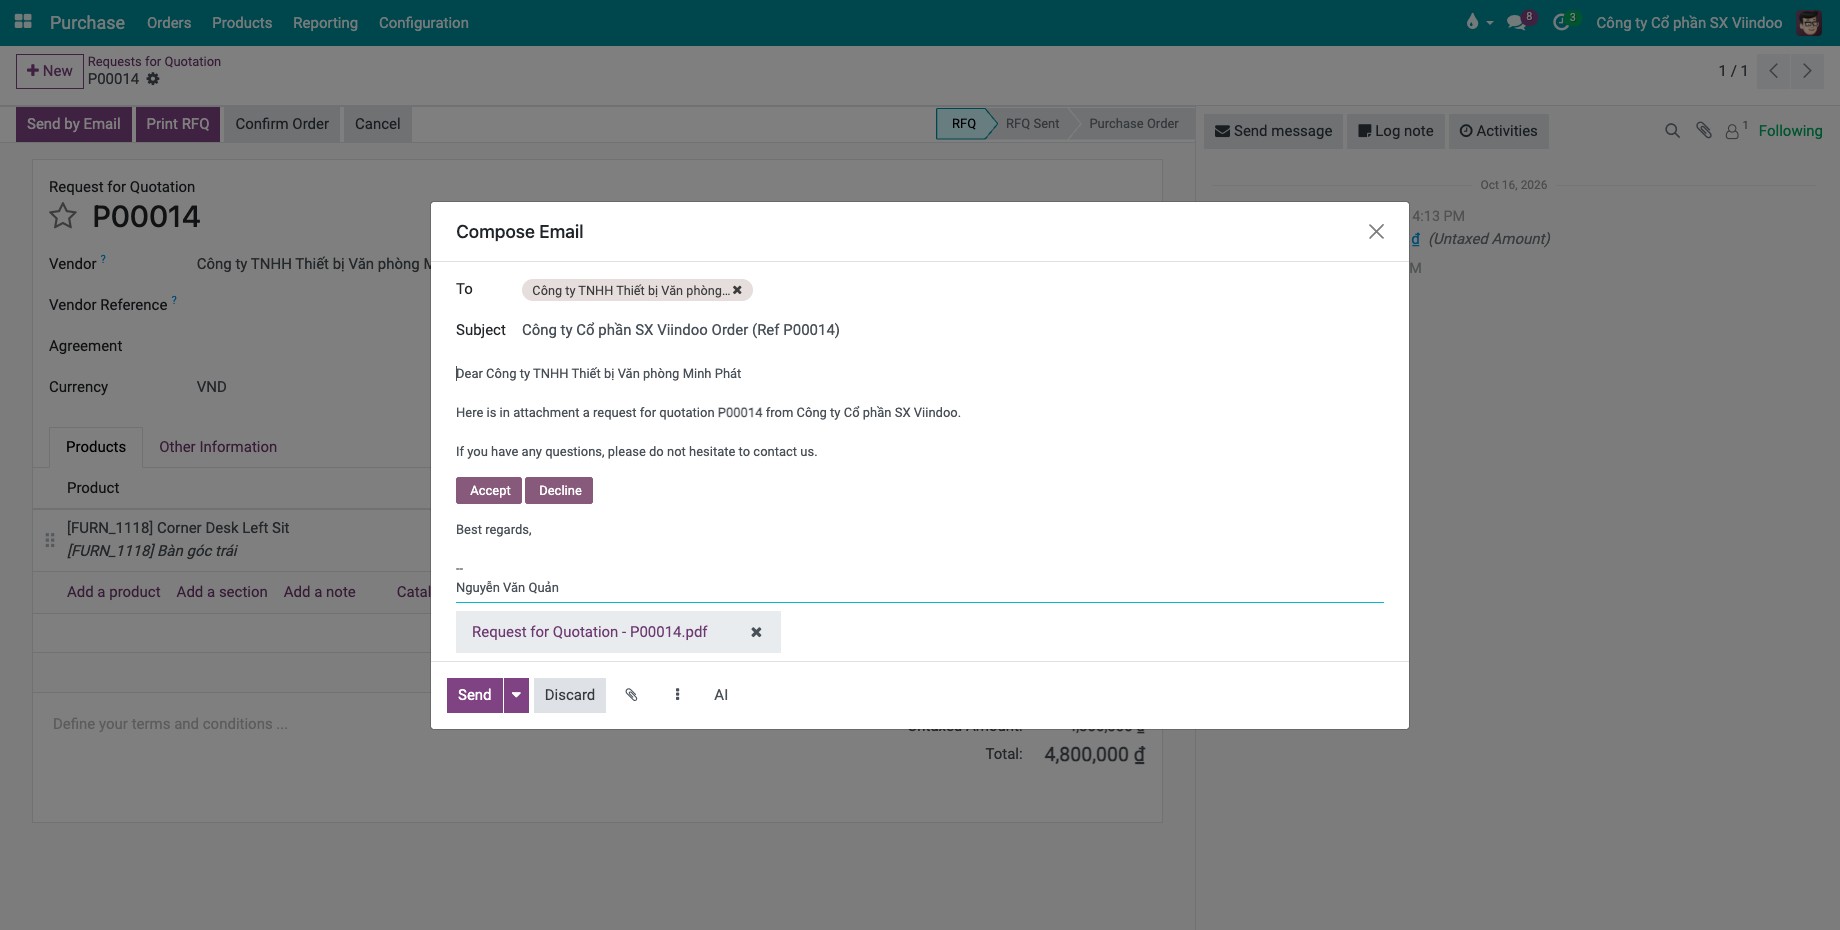
To email it, click Send by Email. Viindoo opens an email to the vendor with the RFQ attached as a PDF. Check the recipients and the text, then click Send. The followers of the RFQ also receive the email.
![Compose Email window with the vendor as recipient and the RFQ PDF attached]()
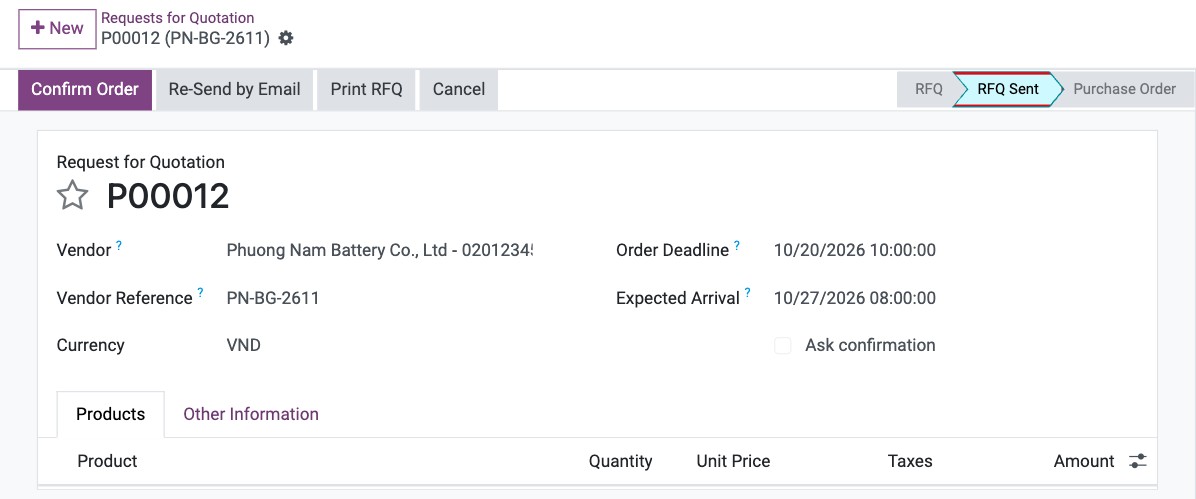
After you print or email the RFQ, its status becomes RFQ Sent and an emailed RFQ is kept in the chatter. To send it again, click Re-Send by Email.
How do I confirm the RFQ into a purchase order?
When the vendor replies, update the prices, quantities and Expected Arrival if needed.
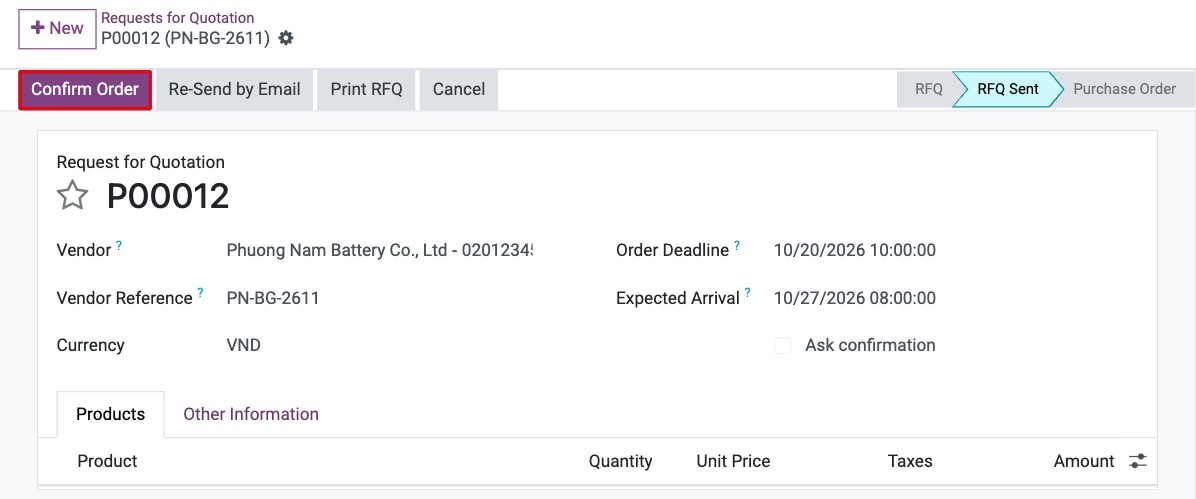
Click Confirm Order. You can also confirm an RFQ that you have not sent.
![Confirm Order button on a request for quotation in the RFQ Sent status]()
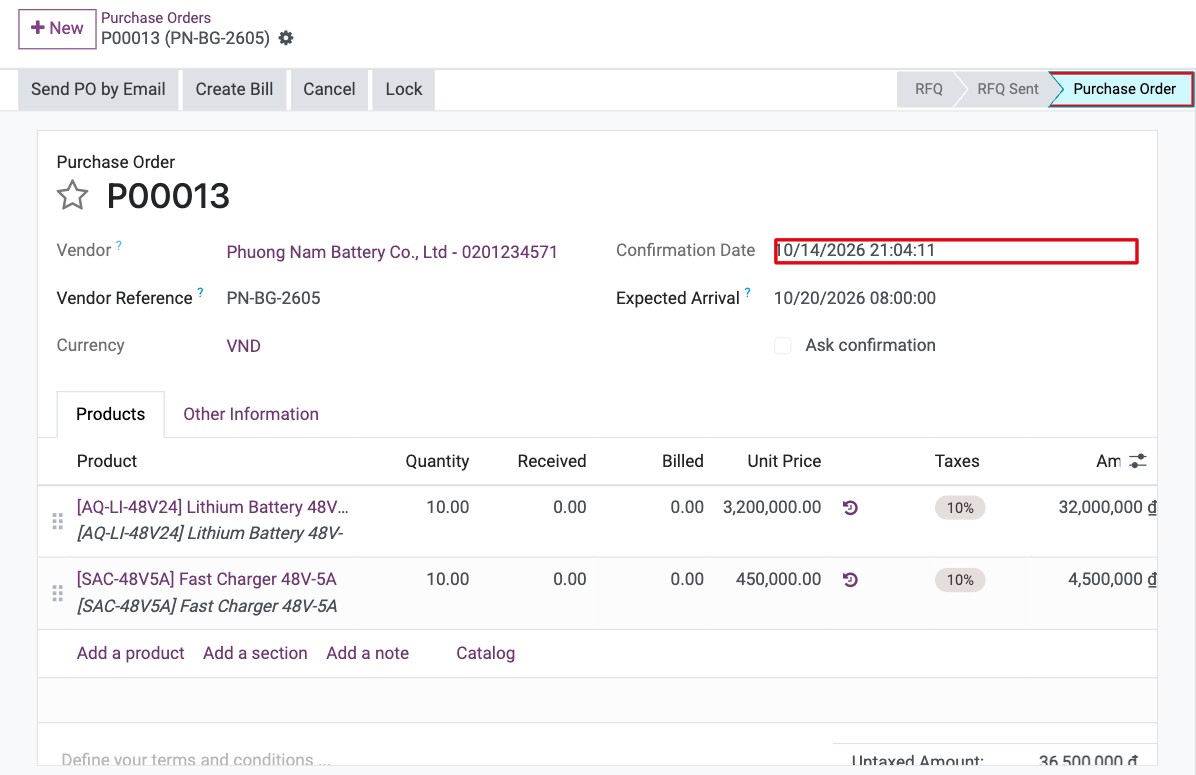
The status becomes Purchase Order and the Confirmation Date is set. If the vendor is not yet on the vendor price list of a product, Viindoo adds it with the price of this order. You can now record the vendor bill with Create Bill (see How to control when vendor bills are created) or email the order with Send PO by Email.
If the vendor asks for changes before you confirm, edit the RFQ and send it again.
If you no longer need it, click Cancel. A cancelled RFQ can be reopened with Set to Draft.
If Purchase Order Approval is enabled in Purchase ‣ Configuration ‣ Settings, an order whose total reaches the Minimum Amount goes to the To Approve status when a Purchase user confirms it, and a Purchase Administrator must click Approve Order.
If Lock Confirmed Orders is enabled, the order is locked as soon as it is confirmed. A Purchase Administrator can click Unlock to edit it.
If you also install Inventory, confirming the order creates the receipt (Receipt button) so that you can receive the products.
Common errors
Message or problem |
What to do |
|---|---|
The email to the vendor was not delivered (red envelope in the chatter). |
The vendor has no valid email. Add the email on the vendor’s contact form and click Re-Send by Email. |
Unable to cancel purchase order(s): … You must first cancel their related vendor bills. |
Cancel or reset to draft the vendor bills of the order in Accounting first, then cancel the order. |
In order to delete a purchase order, you must cancel it first. |
Click Cancel on the order, then delete it. |
The Ask confirmation option is missing. |
Receipt Reminder is disabled. A Purchase Administrator can enable it in Purchase ‣ Configuration ‣ Settings. |
Next steps
How to control when vendor bills are created: choose when the vendor bill can be created.
How to compare vendor offers (call for tenders): ask several vendors for a price and choose the best offer.
How to buy from a vendor with a blanket order: buy regularly from one vendor at agreed prices.
How to pay a vendor in advance for a purchase order: pay the vendor in advance.
How to confirm a purchase order on a past date: confirm the order on a past date.
Related apps: Purchase Confirmation Backdate, Purchase Advance Payment, Inter-Company Rule for Sale/Purchase.
Version notes
Compared with the version 17 guide, the header date of an RFQ is Order Deadline (the old guide called it Confirmation Date, which only appears after you confirm), and you print with the Print RFQ button. Printing also marks the RFQ as sent.