
Create questions in a Survey
Requirements
This tutorial requires the installation of the following applications/modules:
Create a Survey question
To create a survey in Viindoo software, you need to choose the type of survey you want. The types are displayed at the top of the survey form. In which:
Survey: This survey is intended to gather ideas from customers. It does not include point-based questions as well as it does not allow the creation of a live session from the survey.
Live session: You can create live sessions with these surveys. This is suitable for situations when you want to hold live sessions in a class or group to determine the winner.
Assessment: If you want to create a survey as an exam, you can choose this type.
Custom: You can edit the survey according to your ideas

To create a question in a survey, follows these steps:
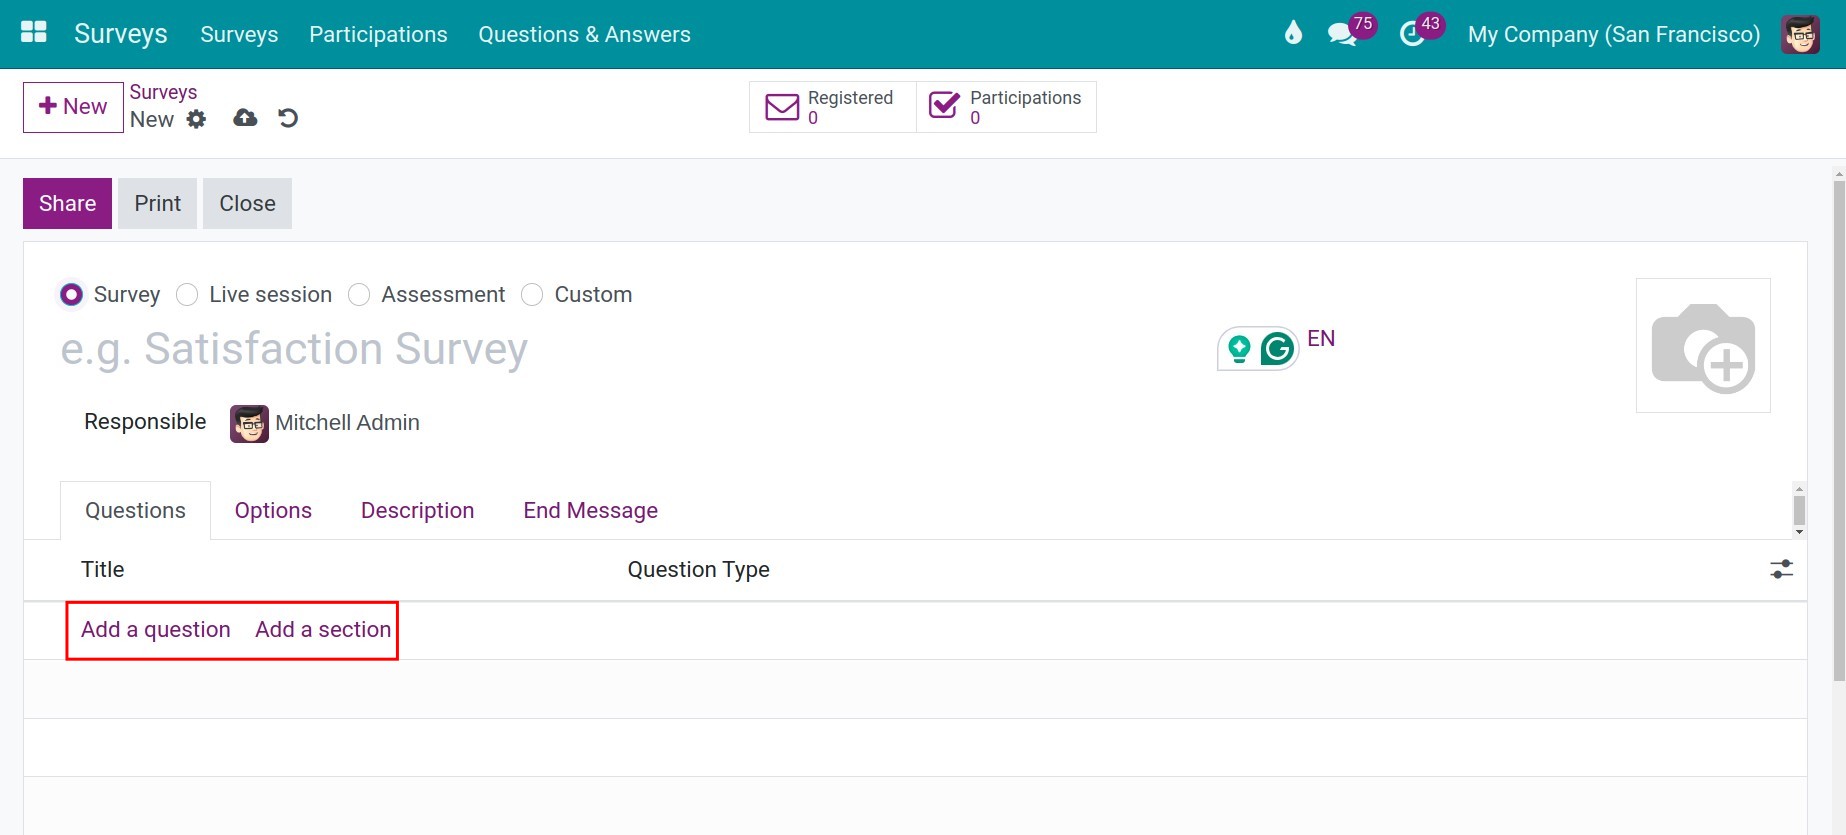
Go to Surveys, at the Surveys view, choose an existing survey or create a new one, navigate to the Questions tab, click on Add a section to set up a section.
Create a question by clicking on Add a question. The Create Sections and Questions window opens.
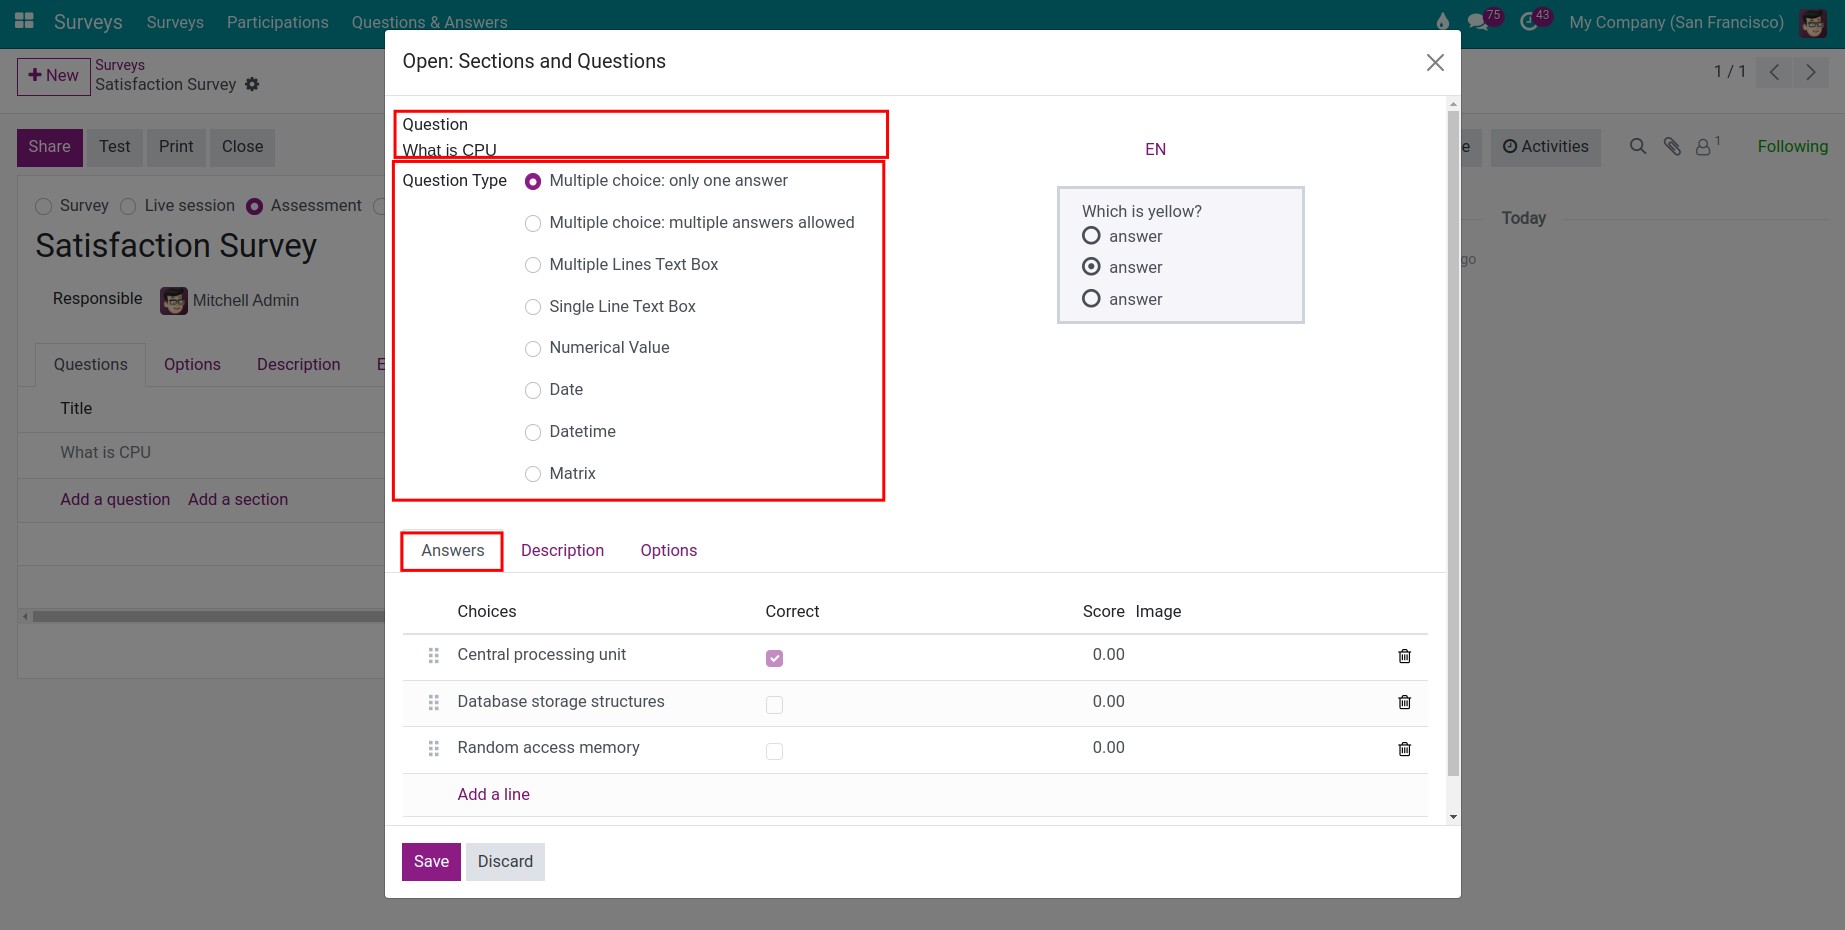
The way you create a question for each “Question type” is different. In this article, we will focus on how to create the Multiple choice question type:
Enter a question in the Question field.
Choose a Question Type.
In the Answers tab, click on Add a line and enter the answers into the Choices list.
Mark at Correct to choose the correct answer.
Enter the score that participants will receive when choosing this answer at Score.
To add an image to an answer, click on the Image cell of that answer, then click on Upload your file.
Add the additional description for the question (if necessary) at the Description tab. This content will appear below the question.
Click on Save & Close. Click on Save & New instead if you want to add another question right away.
Note
The Correct and Score columns are available only when the scoring feature is set up for the survey. You can refer at How to create and manage online surveys.
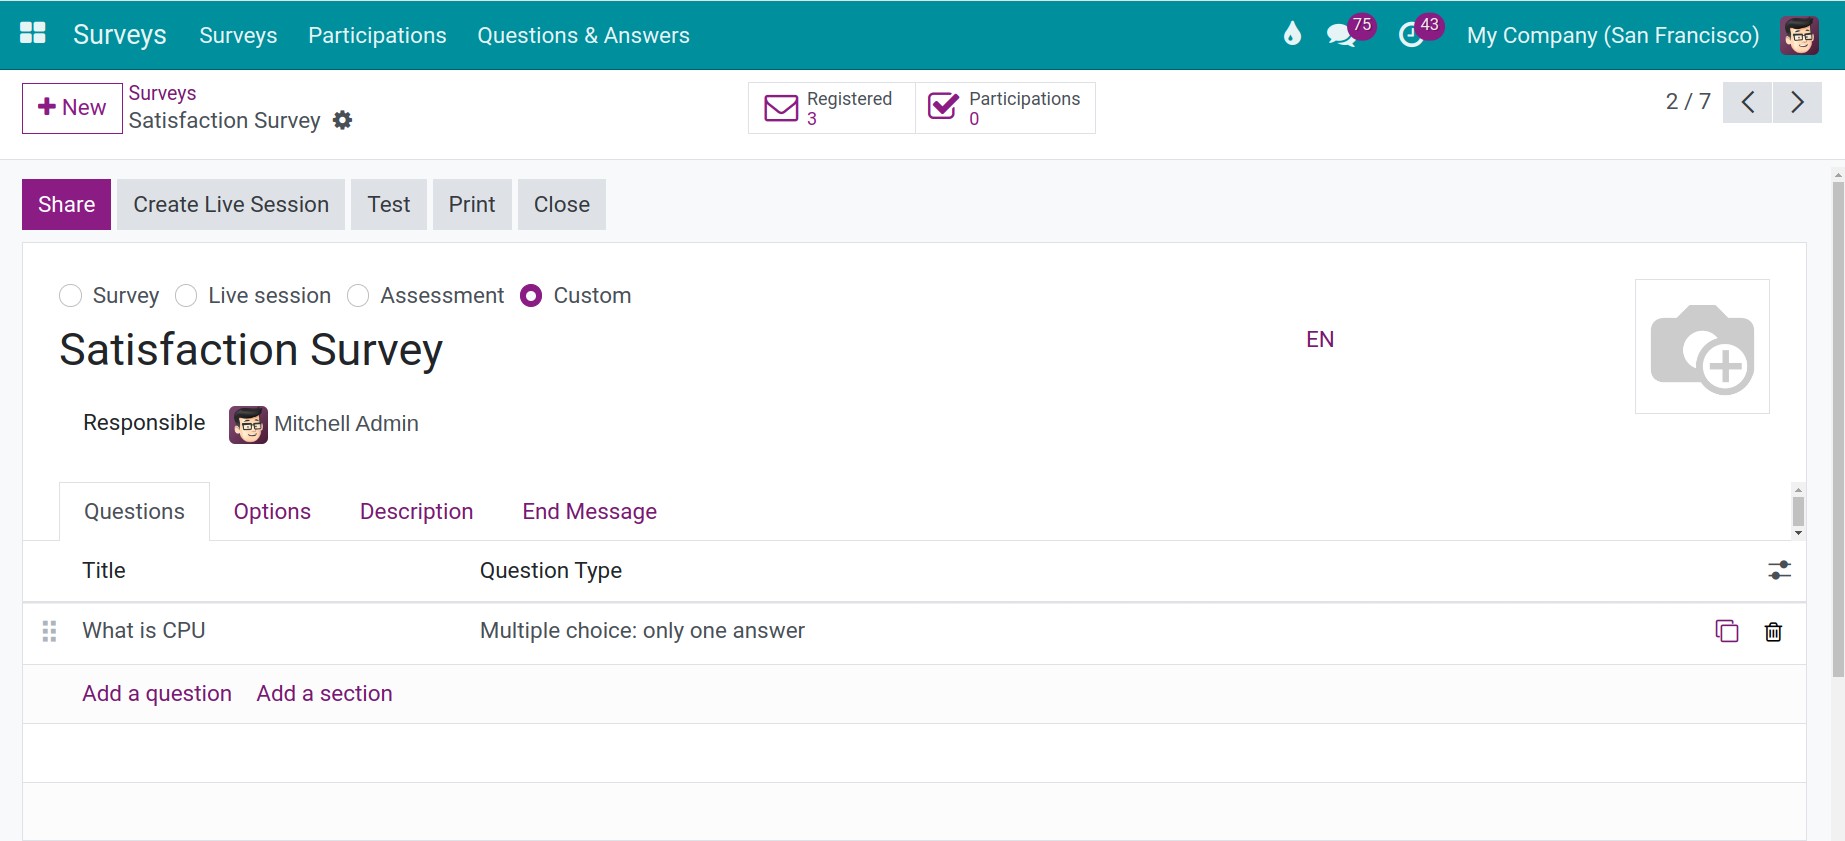
Example: After creating question What is CPU?, the survey view will be displayed as below:
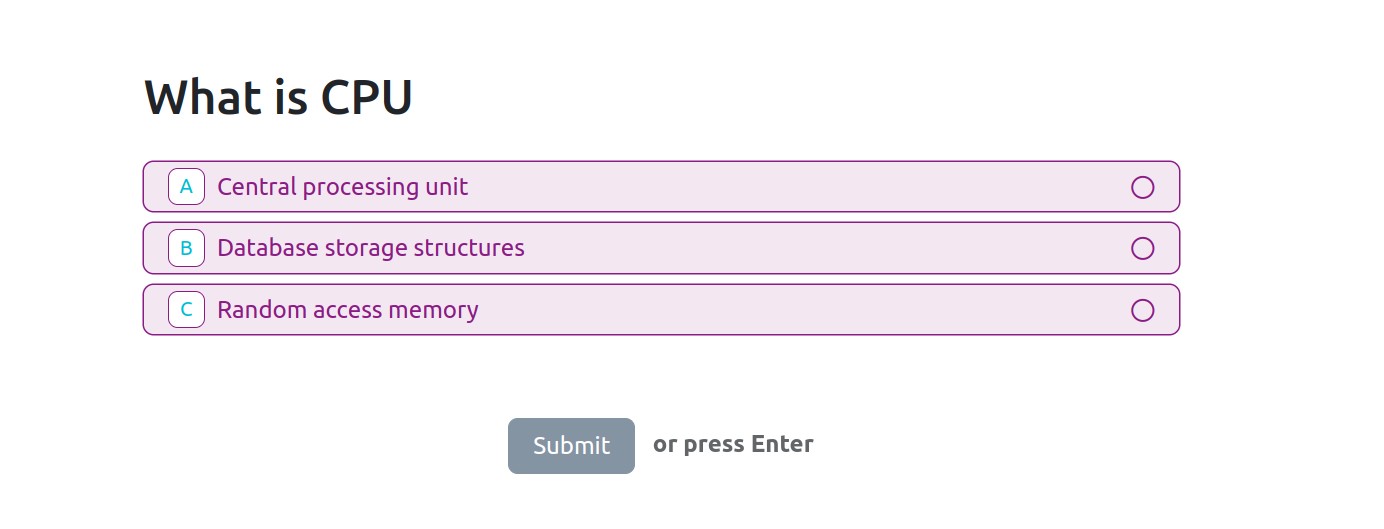
When starting the survey, question view will be displayed as below:
Question settings
Question Types
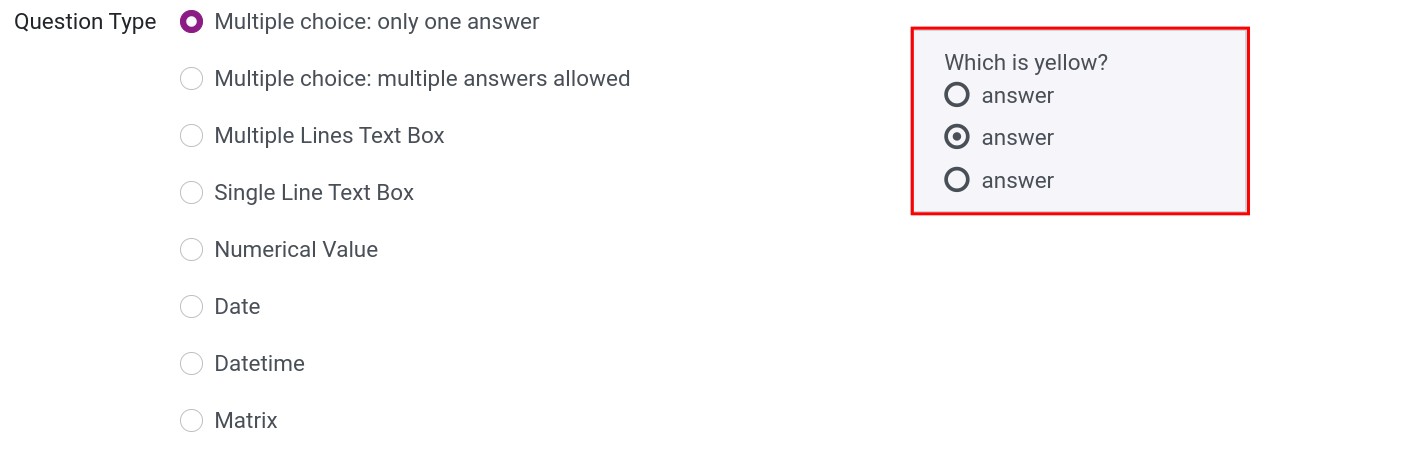
When creating a question, the view will be displayed with these question types:
Multiple choice: only one answer: Allow users to choose only one answer.
Multiple choice: multiple answers allowed: Allow users to choose multiple answers.
Multiple Lines Text Box: Allow users to enter a paragraph.
Single Line Text Box: Allow users to enter a line.
Numerical Value: Allow users to enter numbers only.
Scale: Allow users to rate on a scale. You set the minimum and maximum values (from 0 to 10) and the labels of the lowest, middle and highest points.
Date: Allow users to enter a date.
Datetime: Allow users to enter the date and time.
Matrix: Set up a matrix question with multiple questions and answers.
When choosing a question type, a preview screen of this type will appear to show you how this question will be displayed when starting a survey.
Question Options
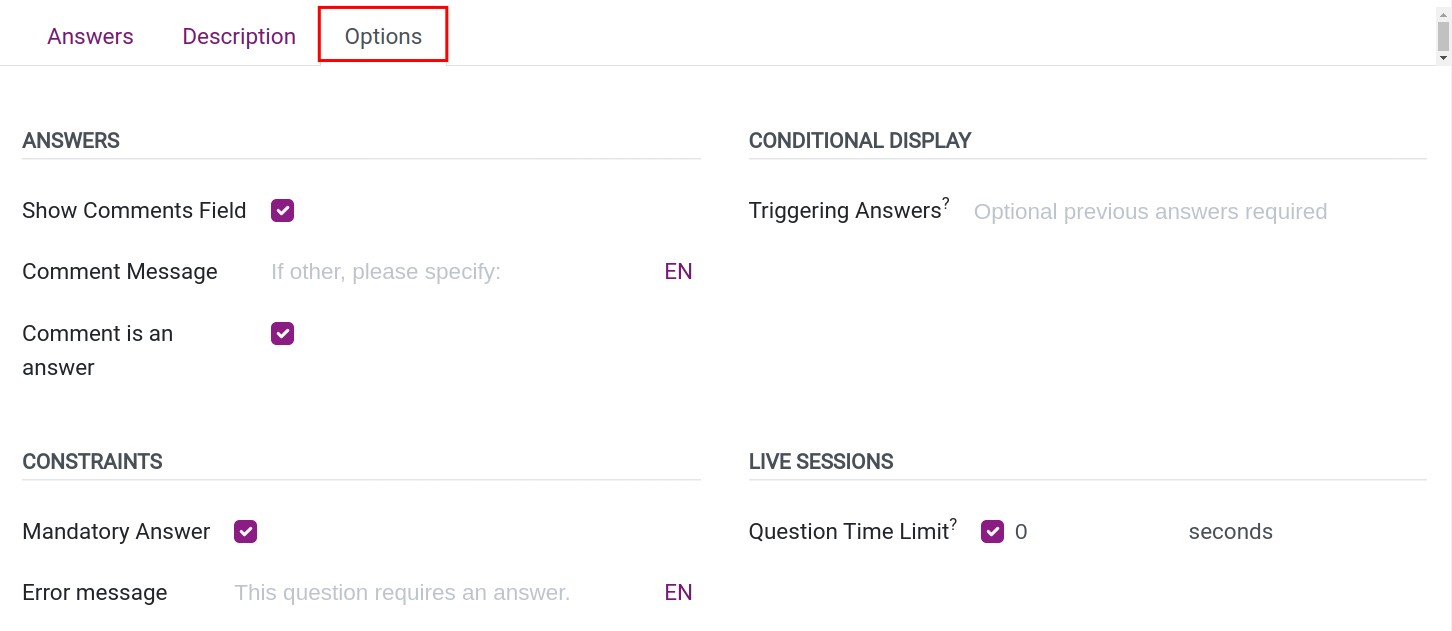
At the create questions view, choose Options tab. This tab provides different settings depending on Question Type was chosen:
Answers:
Show Comments Field: Allow users to enter a comment.
Comment Message: Enter a suggestion for the comments field.
Comment is an answer: Allow comments to be an option. When the user chooses this option, they can comment.
Conditional display:
Triggering Answers: Choose the answers of previous questions that activate this question. The question is displayed only when one of them is chosen.
Constraints:
Mandatory Answer: Users are not allowed to complete the survey when the answers have not been selected.
Error message: Display messages when the users have not answered this question.
Live Sessions:
Time Limit (seconds): Activate this feature if you want to set up the time limit for each question. After you check the box to activate, the time section will appear so you can enter the time limit (e.g. 10 seconds). This feature is only available for surveys of the Live session and Custom types.
See also
Related article
Optional module