
How to set up your company and work with several companies
Your company details (name, logo, address, tax ID, currency) are printed on every quotation, order, invoice and delivery note, so set them up first: go to , open your company and fill in the form. You can also manage several companies in the same Viindoo database: create another company with New, make it a branch by choosing a Parent Company, and give users access to it in Allowed Companies.
Who |
Users with the Administrator (Settings) access right. |
App |
Settings |
Before you start
You have a Viindoo instance and sign in as an Administrator.
How do I set up my company information?
Go to and open your company.
Enter the Company Name, the address, Tax ID, phone, email and website. Click Your logo to upload your logo.
Check the Currency (see the table below), then save.
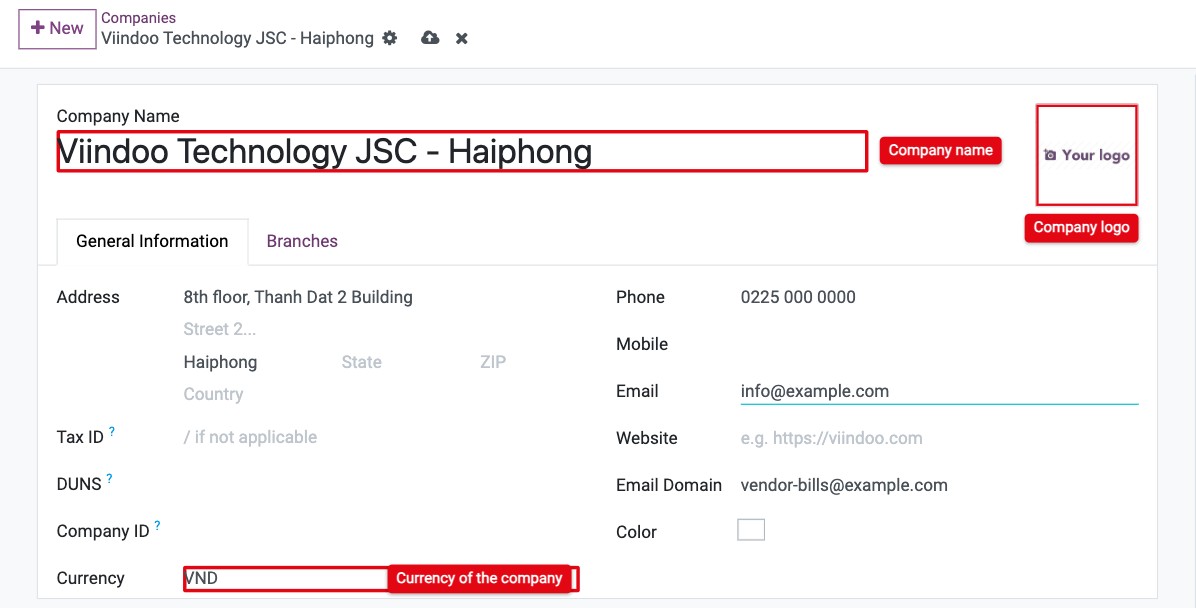
Field |
Effect |
|---|---|
Company Name, address, Tax ID |
Printed in the header of quotations, orders, invoices and delivery notes, so customers and vendors can identify you. |
Logo |
Printed on your documents and shown in the company switcher. |
Currency |
The currency of the company. With the Accounting app installed, it cannot be changed once accounting entries exist, so choose it before you start invoicing. |
How do I add another company?
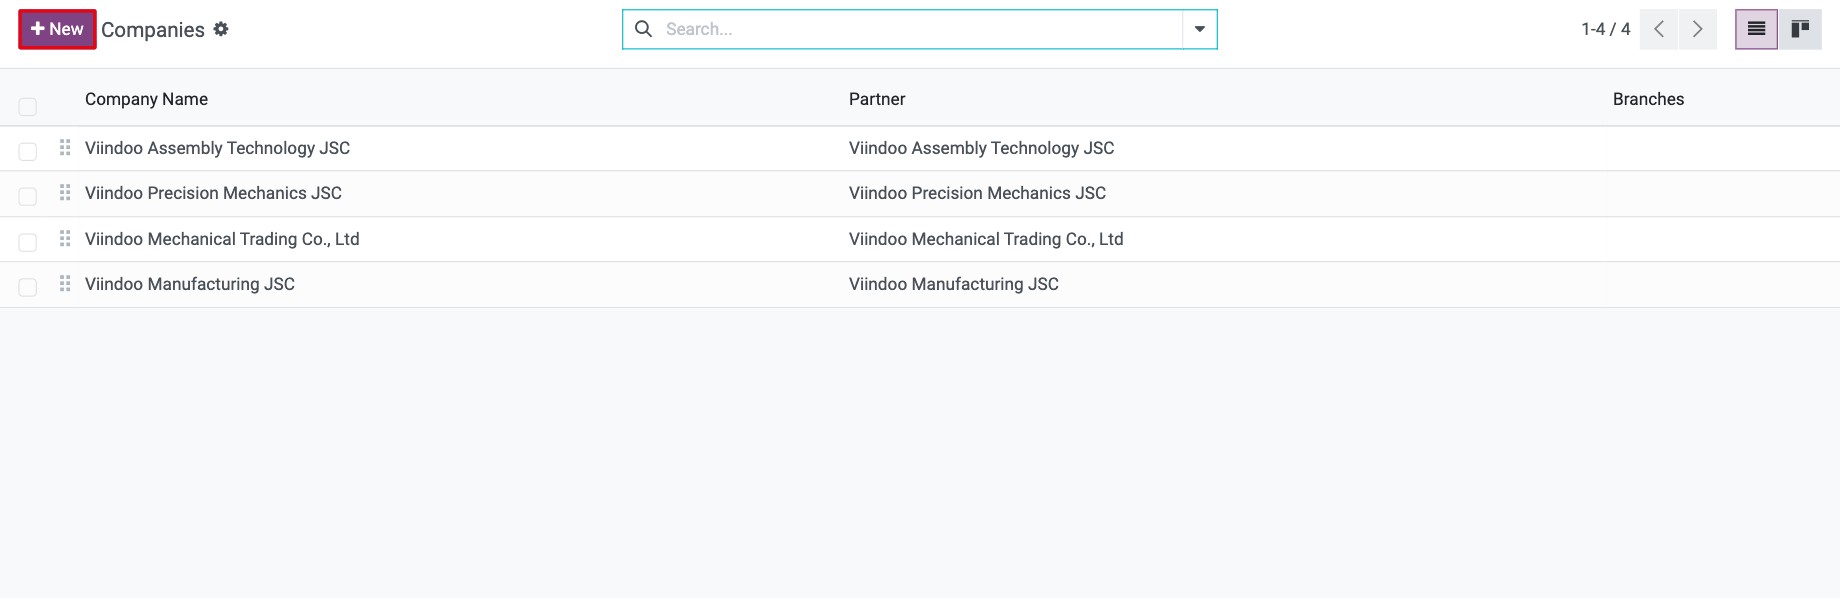
Go to and click New.
![Companies list in Viindoo Settings with the New button]()
Fill in the form as for your first company.
To make it a branch of an existing company, turn on developer mode and choose that company in Parent Company. Leave the field empty for an independent company.
![Parent Company field on a new company form in developer mode]()
Save.
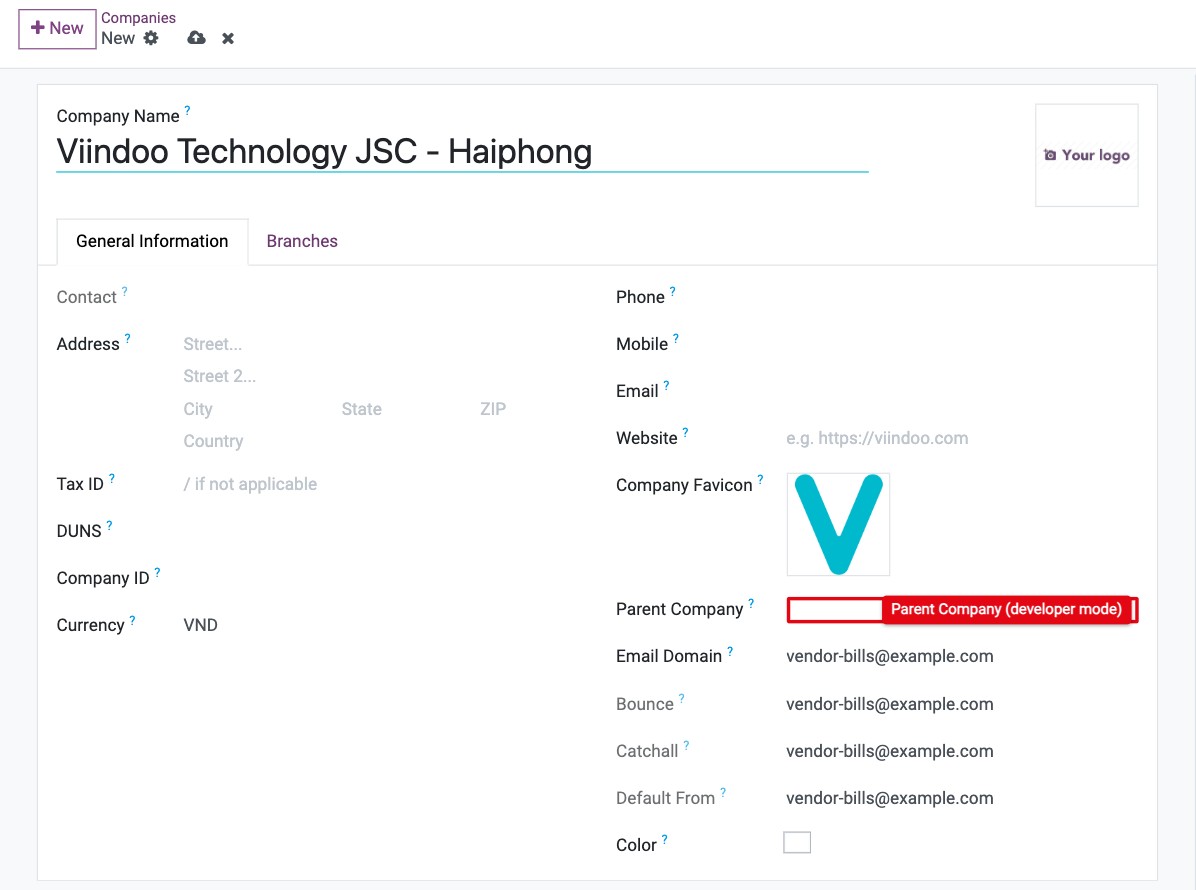
You can also create a branch from the parent company: open it, go to the Branches tab and click Add a line. See How to set up and use branches for how branches work.
Note
A branch always uses the currency of its parent company; its Currency field is read-only.
How do I let a user work in several companies?
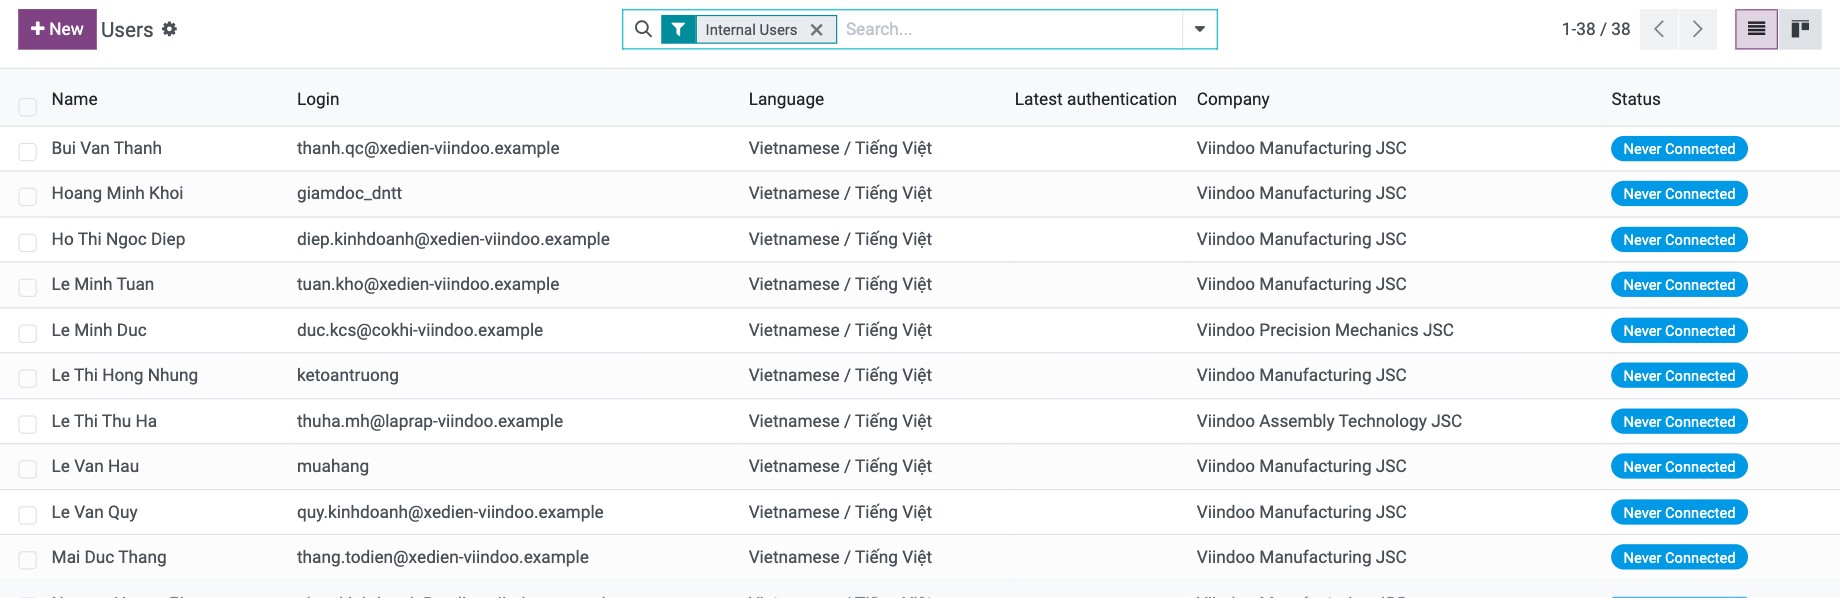
Go to and open the user.
![Users list in Viindoo Settings]()
In Allowed Companies, add every company the user may work in. In Default Company, choose the company the user starts in after signing in.
![Allowed Companies and Default Company fields on the user form]()
Save.
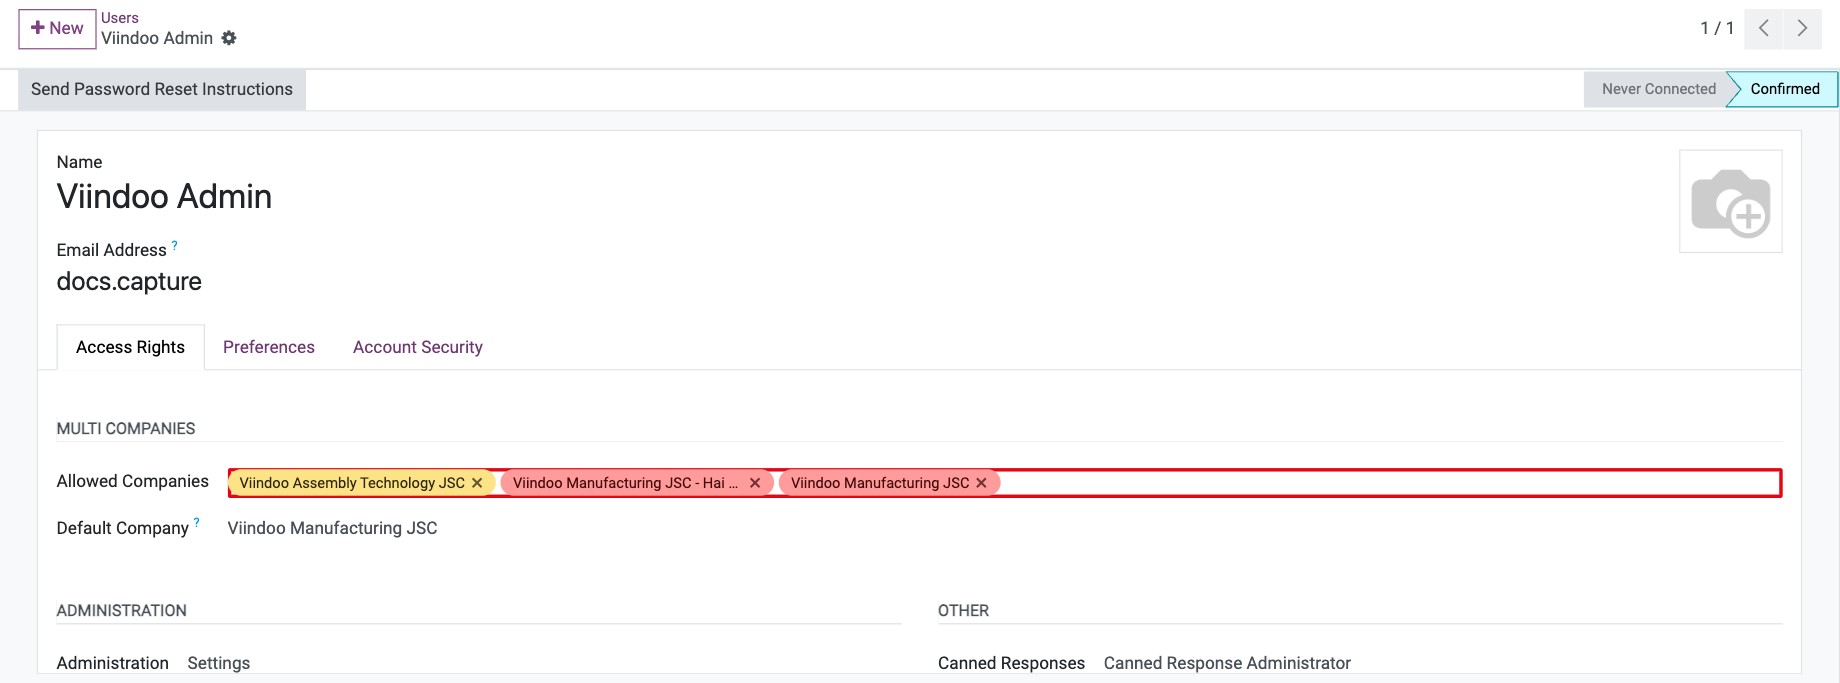
How do I switch between companies?
When you have access to several companies, the company name appears in the top right corner. Click it, then:
click a company name to work in that company only, or
tick several companies to see their records together. New records are created in the current company, the one shown in the top bar.
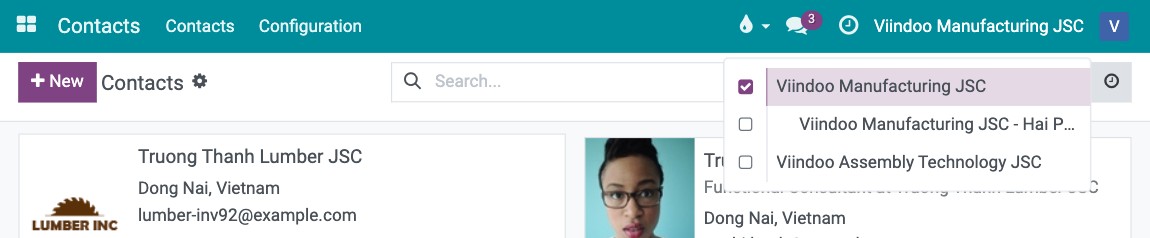
Branches are listed under their parent company, and selecting a parent company also selects its branches.
Common errors
Problem |
What to do |
|---|---|
You cannot change the currency of the company since some journal items already exist |
Shown with the Accounting app: accounting entries already exist in this currency. Keep it. (On a branch the field is read-only because it uses the parent’s currency.) |
The … of a subsidiary must be the same as it’s root company. |
A branch must keep the same currency and accounting settings as its parent company. Change them on the parent company. |
A user does not see the company switcher. |
The user has only one company in Allowed Companies. Add the others. |
I do not see Parent Company. |
Turn on developer mode. |
Next steps
How to set up and use branches: how products, orders, stock and accounting work across a parent company and its branches.
How to create and manage user accounts: create the users of each company.