Instructions
Instruction video: Stock Quality Control
1. Create control points for warehouse operations
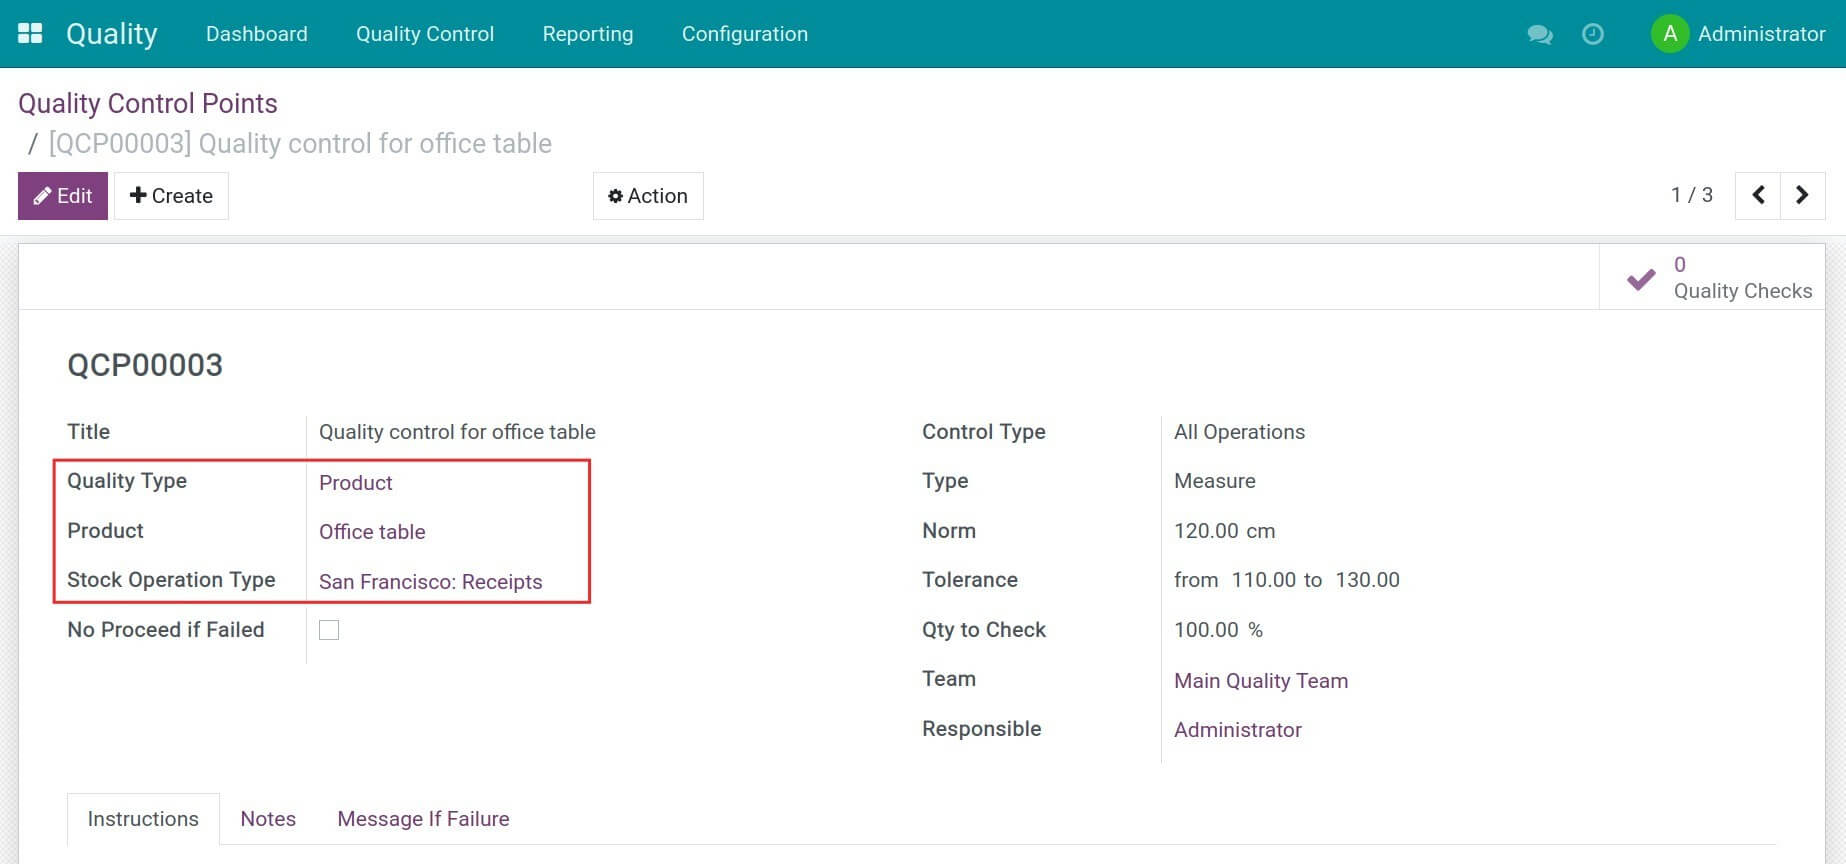
Navigate to Quality > Quality Control > Control Points, and press Create to set up control points. For example, you want to set up the quality control for the Office table warehouse receipt.
2. Receive products at the warehouse and generate quality checks
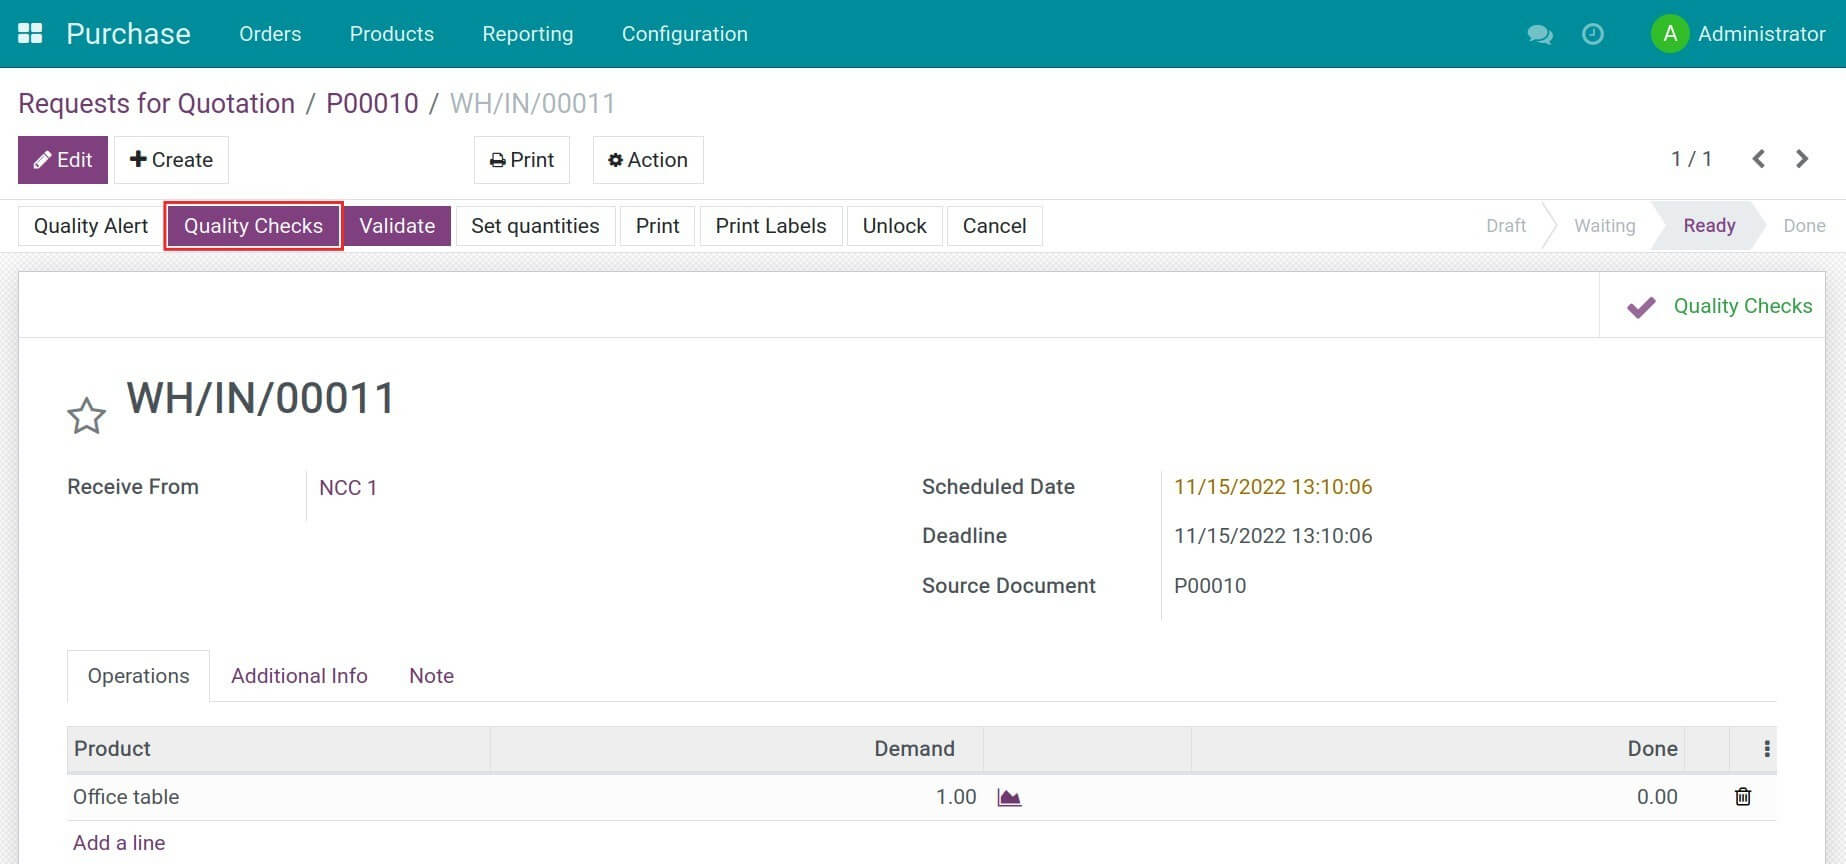
After creating and confirming the purchase order, press Receive Products. On the product incoming transfer slip, press Quality Checks to start the quality control process for the incoming products.
3. Evaluate incoming products quality
The actual measurement of a product is displayed on the system. Press Validate to start the evaluation.
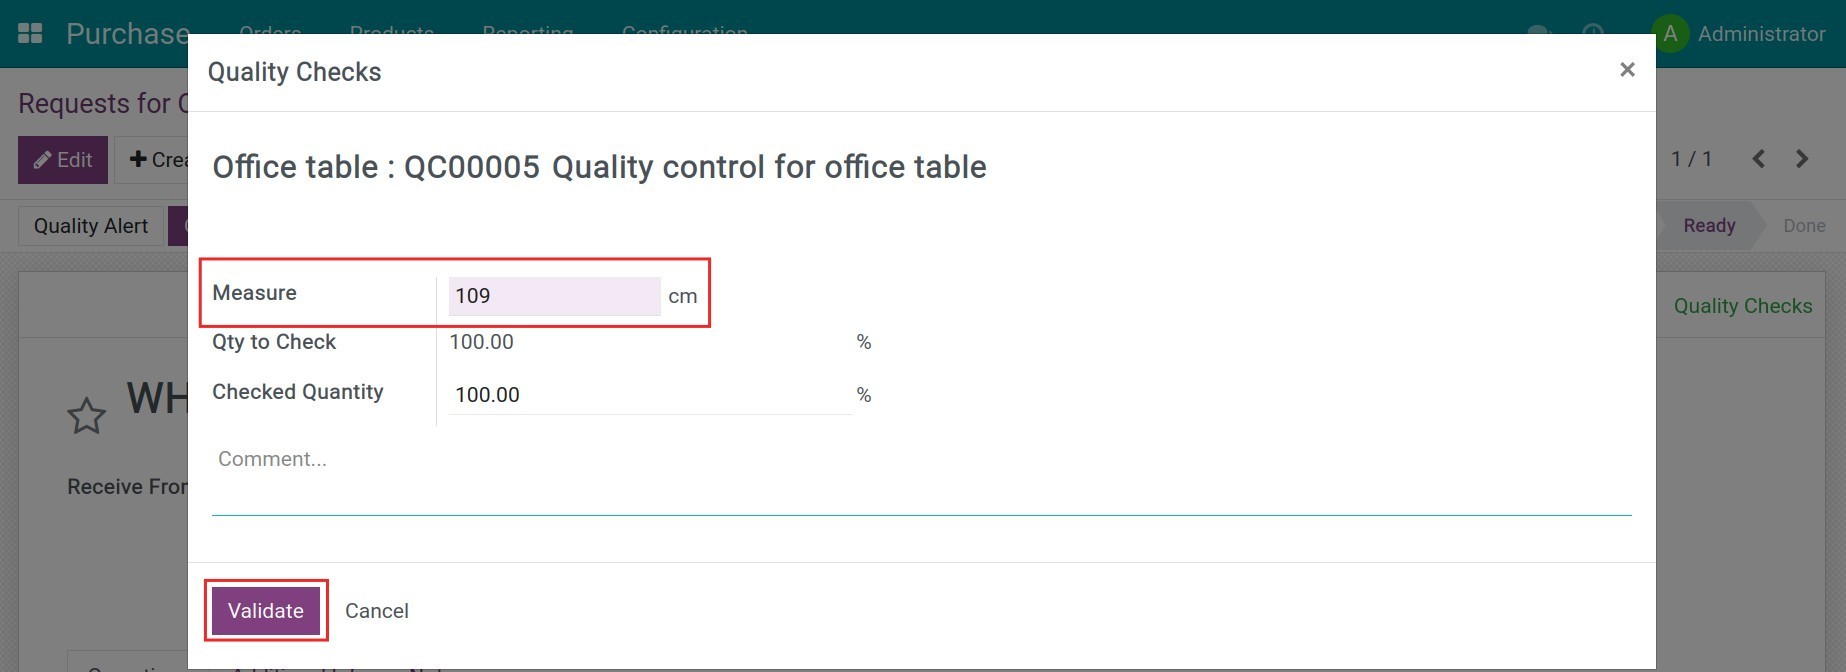
In case the actual measurement is out of the allowed tolerance, a warning will pop up which allows you to Correct Measure or Confirm Measure. At this moment, the quality check is changed to the Failed stage.

If the actual measurement is in the tolerance range, the quality check is marked as Passed and you can process the receive the products in your warehouse.
4. Create and process quality alert
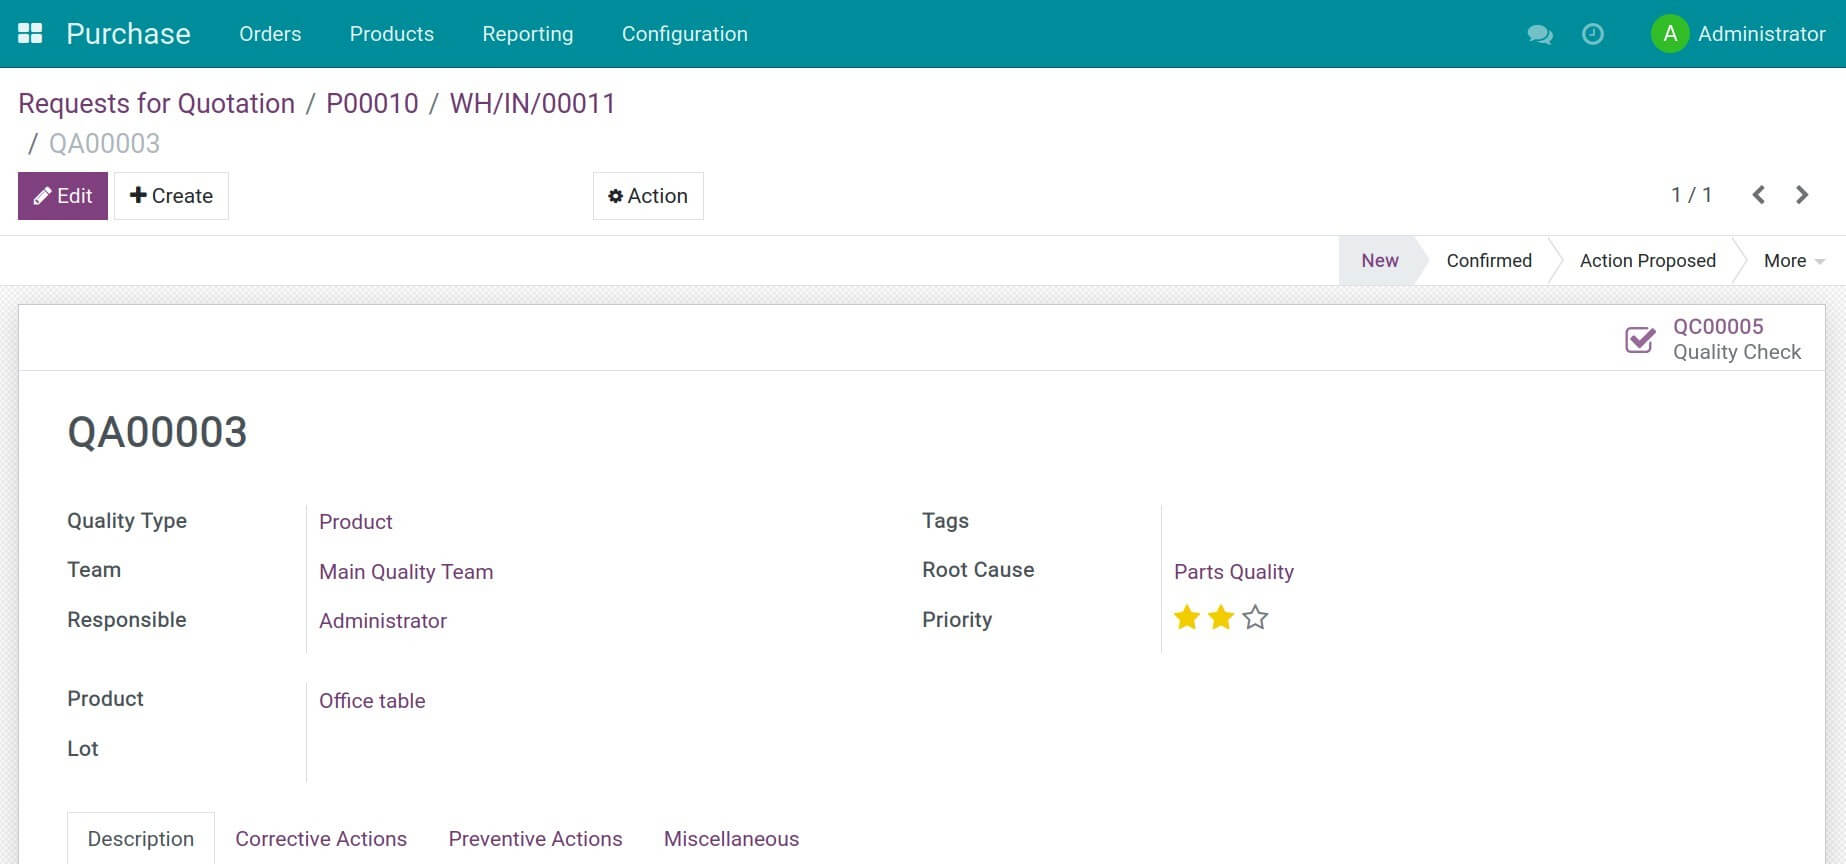
Once done with the quality check, you can create a quality alert right from that quality check or from the incoming transfer slip.
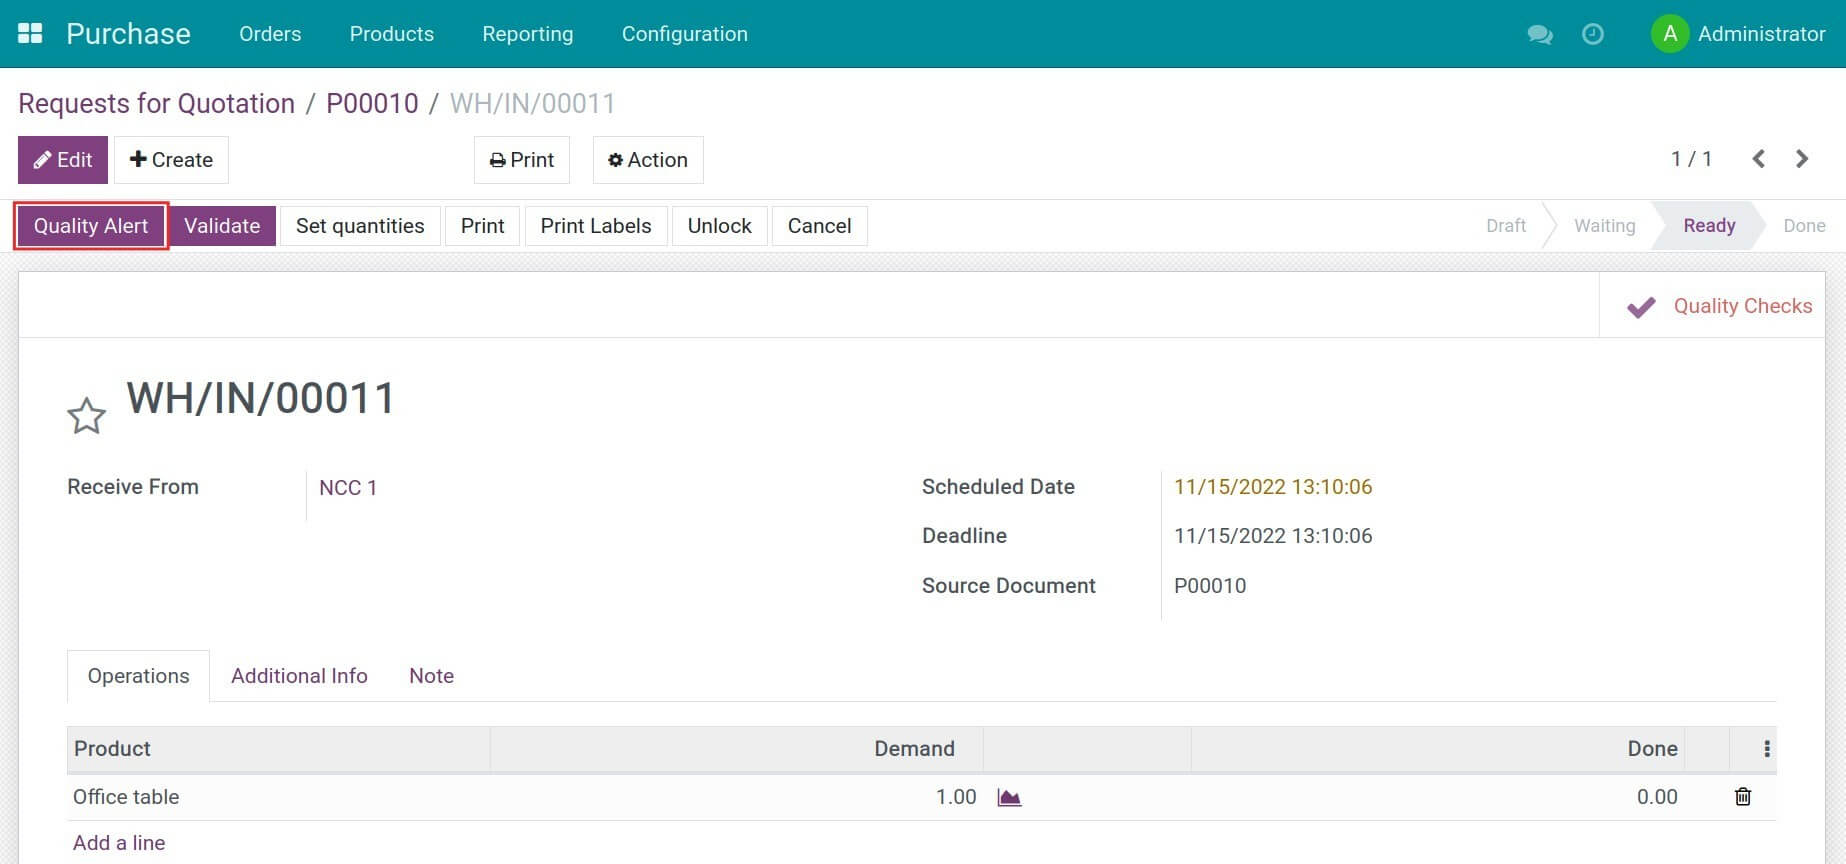
Add information such as the person in charge, and corrective/preventive actions to solve the issue. Change the quality alert stage according to the current progress.
Note: You can do similar steps for the outgoing or internal transfers.


