Instruction
Instruction video: Purchase and Track Landed Costs
1. Activate the feature
Navigate to Inventory > Configuration > Settings, activate the Landed Costs feature and press Save to save the information.

2. Set up Landed cost for a product
Create the Transportation cost with the following information:
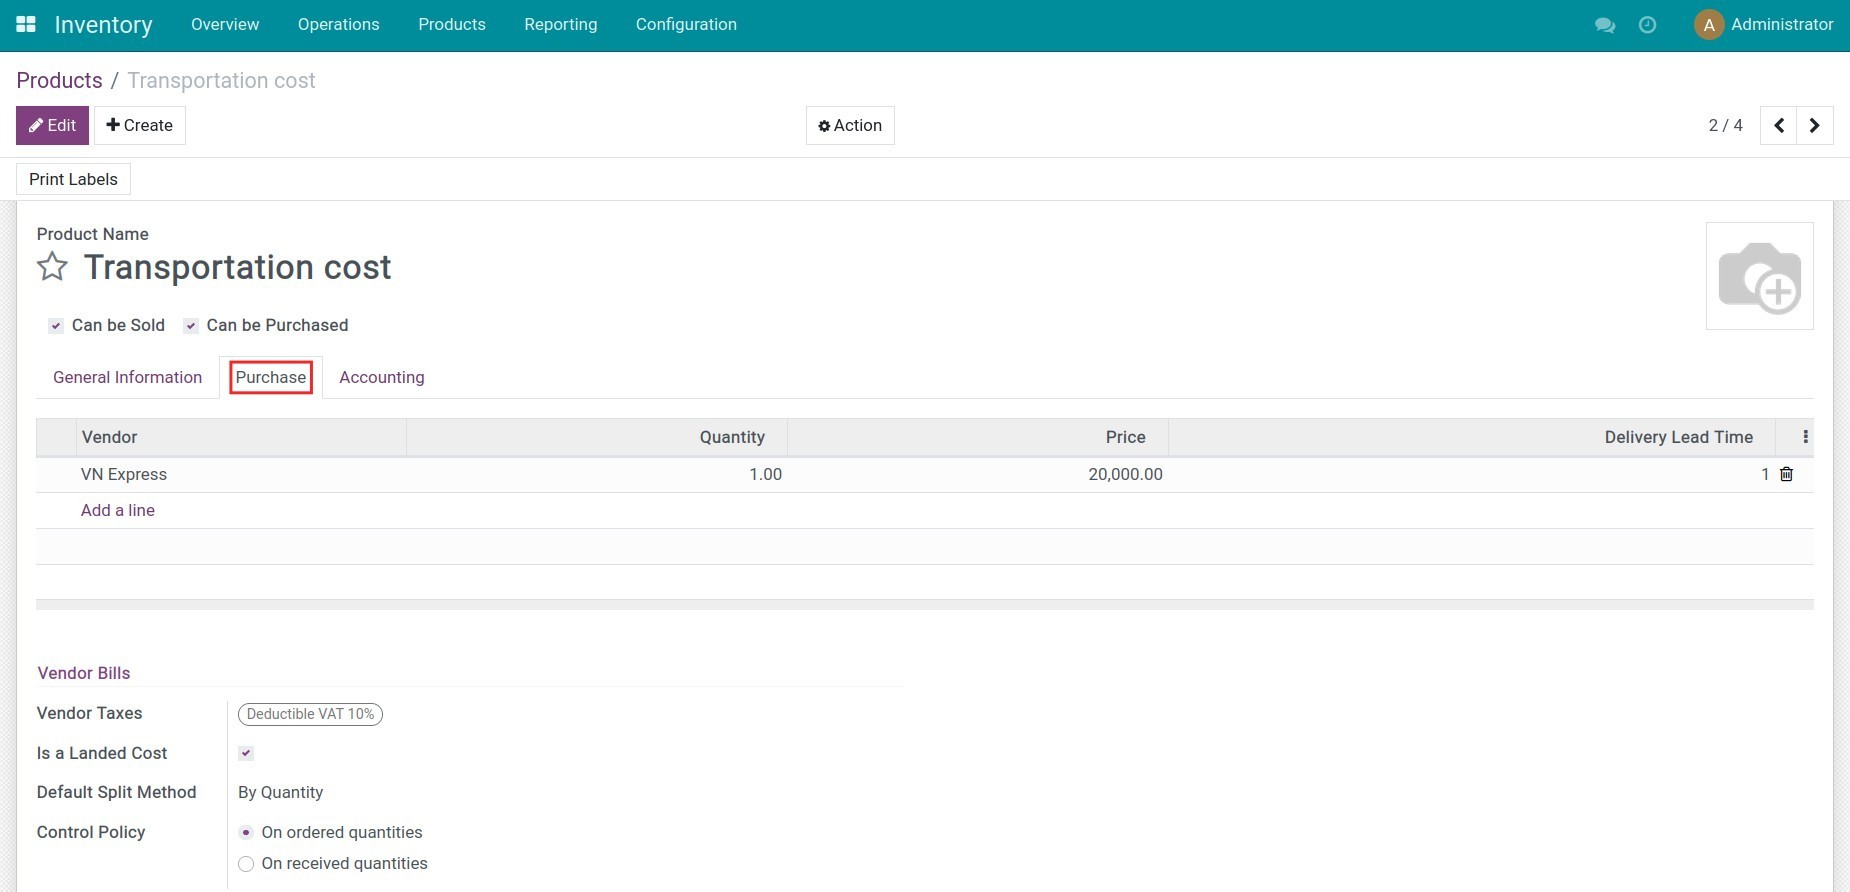
- Product type: Service;
- On the Purchase tab:
- Set up vendor information, quantity, and price;
- Check on Is a Landed Cost;
- Default Split Method: How the landed cost is split to the cost of the stocks. The system supports the 5 splitting methods: Equal, By Quantity, By Current Cost, by weight, and by volume;
- Control Policy: On order quantities.
Press Save to save the information.
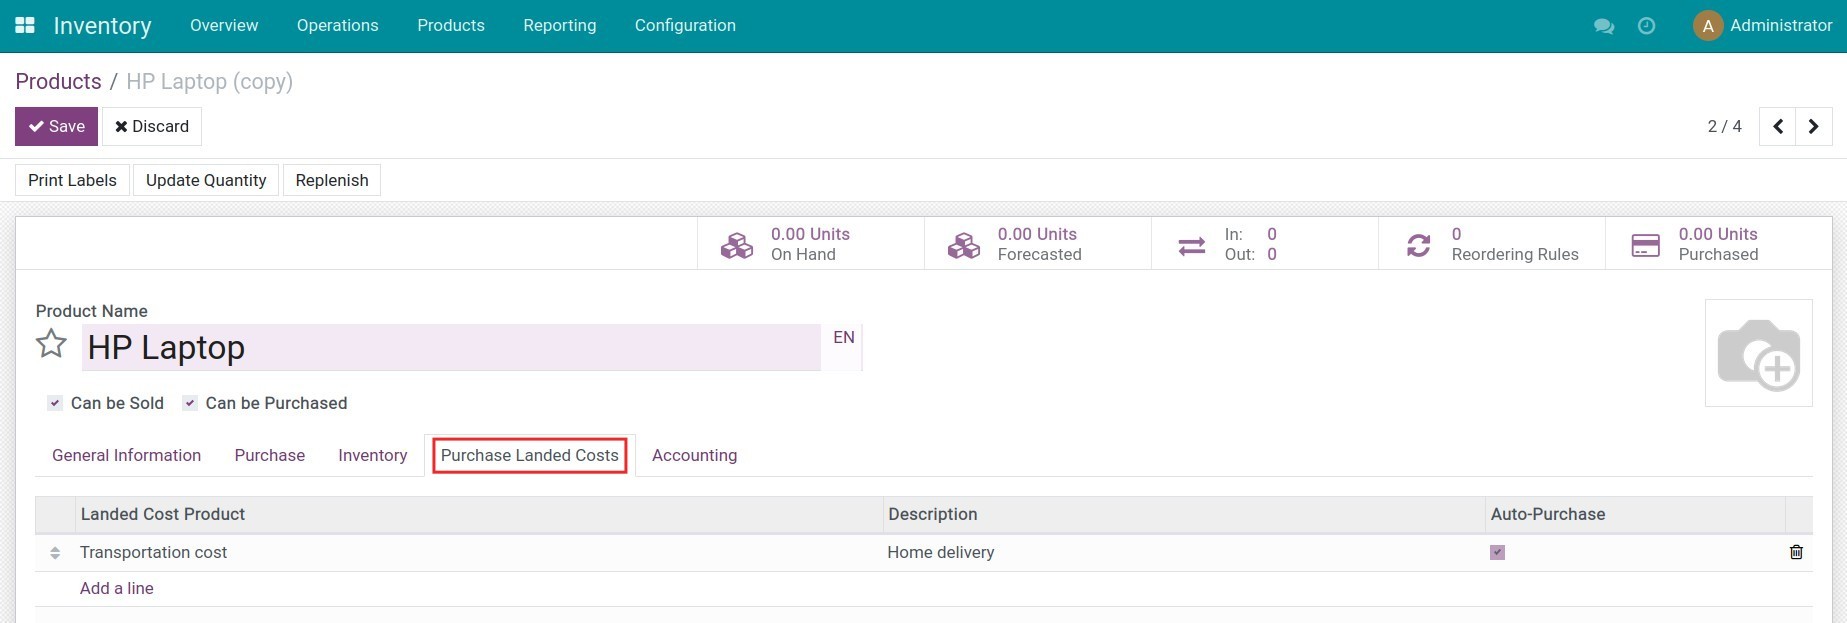
Go to the product list, select the product that needs to add the landed cost, at the Purchase Landed Costs tab, press Add a line and then select the Transportation cost product and check on Auto-Purchase.
3. Create a purchase order for the product and landed cost
Navigate to Purchase > Orders > Requests for Quotation, press Create to create a purchase order Press Confirm Order, the system will auto-create a purchase order and add the vendor of this service.
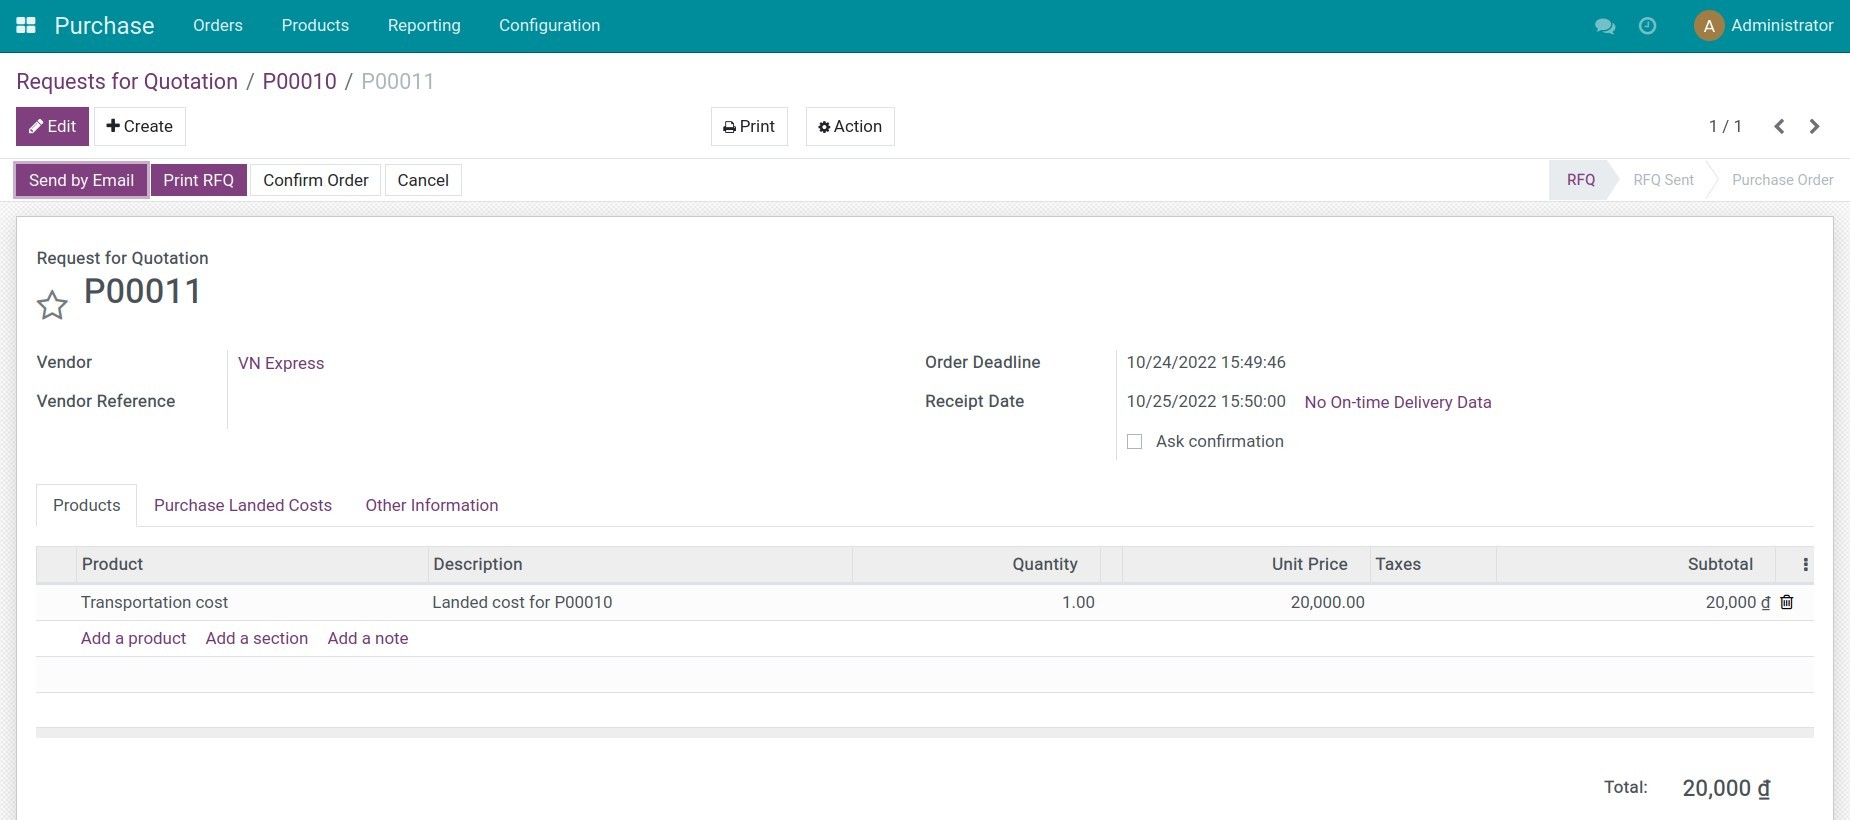
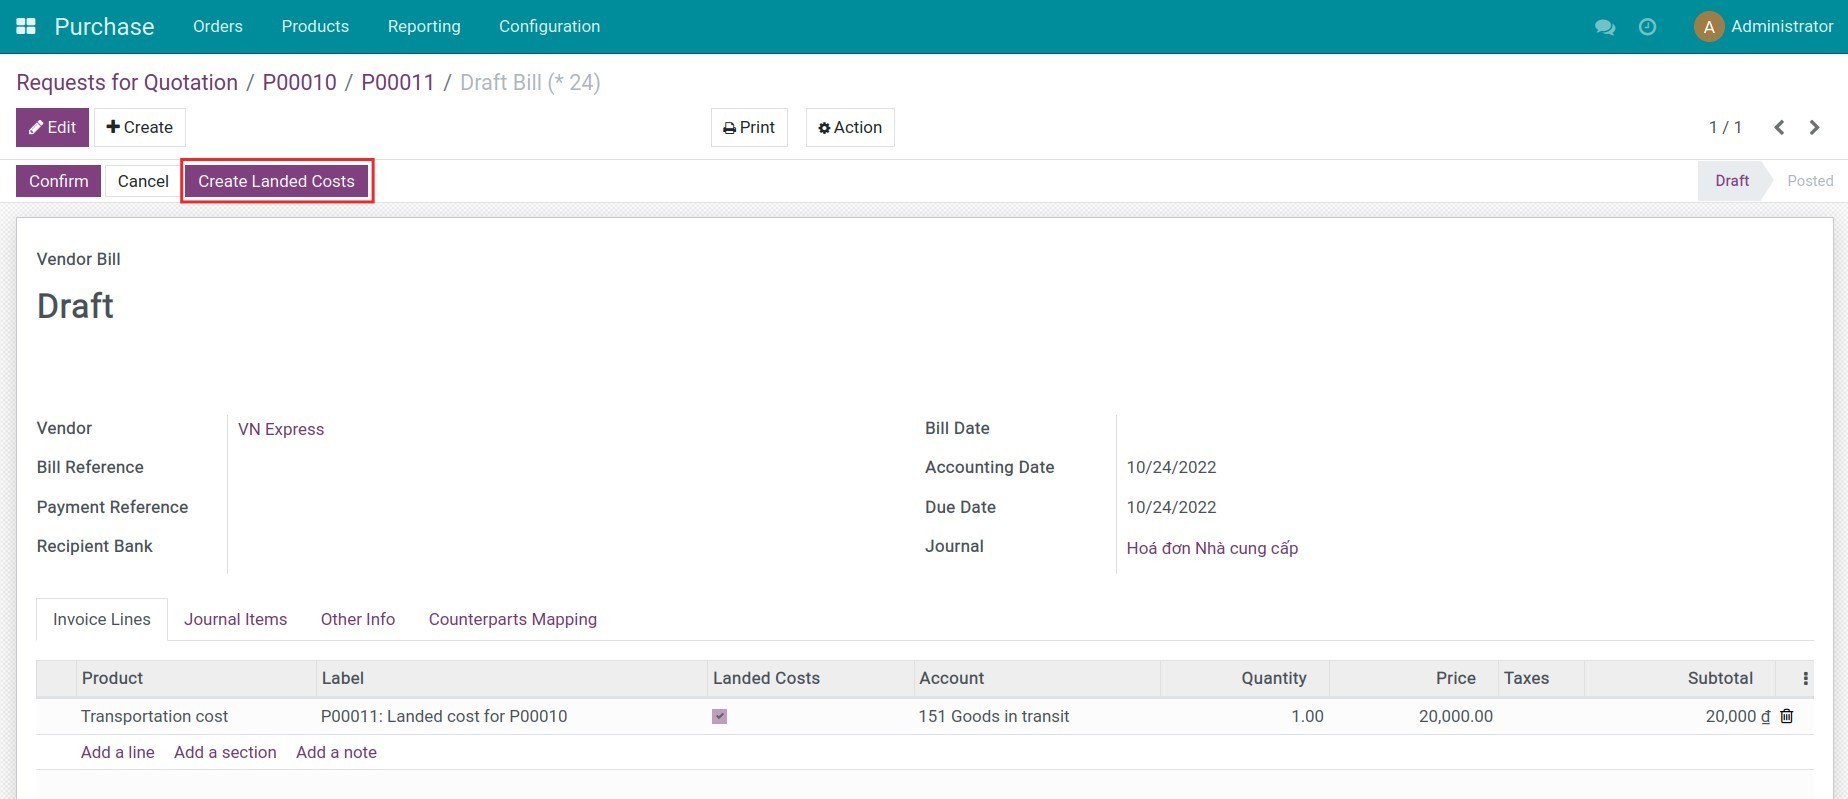
Proceed with the inventory receipt and create the vendor bills for the purchase order. For the landed cost purchase order, you also create the vendor bill.
4. Split the landed cost
On the bill that has the landed cost, press Create Landed Cost. The system will auto-create the landed cost sheet and auto-recognize the receipt to split. Check the landed cost, the split method and press Validate.
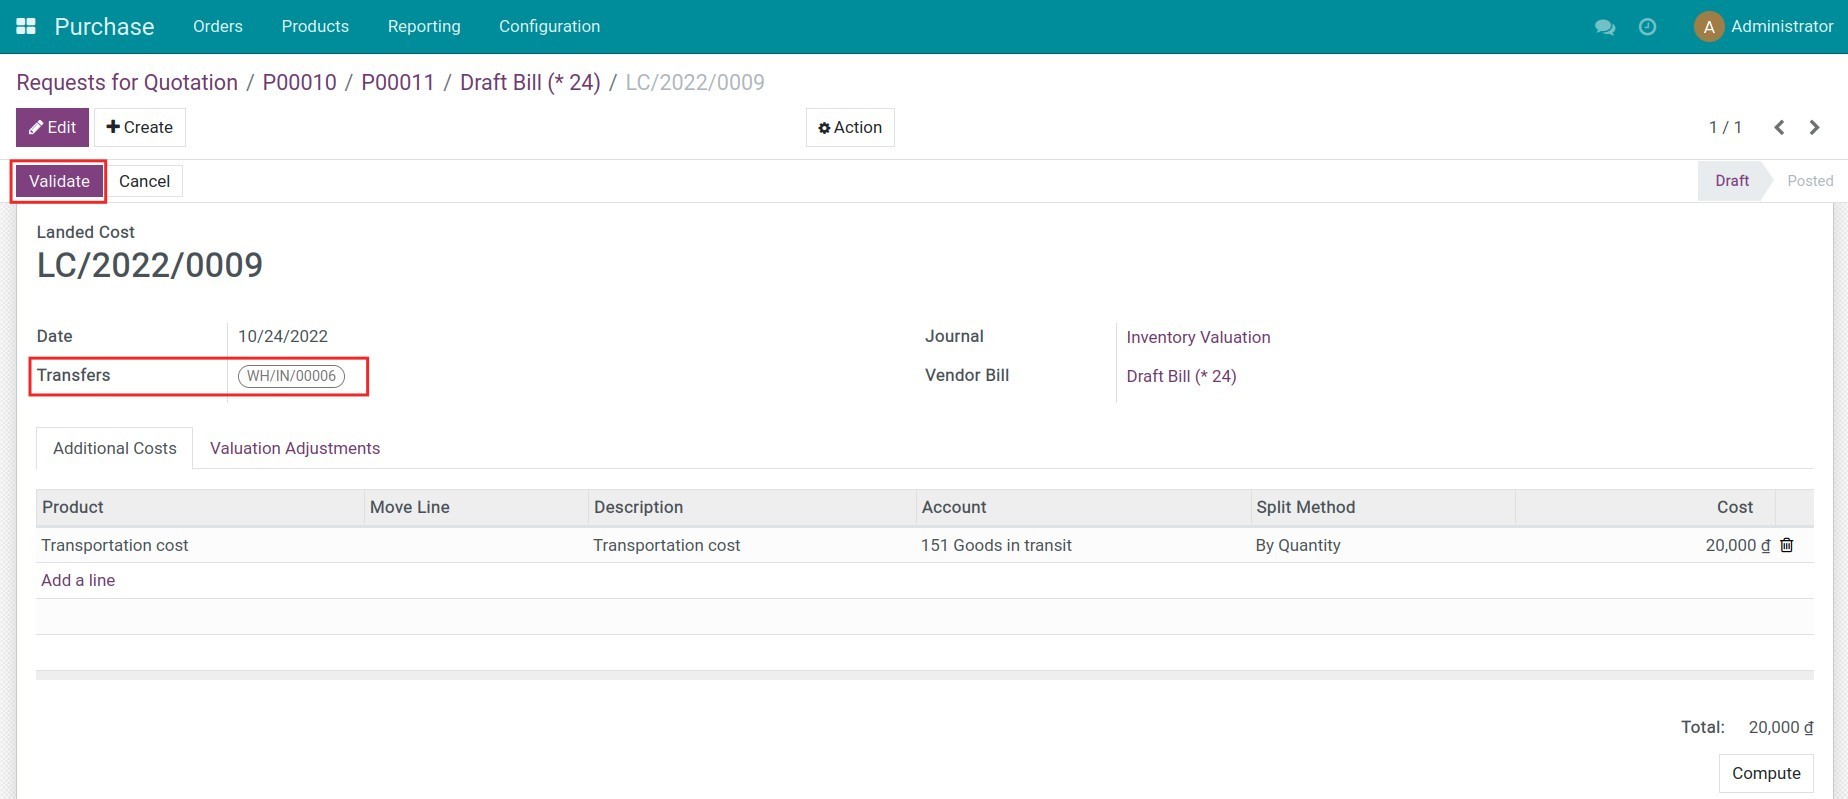
Press the Valuation button to check, you can see the cost of the transportation will be added to the inventory cost.


Return to the landed cost bill, confirm, and proceed with the payment. On the purchase order view, you can track the information relating to the cost, and landed cost applied for this purchase order.
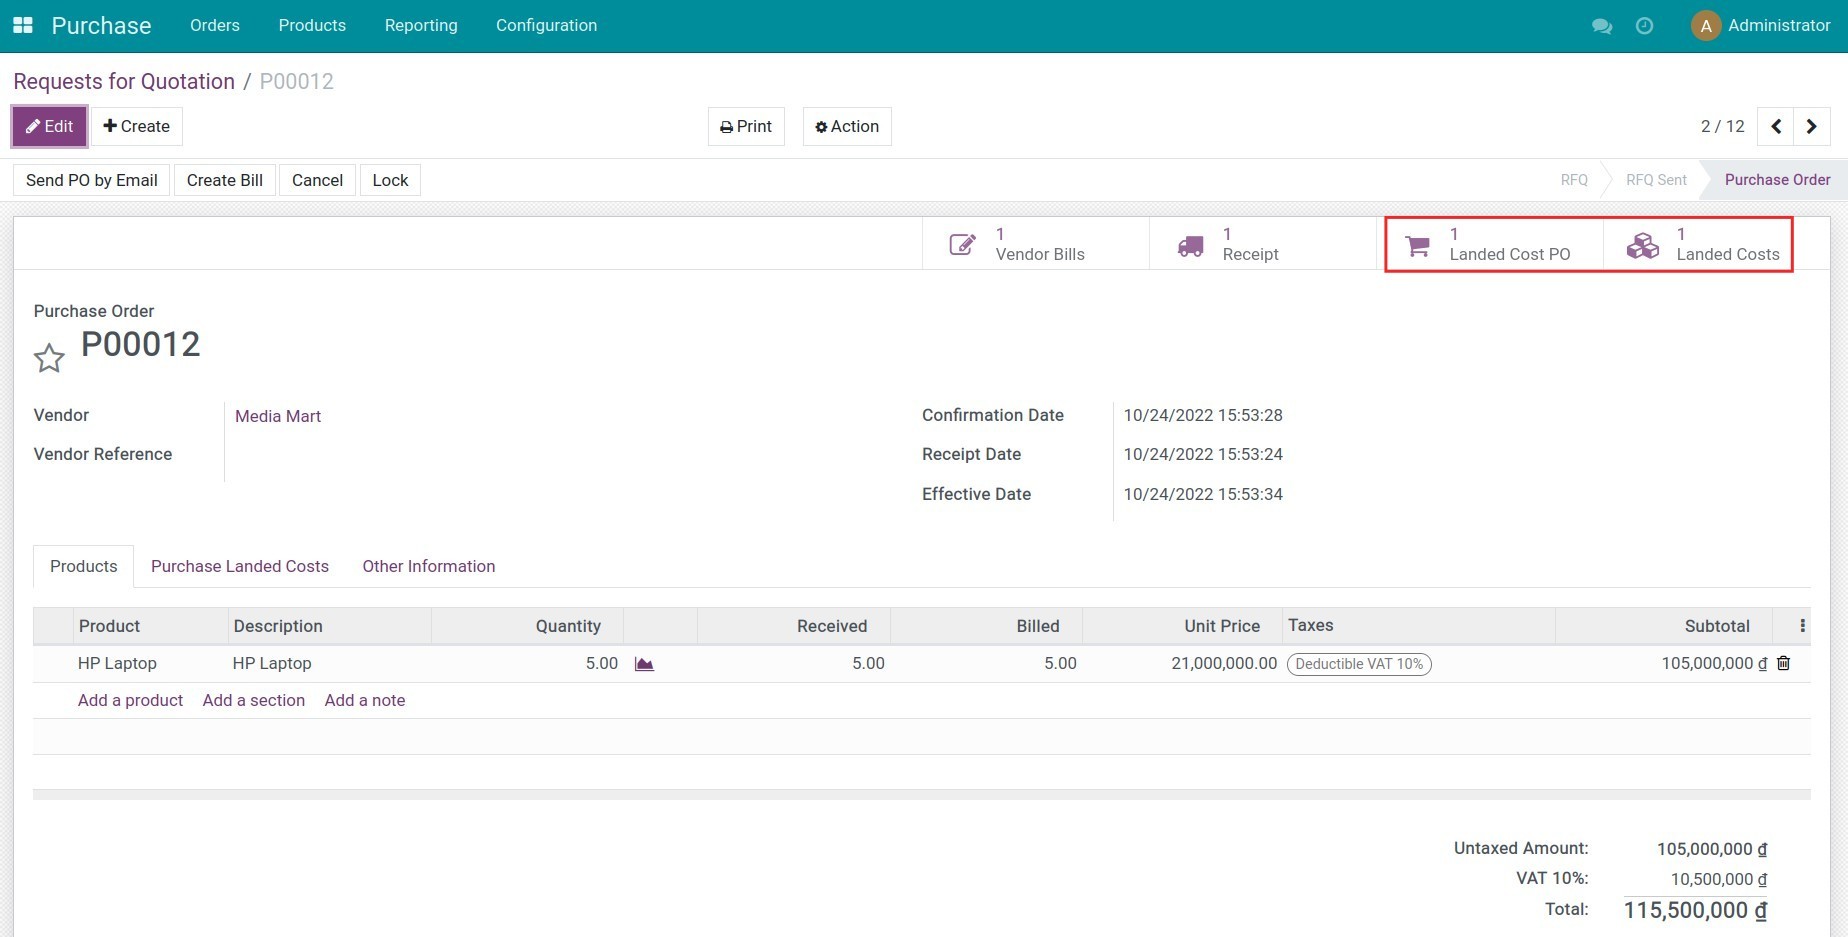
5. Check the product's inventory valuation
Navigate to Inventory > Reporting > Inventory Valuation, and group by the product to see the updated cost.


