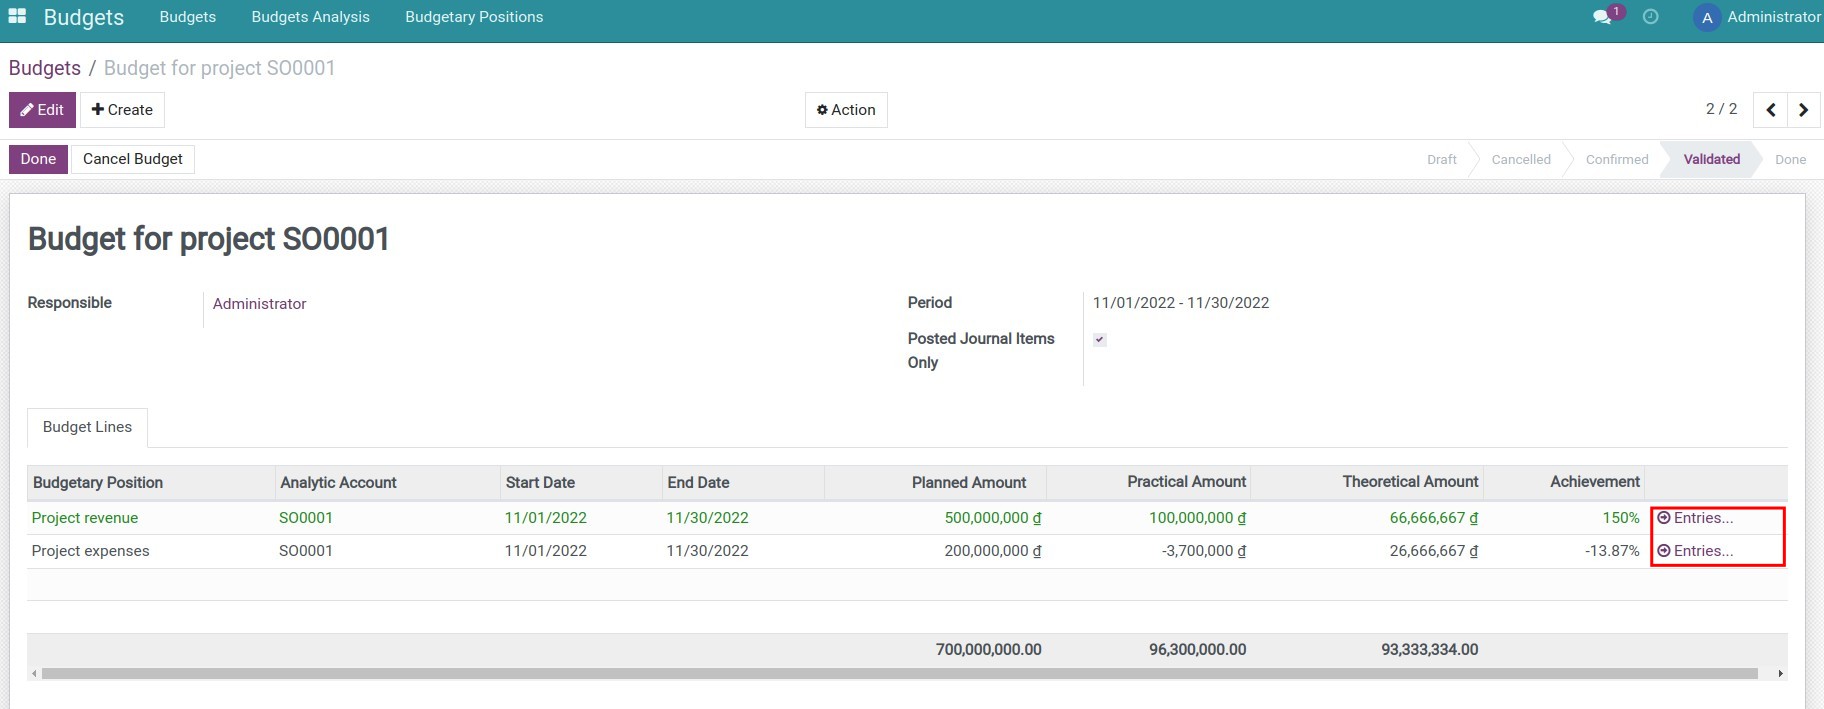
Implement in the software
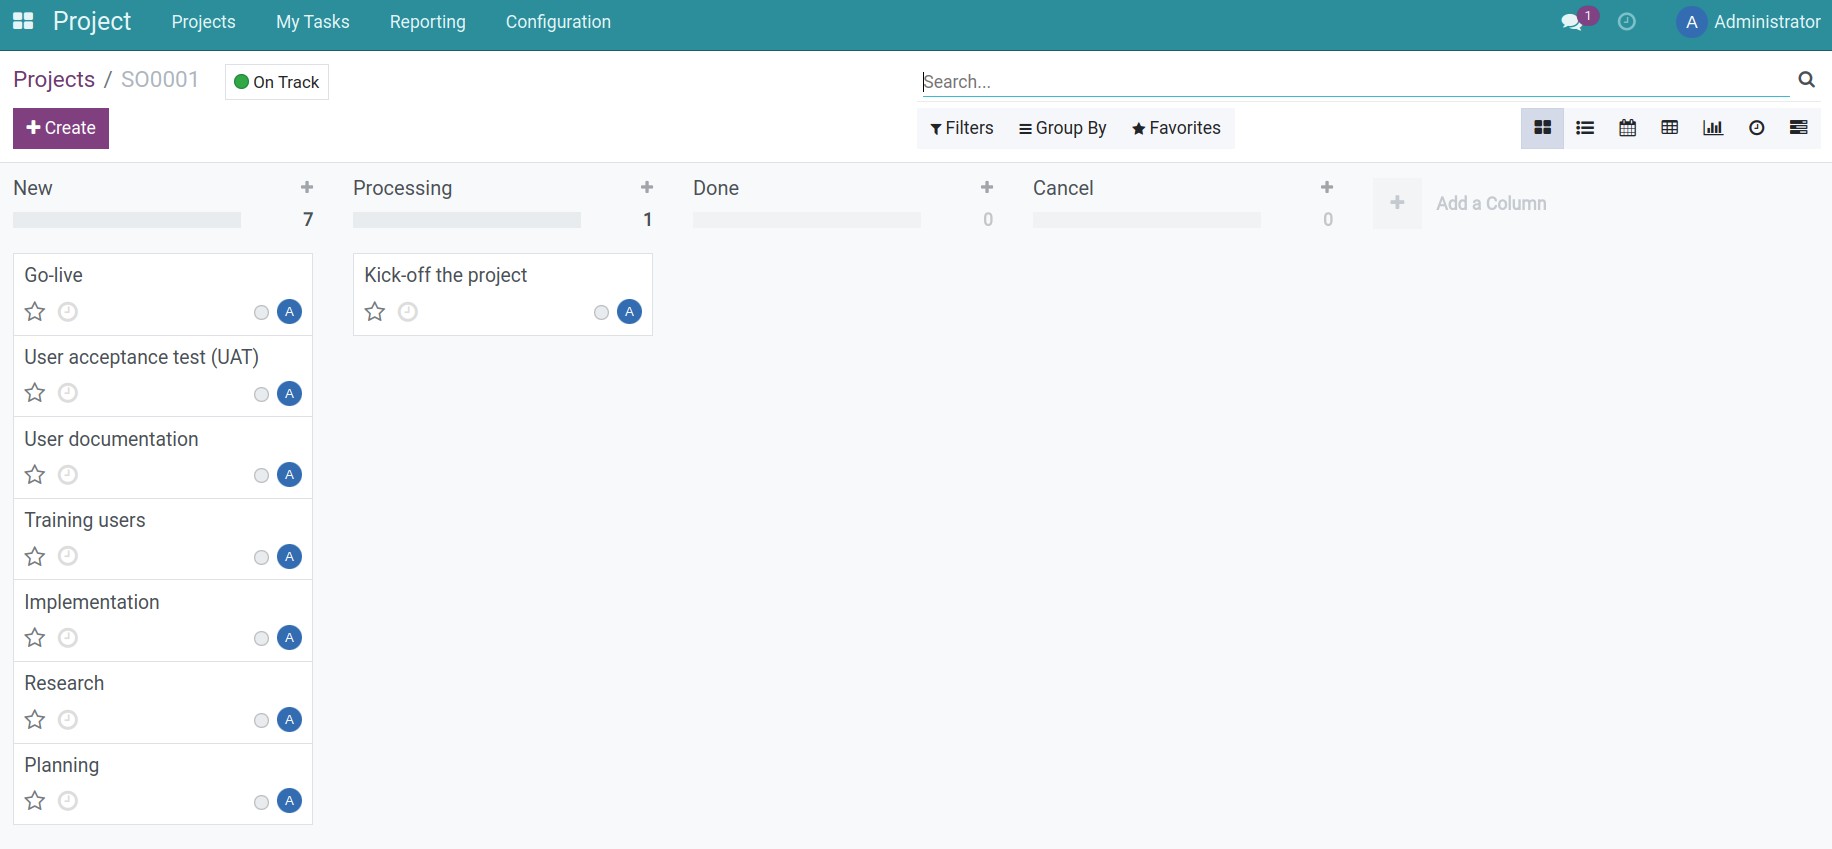
Step 1: Create a project, configure stages and create tasks.

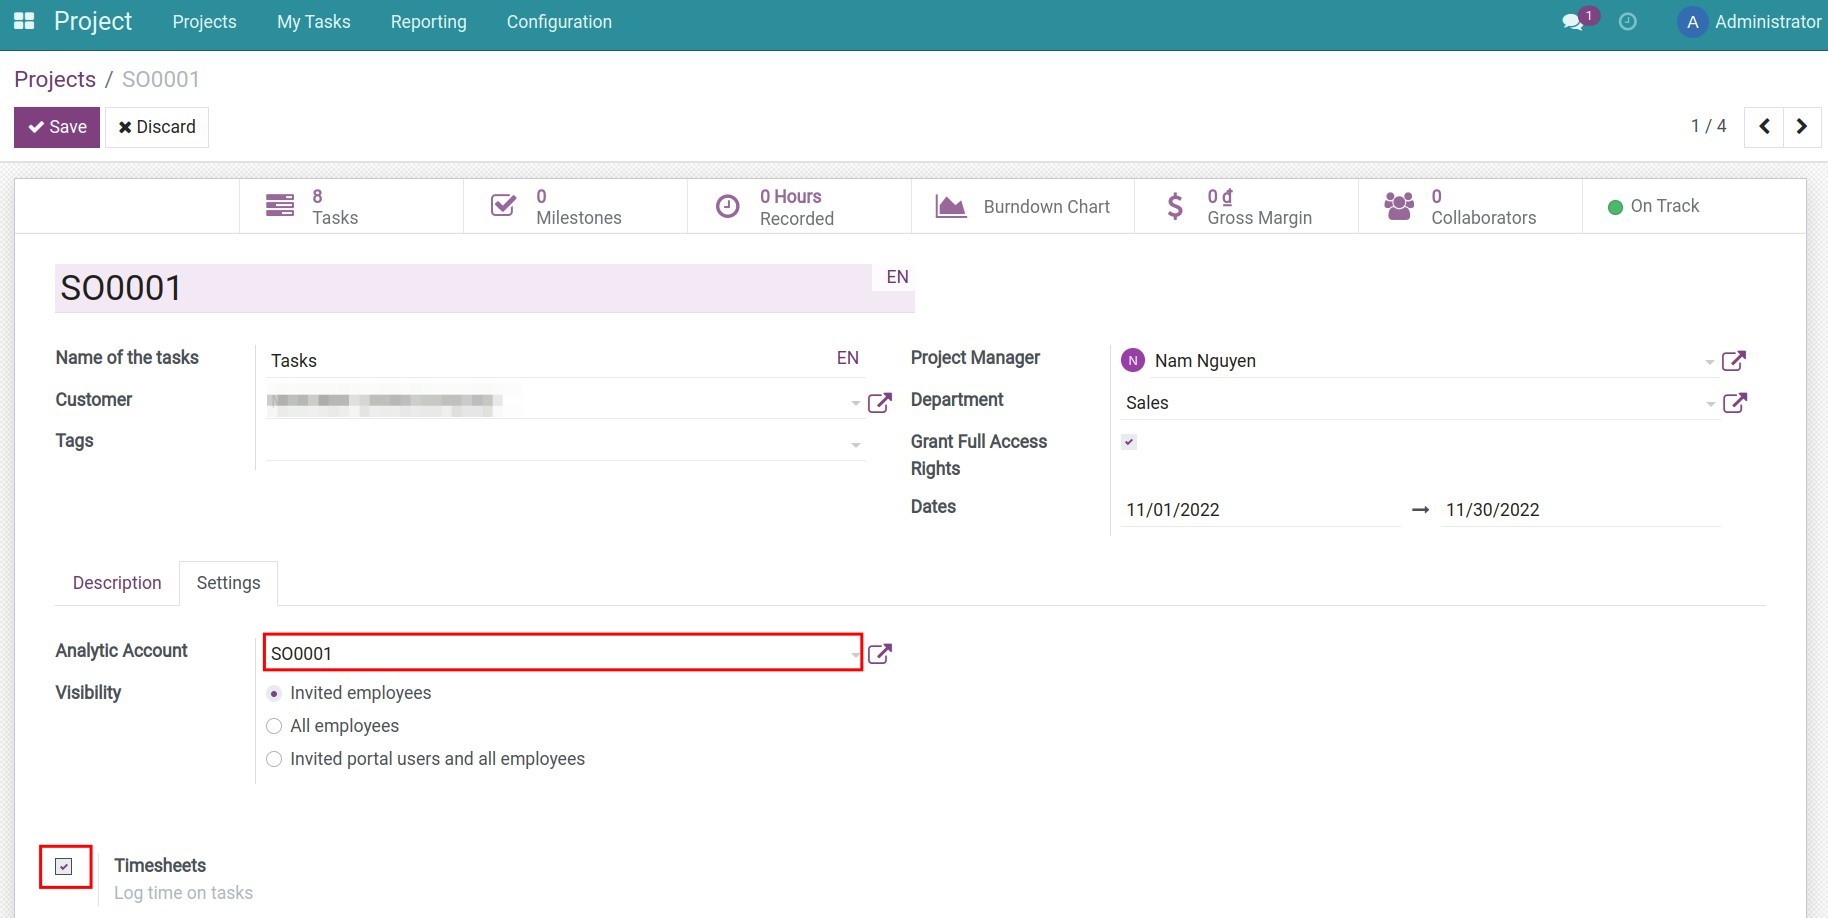
Note: When creating a project, the system automatically creates an analytic account corresponding to the name of the project. Checking the Timesheets feature on the project's general settings will activate the timesheet for the project. To view the project's general settings, go to the Projects application, search for the SO0001 project, click on the ellipsis, and select Edit.

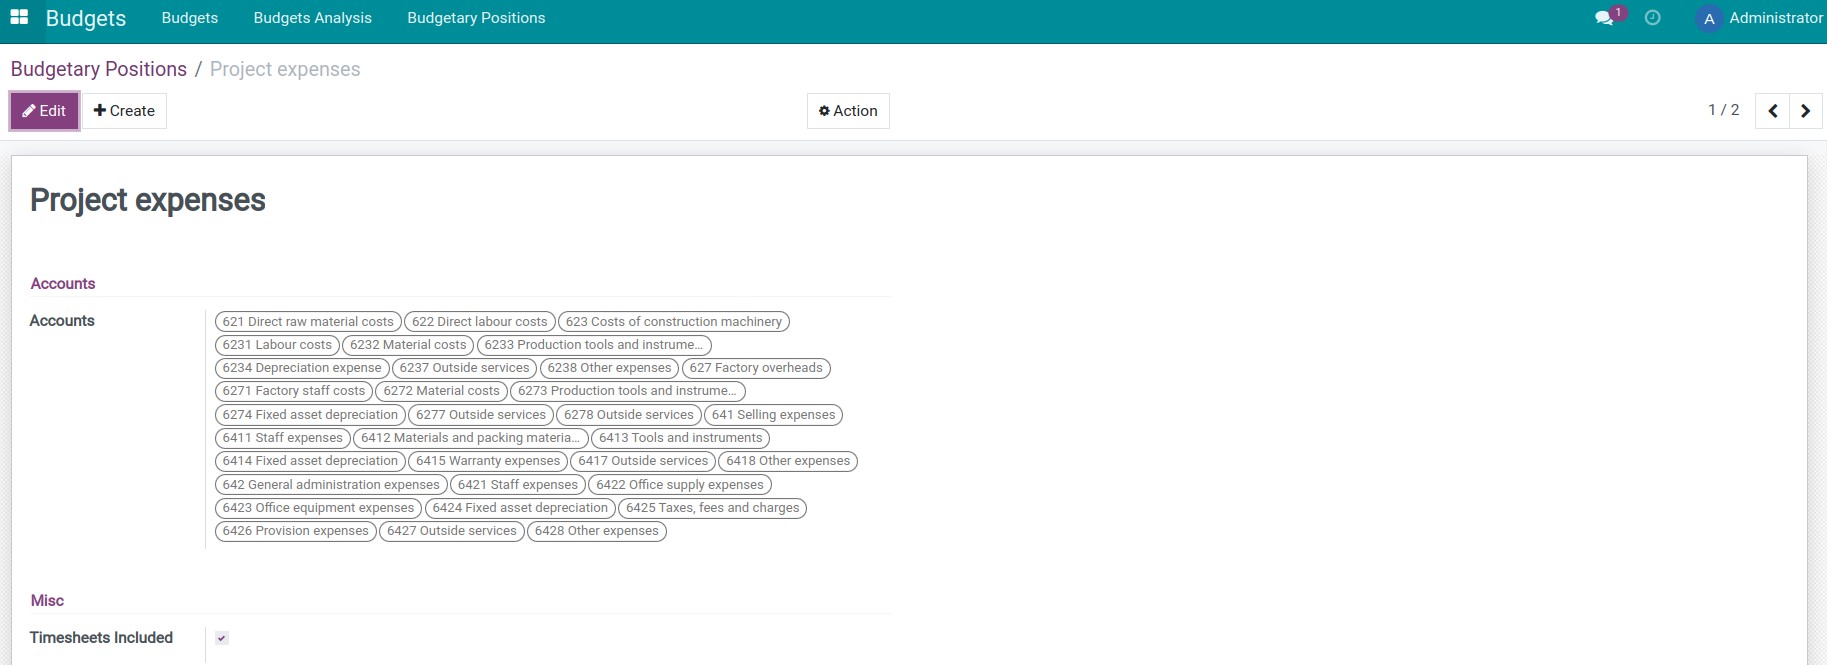
Step 2: Create Budgetary Positions. According to the above example, you will need to create two budgetary positions including project revenue and project cost.
Note: on the project cost budgetary position, you check Timesheets Only so that the system automatically updates the project's timesheet cost data on the Practical Amount column on the Budget.

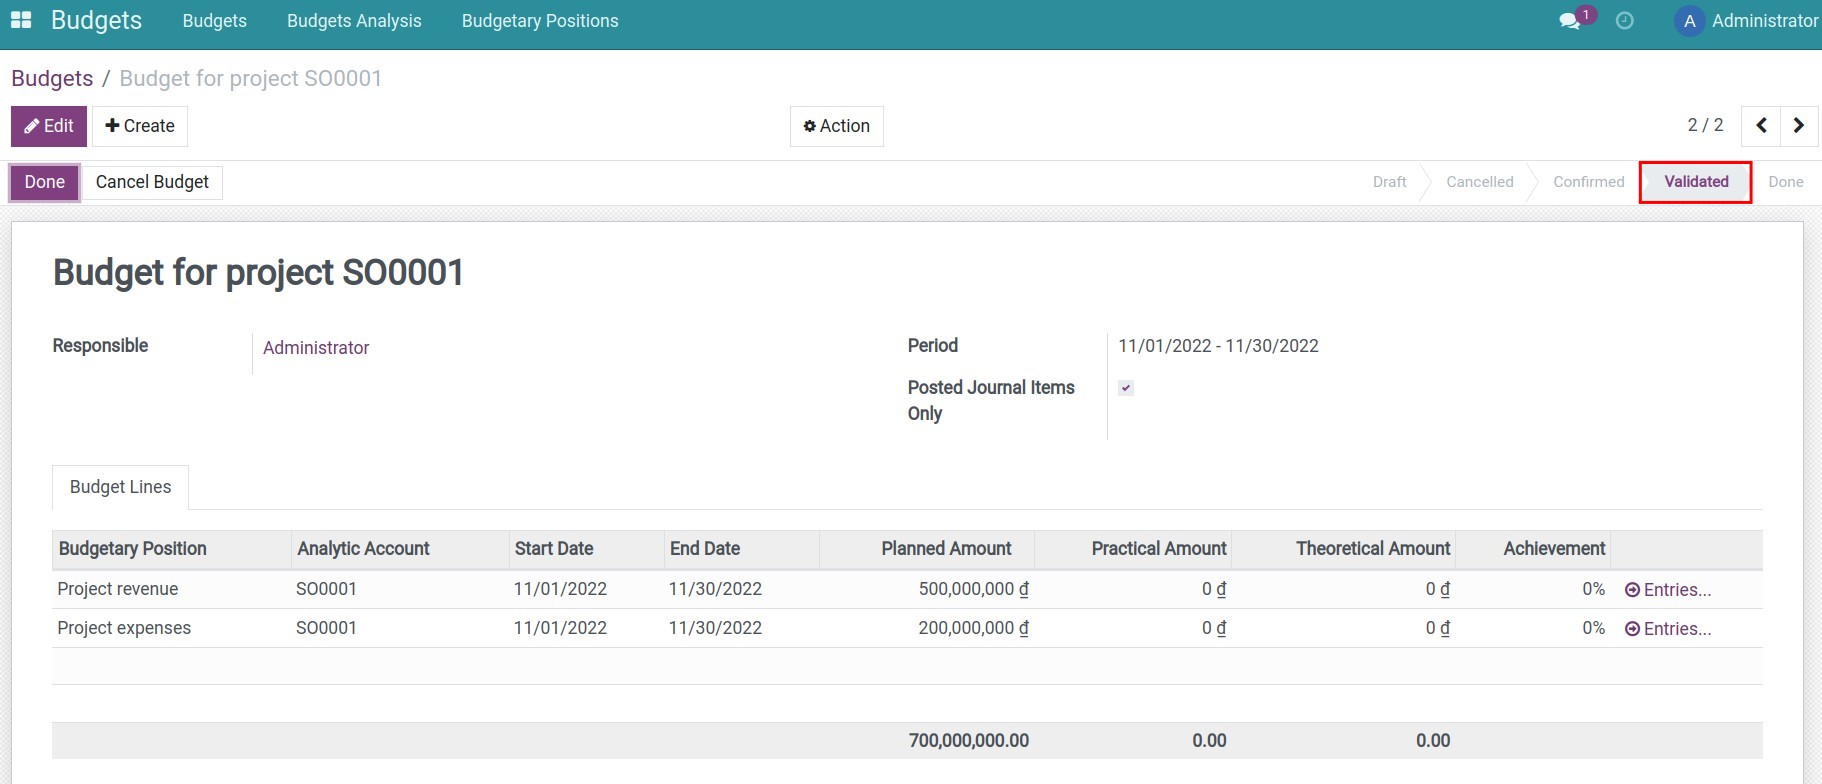
Step 3: Create a budget and approve it.
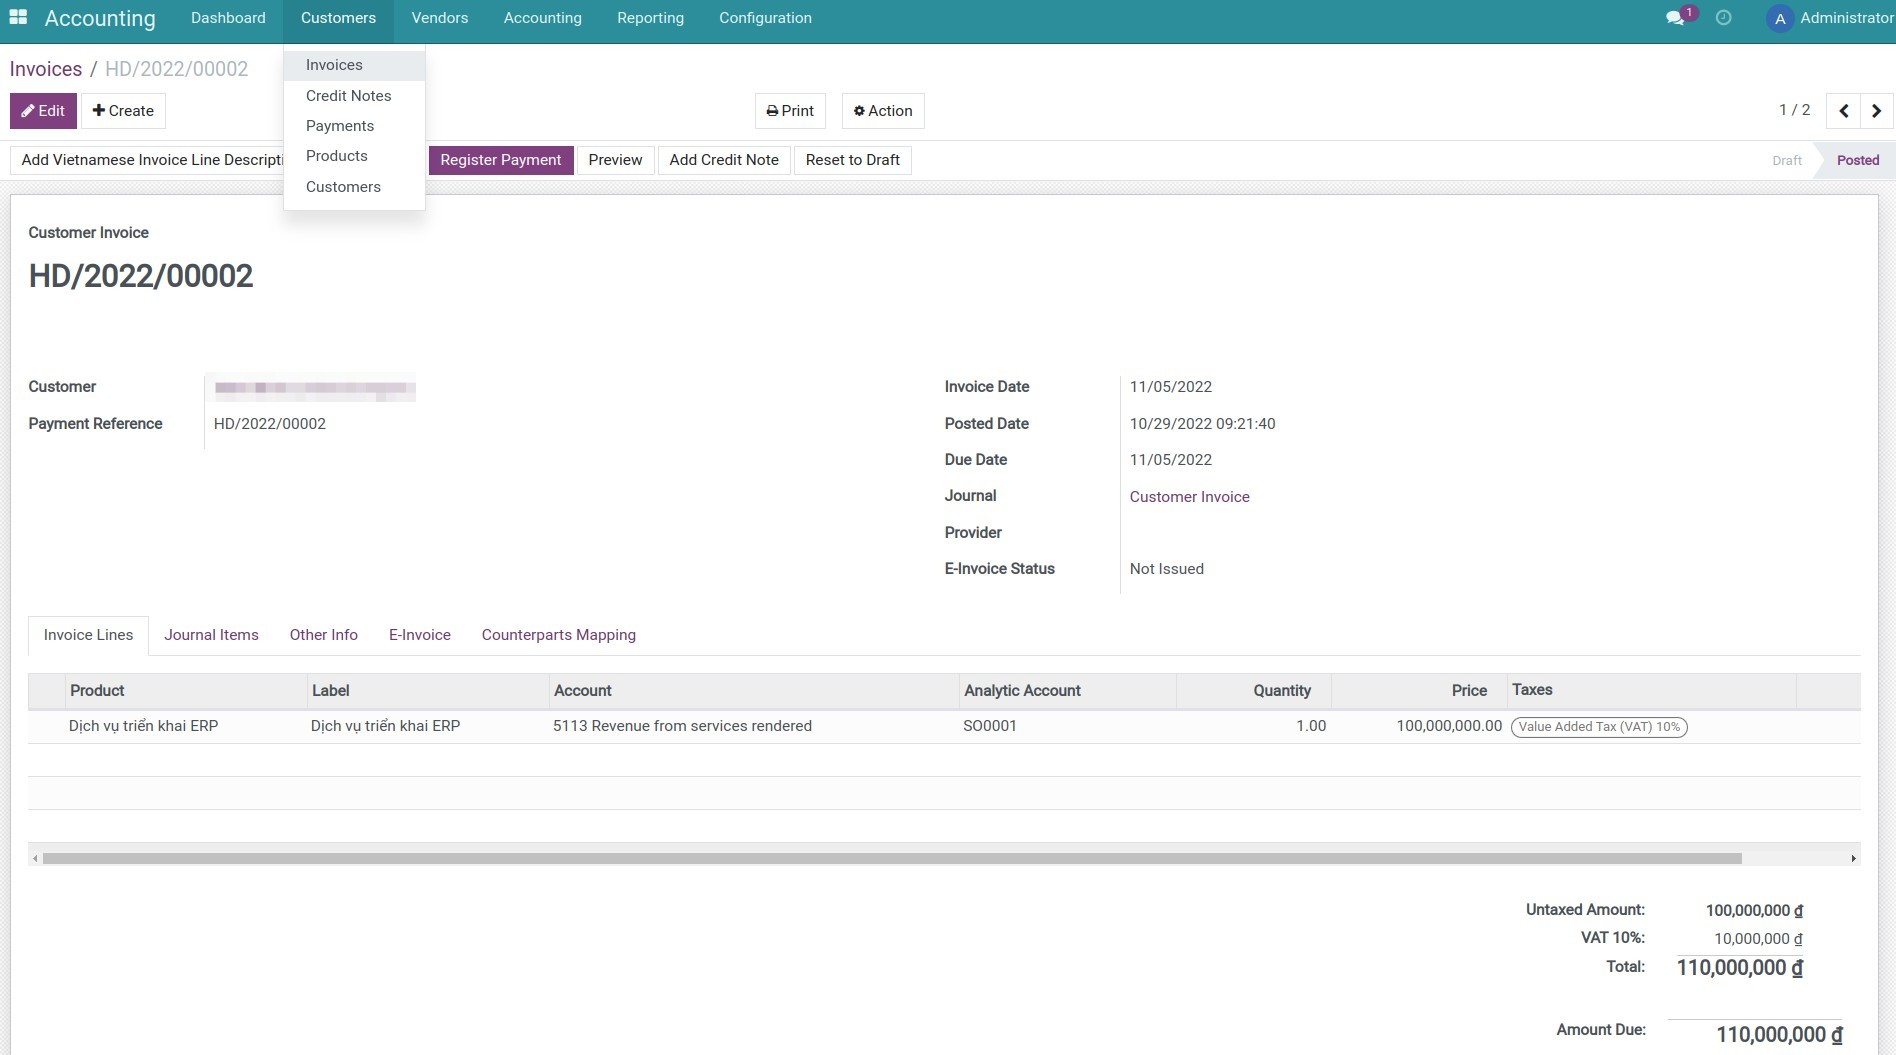
Step 4: Record revenue for the project by going to Accounting > Customers > Invoices and perform Issuing Customer Invoices.
Step 5: Record the costs related to the timesheet in the project.
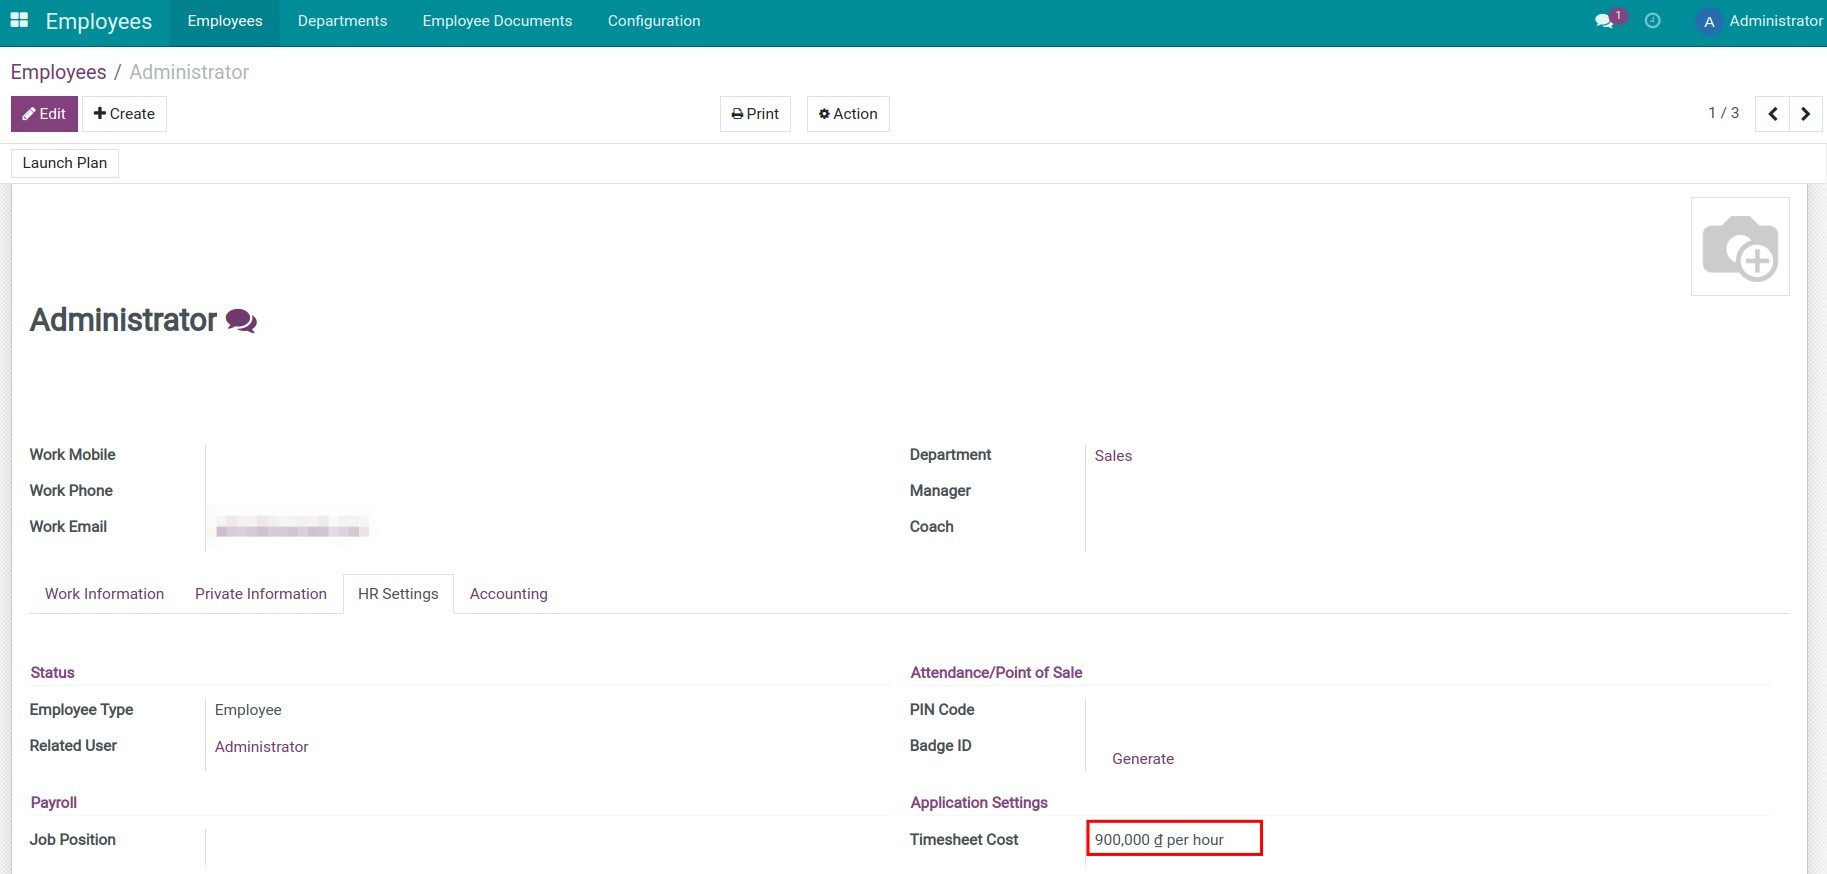
Firstly, you need to set up the cost per timesheet hour on each employee profile. Go to Employees > Employees, select an employee profile, and click Edit. On the employee profile, go to the HR Settings tab, enter Timesheet cost and click Save.
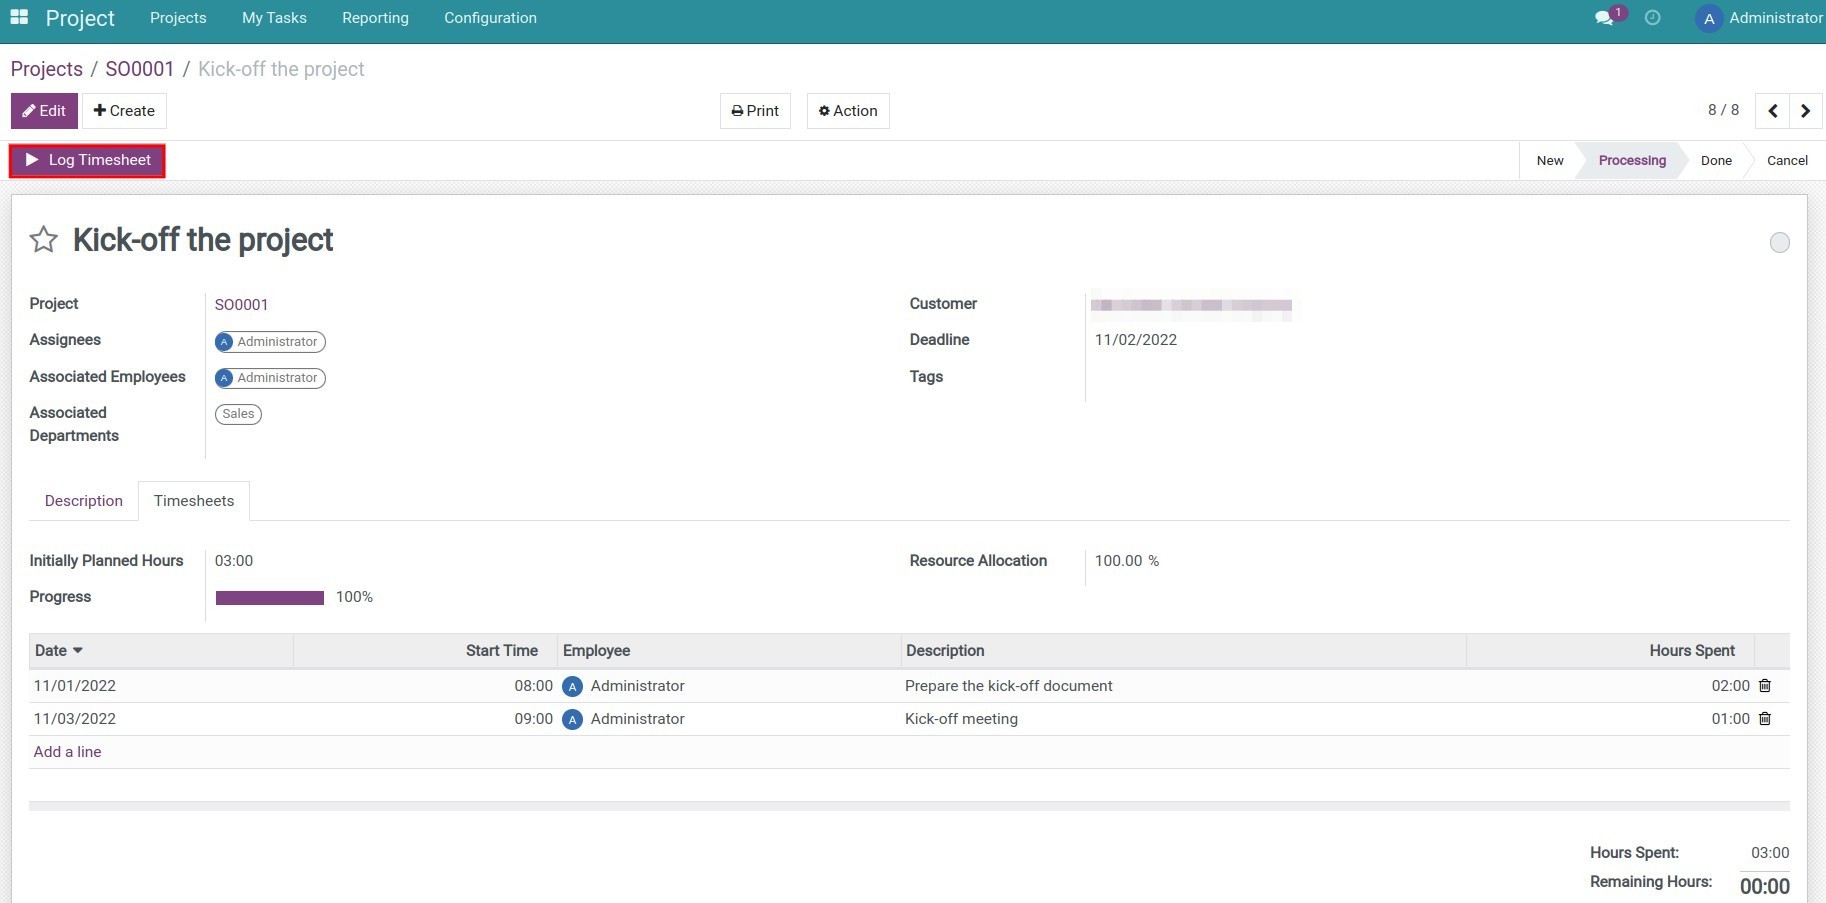
Then, you record the timesheet for each task of the project. Go to Project > SO0001, select a task, then press the Log Timesheet button on the task when you start to do it, and press Stop Timesheet Log when done.
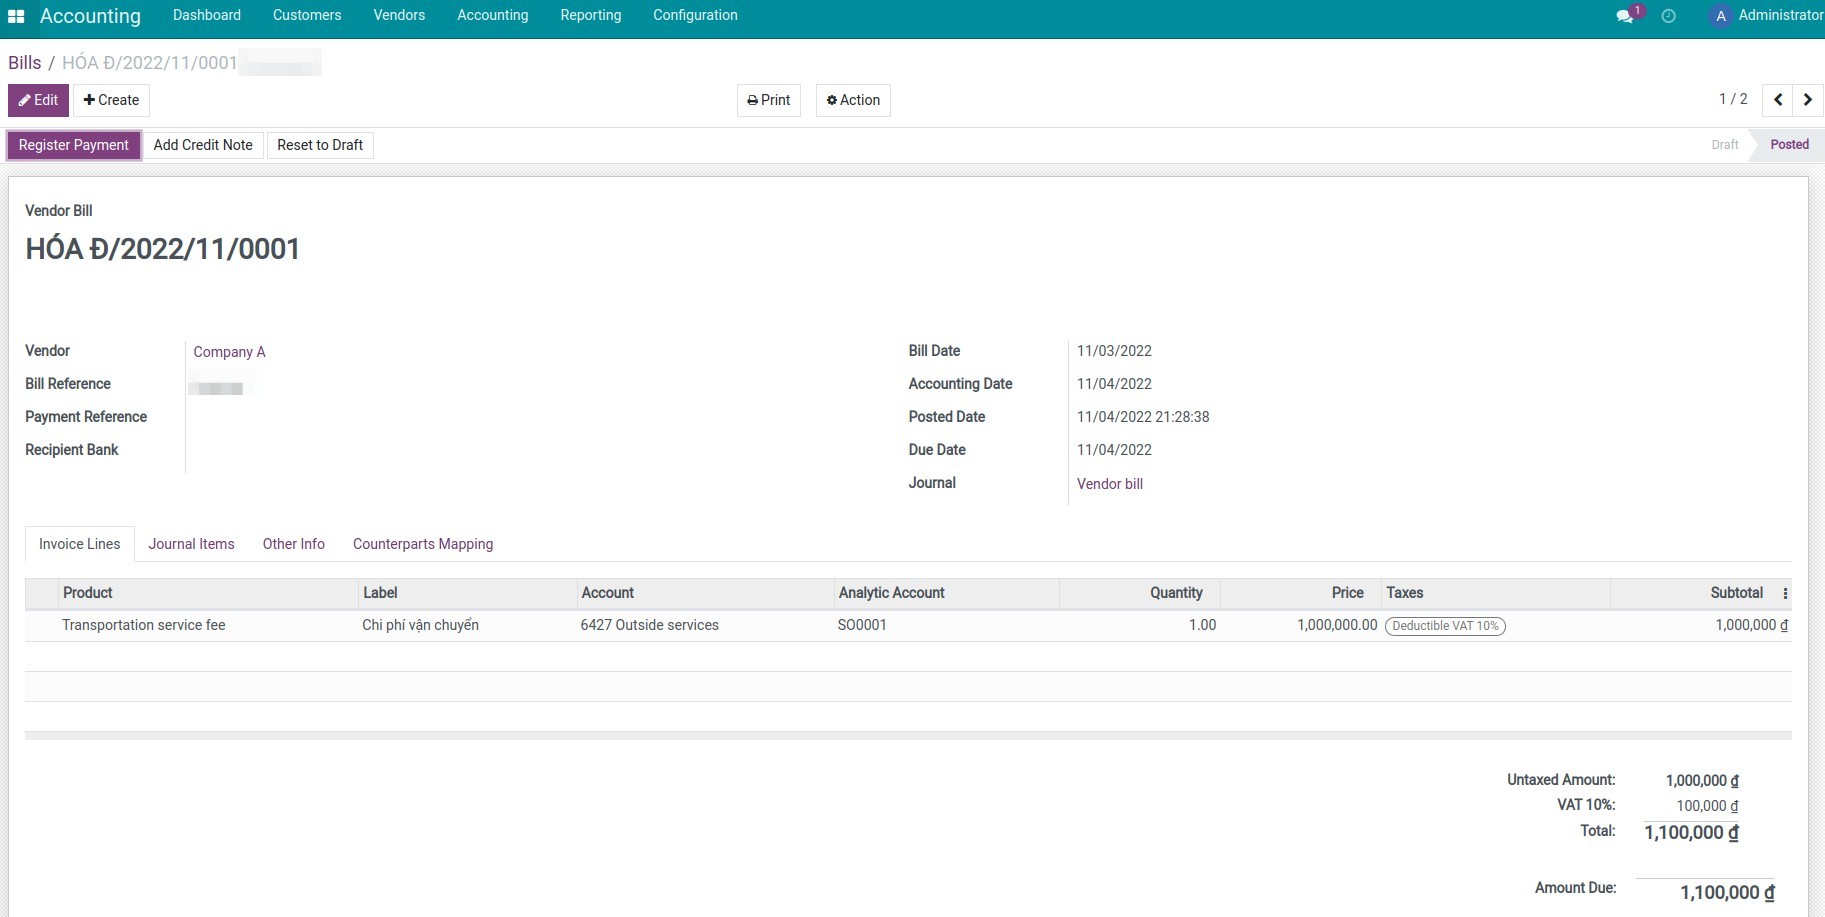
Step 6: Record some other costs of the project (if any). For example, transportation costs when traveling for business.
Step 7: Check the budget implementation.
Go to the Budget app and select a budget. Specifically, you need to select the SO0001 project budget in this example. You can view the Journal Items that have built the result in the Practical Amount column.
